Valentine’s Day many only come once a year, but romance is year-round, and designers that can create a warm, romantic, emotional sentiment will be busy from January through December. Whether you’re a designer or just a spouse or partner, don’t wait until February to send some hearts to your special someone.
In this tutorial, I’ll walk you through the process of creating a gorgeous 3D gift box in Illustrator. You will also learn how to make a crystal heart by following few simple steps. We’ll use the pen tool, the gradient tool, and few other options under the effect menu to achieve the final outcome. So, let’s get started!
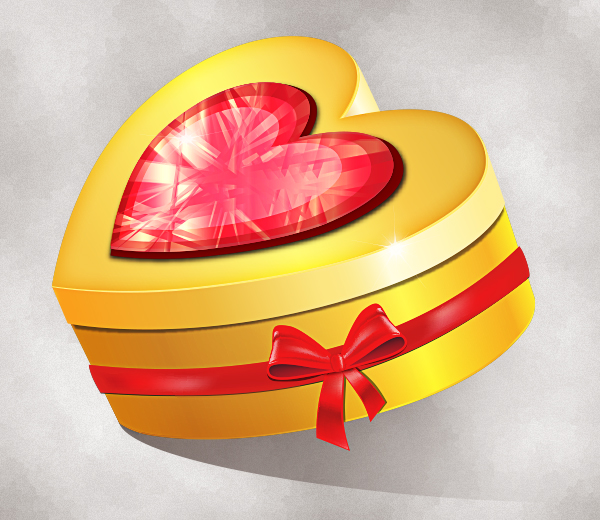
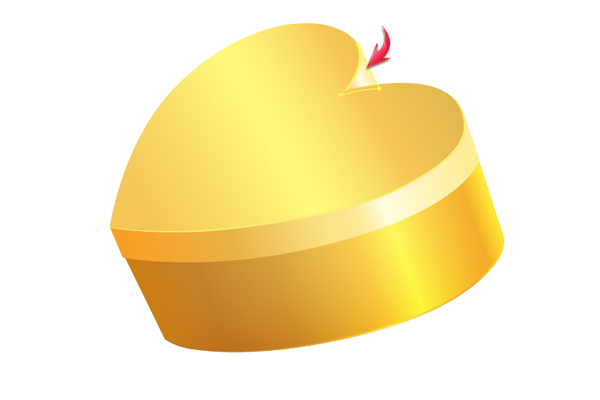
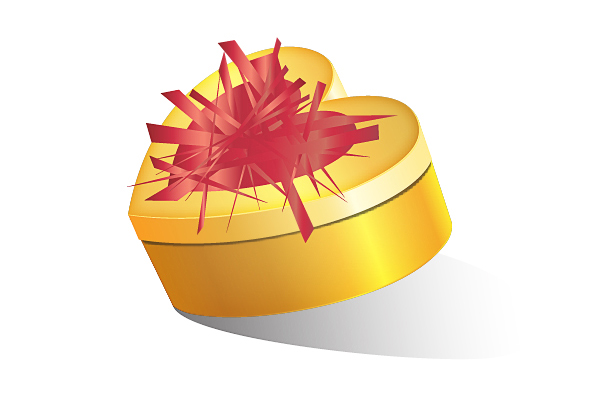
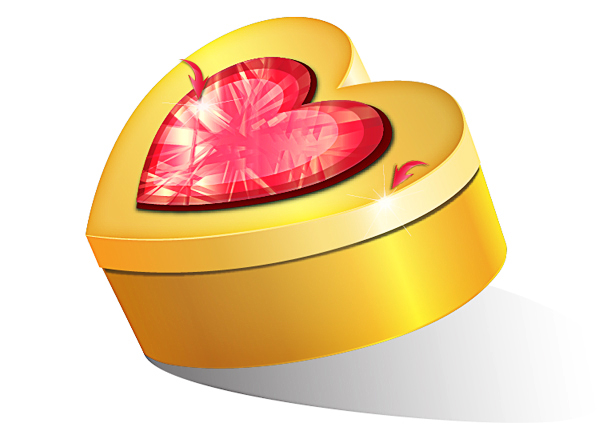
Final result: (Download the completed vector file.)

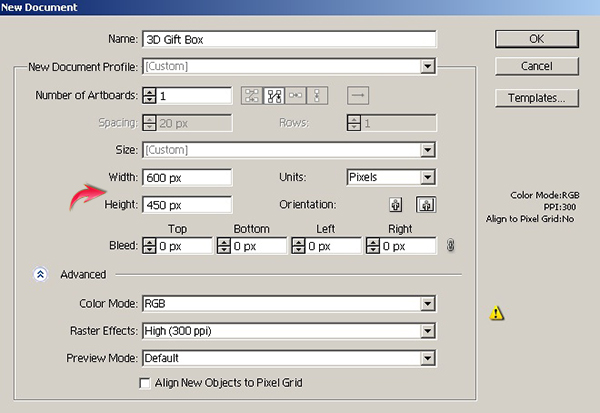
Step 1
Create a new document in illustrator with a 600px width and a 450px height.
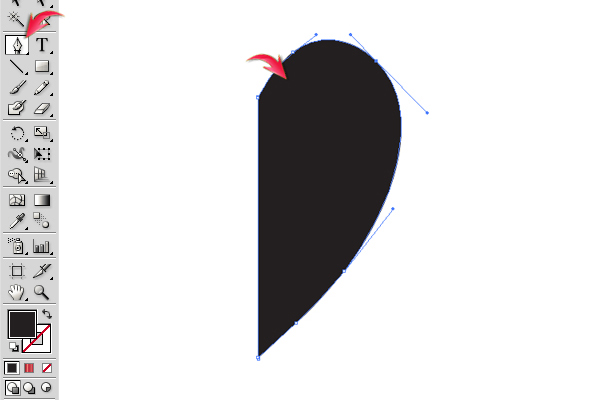
Step 2
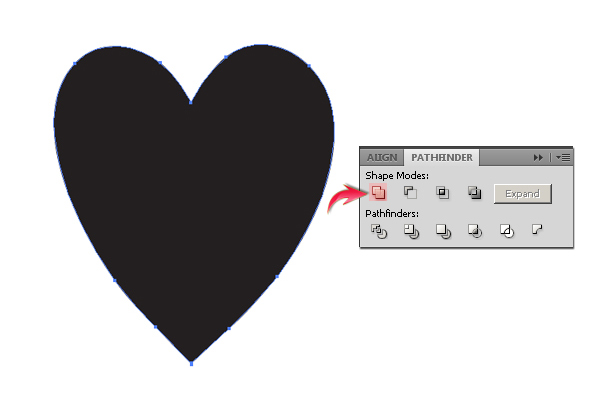
First, we’ll draw the heart shape. Select the pen tool to draw the half-heart shape shown below. Set stroke to “none” and use any fill color, as we’ll apply a gradient on the shape later on.
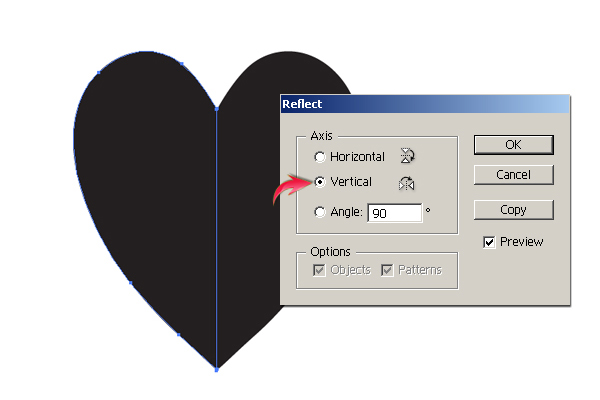
Select the heart shape and click on the square at the top-right corner of the layers panel, and select “duplicate path” from the options. Now, select this duplicated layer and go to “Object” > “Transform” > “Reflect.” Reflect it vertically and position it alongside the previous shape to complete the heart.
Select both the halves now and choose “Unite” shape mode in the pathfinder panel (Shift + Ctrl + F9).
Step 3
Now, select the heart by pressing the ring-shaped target present at the right side of its layer and go to “Effect” > “3D” > “Rotate.” Apply the following settings here.
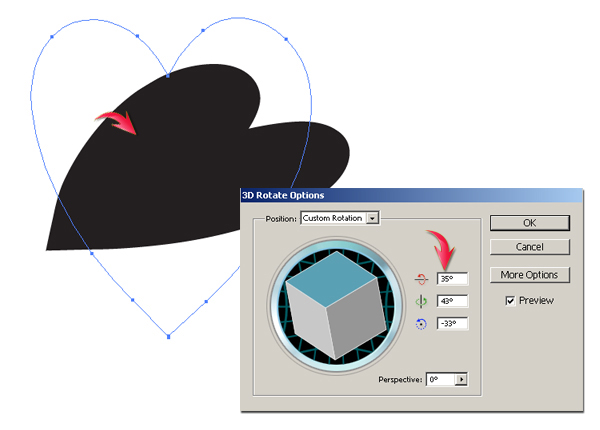
After that, go to “Object” > “Expand.” Now you can easily edit the shape and change its color.
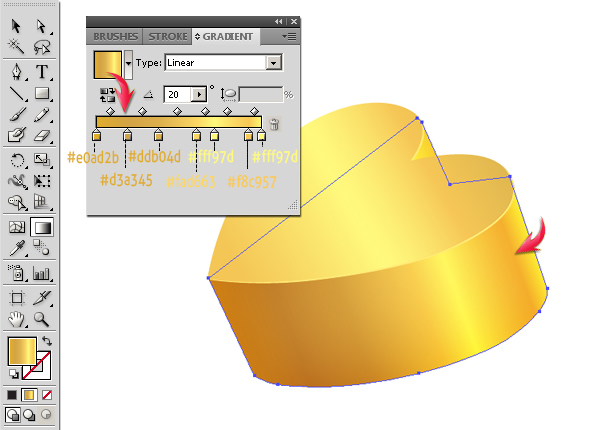
Step 4
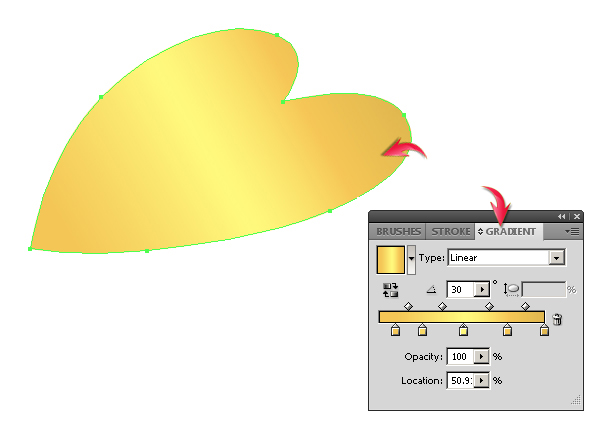
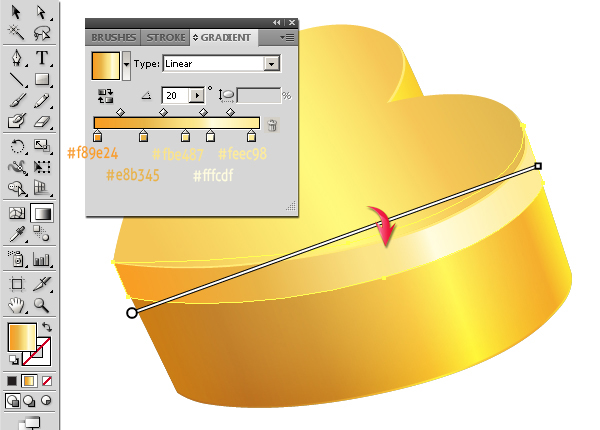
Select the shape and apply the following gradient to it. To get the gradient exactly like mine, pick #FFF97D as your fill color and drag it to the swatches panel; you can label it as gold1. Similarly, select #F8D965 and #E0B74F fill colors and drag them to the swatches, and label them as gold2 and gold3 respectively. Select the heart and gradient tool and keep on selecting your recently saved colors from the swatches to make the gradient. Position gold1 in the center, gold3 near the edges, and gold2 between gold1 and 3.
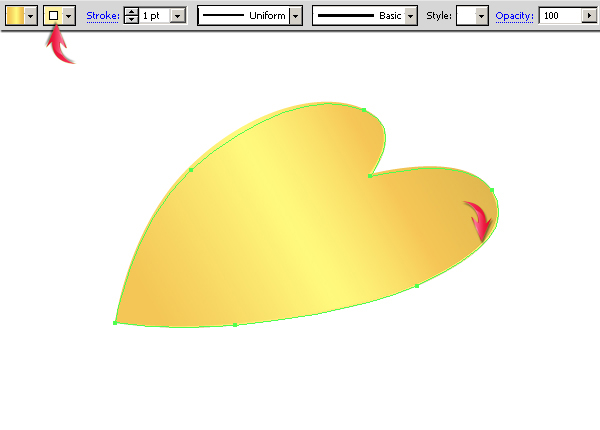
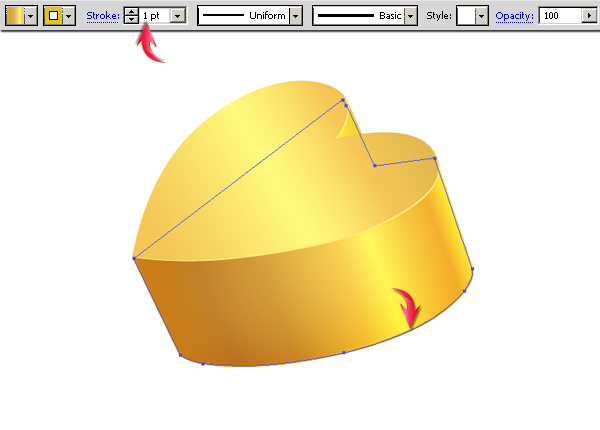
To highlight the lower border of the heart, duplicate the shape, drag it below the original layer, give it a 1pt stroke using color #FFF1A1, and drag it one step downward, as shown below.
Step 5
Draw the following shape using the pen tool to complete the 3d box. Draw it on a new layer just below the heart layers.
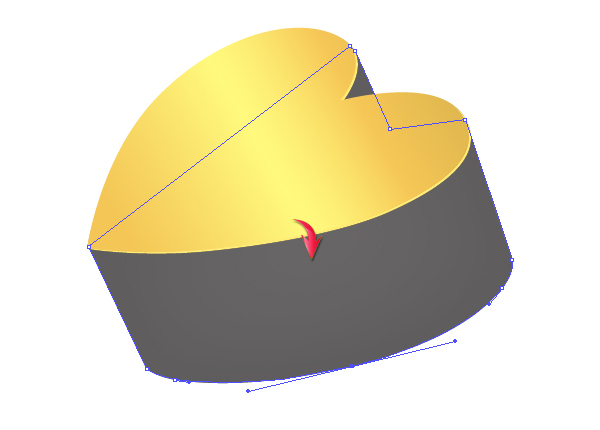
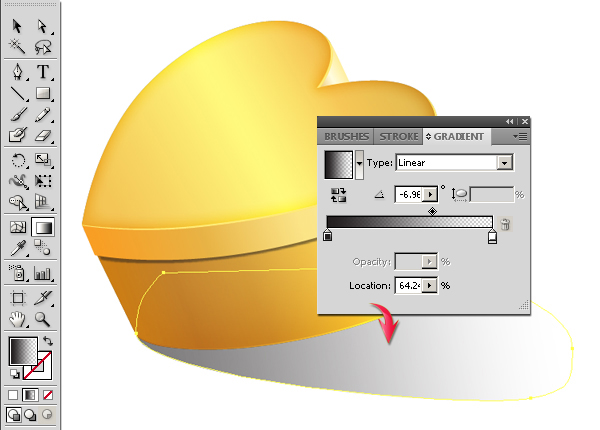
Step 6
Select the box and apply the following gradient to it.
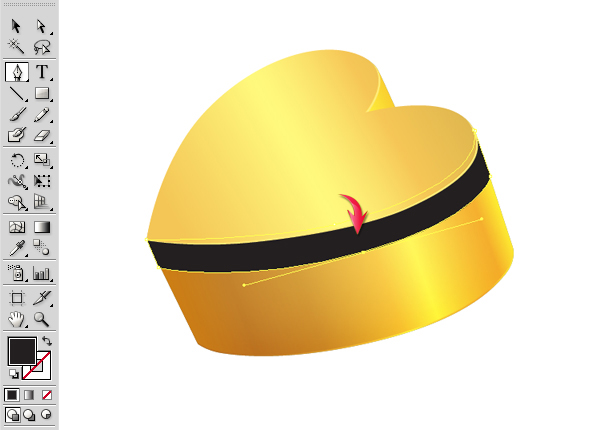
Duplicate the box layer, and give it a 1pt stroke using color #EDC10A. Place this layer below the original and drag it one step downward using the selection tool (“V”).
Step 7
To make a box lid, draw the following shape below the heart layers and above the box.
Step 8
Apply the following gradient to this new shape.
Make a triangular shape to complete the lid, and apply the same gradient to it.
Step 9
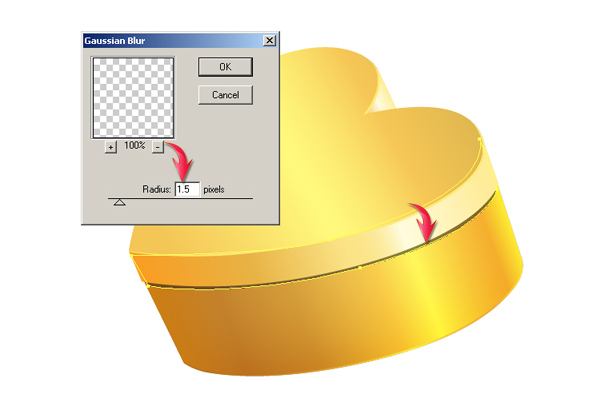
Duplicate the front lid layer, change its fill color to black, place it below the original layer, and drag it a bit downward. Now select it and go to “Effect” > “Blur” > “Gaussian Blur.” Use the following settings.
Step 10
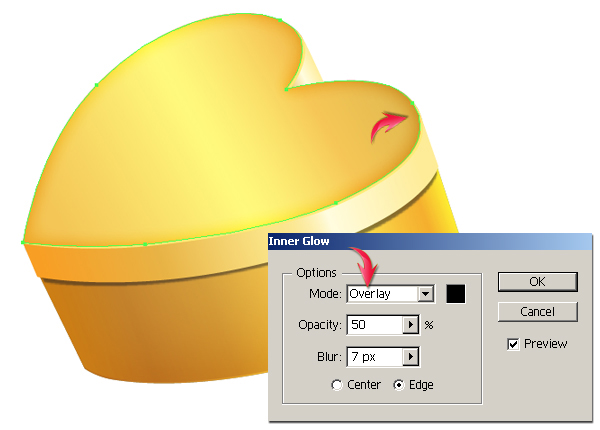
Now select the heart and go to “Effect” > “Stylize” > “Inner Glow.” Use the following settings for your inner glow.
Step 11
To make the shadow, you can use either the ellipse tool or the pen tool. Draw it on a new layer below the rest of the layers. Change its blending mode to “Multiply” and reduce its opacity to 60%.
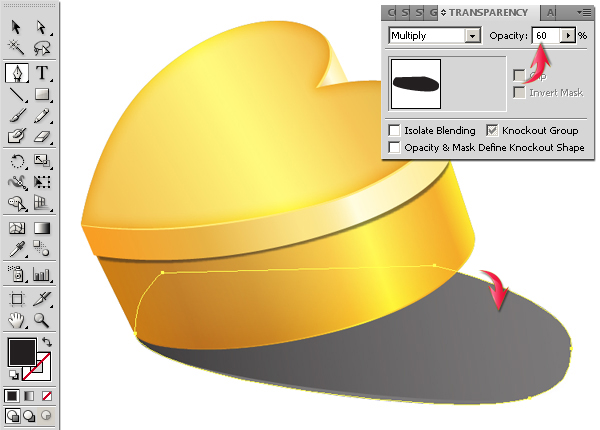
Now, apply the following black-to-transparent gradient to it.
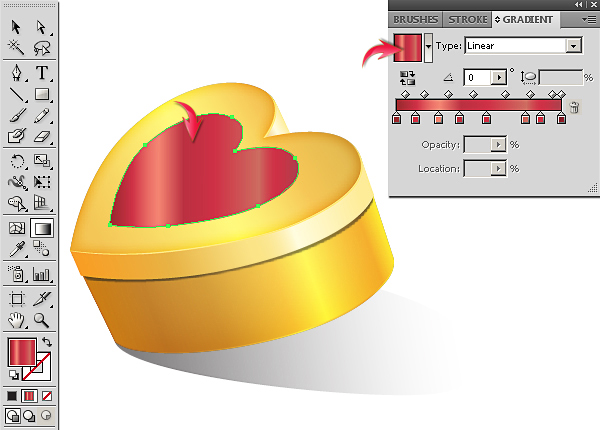
Step 12
Next, we’ll decorate the box by creating a heart-shaped diamond over the lid. Duplicate the heart shape, decrease its size using the selection tool (“V”), and position it as shown below. Now, apply an apple gradient to it. You can find this gradient by clicking the “swatch libraries menu” icon present at the bottom-left corner of your swatches. Choose “Gradients” > “Fruits and Vegetables” > “Apple” from the options.
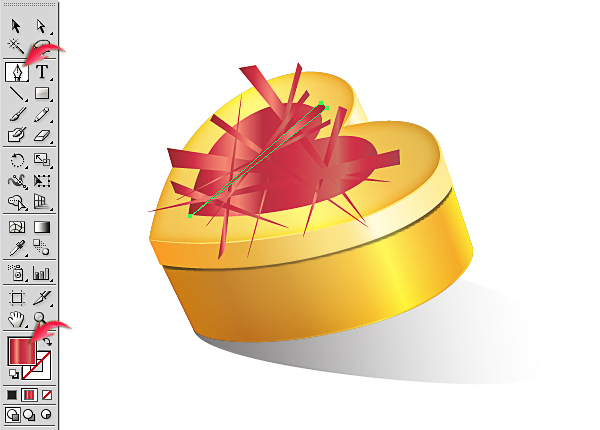
Step 13
Create a new layer at the top and draw a few random triangles with the same “apple” gradient used before.
Once you are done, duplicate this layer and rotate it using the selection tool (“V”) to get a denser look. Select both layers and collect them into a single new layer.
Step 14
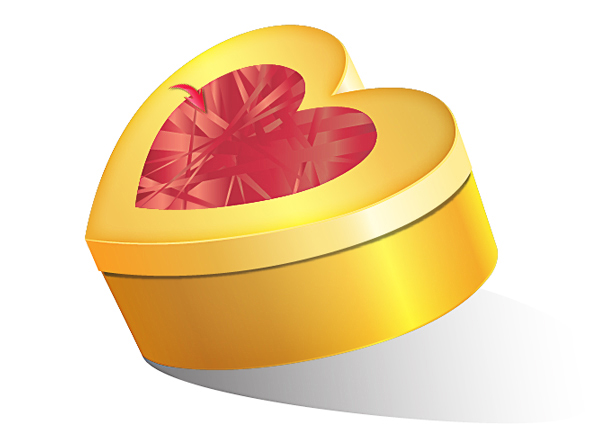
Duplicate the resized heart shape created in step 12 and drag it above the triangles layer. Set its fill to none. Now, select this heart layer and triangles layer and go to “Object” > “Clipping mask” > “Make.” This will confine the triangles to the heart.
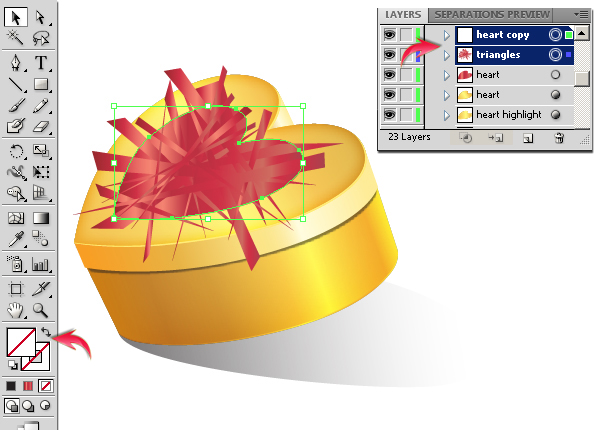
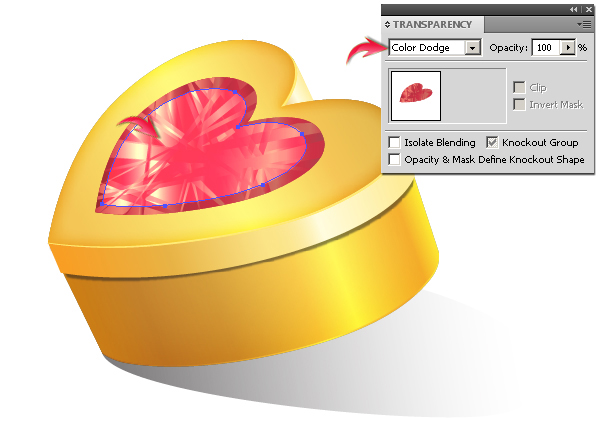
Step 15
Duplicate the triangles layer, decrease its size a bit, and change its blending mode to “Color Dodge” in the transparency panel to get the effect shown below.
Step 16
Now, duplicate the original triangles layer, drag it above the rest of the layers, and change its blending mode to “Soft Light.”

Step 17
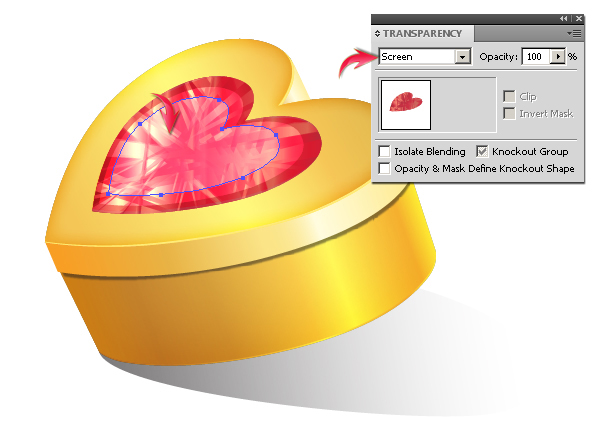
Duplicate this layer, decrease its size, and change its blending mode to “Screen” to get the the effect similar to mine.
Step 18
Duplicate the base heart layer, change its fill color to #6D0000, increase its size, drag it downward a bit, and place it just above the box layers.
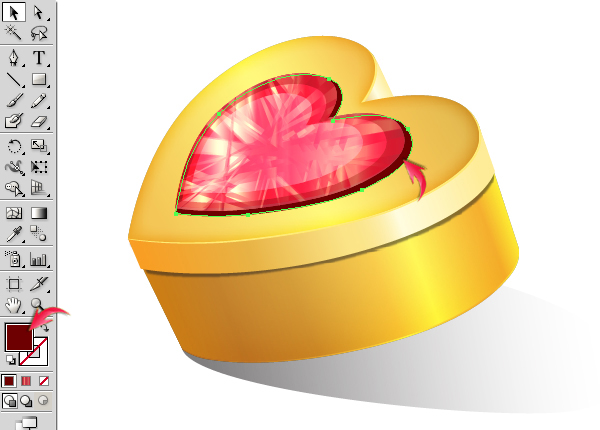
Make its shadow using the same technique explained in step 9 for making the box lid’s shadow.
Step 19
Next, we’ll add few sparkles over the box. Draw a star using the star tool with a white fill color. Duplicate the star. Now, select the original star and go to “Effect” > “Distort &Transform” > “Pucker & Bloat.” Use the following values here. After that, select the duplicated star, apply the following settings as a Gaussian blur, collect both star layers into a new layer, and you are done.
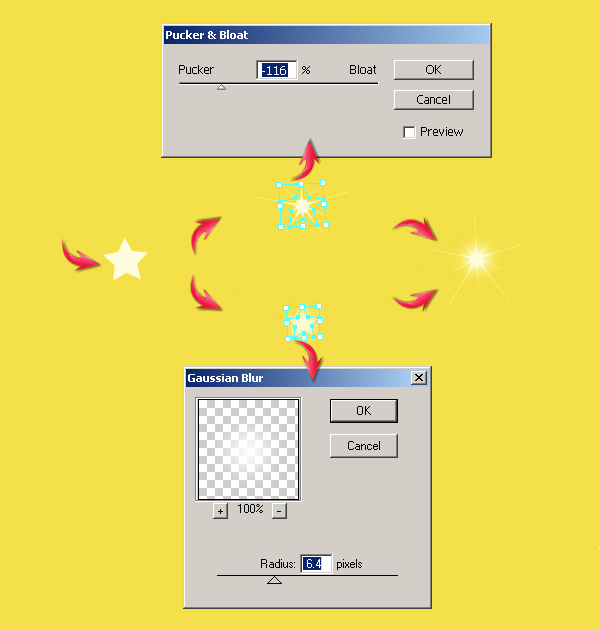
Position it as you like over the gift box.
Step 20
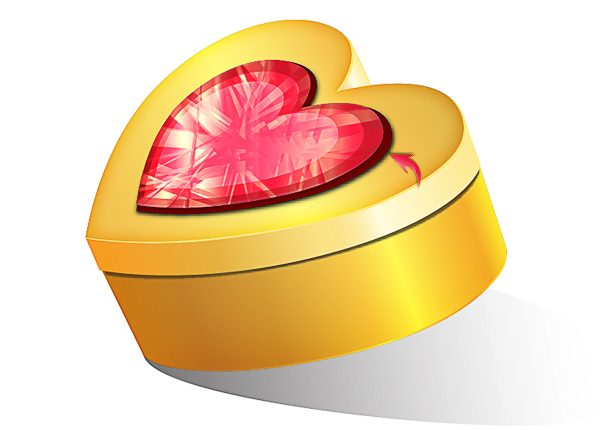
The gift box is ready. However, you can further decorate it with a ribbon or anything else you want. Experiment with your box and share the results.