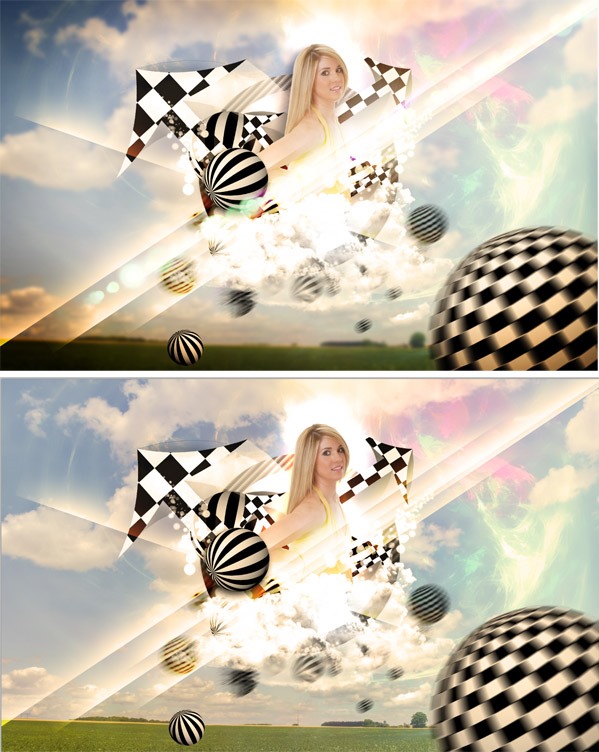
Preview of Final Results
Tutorial Resources
Step 1
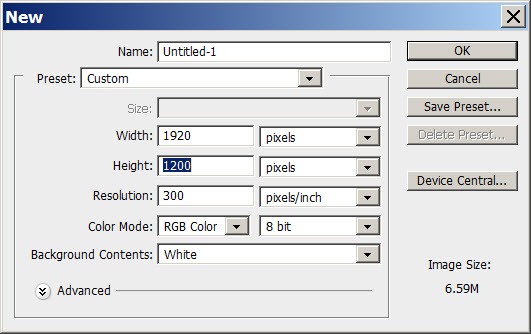
First, start Photoshop and create a new document. This tutorial is also going to be a wallpaper, so the size i’m using is 1920 x 1200. You can follow all the individual settings as shown in the diagram below.
Background
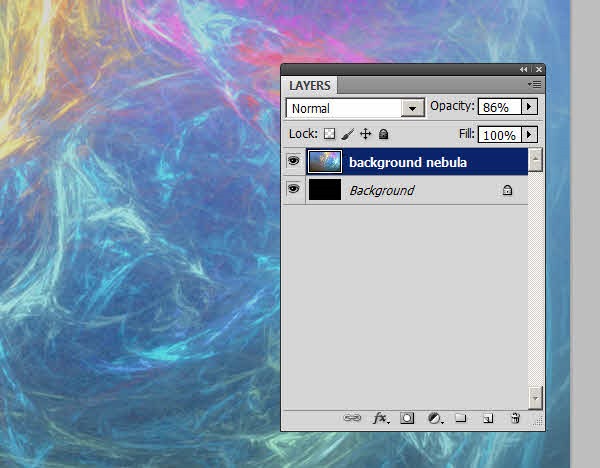
Create a new layer and fill the contents with black. The base colour of the background is going to be black. Get the nebula stock image from the resources and drag it into your document on a new layer. To make it look good, we are going to reduce the opacity of the nebula layer to about 86%. You can also rasterize the background nebula by right clicking on the layer and selecting rasterize.
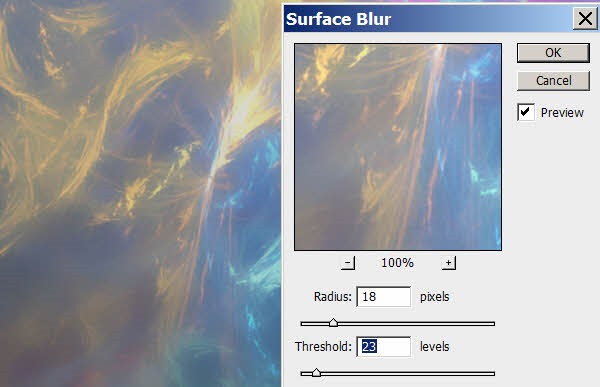
The background is a little grungy, so we are going to remove a little bit of the grunge by going to Filter>Blur>Surface Blur………and use the settings as shown below.Radius 18 & Threshold 23
Step 2. Insert your Model
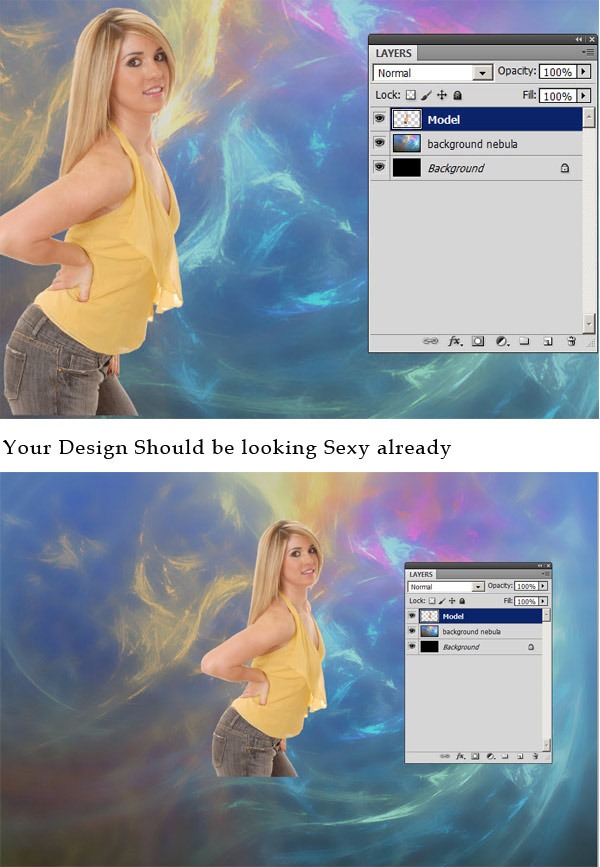
Drag and drop the photo of your model into the document. It was pretty easy to remove the model from its original white background by using the magic wand tool and the layer masks feature.
Step 3. Focal Circle
This step is what i call the focal circle. The focal circle’s main job is to create a “focal point” in the image. (irony huh?). To create the circle, create a new layer by pressing CTRL + N on your keyboard. Now using the Elliptical Marquee tool (“M”) hold shift and drag & draw a perfectly round circle and fill it with black.
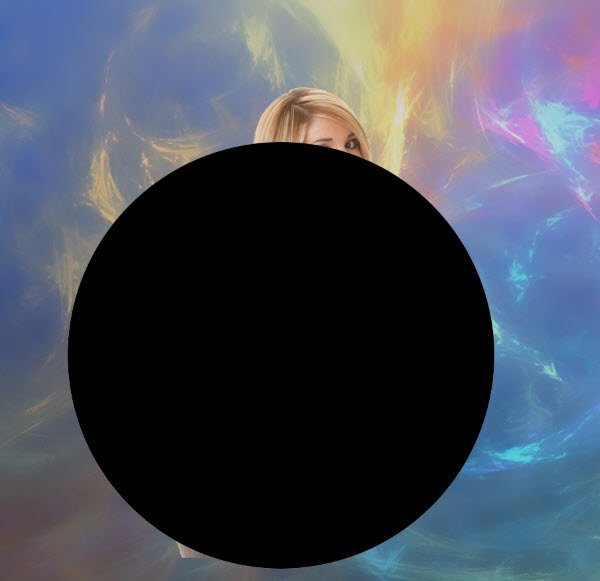
To cut out the middle of the circle use the same procedure by holding shift and drawing a perfectly round circle. When the selection has been made, drag it into the middle of the totally black circle and press delete. This should now leave us with a circular ring.
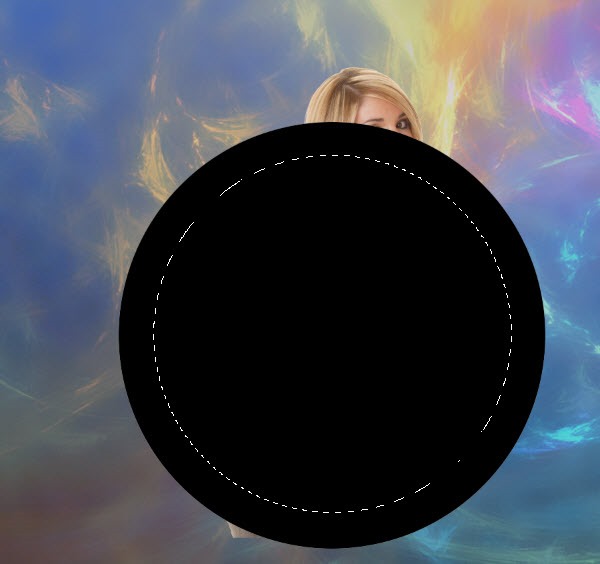
Voila!! Now we are going to move the circular ring layer below the model’s layer. To give the impression that the model is slightly coming out of the ring i’m going to use the eraser tool and erase “a little bit of her backside” as shown in the demonstration.
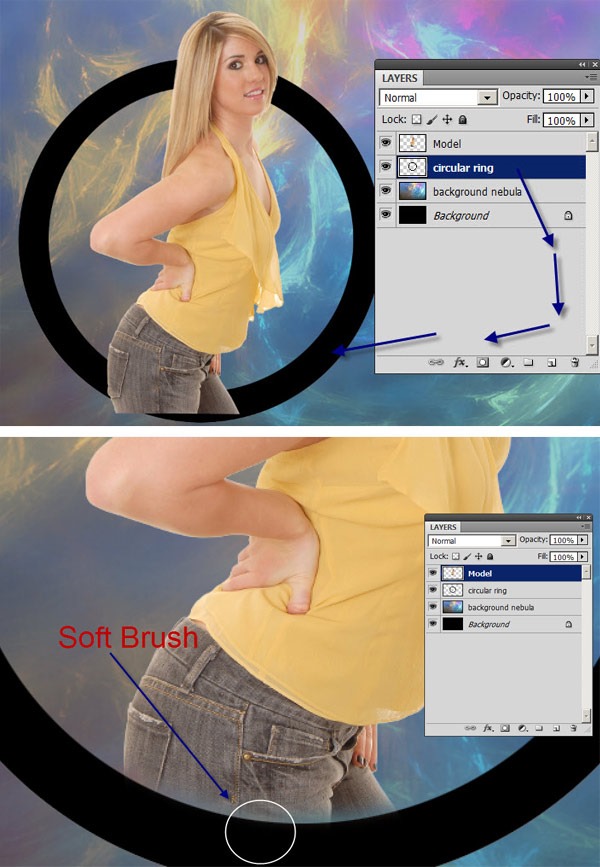
I used a reasonably sized large soft brush to erase the portion of her legs.
Step 4. Styling the Circle
To give the ring a neat retro effect i’m going to use layer styles and the default photoshop patterns. I’m using Photoshop cs5 to write this tutorial so lets hope our features look and behave the same way…………Anyways!!!
Double click on the circular ring layer to open up the layer styles dialog box or right click and select blending options.
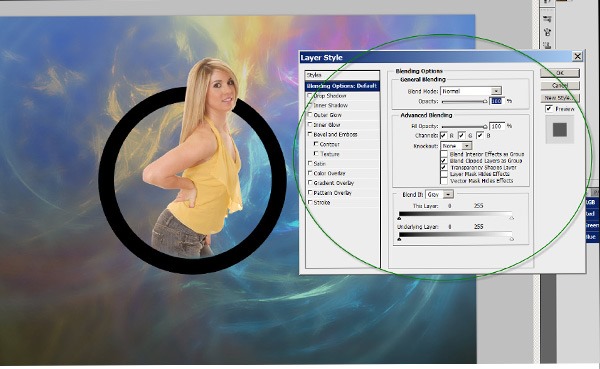
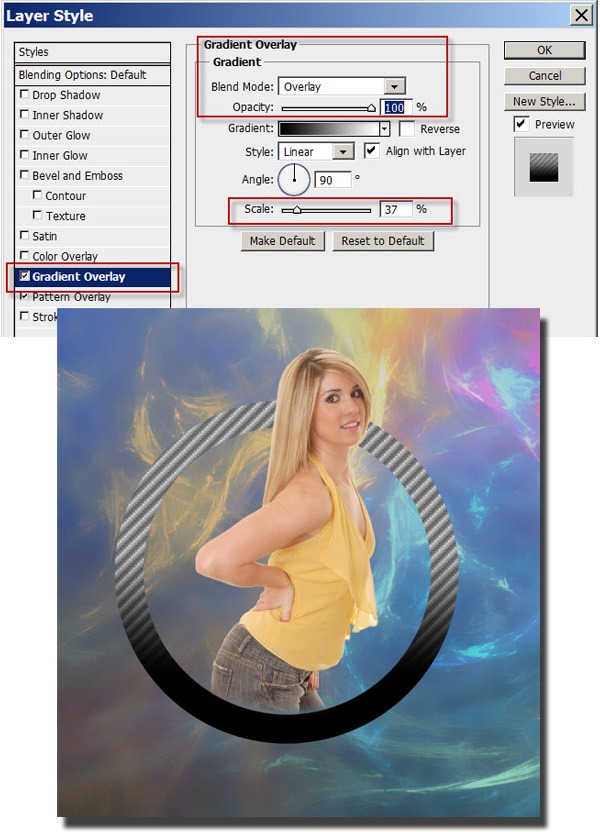
Click on pattern overlay and follow the settings as shown below. Scale is set to 85% and i clicked the small arrow in the dialog box to choose the desired pattern.
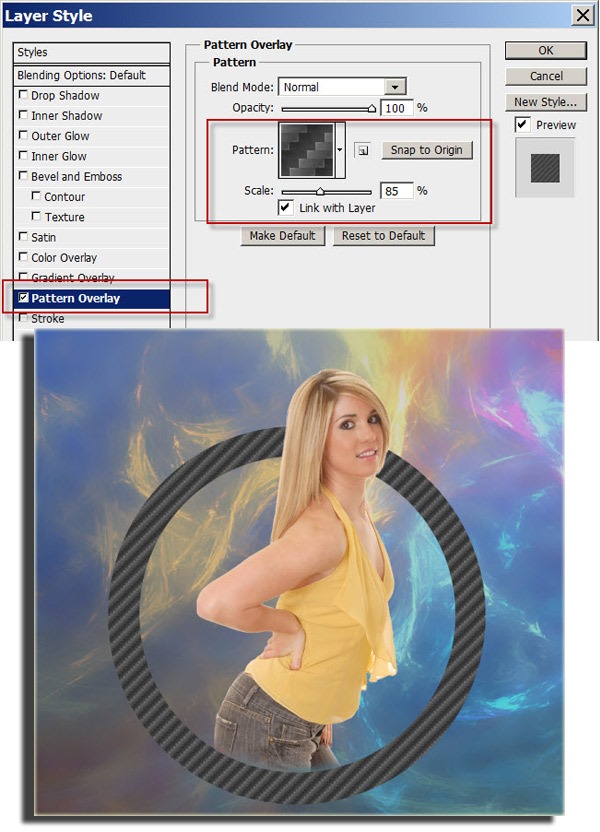
The second layer style we are going to add to the circle is gradient overlay. Leave it at its default black to white gradient but change the blend mode to overlay and the scale to 37%. This gives us a nice gradient effect utilising the pattern.
