Final Product What You’ll Be Creating

In this tutorial, I am going to draw Kermit (known in Mexico as “La Rana René”) by using simple shapes and basic tools in Adobe Illustrator. I’ll also show you how to modify your colors in the blink of an eye! So let’s get started…
1. Create a New Document and Sketch
Step 1
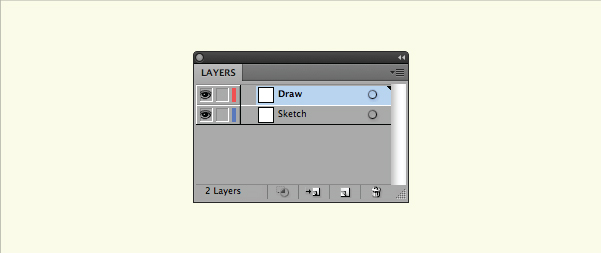
First we start with creating a New Document (Control + N). In the Layers panel Create New Layer. The top layer is where we are going to do our illustration (rename it “Draw”) and the lower layer its where we will do our sketch (rename it “Sketch”).
Step 2
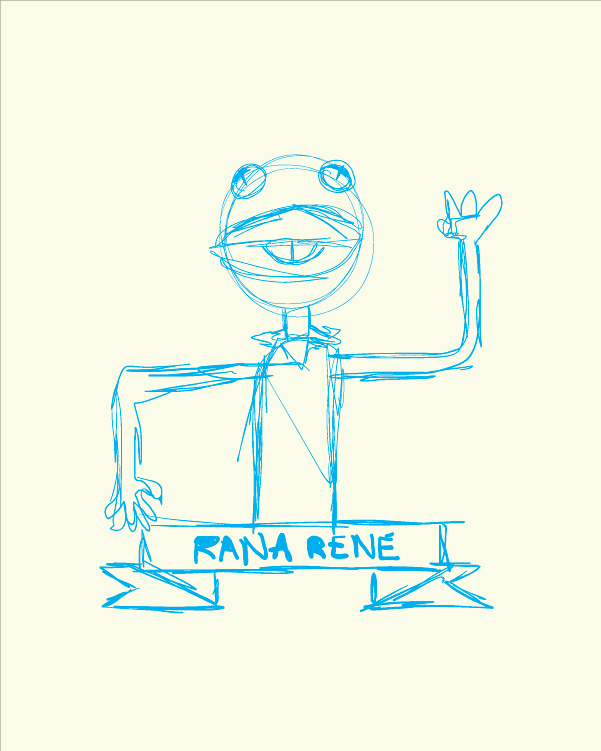
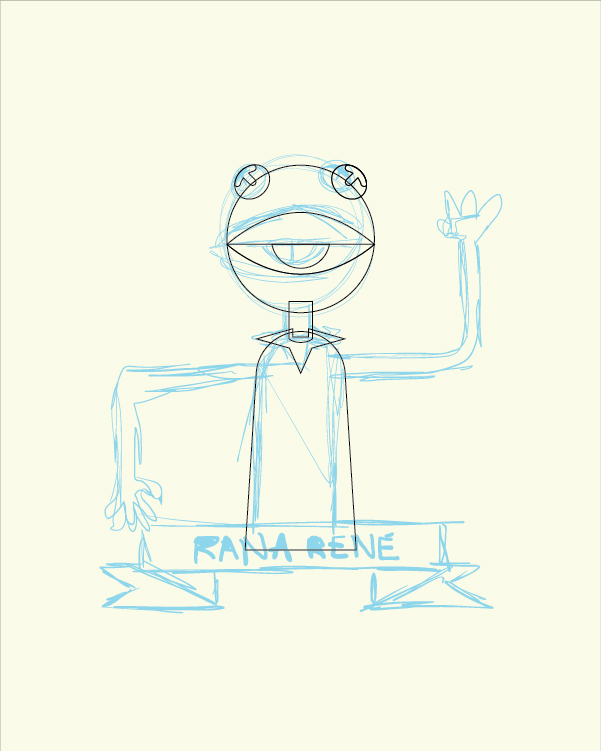
In the layer “Sketch” we begin sketching with the Blob Brush Tool (Shift + B). If you have a pen tablet this will be a lot easier, if not you can do a pencil sketch and take a photo with the webcam of your computer or scan it in. Don’t put too many details on the sketch, just concentrate on the proportions and composition. In the rendering process you can do any necessary adjustments.
Step 3
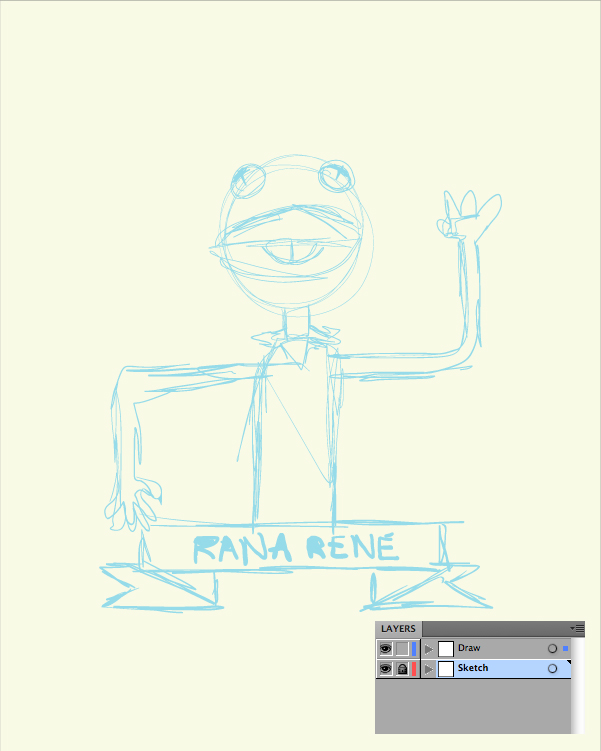
Set the Opacity of your sketch to 40% and Lock the “Sketch” layer.
2. Draw the Head
Step 1
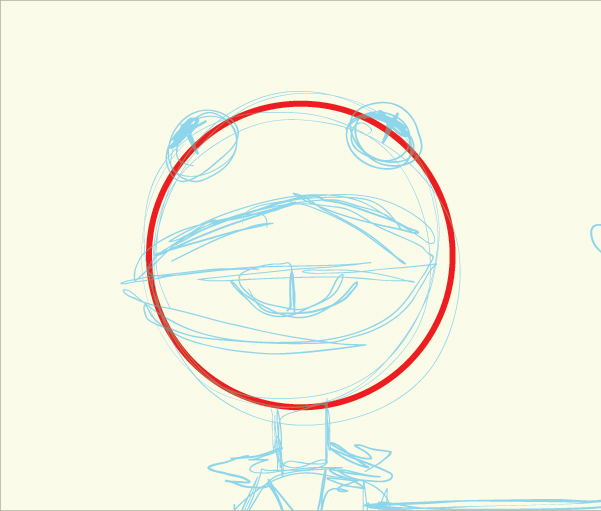
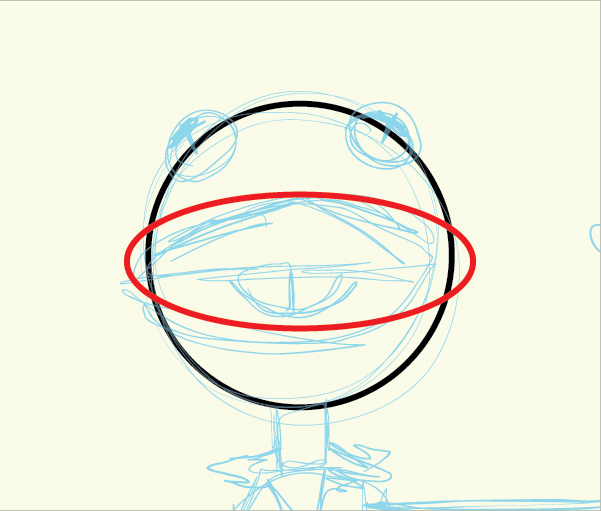
The head base for René is a perfect circle, so use the Ellipse Tool (L) and hold Shift-drag. This will create an even circle.
Step 2
For the mouth we start with a circle, but now draw it more like an ellipse. However the mouth requires a little more detailing.
Step 3
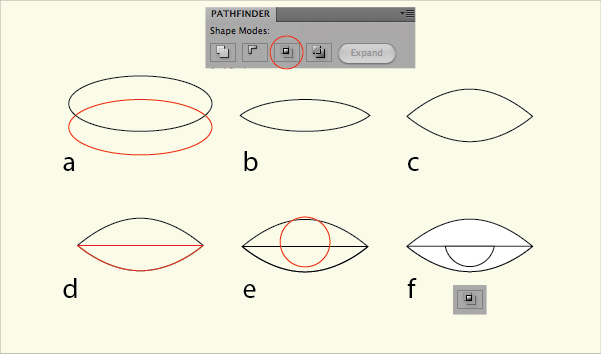
Let’s break down the shapes of the mouth:
- Duplicate your ellipse shape and move it below the original ellipse (a)
- Select both shapes and use Intersect in the Pathfinder panel (b)
- Increase the height between the center points of the curves by using the Direct Selection Tool (A)to select the points and moving them upwards/downwards (c)
- Copy (Control + C) and Paste in Front (Control + F), the with the Eraser Tool (Shift + E) remove half of the duplicate shape. Hold Alt to create a straight line (d)
- Draw an even circle with the Ellipse Tool (L) and position it in the horizontal center of the shapes (e)
- Use Intersect in the Pathfinder panel with a duplicate of the bottom shape to create a semi circle (f)
Step 4
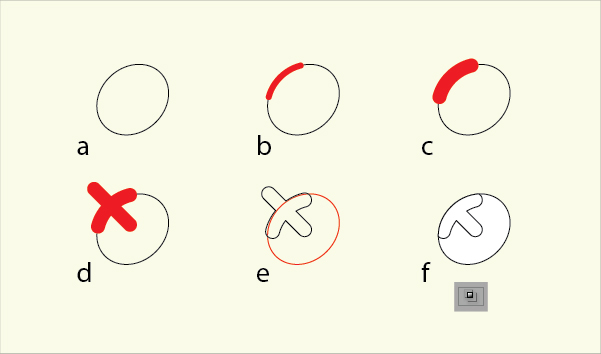
Now let’s create the eye. After drawing and ellipse, rotate it by 45 degrees. With the Blob Brush Tool (Shift + B), draw a line around the top left hand curve. Then create a cross with the line crossing over to the center of the tilted ellipse. Use Pathfinder > Intersect with a duplicate of the tilted ellipse to create your shape.
Step 5
Duplicate the eye and flip it horizontally. Place the eyes around the top of the head as shown below. He’s taking shape!

3. Draw the Neck and Body
Step 1
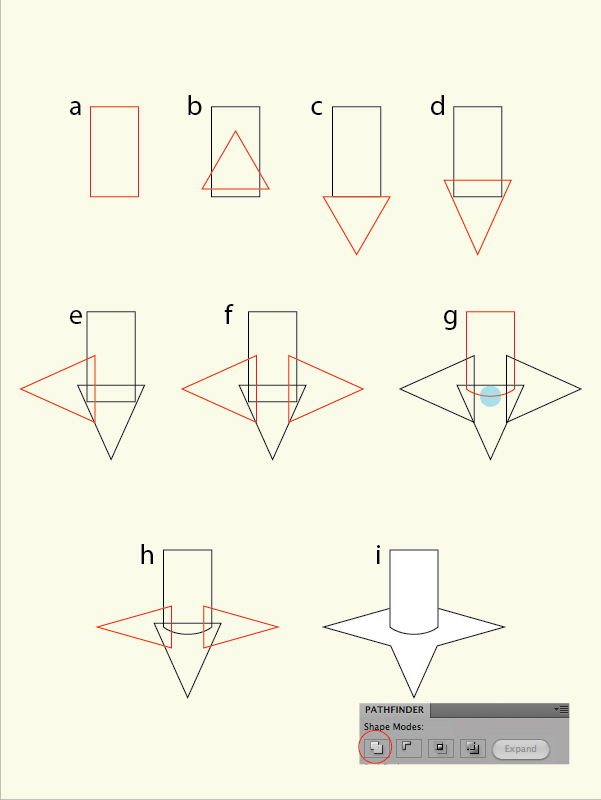
I’m going to construct the neck using the Rectangle Tool (M) and triangles. Follow the process below to find out how.
Step 2
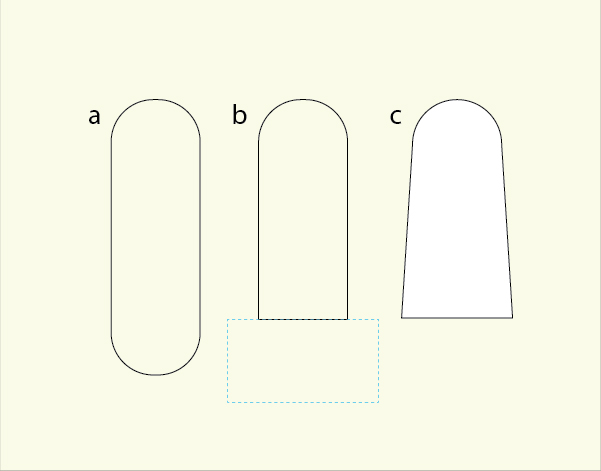
The body its pretty simple:
- Draw a rounded rectangle with the Rounded Rectangle Tool (a)
- With the Eraser Tool (Shift + E) select the figure and remove the lower portion of the shape (b)
- Select with the Direct Selection Tool (A) the lower nodes, then press S for the Scale Tool and adjust the nodes as in the image (c)
Step 3
Our Rana René its beginning form! Now lets create for the arms and the sign.
4. Draw the Arms and Sign
Step 1
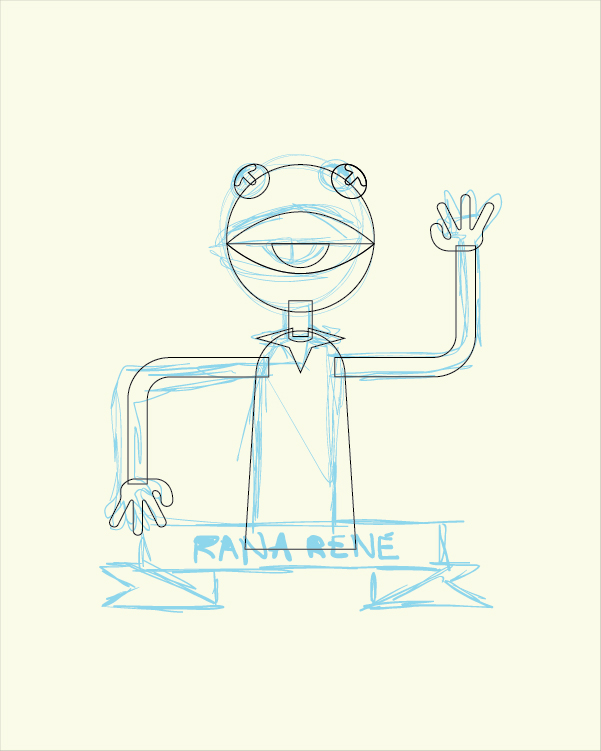
To create the arm, I’ve used the corner of a rounded rectangle. After removing the top left point, I’ve increased the stroke weight and Object > Expanded it.

Step 2
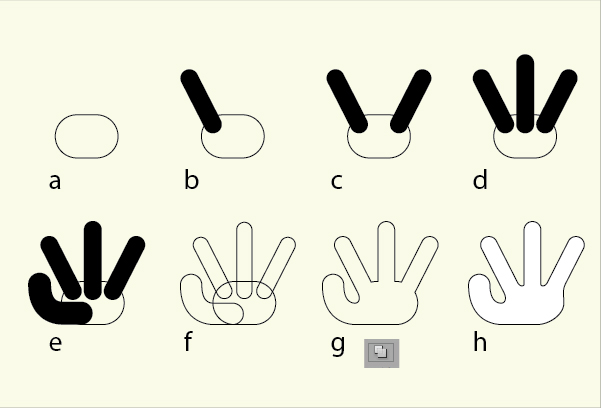
I’ve created the hands by starting with a rounded rectangle (a). Using the Line Segment Tool (\) draw a diagonal line (b) and then Reflect (O) it (c). Draw a central finger (d) and then with the Pen Tool (P) draw a curved line for a thumb (e). Finally, Expand the fingers (f) and then Unite them within the Pathfinderpanel.
Step 3
Let’s move the arms and hands into place, René is looking more complete. Time to move onto the sign.
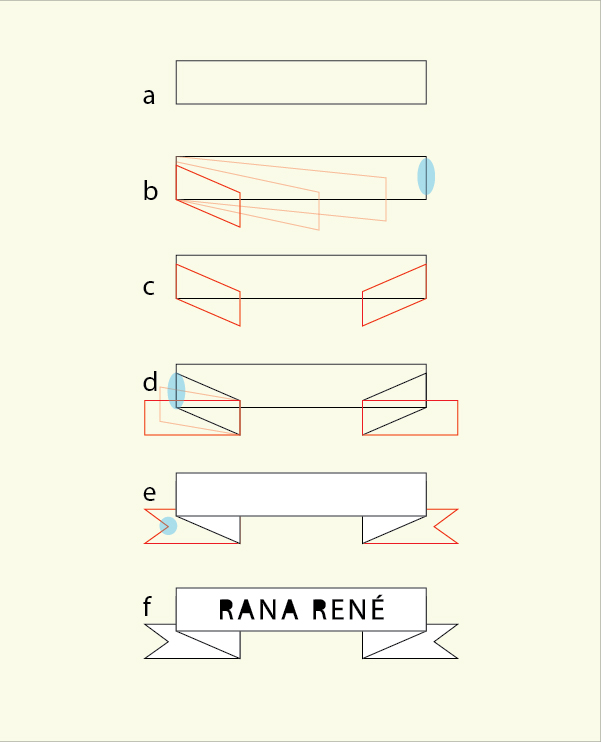
Step 4
Follow the diagram below for creating the ribbon/sign shapes. Then using the Type Tool (T), add your text. I’ve chosen the “Myriad Pro” font you should have with Adobe Illustrator. I’ve then converted it to Outlines (Control + Shift + O) and removed the spaces with the Direct Selection Tool (A) for the “R” and “A” letters.
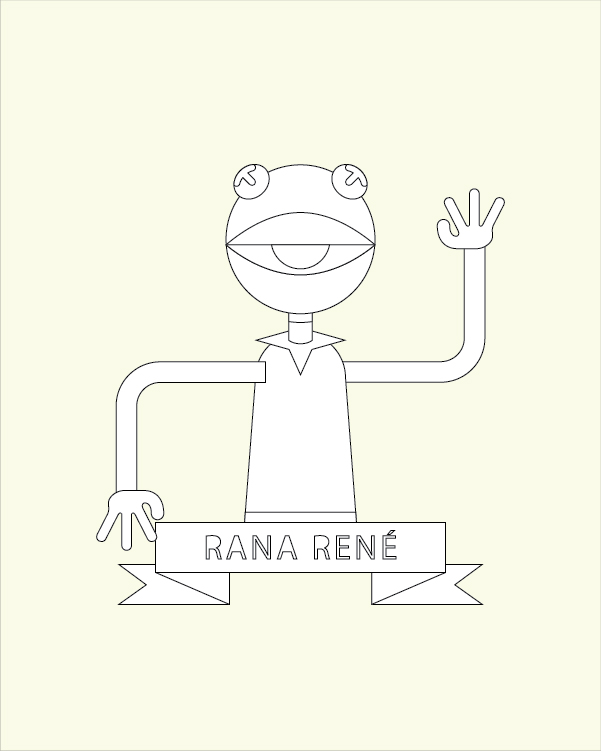
Step 5
Now that the drawing is finished we can start to add color and details.
5. Add Color and Details
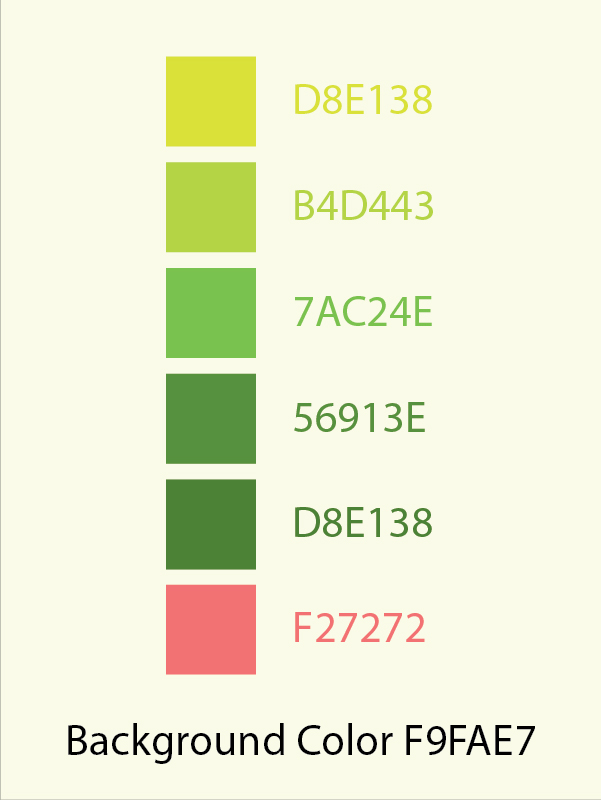
Step 1
Here’s the color palette we are going to use for our illustration. I’ve created a square with each fill and placed them near René.
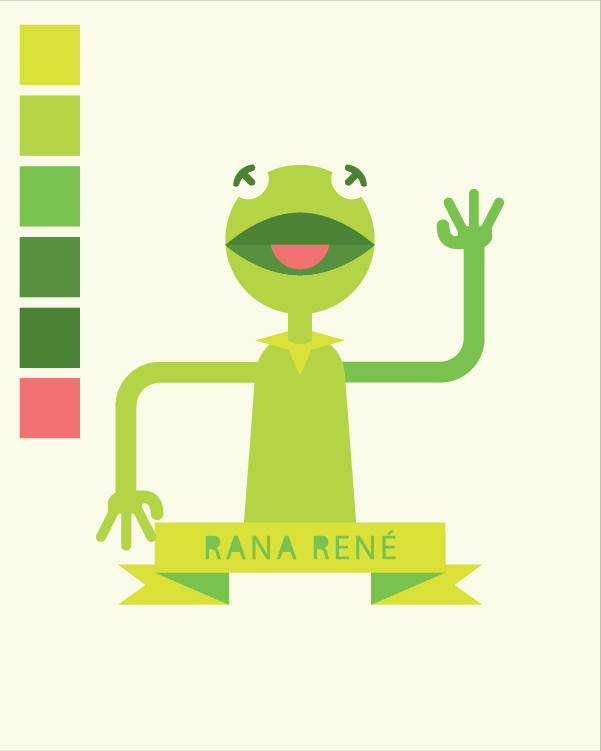
Step 2
I’ve used these colors in the following manner to using the Eyedropper Tool (I) on each selected shape.
Step 3
Using the processes I’ve shown you, add shadows using duplicate shapes and the Pathfinder panel. Circles created by the Ellipse Tool (L) are added to the elbows and a highlight is added to the top lip.

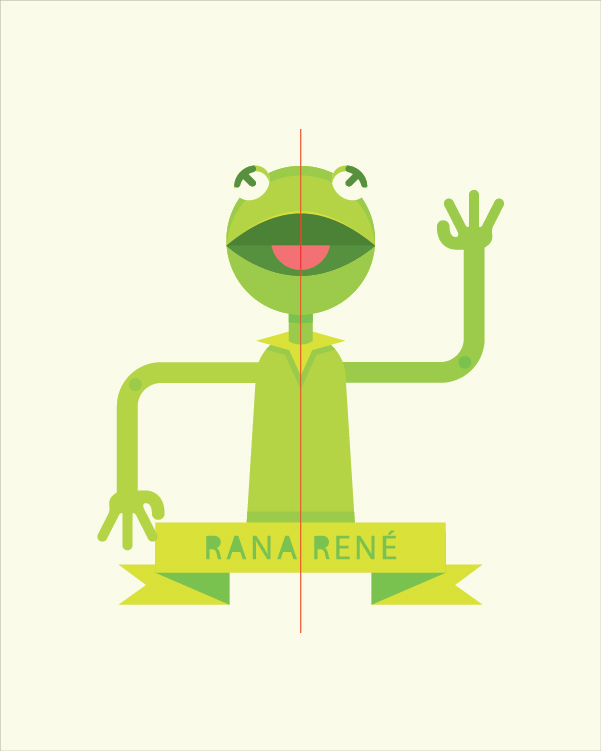
Step 4
Lock the layer containing the sign. Then using the Line Segment Tool (\), draw a line down the middle of your character. Use Pathfinder > Divide to split the shapes.
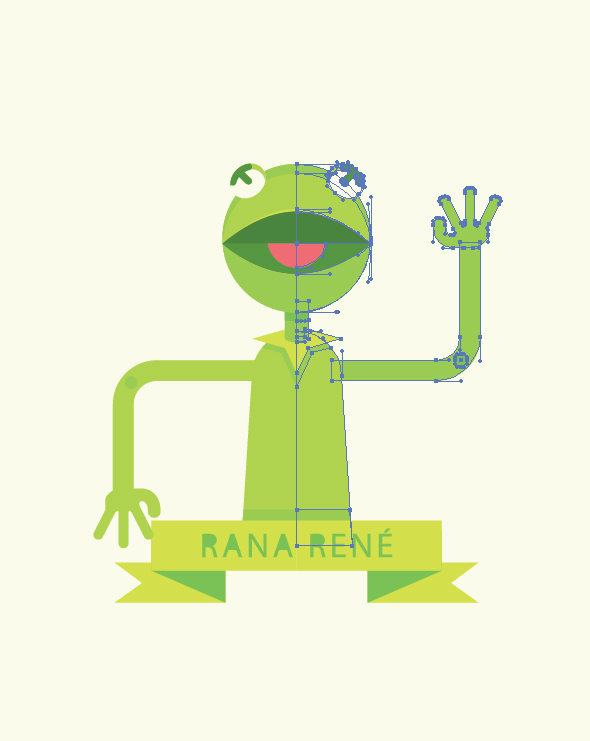
Step 5
Using the Direct Selection Tool (A), select one side of your character and go into Recolor Artwork.
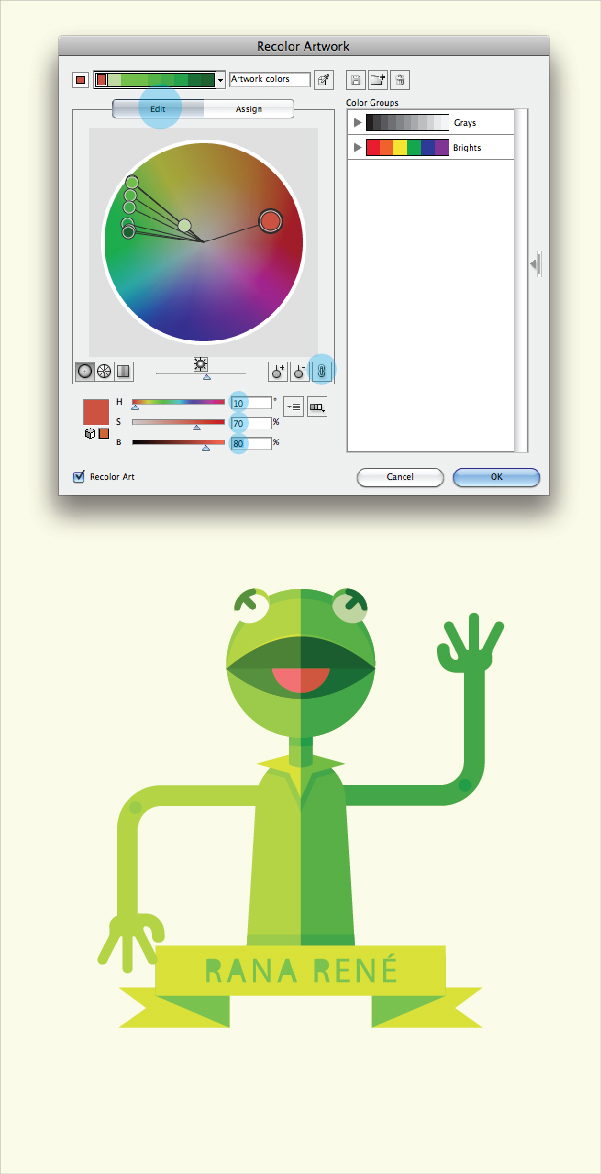
Step 6
In Recolor Artwork, go to Edit and click on the little chain to modify all colors at once. Now enter the values: Hue:10, Brightness: 70, Saturation: 80. This will modify all your colors for half of the illustration in one swoop!
Awesome Work! René Is Now Complete!
Hope you’ve enjoyed my Kermit fan art and you’ve picked up some handy tips along the way. See you soon, saludos and keep on vectoring!