Android OS is used on a large number of devices with different screen sizes, processing power, memory, sensors, etc. There is also a high possibility that your intended user base will have different versions of Android installed on their devices. This means that you will have to be very careful when developing Android apps and should test them thoroughly for a great user experience.
There are only so many physical devices on which you can test your apps. Fortunately, Android Studio provides us with a great alternative in the form of an emulator which can create virtual devices with your specified constraints.
In this tutorial, I will show you how to add virtual and physical devices to your list of devices in Android Studio.
Android Studio Device Manager
You can open the Device Manager in Android Studio either from the right-side Tool Window Bar or from the main menu bar by navigating to View > Tool Windows > Device Manager.
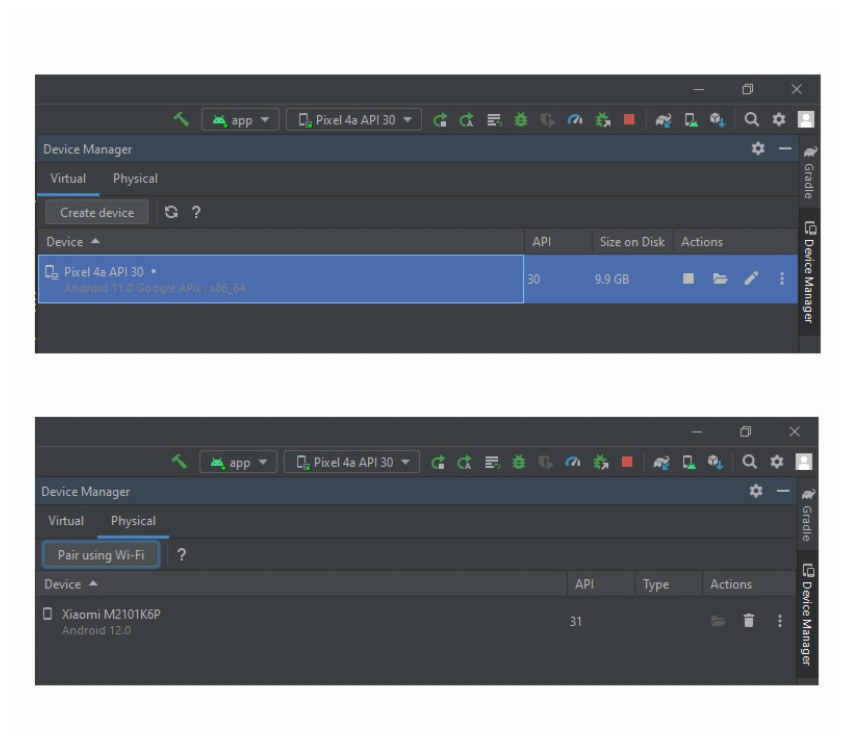
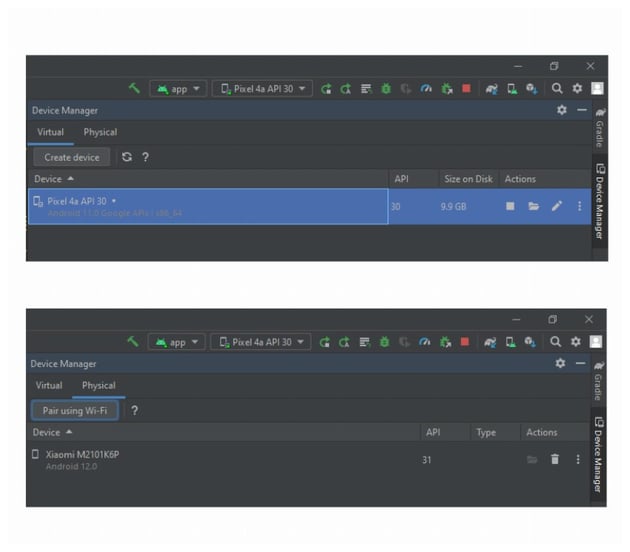
Once the Device Manager tool window is open, you will see a list of virtual and physical devices listed under the Virtual and Physical tabs respectively.
Creating a Virtual Device
With the Device Manager tool window open, you will find a Create Device button under the Virtual tab. Clicking on the button will open a new window which will ask you to select the hardware for your virtual device.
The devices are divided into multiple categories like Phone, Tablet, Wear OS, TV, Automotive, etc. We will be creating a new virtual phone here.
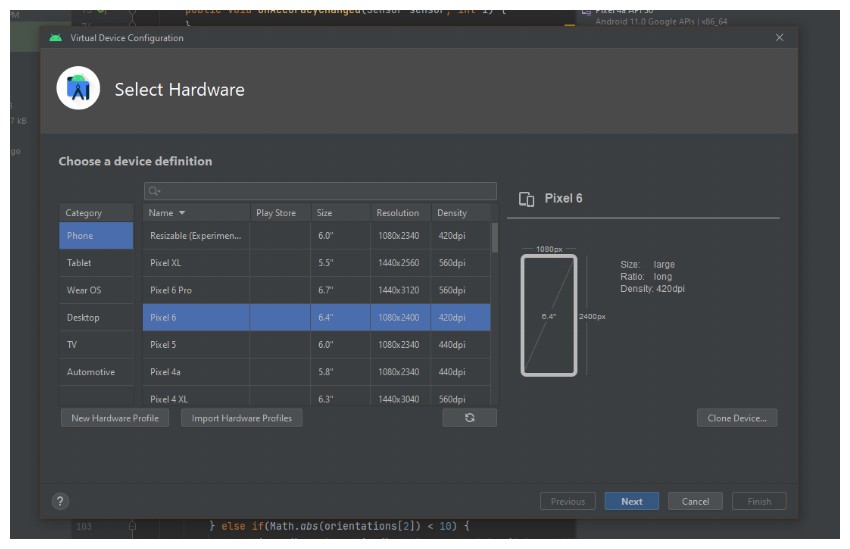

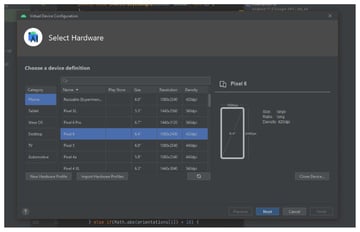
The popup window for virtual device configuration lists some characteristics of the devices that we are creating, such as the size, resolution, display density, etc. Go ahead and select any device you like; I am selecting Pixel 6 Pro for this tutorial.
There is also an experimental phone device with a screen that can resize to four different sizes covering a phone, a foldable device, a tablet, and a desktop. Click the Next button after you have chosen your device. You should now see the following screen, where you have to select a system image to install on your device.


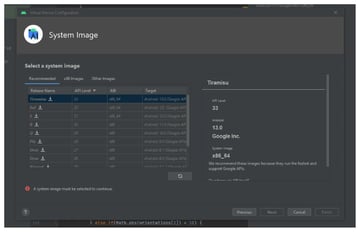
Select an image from the Recommended tab for better compatibility and optimum performance. We will go ahead with the Android 13 image with release name Tiramisu, as you can see in the above image. The Next button might be disabled for your selected system image. In that case, you can click the download icon beside the name of the system image to download it first.
Once the image has been downloaded, you will be able to click the Next button to install it. You will be able to specify a name for your AVD on the next screen and verify other information such as the chosen device and system image. You can also set up values for startup orientation and hardware- or software-based rendering.
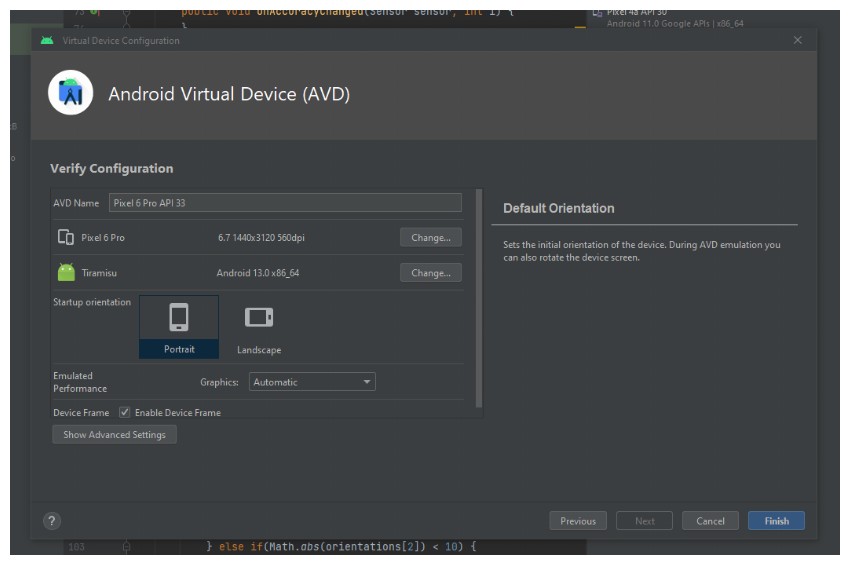
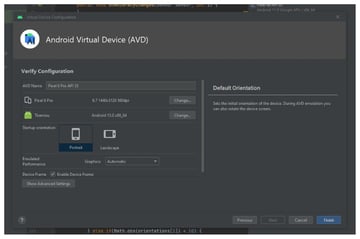
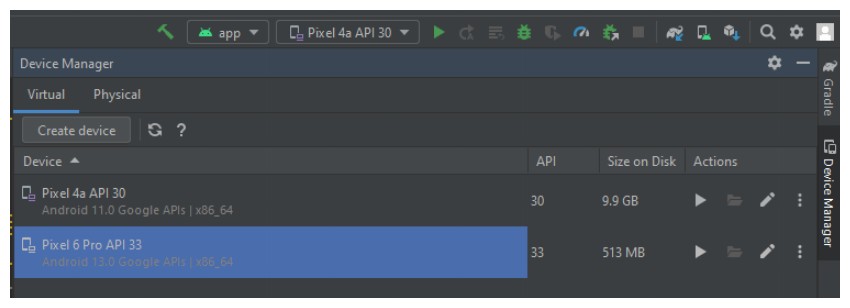
We will leave everything at the default values for now and click Finish. You will then see the virtual device listed in the Device Manager tool window, as shown below.

You can click on the launch icon or button to launch the AVD or Android Virtual Device in the emulator. You can even launch multiple AVDs together. They will be loaded under different tabs. Once launched, you will see the AVD in your emulator window, as shown below.
Installing Apps on the Emulator
We have a tutorial on Tuts+ where we learn how to use the proximity and gyroscope sensors on Android devices. We wrote the code for a simple activity that will detect how close we are to the device using the data from the proximity sensor and then change the screen to red if we are too close.
In that tutorial, we installed the app on a physical device, but Android Studio gives us the option to simulate the information of these sensors on its AVDs. You can install the same proximity sensor code on our AVD in this tutorial.
Once you have created the app, you can install and run it on your emulator by simply pressing the Run App icon in the toolbar or by navigating to Run > Run App. The keyboard shortcut Shift-F10 also works.

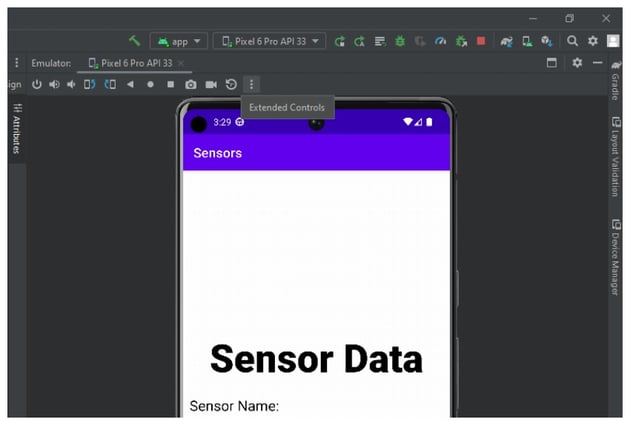

After the installed app has launched successfully, you will see a bunch of buttons at the top of the emulator window. Click the Extended Controls button as shown below.
This will open a new window where you can simulate a lot of functionality from real devices, such as receiving a call or SMS, as well as device position and proximity sensor data. In this case, we are simply interested in the proximity data. Click the Virtual Sensors option in the Extended Controls window. You will see the following options under the Additional Sensors label.


Change the value of the proximity sensor to something below 1 cm, and you will see that the screen turns red. Similarly, use any value above 1, and you will see that the screen turns green.
Managing Physical Devices
Some behaviors, like making a call, can only be properly tested on a physical device. Similarly, it is a lot easier to test Bluetooth capabilities on physical devices for the time being.
This means that it becomes absolutely necessary to be able to test your apps on physical devices. Physical device connections can either be made with a USB or over WiFi. You can connect Android Studio to physical devices by following the steps in this tutorial. The following image shows two paired devices connected using USB as well as WiFi pairing.
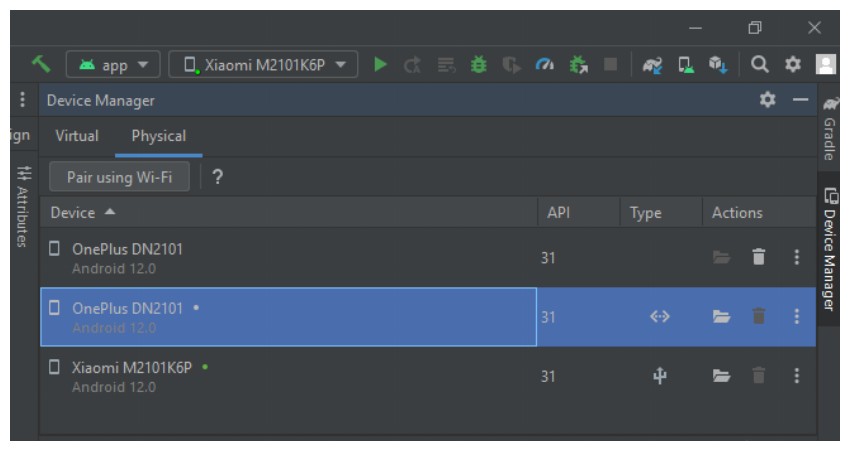

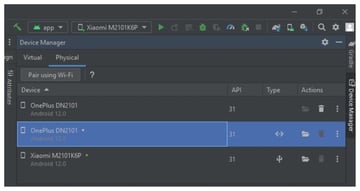
You can run and install your app on any of the devices by selecting them from the dropdown shown in the above image. The currently selected device is Xiaomi M2101K6P. You can either select an AVD from the dropdown or use any other connected physical device.
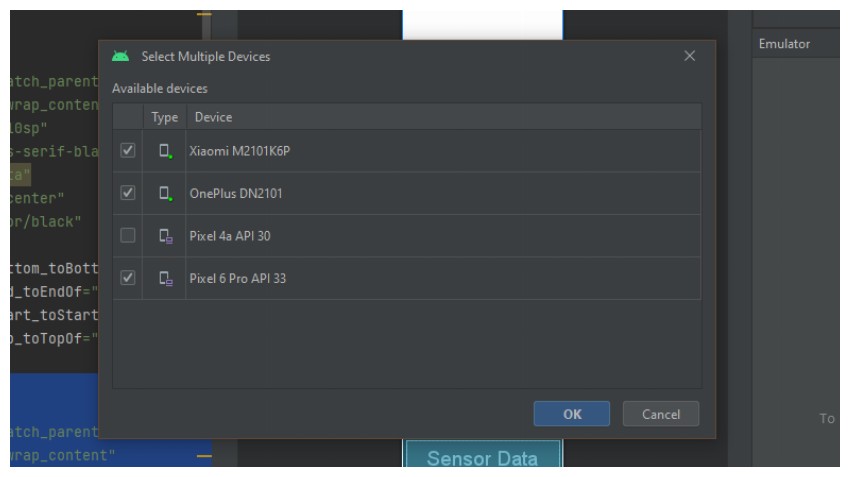

You also have the option to choose Select Multiple Devices in the dropdown and then run your app on multiple devices at the same time. Select the devices where you want to run the app, and then press OK. After that, you still have to click the Run App button or press Shift-F10.
Final Thoughts
In this tutorial, we learned how to manage virtual and physical devices in Android Studio. One of the advantages of using virtual devices is that they will allow you to test your app on a large variety of screen sizes and Android versions. However, they are not meant for you to completely forego testing on physical devices. These virtual devices will also take up a significant amount of hard disk space, so that’s something worth keeping in mind.
As you saw in the tutorial, it isn’t necessary to keep all your physical devices connected via USB. Pairing devices over WiFi allows you to do any testing much more easily. You should always use a combination of physical and virtual devices to achieve the best results.