Following on from our introduction to AJAX, here’s an example which uses the XMLHttpRequest API to initialize an AJAX request.
AJAX Example
Have a look at the following basic structure:
      <div>
          <img src="http://webdesign.tutsplus.com/Einstein.jpg" alt="Einstein">
          <button id="request">Learn more about Einstein</button>
          <div id="bio"></div>
      </div>
Also, consider the related visualization:

Here’s what we want to happen: when we click on the button, an AJAX request will be executed. Then, the element with the bio id will appear and its content will be populated with the response data. That data is static and stored in the Bio.txt file.
Note: the file is uploaded to the Codepen server. In this way, we avoid cross-origin problems which may occur.
Below is the required AJAX code:
      var btn = document.getElementById('request');
      var bio = document.getElementById('bio');

      var request = new XMLHttpRequest();

      request.onreadystatechange = function() {
        if(request.readyState === 4) {
          bio.style.border = '1px solid #e8e8e8';
          if(request.status === 200) {
          	bio.innerHTML = request.responseText;
          } else {
          	bio.innerHTML = 'An error occurred during your request: ' +  request.status + ' ' + request.statusText;
          }
        }
      }

      request.open('Get', 'Bio.txt');

      btn.addEventListener('click', function() {
        this.style.display = 'none';
        request.send();
      });
Broken Down Into Steps
Let’s now describe the steps for this request:
-
Create an XMLHttpRequest object.
-
Write the function that will run when the server sends back the response data. The XMLHttpRequest object has the
onreadystatechangeproperty which stores this function. Every time the state of the request changes, this callback function is executed. -
Monitor a few other properties of the XMLHttpRequest object. First, the
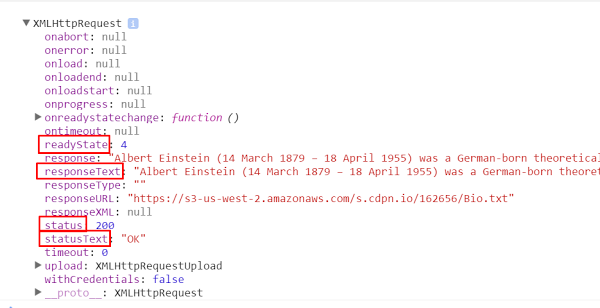
readyStateproperty specifies the state of our request. Throughout the AJAX call its value changes and can receive values from0to4(e.g. the value4means that the response data is available to us). Second, thestatusproperty indicates whether the request is successful or not (e.g. the value200defines a successful request). In this example, assuming that we retrieve the response data and the AJAX call is successful, we update the content of the target element. Otherwise, we display a message with information extracted from the XMLHttpRequest object. -
Specify the type of the request by using the
openmethod. This method accepts two required parameters and three optional ones. The first required parameter defines the HTTP method (e.g.GETorPOST). The second one determines the URL to which we’ll send the request. Optionally, we pass a third boolean parameter which indicates whether the request is asynchronous (i.e. defaulttruevalue) or synchronous. The other two optional parameters can be used for authentication purposes. -
Submit the request when the button is clicked via the
sendmethod. Plus, at this point we hide the button.
Note: If you really need to support very old versions of Internet Explorer (i.e. IE6 and below), you have to create an instance of the ActiveXObject object (see Step 1 section).
The next visualization shows the body of our request as it is printed in the browser’s console.

The final demo looks like this:

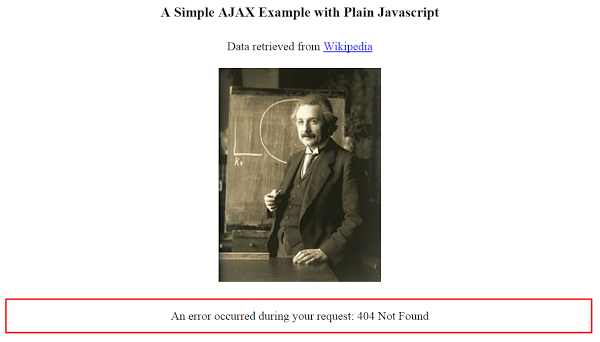
On the other hand, if we request a file which doesn’t exist, we’ll see a message similar to the following:

Note: If you run the example from your local environment (and store the Bio.txt file in it), the error message will probably be different. For instance, you might see the following result:

Here’s the embedded Codepen demo:
Conclusion
In this tutorial we explored how we can implement a straightforward AJAX request using vanilla JavaScript.
In the next part of this series, we’ll focus on jQuery’s AJAX-related functions and methods. Then, in the final part of the series, we’ll work with a more complicated example. Stay tuned!