This tutorial is specifically for those who are just diving into web development. If you have one year of experience or less, hopefully some of the tips listed here will help you to become better, quicker!
1. Always Close Your Tags
Back in the day, it wasn’t uncommon to see things like this:
<li>Some text here.
<li>Some new text here.
<li>You get the idea.
Notice how the wrapping UL/OL tag was omitted. Additionally, many chose to leave off the closing LI tags as well. By today’s standards, this is simply bad practice and should be 100% avoided. Always, always close your tags. Otherwise, you’ll encounter validation and glitch issues at every turn.
Better
<ul>
  <li>Some text here. </li>
  <li>Some new text here. </li>
  <li>You get the idea. </li>
</ul>
2. Declare the DOCTYPE
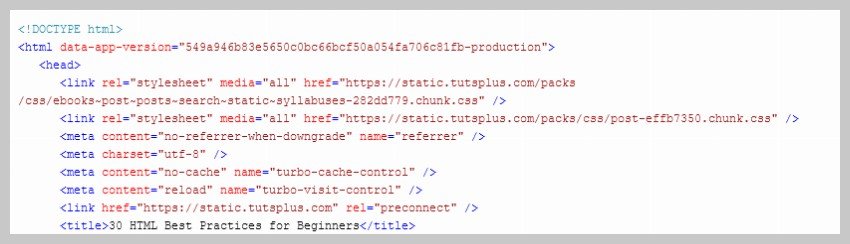
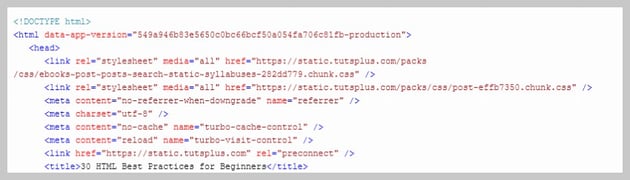
Declaring a DOCTYPE was a cumbersome process in the past. However, HTML5 has made things a lot simpler. Now, you can just add the following line at the top of your webpage to let browsers know that it should be interpreted as HTML5.
<!DOCTYPE html>
Some old websites that have not been updated in quite some time might still be using older standards to declare DOCTYPE. Don’t be confused by all that. Using the above line is the correct way to do it in HTML5. Just remember that it has to go before everything, even the <html> tag.
3. Never Use Inline Styles
When you’re hard at work on your markup, sometimes it can be tempting to take the easy route and sneak in a bit of styling.
<p style="color: red;">I'm going to make this text red so that it really stands out and makes people take notice! </p>
Sure, it looks harmless enough. However, this points to an error in your coding practices.
When creating your markup, don’t even think about the styling yet. You only begin adding styles once the page has been completely coded.
It’s like crossing the streams in Ghostbusters. It’s just not a good idea. -Chris Coyier (in reference to something completely unrelated.)
Instead, finish your markup, and then reference that P tag from your external stylesheet.
Better
#someElement > p {
  color: red;
}
4. Place All External CSS Files Within the Head Tag
Technically, you can place stylesheets anywhere you like. However, the HTML specification recommends that they be placed within the document HEAD tag. The primary benefit is that your pages will seemingly load faster.
While researching performance at Yahoo!, we discovered that moving stylesheets to the document HEAD makes pages appear to be loading faster. This is because putting stylesheets in the HEAD allows the page to render progressively. – ySlow Team
<head>
<title>My Favorites Kinds of Corn</title>
<link rel="stylesheet" type="text/css" media="screen" href="path/to/file.css" />
<link rel="stylesheet" type="text/css" media="screen" href="path/to/anotherFile.css" />
</head>
5. Consider Placing JavaScript Files at the Bottom


Remember—the primary goal is to make the page load as quickly as possible for the user. When loading a script, the browser can’t continue until the entire file has been loaded. Thus, the user will have to wait longer before noticing any progress.
If you have JS files whose only purpose is to add functionality—for example, after a button is clicked—go ahead and place those files at the bottom, just before the closing body tag. This is absolutely a best practice.
Better
<p>And now you know my favorite kinds of corn. </p>
<script type="text/javascript" src="http://code.tutsplus.com/path/to/file.js"></script>
<script type="text/javascript" src="path/to/anotherFile.js"></script>
</body>
</html>
6. Never Use Inline JavaScript. It’s Not 1996!
Another common practice years ago was to place JS commands directly within tags. This was very common with simple image galleries. Essentially, an onclick attribute was appended to the tag. The value would then be equal to some JS procedure. Needless to say, you should never, ever do this. Instead, transfer this code to an external JS file and use addEventListener or attachEvent to “listen” for your desired event. Or, if using a framework like jQuery, just use the click() method.
$('a#moreCornInfoLink').click(function() {
  alert('Want to learn more about corn?');
});
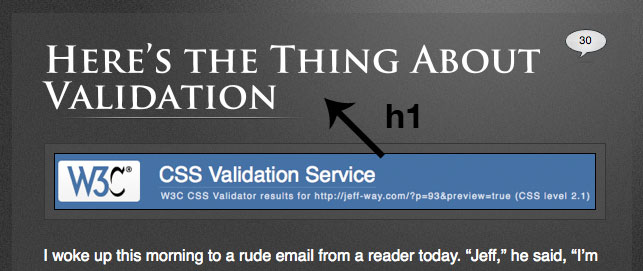
7. Validate Continuously
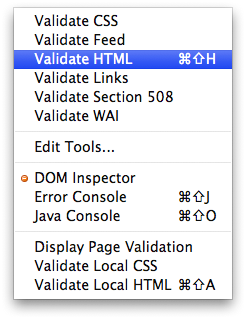
I once blogged about how the idea of validation has been completely misconstrued by those who don’t completely understand its purpose. As I mentioned in the article, “validation should work for you, not against.”
However, especially when first getting started, I highly recommend that you download the Web Developer Toolbar and use the “Validate HTML” and “Validate CSS” options continuously. While CSS is a somewhat easy language to learn, it can also make you tear your hair out. As you’ll find, many times, it’s your shabby markup that’s causing that strange whitespace issue on the page. Validate, validate, validate.
8. Use Browser Developer Tools

I can’t recommend this one enough. Using developer tools that come with all major browsers will help you resolve all kinds of layout problems and save a lot of time. Take a couple of hours and scour the web for every worthy tutorial you can find on the subject. The knowledge you gain will be well worth the time you invest.
9. Keep Your Tag Names Lowercase
Technically, you can get away with capitalizing your tag names.
<DIV>
<P>Here's an interesting fact about corn. </P>
</DIV>
Having said that, please don’t. It serves no purpose and hurts my eyes—not to mention the fact that it reminds me of Microsoft Word’s HTML function!
Better
<div>
<p>Here's an interesting fact about corn. </p>
</div>
10. Use H1 through H6 Tags
Admittedly, this is something I tend to slack on. It’s best practice to use all six of these tags. If I’m honest, I usually only implement the top four; but I’m working on it! For semantic and SEO reasons, force yourself to replace that P tag with an H6 when appropriate.
<h1>This is a really important corn fact! </h1>
<h6>Small, but still significant corn fact goes here. </h6>
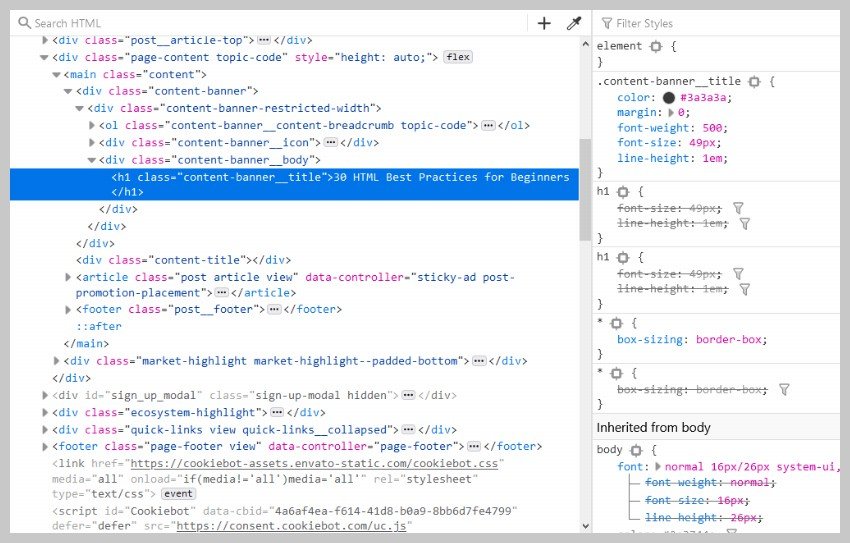
11. If Building a Blog, Save the H1 for the Article Title

Just this morning, on Twitter, I asked our followers whether they felt it was smartest to place the H1 tag as the logo or to instead use it as the article’s title. Around 80% of the returned tweets were in favor of the latter method.
As with anything, determine what’s best for your own website. However, if building a blog, I’d recommend that you save your H1 tags for your article title. For SEO purposes, this is a better practice—in my opinion.
12. Download ySlow
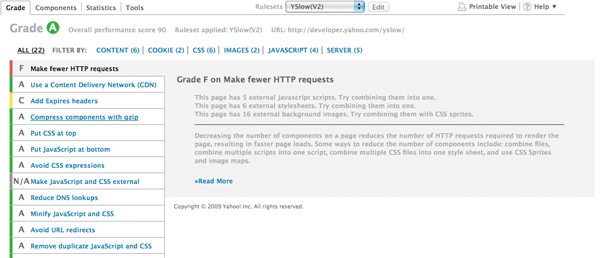

Especially in the last few years, the Yahoo team has been doing some really great work in our field. They released an extension for all major browsers like Chrome, Firefox, Safari and Opera etc. called ySlow. When activated, it will analyze the given website and return a “report card” of sorts which details the areas where your site needs improvement. It can be a bit harsh, but it’s all for the greater good. I highly recommend it.
13. Start Using New HTML5 Tags
In the old days, different sections of a page were all wrapped inside div tags. This is because there was no way to provide a more semantic structure to our page. This is no longer true. HTML5 comes with a lot of new tags that we can use to provide structure to the content on our webpage. This includes tags like nav, section, article, aside, etc.
Read about them and start using them in your new projects.
14. Wrap Navigation With an Unordered List

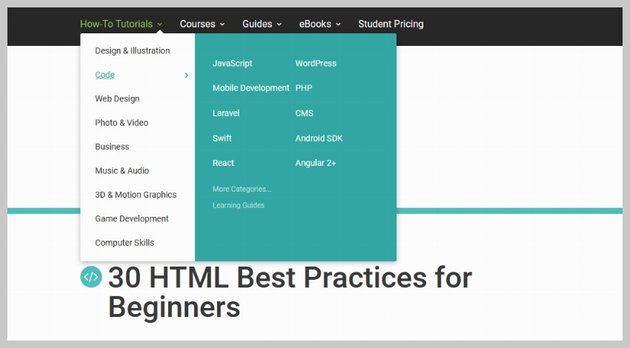
Every website has a navigation section of some sort. While you can definitely get away with formatting it like so:
 <div id="nav">
  <a href="#">Home </a>
   <a href="#">About </a>
   <a href="#">Contact </a>
 </div>
I’d encourage you not to use this method, for semantic reasons. Your job is to write the best possible code that you’re capable of.
Why would we style a list of navigation links with anything other than an unordered LIST?
The ul tag is meant to contain a list of items. We also get rid of the wrapper div and replace it with the nav tag.
Better
<nav>
    <ul>
      <li><a href="#">Home</a></li>
      <li><a href="#">About</a></li>
      <li><a href="#">Contact</a></li>
    </ul>
</nav>
15. Check Browser Support for Modern Features
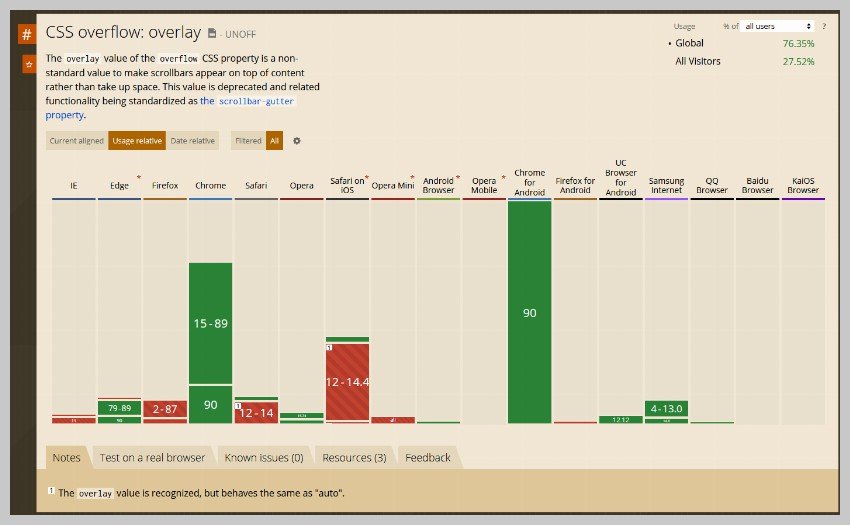


New features are added to the HTML and CSS spec all the time. Some of these features might not be available in all browsers. Therefore, it makes sense to figure out what browsers are used by your target audience and then plan accordingly.
You might be able to provide polyfills for browsers which don’t support a feature or warn users they are using an incompatible browser if that feature is necessary for the functioning of the website. In any case, knowing which features are commonly available across browsers can be helpful. The Can I Use website is a great resource for that kind of thing.
16. Choose a Great Code Editor
There are a lot of great code editors available for you to use now, from something basic and lightweight like Notepad++ to full-fledged IDEs. My personal favorite among them all is Visual Studio Code. It is free, built upon open source, and comes with lots of extensions to help you write better code fast.
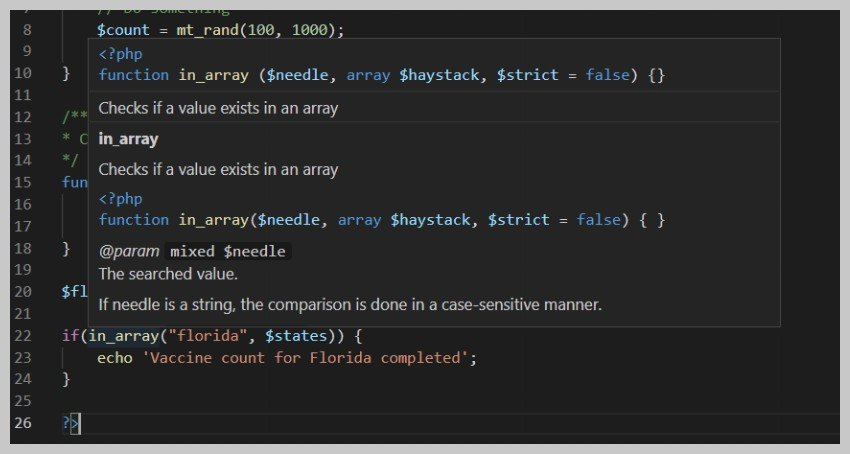

There are a lot of other code editors available as well, like Atom, Brackets, and Vim. Just pick one that you like best and start coding.
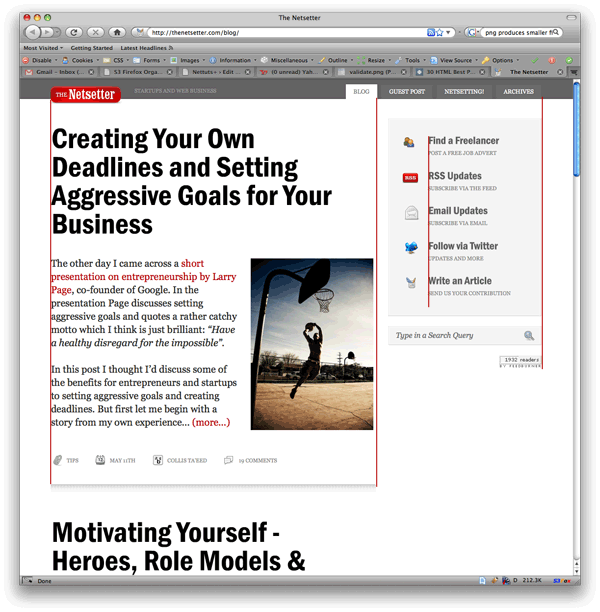
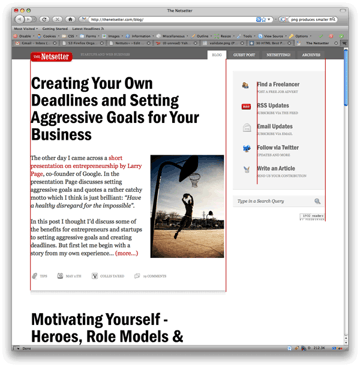
17. Once the Website Is Complete, Compress!

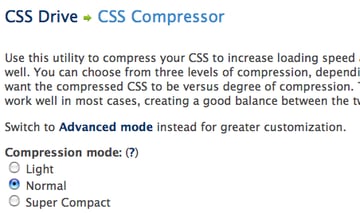
By zipping your CSS and JavaScript files, you can reduce the size of each file by a substantial 25% or so. Please don’t bother doing this while still in development. However, once the site is more or less complete, use a few online compression programs to save yourself some bandwidth.
JavaScript Compression Services
CSS Compression Services
18. Cut, Cut, Cut

Looking back on my first website, I must have had a severe case of divitis. Your natural instinct is to safely wrap each paragraph with a div, and then wrap it with one more div for good measure. As you’ll quickly learn, this is highly inefficient.
Once you’ve completed your markup, go over it two more times and find ways to reduce the number of elements on the page. Does that UL really need its own wrapping div? I think not.
Just as the key to writing is to “cut, cut, cut,” the same holds true for your markup.
19. All Images Require “Alt” Attributes
It’s easy to ignore the necessity for alt attributes within image tags. Nevertheless, it’s very important, for accessibility and validation reasons, that you take an extra moment to fill these sections in.
Bad
<IMG SRC="http://code.tutsplus.com/cornImage.jpg" />
Better
<img src="http://code.tutsplus.com/cornImage.jpg" alt="A corn field I visited." />
20. Stay Up Late
I highly doubt that I’m the only one who, at one point while learning, looked up and realized that I was in a pitch-dark room well into the early, early morning. If you’ve found yourself in a similar situation, rest assured that you’ve chosen the right field.
The amazing “AHA” moments, at least for me, always occur late at night. This was the case when I first began to understand exactly what JavaScript closures were. It’s a great feeling that you need to experience, if you haven’t already.
21. View Source
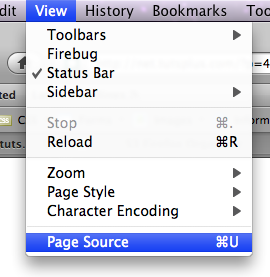
What better way to learn HTML than to copy your heroes? Initially, we’re all copiers! Then slowly, you begin to develop your own styles/methods. So visit the websites of those you respect. How did they code this and that section? Learn and copy from them. We all did it, and you should too. (Don’t steal the design; just learn from the coding style.)
Notice any cool JavaScript effects that you’d like to learn? It’s likely that they’re using a plugin to accomplish the effect. View the source and search the HEAD tag for the name of the script. Then Google it and implement it into your own site! Yay.
22. Style ALL Elements
This best practice is especially true when designing for clients. Just because you haven’t used a blockquote doesn’t mean that the client won’t. Never use ordered lists? That doesn’t mean they won’t! Do yourself a service and create a special page specifically to show off the styling of every element: UL, OL, P, H1–H6, blockquotes, etc.
23. Use Twitter


Initially, the idea behind Twitter was to post “what you were doing.” Though this still holds true to a small extent, it’s become much more of a networking tool in our industry. If a web dev writer that I admire posts a link to an article they found interesting, you better believe that I’m going to check it out as well—and you should too! 
24. Learn Photoshop

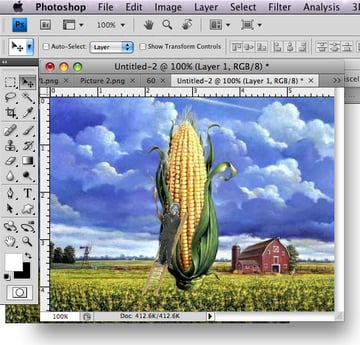
Photoshop is open pretty much 24/7 on my computer.
In fact, Photoshop may very well become the most important tool you have. Once you’ve learned HTML and CSS, I would personally recommend that you then learn as many Photoshop techniques as possible.
25. Learn Each HTML Tag
There are literally dozens of HTML tags that you won’t come across every day. Nevertheless, that doesn’t mean you shouldn’t learn them! Are you familiar with the “abbr” tag? What about “cite”? These two alone deserve a spot in your tool-chest. Learn all of them!
By the way, in case you’re unfamiliar with the two listed above:
- abbr does pretty much what you’d expect. It refers to an abbreviation. “Blvd” could be wrapped in a <abbr> tag because it’s an abbreviation for “boulevard”.
- cite is used to reference the title of some work. For example, if you reference this article on your own blog, you could put “30 HTML Best Practices for Beginners” within a <cite> tag. Note that it shouldn’t be used to reference the author of a quote. This is a common misconception.
26. Participate in the Community
Just as sites like ours contribute greatly to furthering a web developer’s knowledge, you should too! Finally figured out how to float your elements correctly? Make a blog post to teach others how. There will always be those with less experience than you. Not only will you be contributing to the community, but you’ll also teach yourself. Ever notice how you don’t truly understand something until you’re forced to teach it?
27. Use a CSS Reset
This is another area that’s been debated to death. CSS resets: to use or not to use; that is the question. If I were to offer my own personal advice, I’d 100% recommend that you create your own reset file. Begin by downloading a popular one, like Eric Meyer’s, and then slowly, as you learn more, begin to modify it into your own.
If you don’t do this, you won’t truly understand why your list items are receiving that extra bit of padding when you didn’t specify it anywhere in your CSS file. Save yourself the anger and reset everything! This one should get you started.
html, body, div, span,
h1, h2, h3, h4, h5, h6, p, blockquote, pre,
a, abbr, acronym, address, big, cite, code,
img, ins, kbd, q, s, samp,
small, strike, strong,
dl, dt, dd, ol, ul, li,
fieldset, form, label, legend,
table, caption, tbody, tfoot, thead, tr, th, td {
	margin: 0;
	padding: 0;
	border: 0;
	outline: 0;
	font-size: 100%;
	vertical-align: baseline;
	background: transparent;
}
body {
	line-height: 1;
}
ol, ul {
	list-style: none;
}
blockquote, q {
	quotes: none;
}
blockquote:before, blockquote:after,
q:before, q:after {
	content: '';
	content: none;
}

table {
	border-collapse: collapse;
	border-spacing: 0;
}
28. Line ’em Up!
Generally speaking, you should strive to line up your elements as best as possible. Take a look at your favorite designs. Did you notice how each heading, icon, paragraph, and logo lines up with something else on the page? Not doing this is one of the biggest signs of a beginner. Think of it this way: If I ask why you placed an element in that spot, you should be able to give me an exact reason.
29. Slice a PSD
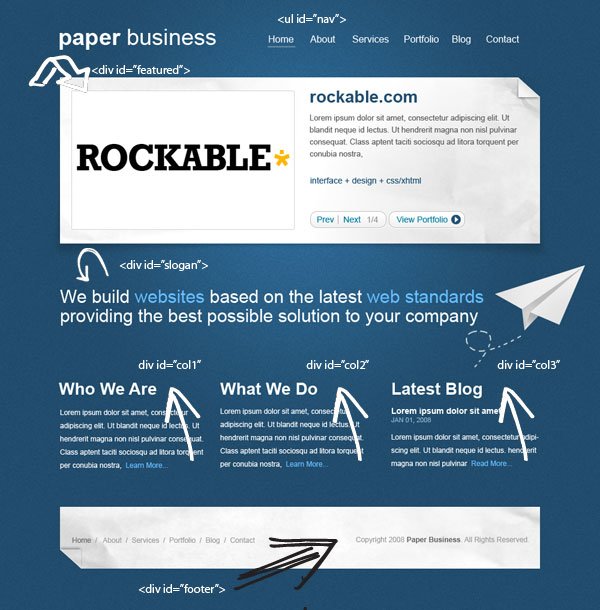

Okay, so you’ve gained a solid grasp of HTML, CSS, and Photoshop. The next step is to convert your first PSD into a working website. Don’t worry; it’s not as tough as you might think. I can’t think of a better way to put your skills to the test. If you need assistance, review these in-depth video tutorials that show you exactly how to get the job done.
30. Don’t Use a Framework… Yet
Frameworks, whether they be for Javascript or CSS, are fantastic; but please don’t use them when first getting started. Though it could be argued that jQuery and Javascript can be learned simultaneously, the same can’t be said for CSS. I’ve personally promoted the 960 CSS Framework, and use it often. Having said that, if you’re still in the process of learning CSS—meaning the first year—you’ll only make yourself more confused if you use one.
CSS frameworks are for experienced developers who want to save themselves a bit of time. They’re not for beginners.
This post has been updated with contributions from Monty Shokeen. Monty is a full-stack developer who also loves to write tutorials, and to learn about new JavaScript libraries.
