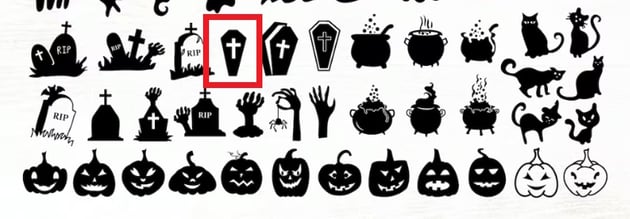
1. Pumpkin Faces in Cricut
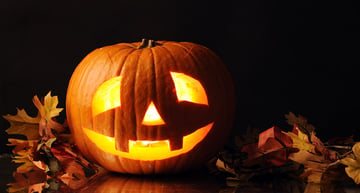
We are going to start off easy with some pumpkin faces, and these are the perfect type of Cricut Halloween SVGs to use. These are some of my favourite things to do for a Halloween craft, as they’re so versatile. You can place your pumpkin faces on actual vegetables like pumpkins, turnips, butternuts—pretty much anything! This is also the type of thing you can easily cut out of cardstock or even vinyl, to place on fake pumpkin cutouts.
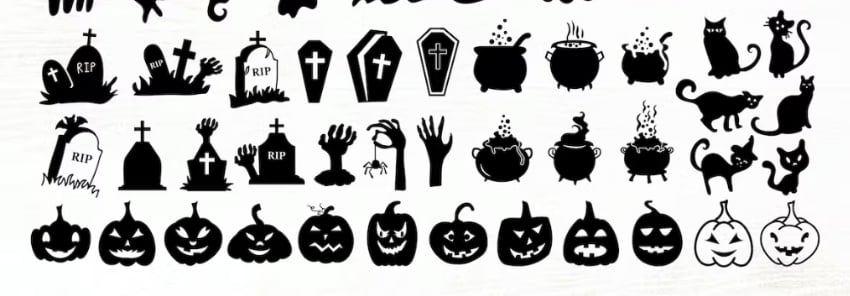
There are so many perfect faces on Envato Elements that you can use as the faces for your pumpkins in many different graphic bundles. Many of them are images in PNG format that you can very quickly upload into Cricut Design Space and cut within two minutes!
I have even used these as a stencil to carve out a pumpkin before – I am not too good with drawing these things freehand, so I used my Cricut to cut out these graphics to help me get the perfect carved pumpkin!


2. Scary Bunting
Would Halloween be complete without a scary warning sign? Here is where the Halloween fonts on Cricut Design Space really shine—there are so many to choose from:
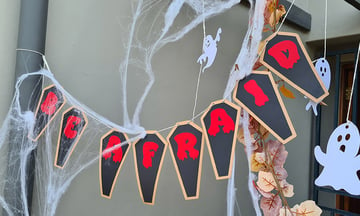
Bunting with words on it is another project that beautifully rounds out any event, and Halloween is no exception! But did you know that it is really easy to make yourself?
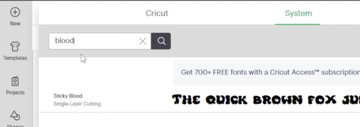
We need to start this one off by installing the font on our computer. There’s a long list of fun Halloween fonts that we can use on our Cricut machines, and I have chosen the Sticky Blood font. We need to be sure to restart Cricut Design Space after installing the font for it to show up in the program.


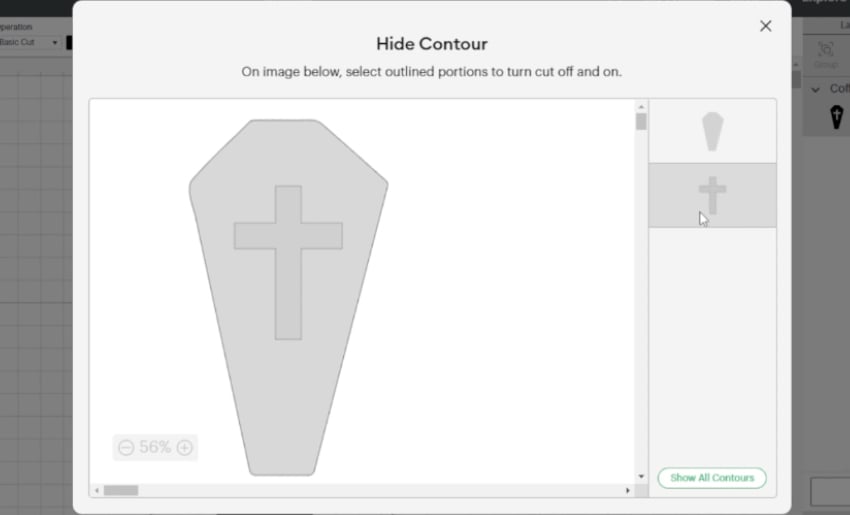
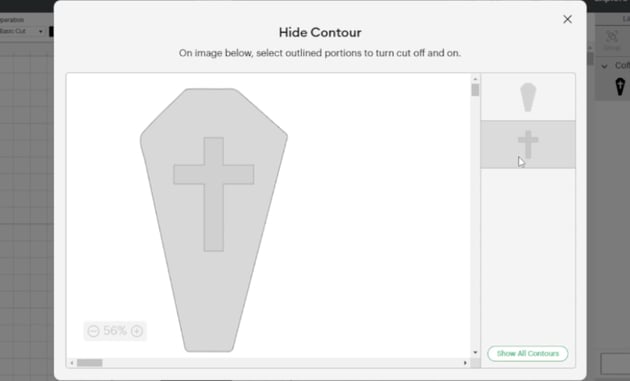
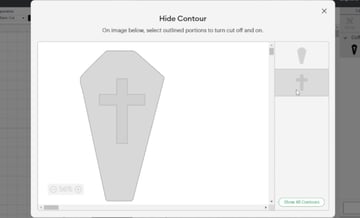
I’m going to be using the coffin from this graphic bundle and uploading it into Cricut Design Space by simply using the SVG file. Once I have inserted it onto my canvas, I can start having some fun!
We need to first remove the cross in the middle of the coffin, so click on Contour, and click on the cross. I like to resize the coffin to be the correct size, and I want it to be around 20 cm tall—but be sure to scale this to the size of your space. If you have a small space, you can get away with smaller bunting.
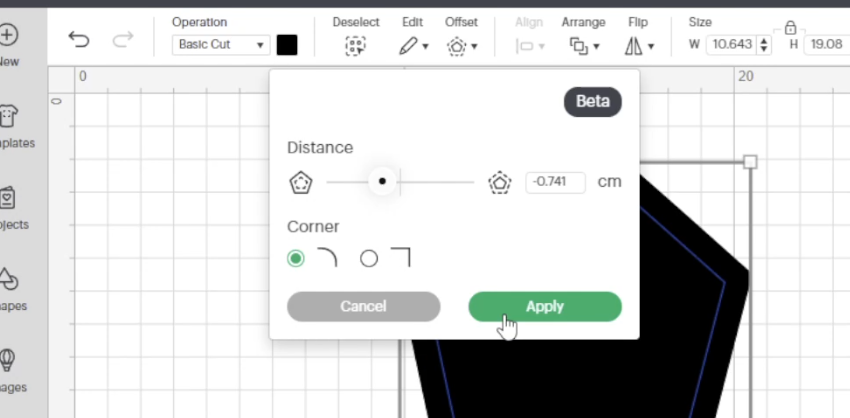
This step is optional, but I like to add a little bit of dimension to the bunting. And we can do that by using the offset feature. Setting it to a negative value gives an internal offset, so set it to around -0.7 cm (0.3 inches), and click Apply. I also like to do this before I have sliced out the circles for the holes in the next step, otherwise it looks a little funny.
I also changed the colours of the layers to match my cardstock, so I used brown for the original layer and black for the internal offset layer to look like a wooden coffin with a dark inside!


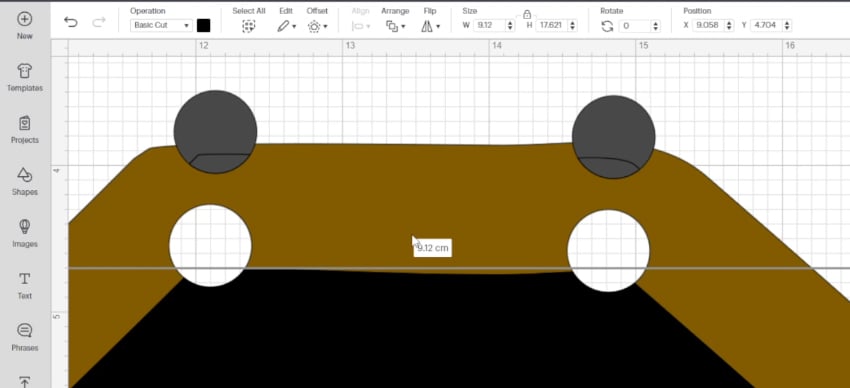
Add two small circles (around 0.5 cm in diameter), weld them together so that they’re on one layer, and slice them with the larger coffin layer to create holes for your string.

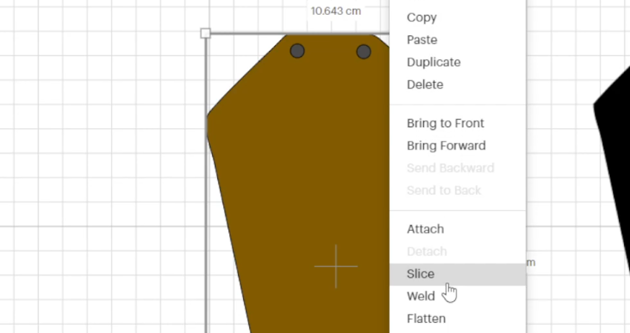

Line up the holes with the internal offset layer and slice that too so there aren’t any pieces that shouldn’t be there. Use the same circles to slice again!

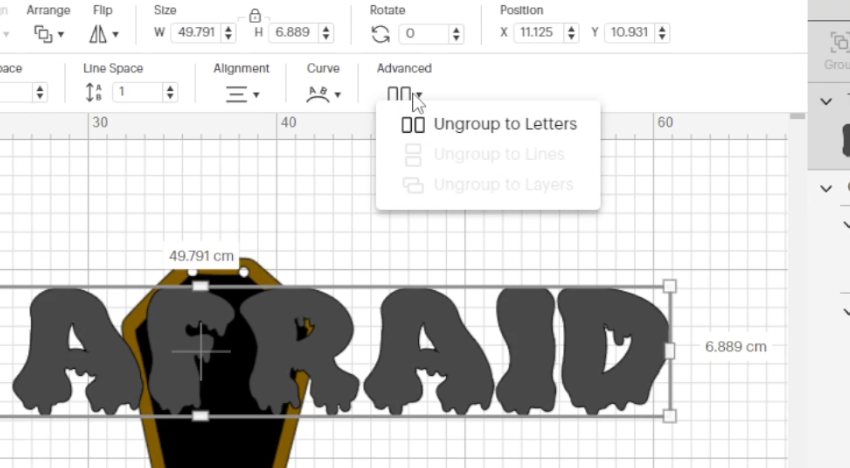
Next, we simply need to add our text, change the font, and duplicate the coffins to match the number of letters we have for our bunting. Remember to check under System fonts for your new font. If it isn’t showing, save your project and restart Design Space.


Resize your letters so that they all fit how you want them to on your coffins, and ungroup them.


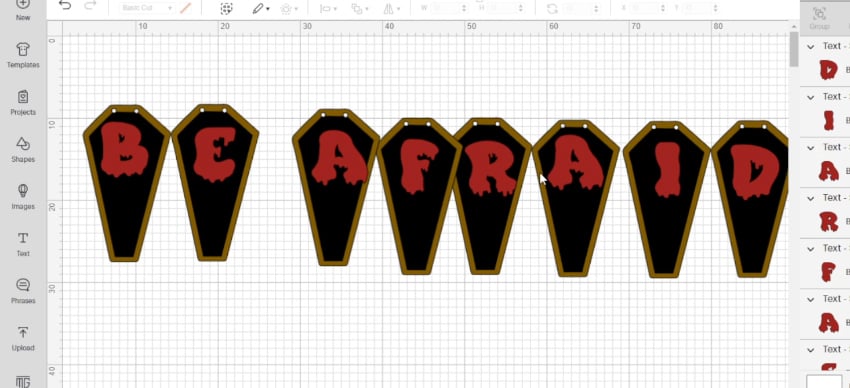
Make sure there is one coffin/group of coffins per letter. Then we can cut it all out, stick it all together, and string it up!


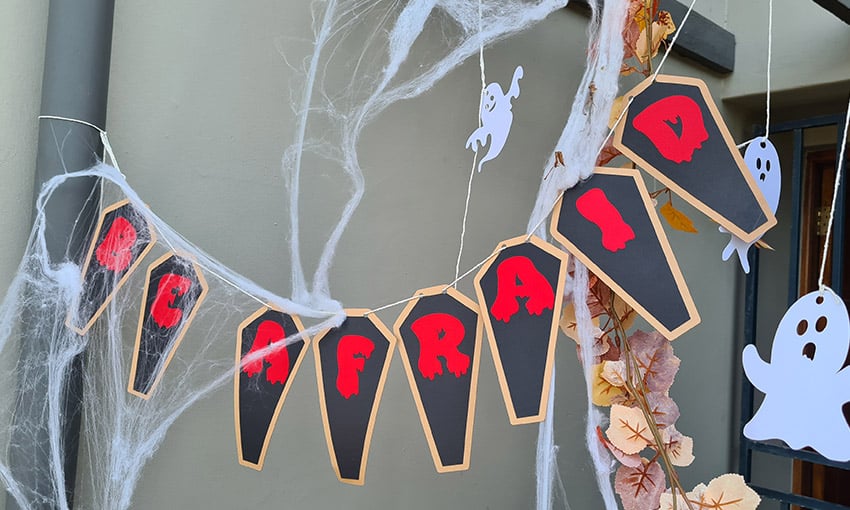
Now that everything is cut and glued together, you can string up your awesome Halloween bunting sign! This would also be a fantastic project to layer on vinyl as a Cricut Halloween shirt idea too!

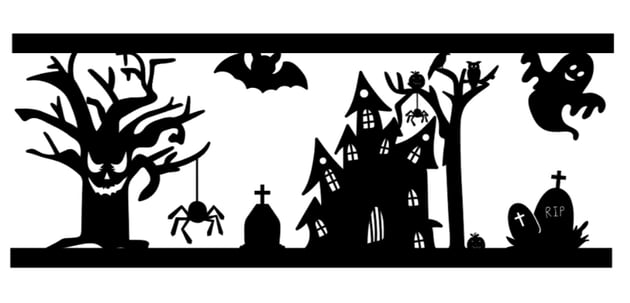
3. Flying Bats & Ghosts
Bats and ghosts are never far away from the word Halloween!
Every Halloween, I like to cut out various different forms of bats and hang them up somewhere as if they are mid-flight—or even hanging upside down to make them look as if they are sleeping!
Luckily for us, there’s no shortage of bat graphics on Envato Elements that we can use in Cricut Design Space. By slicing out a little hole in one or two of the wings, we can string them up to scare some trick-or-treaters, or cut them out of removable vinyl to stick on the walls.
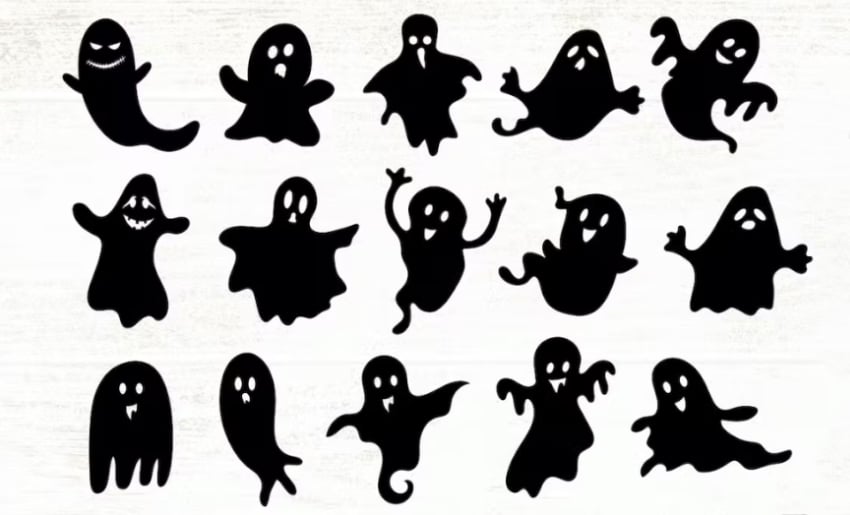


Flying ghosts are also easy to cut out with your Cricut and hang up to add a little something extra to your decor! You can choose to go for some scary ghosts flying in the wind or even some strategically placed ghosts in front of lights to make them look a little bit spookier! Hanging them up individually is a great way to avoid overwhelming the decor, but you could also just as easily hang them all up on the same bunting.
4. Halloween-Themed Candy Jars
We all need to stock up with candy for Halloween, so why not make some super easy and cute candy jars for our party, or just to snack on when we get hungry while working? Candy jars are easy to make with Cricut’s Print Then Cut feature.
We can use so many of the different graphics available on Envato Elements to cut out vinyl stickers and stick them all over the jar, which, let’s face it, would look very cute. But what I also realised about Elements is that they actually have many cool graphic illustrations, so we can print then cut them out and stick them onto the jar!

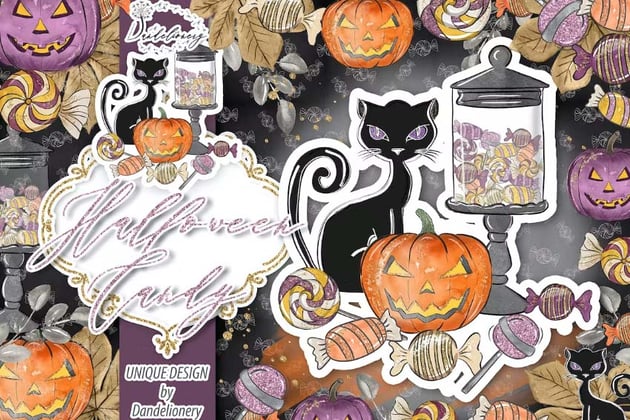
This is the perfect kind of Cricut Halloween project to make when you are in a rush, as it is as simple as uploading the design into Design Space, print then cutting it, and sticking it on a candy jar. This kind of last-minute project will make you look like the real hero of the day!
5. Scary Candle Silhouettes
You can easily create a creepy silhouette to wrap around a jar with a candle in it. With a little bit of fiddling around in Cricut Design Space, you can easily make this project to create this gorgeous silhouette wrap.
We do need to make sure that we are looking for a graphic that is connected and doesn’t have any loose bits as those won’t stay put. We can easily achieve this by adding a very thin rectangle at the top and bottom that will wrap around the candle jar.


When we carefully place our haunted houses, dead trees, bats, ghosts, etc., we need to be sure to make them overlap the top and the bottom bar (also making sure to have at least two points where the bars are joined through a house or a tree).
This is a similar method to that of a stencil, as all of the elements need to touch each other in one way or another. Add all of the elements you want to display on your canvas, like a creepy house, perhaps some bats, tombstones—literally anything you want! Once you have all of your creepy elements added, make sure to weld everything together so that it all cuts as one big piece!
6. Seamless Patterns for Trick-or-Treat Bags
There are so many repeatable patterns on Envato Elements that are perfect for making your own trick-or-treat bags! These patterns can be applied to any packet or box template you have. All you need to do is download the pattern, upload it as a pattern to Design Space, and when your template is set to print then cut, you can change the colour and print out your perfect trick-or-treat bag. Don’t forget to attach the score lines to your print then cut design so you can easily fold your little bag.
Another method is to simply print out the pattern on a larger piece of paper, and use the normal cut feature to get a slightly bigger bag, as you are a bit limited in size on Cricut Design Space.


7. Red Vinyl as Blood Splatter
Now for a more gory one: why not take some perfect splatter patterns and cut them out of removable vinyl to look like blood splatter on the walls? The nice part about this one is that you can use this on windows, walls, and so many different places—but be sure to use removable vinyl as you don’t want to damage the property!


There are so many different splatters available that you can easily combine a few of them to make your place look really good.
8. Red Hand on a Wall
To nicely complement the blood splatter, you can start to freak out your neighbours by adding a bloody hand print to the wall! The graphic in a different project is absolutely perfect for this, and this is another project where you can easily add the graphic to Design Space, and cut it out of removable vinyl.
To take it to the next level, be sure to pair it with some strategically placed blood splatters alongside the hand to really sell the haunted house feeling!


For this project, I simply uploaded multiple different splatters into Design Space and welded them on a bit—you can really go wild here, so have a bit of fun! Use the weld and the slice features to create your own unique project.
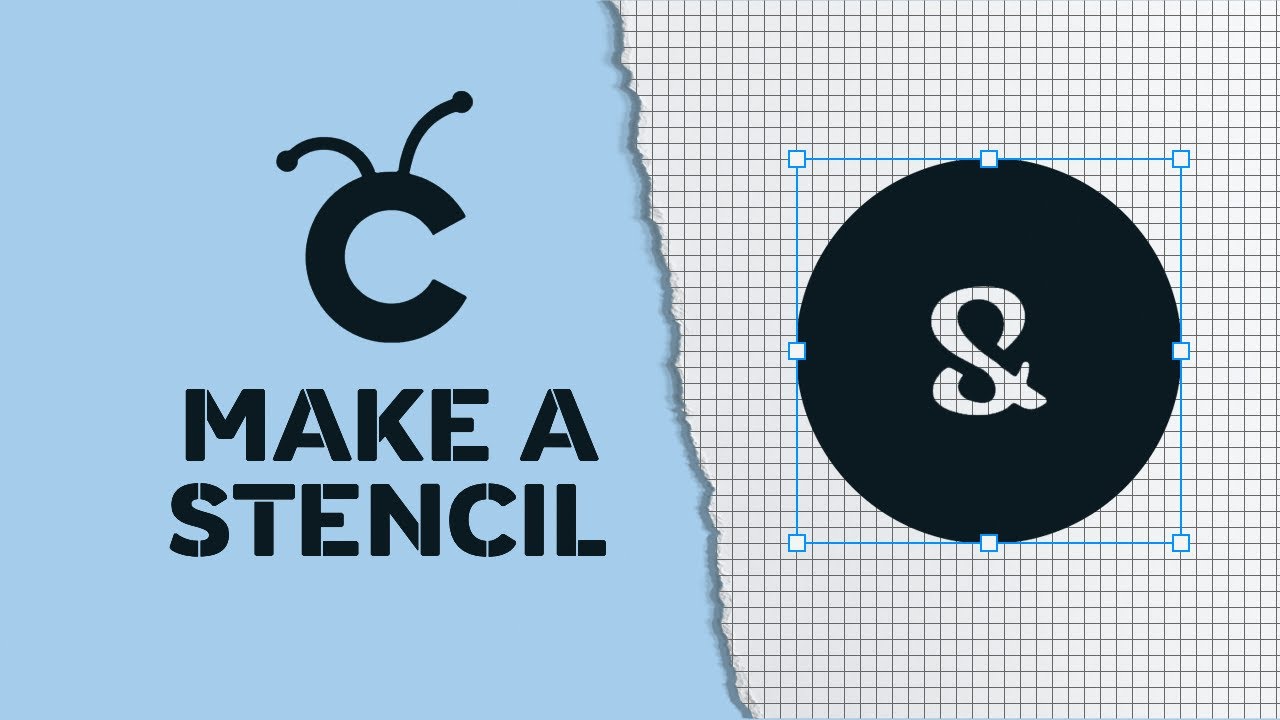
9. Scary Stencils for Washable Spray
You can turn almost any of these graphics into stencils and use washable spray to add decor to your windows, walls, cookies, cakes—honestly the things you can use this on are so vast! Just add a shape to your canvas, making sure it is big enough to leave a few centimetres of space around the edge of your design.
Take your design, centre the two layers, and slice them. If there are any floating pieces, those will get lost, so you will need to make sure they are connected to the main design by adding a strip to connect them!
And if you’re wondering how to make a stencil with Cricut, we’ve got just the right video for that:
10. Huge Tombstone Decor
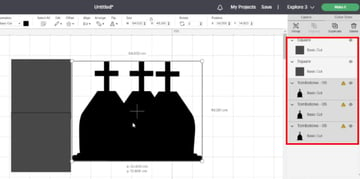
This one is quite fun and is another project that can be applied to pretty much anything we have covered today, but it is to make a nice large tombstone, but one that is larger than the cutting size on your mat.
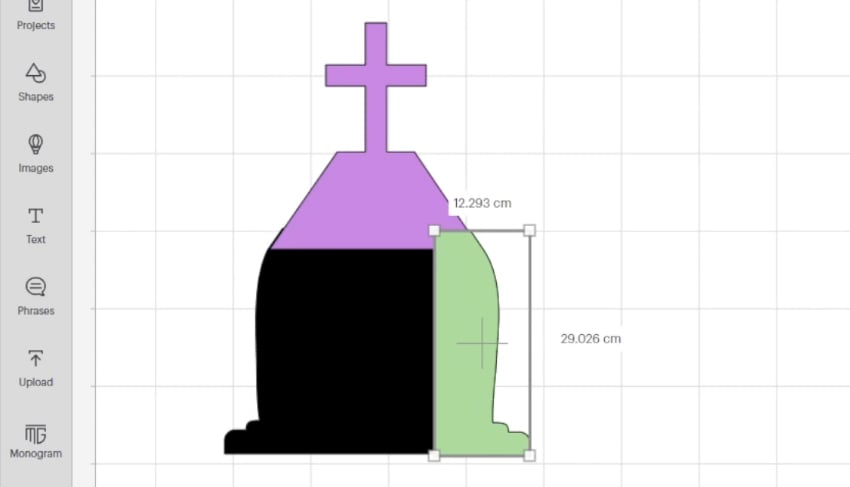
We are going to use one of the tombstones from one of the icon packs (but you can use any of the Cricut Halloween SVG or PNG files), upload it into Design Space, add it to our canvas, and duplicate the design a few times. Add a square, change the size to 29.2 cm (the cutting size on your mat), and duplicate that one a few times as well. Your canvas should look something like this.

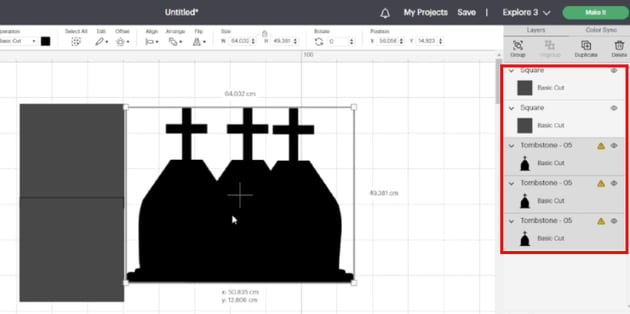
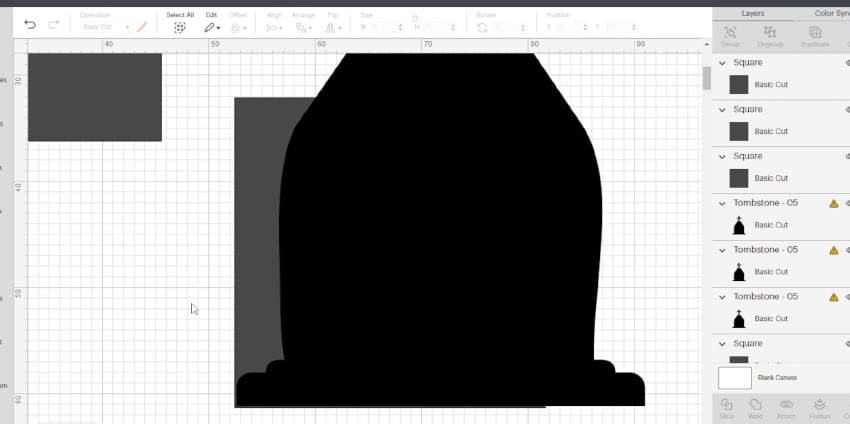
Now comes the part where we need to slice our design a few times to ensure that they overlap a bit so we can glue the pieces together. You will need to line up one of the squares and one of the tombstones so that the majority of the tombstone is covered by the square. Select both the square and the tombstone, and slice.
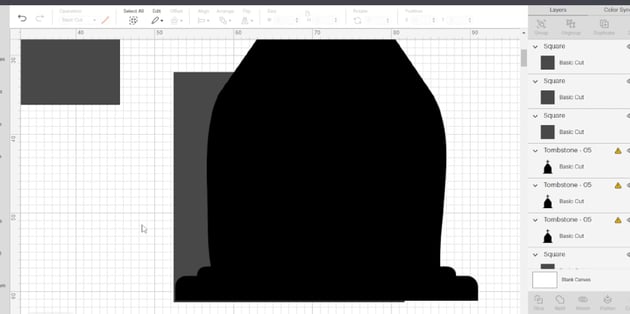
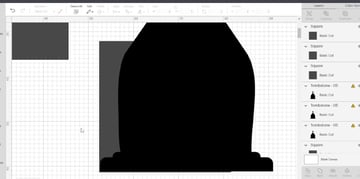
Once you have sliced the first part, repeat the same steps on the remaining areas of the tombstone that you haven’t yet sliced, remembering to leave an overlap for you to glue them all together.


Cutting them out on your Cricut and assembling them should be very easy to do! I used Kraft board as it is a little thicker than most other cardstocks.
You can also very easily follow this tutorial on the YouTube version, and very easily make any of these awesome Cricut Halloween idea projects!
If you want to learn some more skills to go along with these awesome projects and discover more Halloween fonts on Cricut, be sure to check out these articles that will help you improve on Cricut Design Space: