
BrowserSync is an automation tool that makes web development faster. In the past we’ve automated a lot of actions like compilation of SASS files, image compression etc. BrowserSync brings a whole new type of automation to the table with batteries included.
BrowserSync makes your tweaking and testing faster by synchronizing file changes and interactions across many devices.
Features of BrowserSync
- Live reloading: This is probably the most important feature of BrowserSync. change your code and the page is auto-reloaded. Live reloading works across many browsers and devices.
- Interaction synchronization: It means that all your actions are mirrored across every browser. This little feature is useful for testing, especially, when testing across many devices. You can also customize what actions are mirrored across browsers.
- Simulate slower connections: I believe you are expecting users from all over the world, and some countries are not fortunate enough to have fast internet connection; BrowserSync has a feature that you can use to throttle your website connection speed.
- URL history: BrowserSync logs all browsing history so you can push a test URL to all devices.
- Extra: BrowserSync is compatible with many task runners like GULP and Grunt. And they work across many operating systems.
How does BrowserSync Work?
First off, BrowserSync creates a small server, but if you already have a server setup, BrowserSync can hook into that server and act as a proxy. Next, it injects a javascript file on every page; This file makes use of WebSockets to communicate between the server and the client to watch changes to your code or browser action. As soon as BrowserSync detects an action it performs a page reload.
Install BrowserSync
BrowserSync is an npm package, as such it needs Node.js installed. To install BrowserSync, just open a terminal and:
npm install -g browser-syncTo check if BrowserSync installed, in your terminal type
browser-sync --versionYou should get BrowserSync version. At the time of writing this article, the current version installed is 2.11.1.
Using BrowserSync
First we will use BrowserSync with static files. Assuming you have a directory structure like:
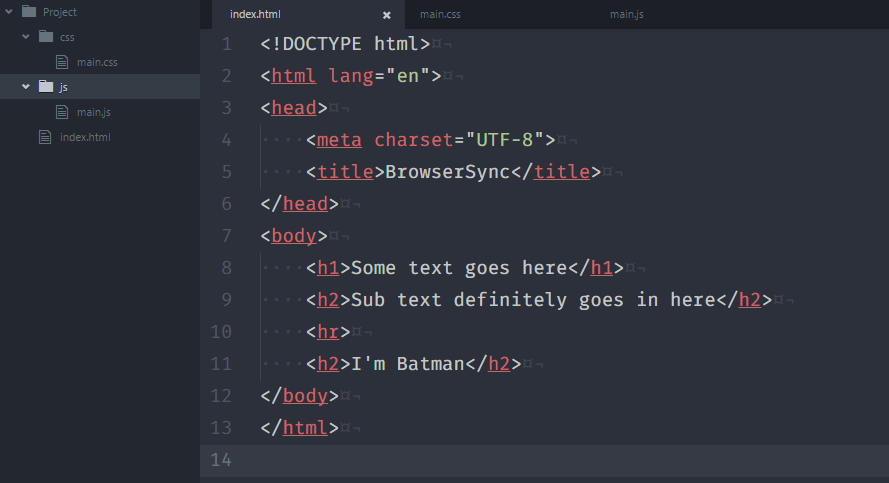
And from the root of your project directory run the following command
browser-sync start --server --files "*.html, css/*.css"This instructs BrowserSync to watch all HTML and CSS files. Once you run the command, a browser window opens in the default browser serving the directories root file, in this case index.html. In the console of the running BrowserSync start command, you should see the following result.
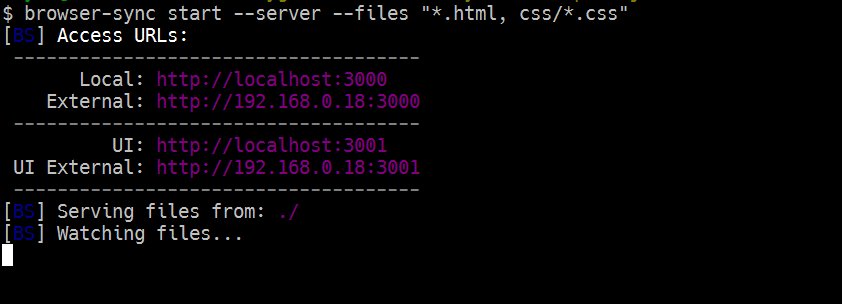
- Local: represents the address on your local machine with which you can view the project.
- External: represents the address that any user on you local network(LAN or wifi) can view the project.
- UI: will be talked about below.
BrowserSync and Gulp task-runner
Still one of the best task-runners available to the community. To set up a BrowserSync GULP task, we need to have GULP installed. To install GULP, just run the following command:
npm install -g gulpIn the root of your project folder, create a file named gulpfile.js. In that file create a gulp task named browser-sync.
var gulp = require('gulp');
var bs = require('browser-sync').create(); // create a browser sync instance.

gulp.task('browser-sync', function() {
    bs.init({
        server: {
            baseDir: "./"
        }
    });
});
To trigger this command, from the terminal run
gulp browser-syncWhat this does is the same as the BrowserSync command we ran earlier. BrowserSync monitors the directory defined in baseDir and whenever we run the command, the page reloads.
You might have already setup a server somewhere on your computer, and you want to keep it that way; Like I mentioned earlier, BrowserSync can act as a proxy to an existing server. To do so just:
...
bs.init({
    server: {
        baseDir: "./"
    },
    proxy: "localhost:8080" // makes a proxy for localhost:8080
});
The proxy option points to the server you want to make a proxy. If your server makes use of WebSockets, you need to tell BrowserSync to enable WebSockets.
...
bs.init({
    server: {
        baseDir: "./"
    },
    proxy: {
        target: "localhost:8080", // can be [virtual host, sub-directory, localhost with port]
        ws: true // enables websockets
    }
});
...- NOTE: BrowserSync has more options than just server and proxy. Take a look at some of the other options.
Using BrowserSync and SASS
Before we integrate BrowserSync with SASS, lets first create our GULP SASS task. For the task to work we need to install our GULP SASS package.
npm install --save-dev gulp-sassNow that we have it installed we can define our task.
...
var sass = require('gulp-sass');

...
gulp.task('sass', function () {
    return gulp.src('scss/*.scss')
                .pipe(sass())
                .pipe(gulp.dest('css'));
});
Now that we have our SASS task defined we can pipe the result from the sass task into BrowserSync.
gulp.task('sass', function () {
    return gulp.src('scss/*.scss')
                .pipe(sass())
                .pipe(gulp.dest('css'))
                .pipe(bs.reload({stream: true})); // prompts a reload after compilation
});
Now whenever you run gulp sass from the terminal, all SASS assets will compile and the browser will reload.
Auto-reload BrowserSync
We need to tell BrowserSync to watch all source files for changes. And for that we need to use GULP’s watch command to set it up.
gulp.task('watch', ['browser-sync'], function () {
    gulp.watch("scss/*.scss", ['sass']);
    gulp.watch("*.html").on('change', bs.reload);
});
With the watch task define, as soon as we call gulp watch, it runs browser-sync task and sets up a watcher on all our sass and html files.
Our final file gulpfile.js should look like this:
var gulp = require('gulp');
var sass = require('gulp-sass');
var bs = require('browser-sync').create();

gulp.task('browser-sync', ['sass'], function() {
    bs.init({
        server: {
            baseDir: "./"
        }
    });
});

gulp.task('sass', function () {
    return gulp.src('scss/*.scss')
                .pipe(sass())
                .pipe(gulp.dest('css'))
                .pipe(bs.reload({stream: true}));
});

gulp.task('watch', ['browser-sync'], function () {
    gulp.watch("scss/*.scss", ['sass']);
    gulp.watch("*.html").on('change', bs.reload);
});
BrowserSync UI
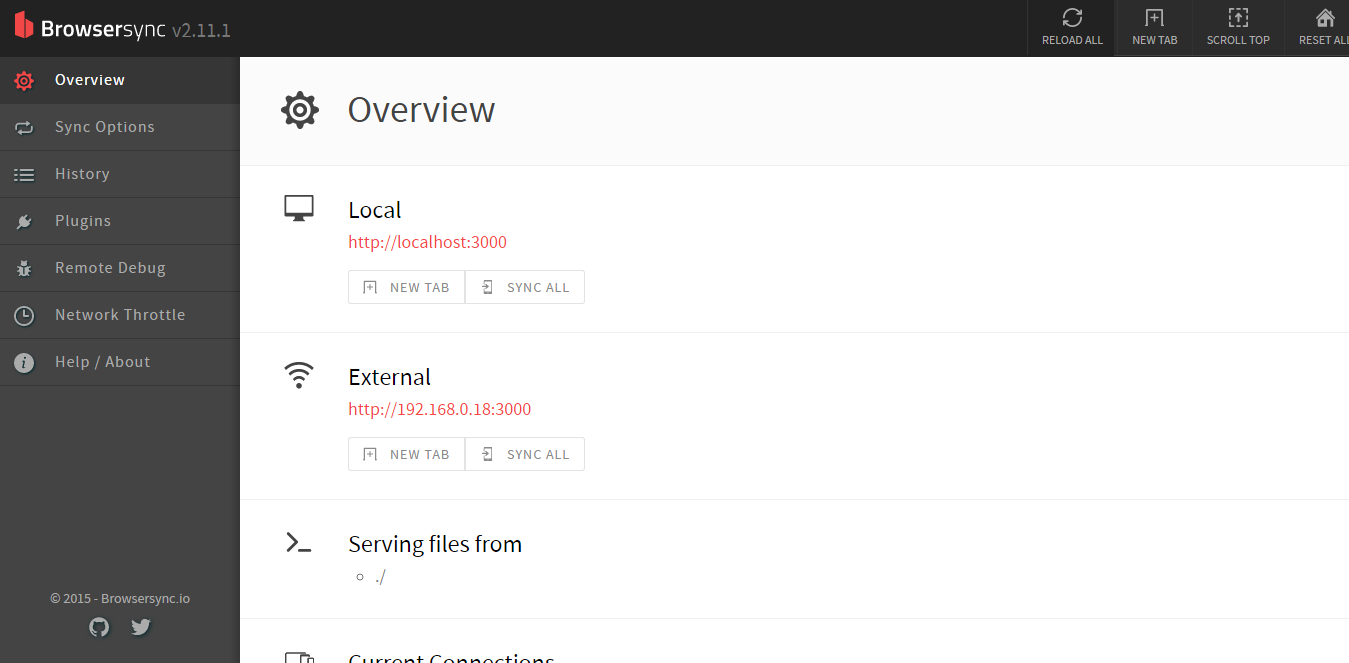
At the time of writing this article, the above image showed what the current BrowserSync UI looked like. This then begs the question “What is BrowserSync UI?”
BrowserSync UI gives you a bird’s eyeview of all BrowserSync options, it shows you all sync options, history, and it lets you configure BrowserSync. To access the UI, just visit the address referenced on your terminal as UI. In my case it is localhost:3001.
Conclusion
BrowserSync is solid, well-tested, and definitely improves development speed. BrowserSync is definitely a tool to add to your toolbelt.