
Oh, you fancy! Follow these simple tips, tricks, dos, and don’ts to achieve the letterpress business card design of your dreams!
But first… If you found yourself here and you’re all “Wait, what the f*ck is letterpress?” Let us
explain.
Let’s start with what NOT to do, shall we?
1. No photos. We have lots of options where photos can really shine, but letterpress doesn’t play nice with photos or images.
2. No gradients. Keep your design and text to solid colors. You can always incorporate foil or metallic ink if you want that extra pop.
3. No hairlines. Width of lines should be .25 point or thicker.
4. No tiny type. All text should be 6 point or larger. Also, remember to outline your type before submitting your final design.
5. Keep it to 1 or 2 colors.
6. No transparencies. All colors should be at 100% opacity.
Now that we’ve gotten the bossy stuff out of the way, let’s talk about the simple steps to creating
a letterpress worthy design.
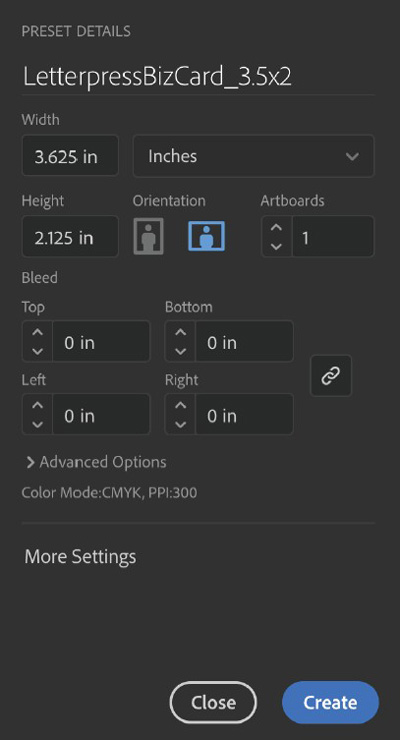
STEP 1: Create a New Document in Adobe Illustrator
At this point, you need to know if you want a standard size, square, custom, or die-cut business
card. For this tutorial, we’ll be using a horizontal standard size business card – 3.5” wide x 2” tall.
We need to take cut and bleeds into account (we will get into this in Step 2), so add .125” (or 1/8
of an inch) onto both the width and height measurements. Make sure your document is set to
CMYK and click CREATE!
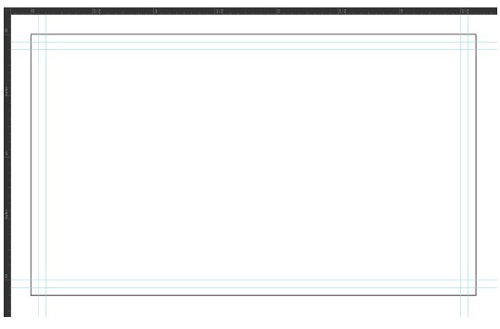
STEP 2: Set Up Your Guides
We’re going to insert two sets of guides – cut guides and “safe area” guides. If you don’t have
your rulers visible pressing “ctrl + r (PC)” or “cmd + r (Mac)” will do the trick. Drag one set of
guides to .0625“ (or 1/16 of an inch). These are your cut marks. Drag another set to .125” (or 1/8 of
an inch). These represent your “safe area”. Keep all design elements within the inner-most “safe
area” guides. The diagram below respresents how your artboard should look at this point.
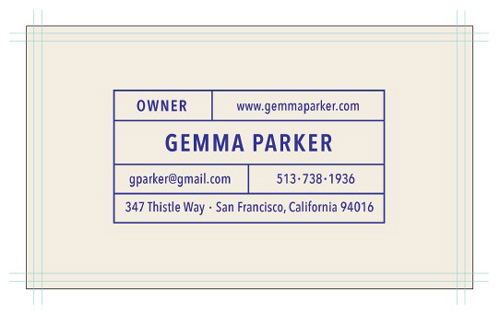
STEP 3: Create Your Design
Again, check to make sure your document is set to CMYK Color Mode. You can now start laying
in your design elements. Remember the six “DONTS” from before, and it should be smooth
sailing!
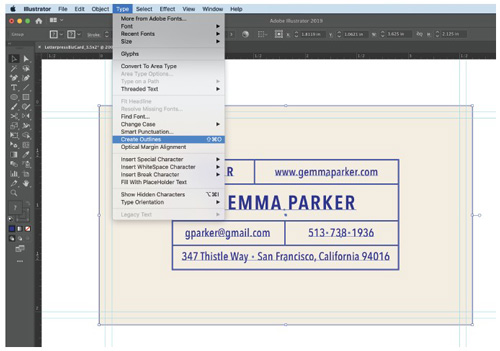
Once your design is complete there’s just one more step needed before you can save and send
your design to us.
Outline all text. You can easily select all text by pressing “ctrl + a (PC)” or “cmd + a (Mac)”. Then,
in your top Type menu click “Create Outlines”.
STEP 4: Put a Fork In It!
If you’re happy and you know it, it’s time to save and send: File > Save As. Set your Format to
Illustrator EPS, click Save, and you’re DONE!
Need a more detailed step-by-step process to designing business cards? Learn how here!