The Perspective Warp tool is almost like magic. It lets you change the perspective in your image and can be used to rotate buildings and objects, make telephoto shots look like wide angle shots, and quickly straighten multiple objects in less than a minute. Read this tutorial and find out four useful ways to use the Perspective Warp tool in Photoshop CC.
Video Tutorial
Rotate a Building
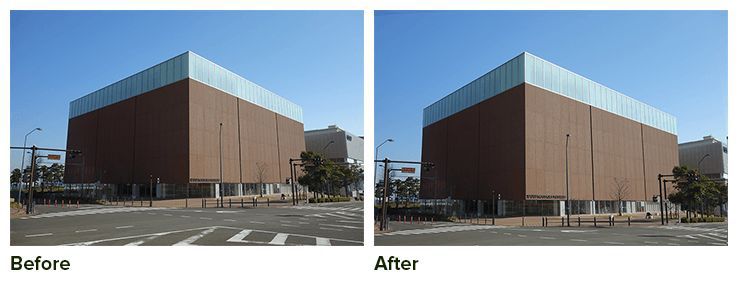
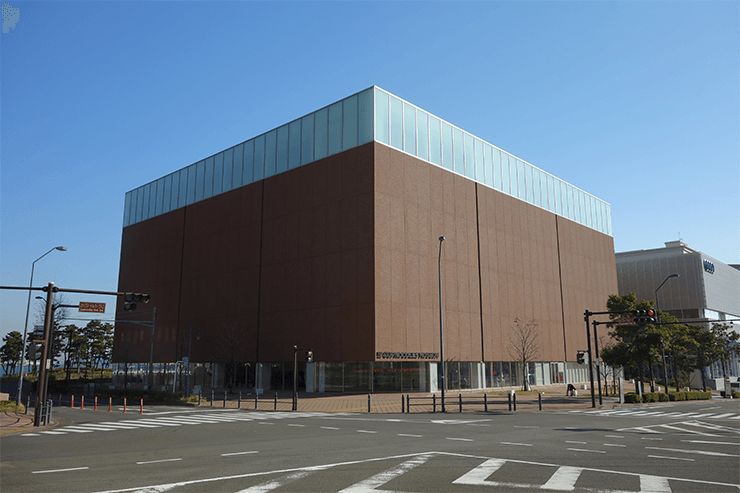
The primary reason the Perspective Warp tool was created was to allow you to change the perspective of an object. In this case, we’ll use a building since it’s the simplest example. As you can see in this image, the building was photographed at an awkward angle. In hindsight, I should have took it from another angle. But thanks to the Perspective Warp tool, we can now fix this without going back there.
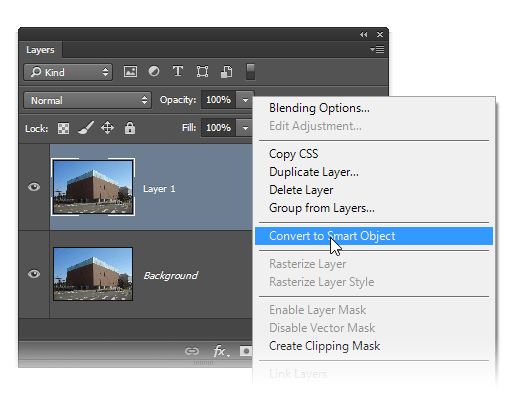
Here’s how to do it. First duplicate your layer by pressing Ctrl/Cmd+J then convert it to a Smart Object by right-clicking on the layer and choosing “Convert to Smart Object”. By converting the layer to a Smart Object, we can apply the Perspective Warp nondestructively and go back to edit the settings at any time.
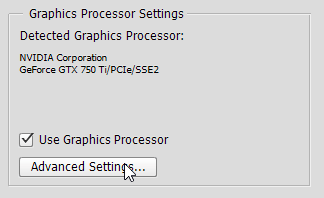
Next, go to Edit > Perspective Warp. If you don’t see this, make sure that you have the latest version of Photoshop CC installed. If it’s grayed out, then go to Edit > Preferences > Performance. Make sure that the “Use Graphics Processor” option is enabled. Note that your graphics processor must have at least 512 MB of video RAM to use this feature.
Once you have the Perspective Warp tool activated, click anywhere to create a grid. Drag the points on the grid to create a grid that covers the perspective of the building. You can also click on a point and use the arrow keys on your keyboard to move them around. Pay attention to the grid lines and make sure that they are parallel with any lines on your building.
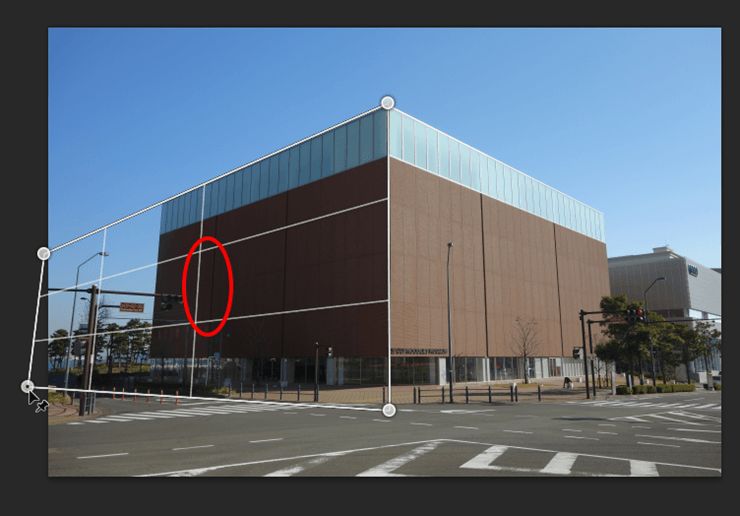
Click anywhere on the image to create another grid. This time, drag one of the points towards the corner of the grid you created earlier. Release your mouse when you see two lines highlighted in blue. This will merge the points together.
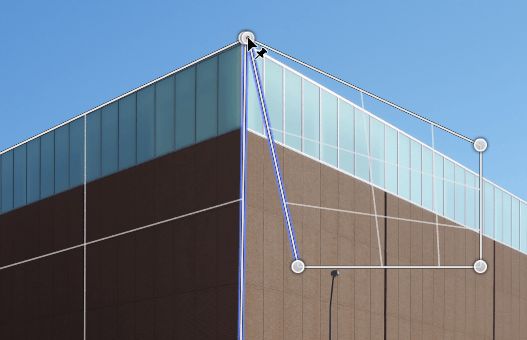
Continue dragging the rest of the points towards the other corners of the building.
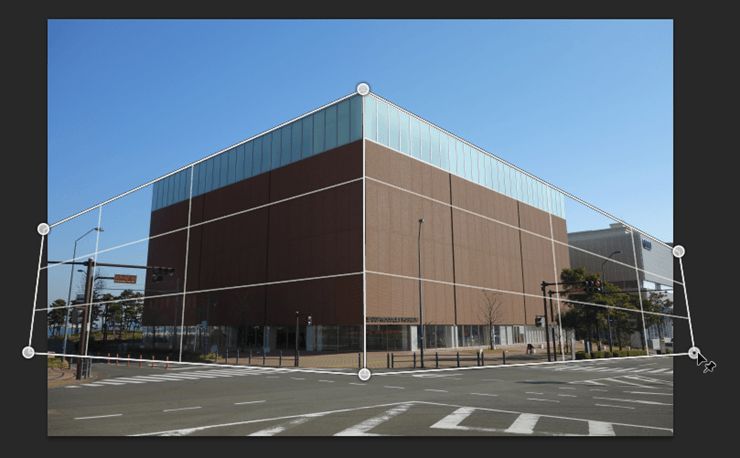
Next, switch to the Warp mode by clicking on the button in the options bar.

You can move the points around but it’ll usually skew your image which isn’t what we want.
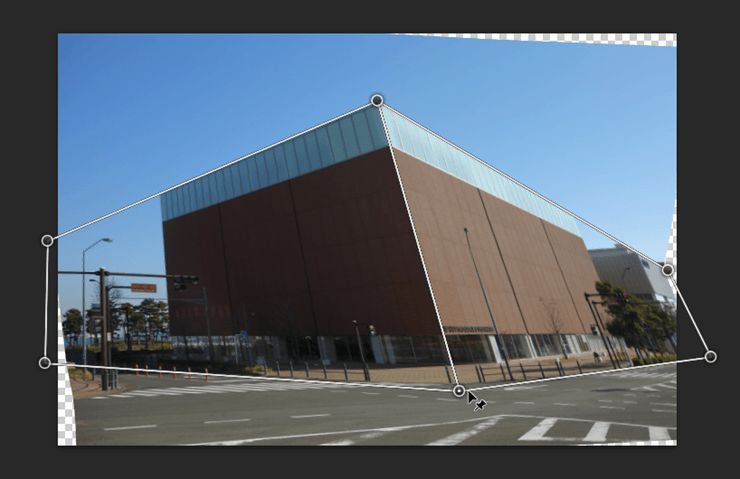
Instead, hold the shift key and click on the middle line. This will straighten the line and make the two points link to each other. Now when you drag one point, the other will follow it horizontally.
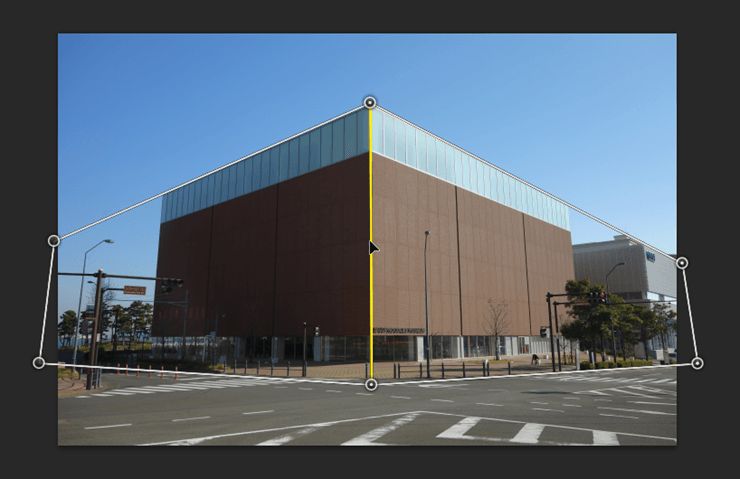
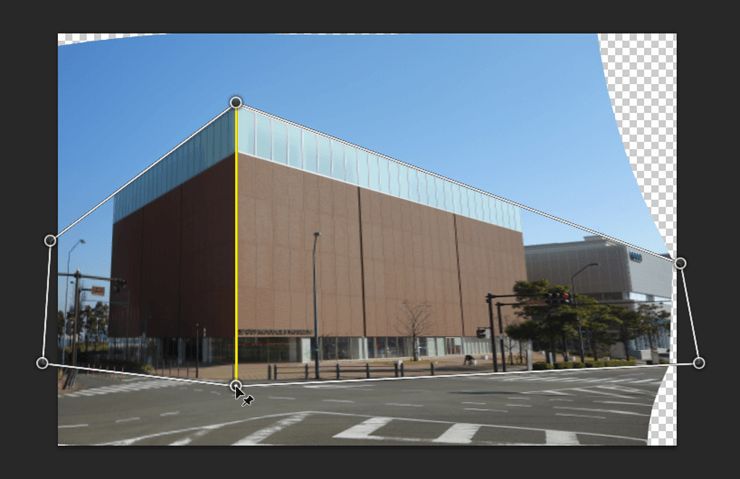
Hold the shift key and click on the other two vertical lines.
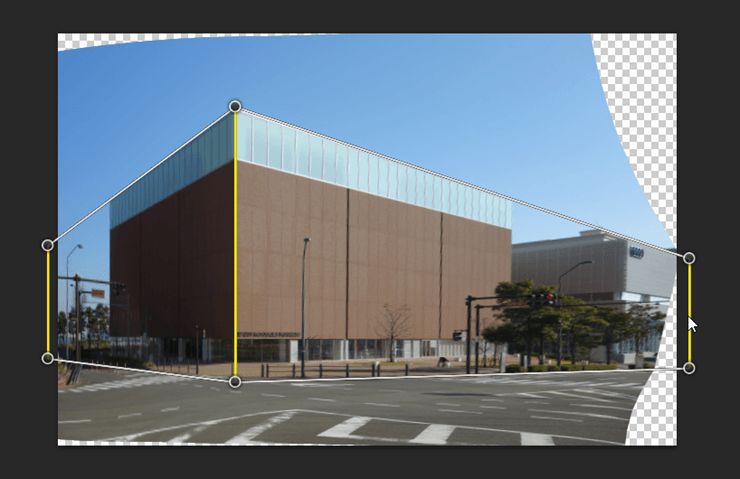
Drag the points so that it fits your image.
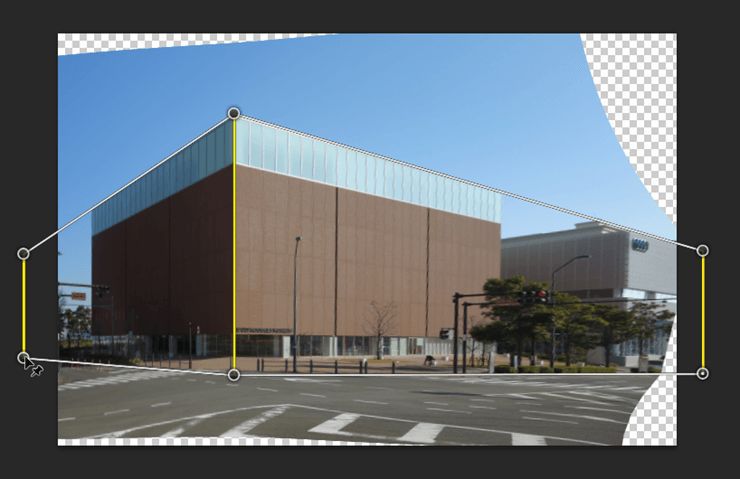
You can complete the image by trimming off the edges with the Crop tool. If you get any
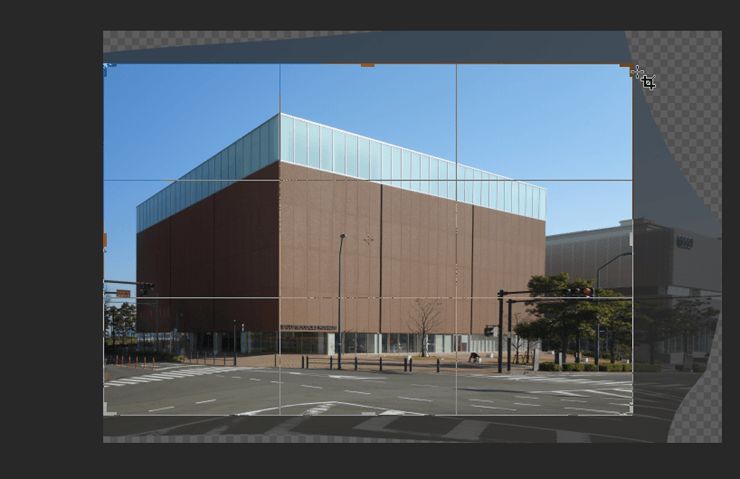
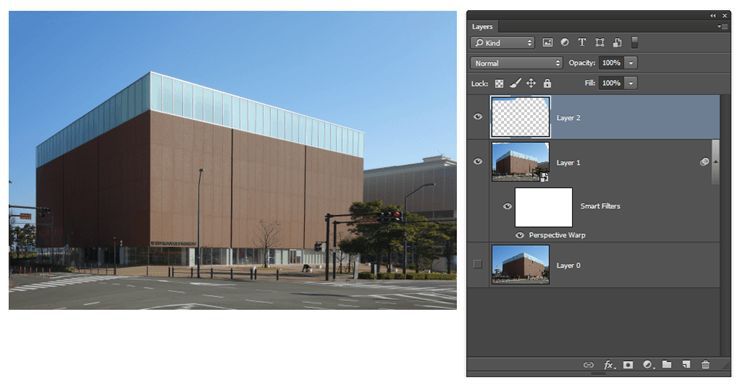
If you get any transparent spots, you can use the Healing brush tool to fill it in. You can’t use it directly on the Smart Object, but here’s how to get around it. Create a new layer then select the Healing Brush tool. In the options bar, checkmark the Sample All Layers option. Now you can click on a transparent spot and it’ll heal the area using the data from all your layers.

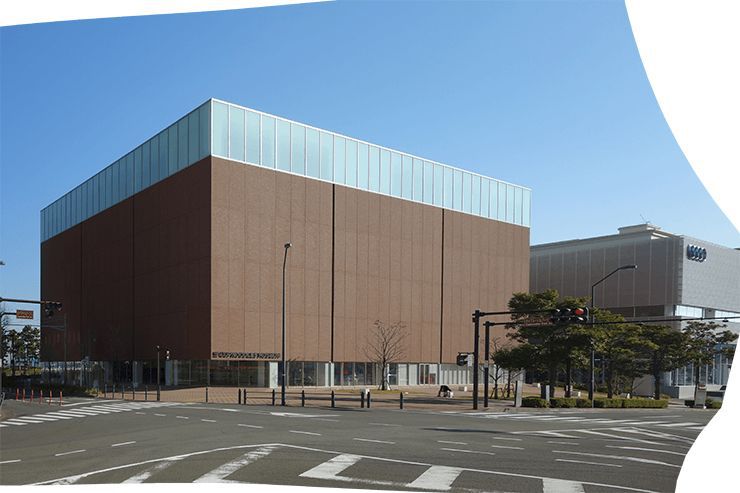
Here’s a before and after shot of the Perspective Warp tool.
Match Perspective
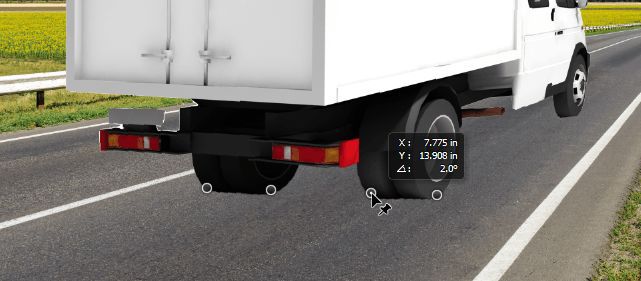
Another useful purpose for the Perspective Warp tool is to match the perspective of two images. For example, we found two images on ShutterStock.com – one of a truck and one of a road. The perspective is similar but not close enough for us to simply place the truck on the road. To fix this, we can use the Perspective Warp tool to change the perspective of the truck.

Using the Perspective Warp tool, draw two boxes around the sides of the truck. Hold the shift key and click on a vertical line that you want to move.
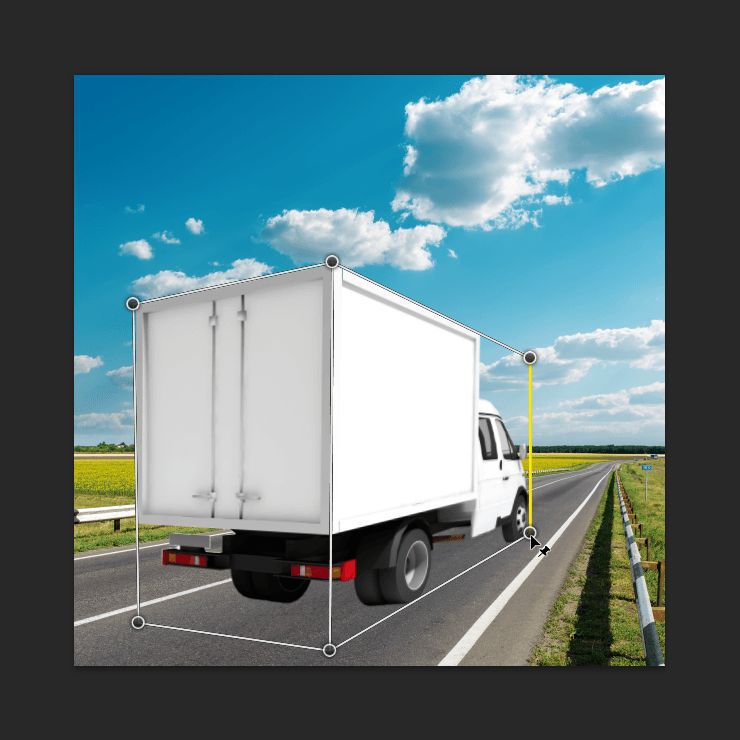
That’s all! This feature is great for photo manipulators who spend countless hours finding the right stock photo with matching perspective. There’s still some fixing required especially around the wheels.
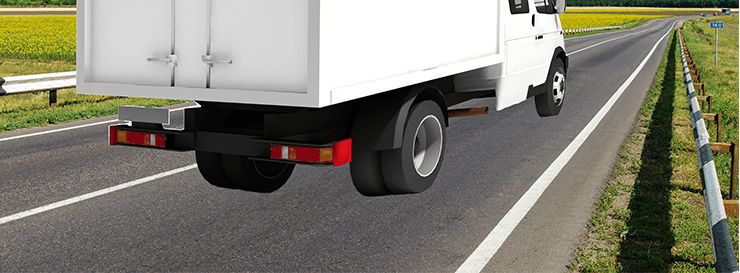
To fix this, we can use the Puppet Warp tool by going to Edit > Puppet Warp. Click to create four points on the edge of the wheel then drag the middle two points upwards to align the wheels.
