Smart contracts on the Ethereum main-net use real money, so building error-free smart contracts is crucial and requires special tools like debuggers.
Remix IDE is the most fully-featured IDE for Solidity. Among other tools, it has an excellent step-by-step debugger. You can perform various tasks such as moving in time, changing the current step, exploring local variables and current state by expanding various panels.
You can also set breakpoints to move between different points in the code. And the terminal allows you to display transactions executed from Remix and debug them.
Throughout this tutorial, we’ll use Truffle and OpenZeppelin to build a simple custom token. We’ll see why and how to flatten the contract, and finally we’ll use Remix IDE to start debugging the contract.
Why Flatten a Smart Contract?
Flattening a smart contract refers to combining all Solidity code in one file instead of multiple source files such that, instead of having imports, the imported code is embedded in the same file. We need to flatten smart contracts for various reasons, such as manually reviewing the contract, verifying the contract on Etherscan, or debugging the contract with Remix IDE, as it currently doesn’t support imports.
Writing a Simple Token Using Truffle and OpenZeppelin
Remix IDE is officially recommended for building small contracts or for the sake of learning Solidity, but once you need to build a larger contract or need advanced compilation options, you’ll have to use the Solidity compiler or other tools/frameworks such as Truffle.
Besides error-free contracts, security is also a crucial part of building a smart contract. For this reason, using battle-tested frameworks like OpenZeppelin that provides reusable, well-tested, community-reviewed smart contracts, will help you reduce the vulnerabilities in your Dapps.
Let’s now see how we can use Truffle and OpenZeppelin to create a simple custom Token that extends the standard token from OpenZeppelin.
Requirements
This tutorial requires some knowledge of Truffle, Ethereum and Solidity. You can read the Blockchain Introduction and Ethereum Introduction.
You also need to have Node.js 5.0+ and npm installed on your system. Refer to their download page for instructions.
Installing Truffle
Using your terminal, run the following command to install Truffle:
npm install -g truffle
Creating a New Truffle Project
Start by creating a new directory for your project. Let’s call it simpletoken and navigate into it:
mkdir simpletoken
cd simpletoken
Next, create the actual project files using:
truffle init
This command will create multiple folders, such as contracts/ and migrations/, and files that will be used when deploying the contract to the blockchain.
Next, we’ll install OpenZeppelin:
npm install openzeppelin-solidity
Creating a Simple Token Contract
Inside the contracts/ folder, create a file named SimpleToken.sol and add the following content:
pragma solidity ^0.4.23;

import 'openzeppelin-solidity/contracts/token/ERC20/StandardToken.sol';

contract SimpleToken is StandardToken {
    address public owner;

    string public name = 'SimpleToken';
    string public symbol = 'STt';
    uint8 public decimals = 2;
    uint public INITIAL_SUPPLY = 10000;

    constructor() public {
      totalSupply_ = INITIAL_SUPPLY;
      balances[owner] = INITIAL_SUPPLY;
    }

}
This is the contract that we’re going to flatten and debug. We’re importing the OpenZeppelin StandardToken.sol contract and declaring our SimpleToken contract which extends StandardToken.sol using the is operator.
Our contract will inherit a bunch of variables and functions, which need to be overridden in order to customize the contract.
For the sake of completing our Truffle project, inside the migrations/ folder of your project, create a file called 2_deploy_contract.js and add the following content:
var  SimpleToken = artifacts.require("SimpleToken");
    module.exports  =  function(deployer) {
        deployer.deploy(SimpleToken);
};
Using this file, we can deploy/migrate our smart contract into the blockchain, but we don’t actually need this for this example, because we’re going to use Remix IDE to deploy the smart contract after flattening it.
Flattening the Contract Using Truffle Flattener
Truffle Flattener is an npm utility that flattens or combines Solidity files developed under Truffle with all of their dependencies in the right order.
First, start by installing truffle-flattener from npm globally using:
npm install -g truffle-flattener
Next, inside your Truffle project, run the following command to flatten the SimpleToken.sol file:
truffle-flattener contracts/SimpleToken.sol > FlattenedSimpleToken.sol
truffle-flattener outputs the flattened contract into the standard output or the terminal. Using the > operator we save the output in the FlattenedSimpleToken.sol file inside the current folder.
Compiling and Deploying the Contract Using Remix IDE
You can access your flattened smart contract from the FlattenedSimpleToken.sol file. Open the file and copy its content.
Next, open Remix IDE from https://remix.ethereum.org and paste the flattened smart contract into a new file in the IDE.
If you get an error saying Mock compiler : Source not found, make sure to select a newer compiler version from Settings tab > Solidity version pane > select new compiler version dropdown.
If Auto compile is disabled, click on the Start to compile button in the Compile panel.
Next, activate the Run panel. First make sure you have JavaScript VM selected for environment. On the second box, select the SimpleToken contract from the drop-down, then click on the red Deploy button, right below the drop-down.
Your contract is deployed and running on the JavaScript VM, which simulates a blockchain. We can now start debugging it in different ways.
Debugging the Custom Token Contract
To see how we can debug the contract, we’ll first introduce some errors.
You can start debugging smart contracts in Remix IDE using two different ways, depending on the use case.
When you first deploy your smart contract or perform any transaction afterwards, some information will be logged in the terminal and you can start debugging it from the white Debug button next to the log. Let’s see that in action.
Using assert()
SafeMath is an OpenZeppelin library for Math operations with safety checks that throw an error. The sub(a,b) function subtracts two numbers and returns an unsigned number. The first parameter should be greater than the second parameter so we can always get a positive number. The function enforces this rule using an assert() function. This is the code for the sub function:
  function sub(uint256 a, uint256 b) internal pure returns (uint256) {
    assert(b <= a);
    return a - b;
  }
As long as you provide values for a and b that verify the condition b <= a, the execution continues without problems, but once you provide a value of b greater that a, the assert() function will throw an error that says:
VM error: invalid opcode. invalid opcode The execution might have thrown. Debug the transaction to get more information.
So let’s add a call to the sub() with wrong parameters in the SimpleToken contract:
    constructor() public {
      totalSupply_ = INITIAL_SUPPLY;
      balances[owner] = INITIAL_SUPPLY;
      SafeMath.sub(10, 1000);
    }
If you redeploy the contract, you’re going to get the the invalid opcode error in the terminal:

Once you click the Debug button you’ll be taken to the Debugger panel where you can start debugging your code.
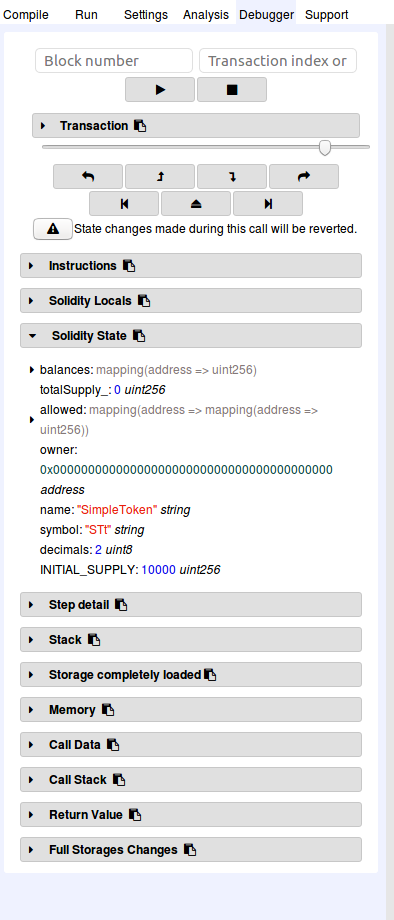
In the code editor, the first line/instruction will be highlighted marking where we are currently at the code.

Click on the Step over forward button to step through the code.
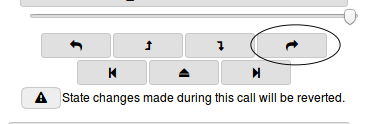
You can also jump right in the exception using the Jump to exception button.
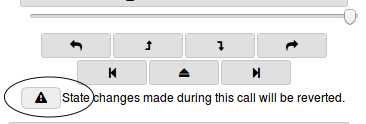
Whatever way you’re using, the debugger will take you to the code causing the problem, and will then stop.

You can inspect the state of the local variables at the current step.

The Solidity Locals panel displays local variables associated with the current context.
From the source code and Solidity Locals, you can conclude that the source of the problem is related to the assert() method and the value of b being greater than the value of a.
You can stop debugging using the stop debugging button.

It’s also worth looking at the other panels of the debugger.
Instructions
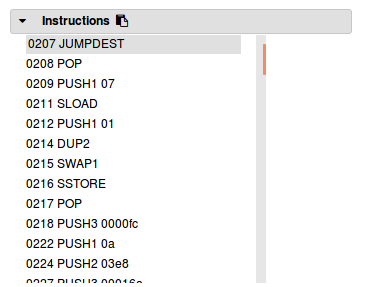
The Instructions panel displays the byte-code of the debugged contract. The byte-code of the current step is highlighted.
Solidity State
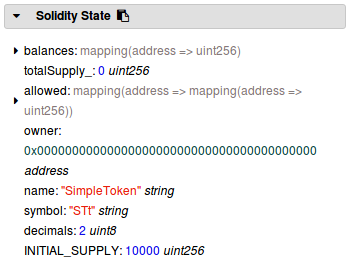
The Solidity State panel displays state variables of the currently debugged contract.
Low Level Panels
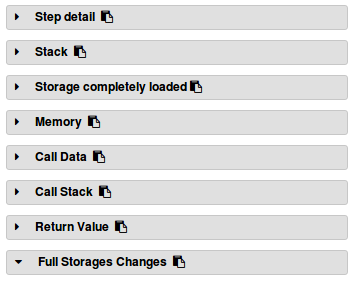
These panels display low level information about the execution such as step details, memory, stack and return value of functions.
Conclusion
In this tutorial, we’ve used Truffle and OpenZeppelin to build a simple token, then used truffle-flattener to flatten the custom contract and Remix IDE to start debugging the contract for errors.
Hopefully this will help you fearlessly dive into step-by-step debugging of your own contracts. Let us know how it works out for you!