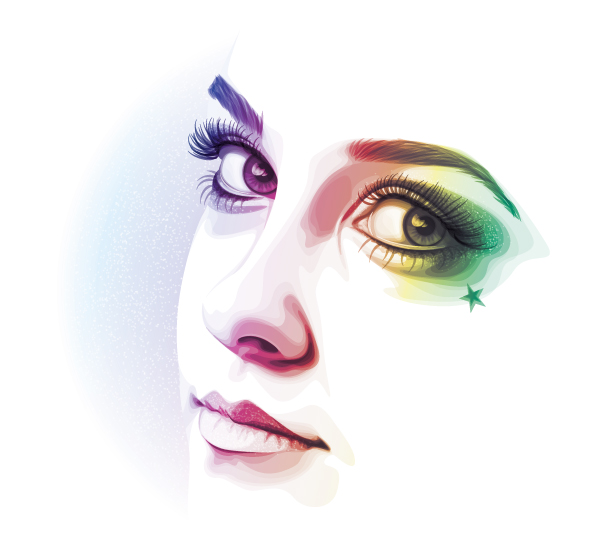
In today’s tutorial, I’m going to show you how I created a simple, rainbow colored portrait using a stock image base in Adobe Illustrator. I’ll be adding subtle decoration to the portrait with the help of a Scatter Brush and will be playing with a splash of color to create the rainbow effect. So let’s get started!
1. Prepare Your Layers
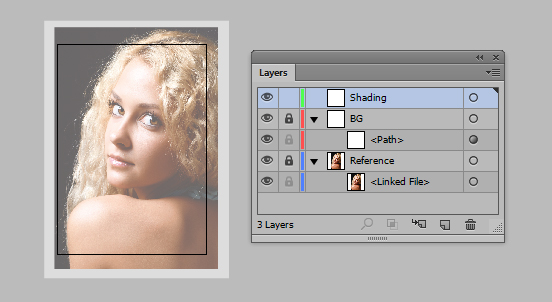
After purchasing and cropping my stock image in Adobe Photoshop, I’ve created a New document and File > Placed my image onto my artboard. If you regularly follow my tutorials, you may recognize this stock image as I’ve used it in a previous premium tutorial.
I’ve set up my layers in the Layers panel as shown below, with a white fill Rectangle (M) at 50% Opacity in the “BG” layer.
2. Draw Your Base Shape
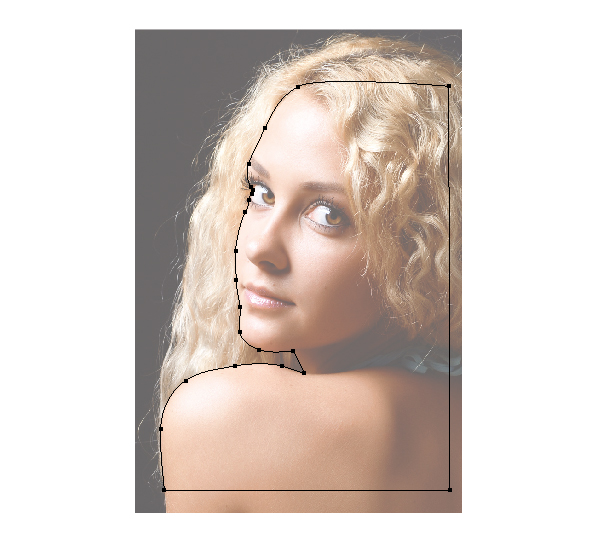
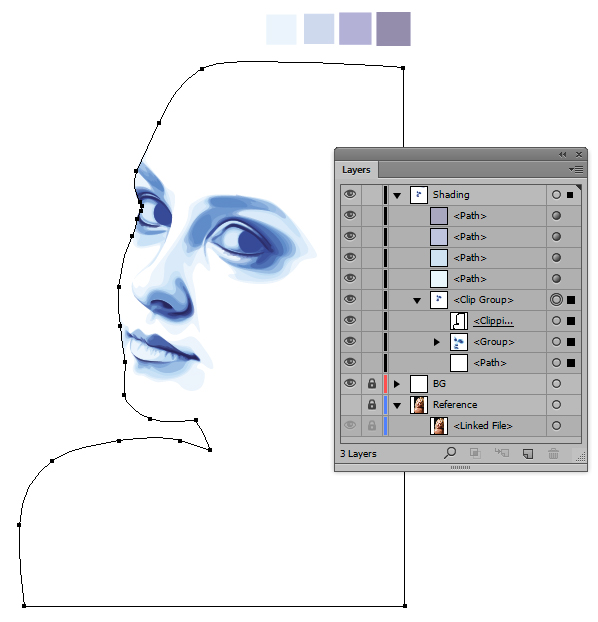
Using the Pen Tool (P), draw a shape around the entire skin area. We’ll only be using the face area, but it’s good practice in case you decide to shade other areas of the portrait. This shape will have a white fill.
3. Begin Vectoring Your Skin Shading
Step 1
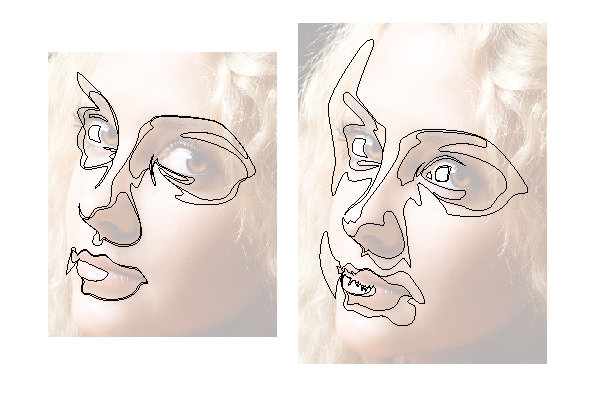
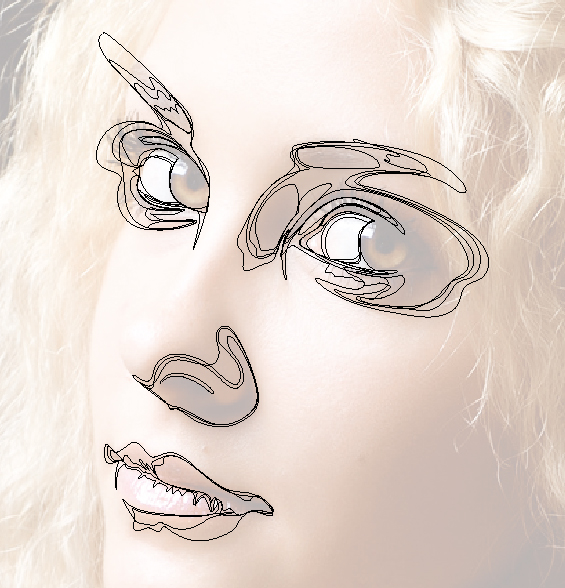
Begin drawing your first shapes with the Pen Tool (P). The first shapes will be the large areas of shadow around the eyes, nose and lips. These shapes will have a light blue fill (C=70, M=15, Y=0, K=0) set to Blending Mode Multiply, Opacity 10%. Group them once done (CTRL + G).
Step 2
The next shapes are still large shapes of shading, however they are smaller than the previous. The theory is the smaller the shading shape, the darker the color. So for these shapes they are a medium blue (C=85, M=50, Y=0, K=0) and are set to Blending Mode Multiply, Opacity 20%. Group them once done (CTRL + G).
Step 3
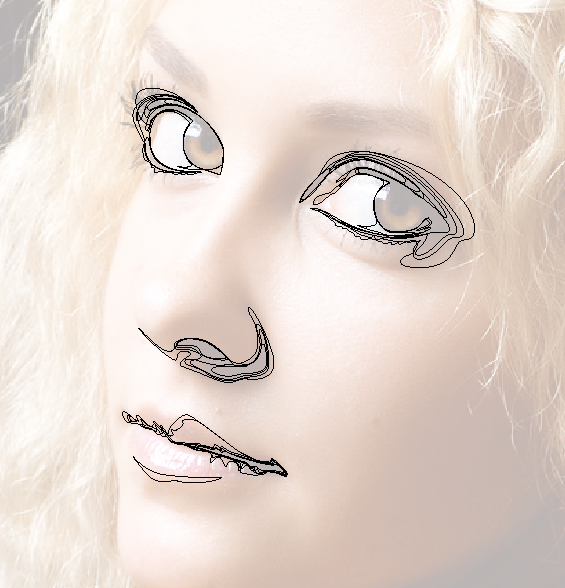
You can tell the difference in size now, as smaller shapes are drawn. These with a darker blue (C=100, M=95, Y=5, K=0) set to Blending Mode Multiply, Opacity 30%. Group them once done (CTRL + G).
Step 4
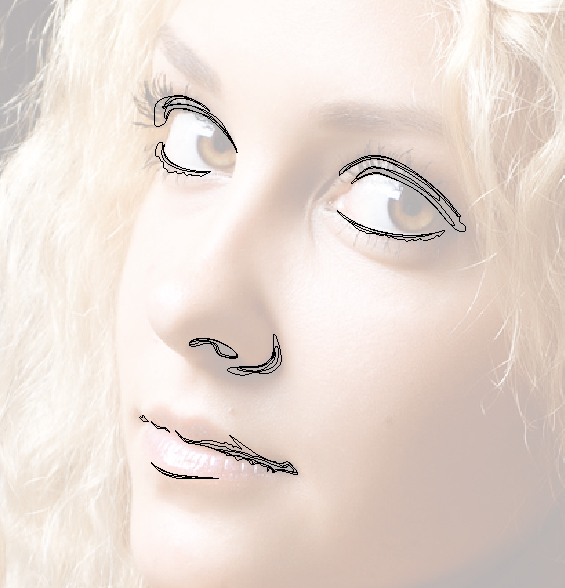
Even smaller, darker shapes are drawn. These are in the areas of the deepest shade and should be drawn as if they are lines with notches on. These have a navy blue fill (C=100, M=100, Y=25, K=25) and are set to Blending Mode Multiply, Opacity 40%. Group them once done (CTRL + G).
4. Color Your Shapes
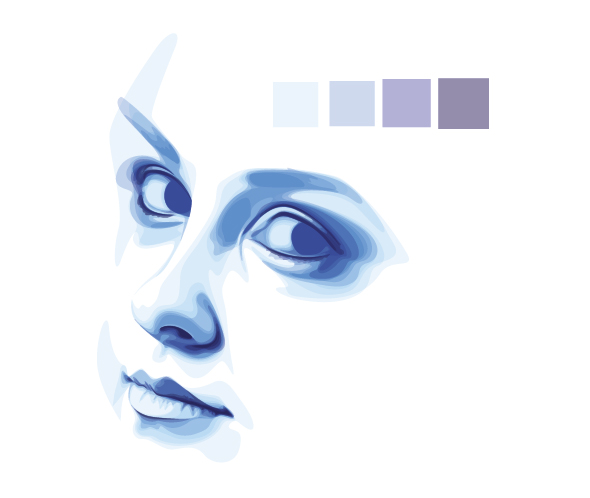
You can now see the shapes all visible and they form the shading and details of the face. I’ve drawn a square with the Rectangle Tool (M) with the various fills and Transparency settings on. This will make it easier for me to use the Eyedropper Tool (I) should further shapes be required.
5. Add the Shapes to a Clipping Mask
Group together all the shapes (CTRL + G). Then duplicate the white fill base of the skin. Use this to create a Clipping Mask (CTRL + 7).
6. Create the Eyes
Step 1
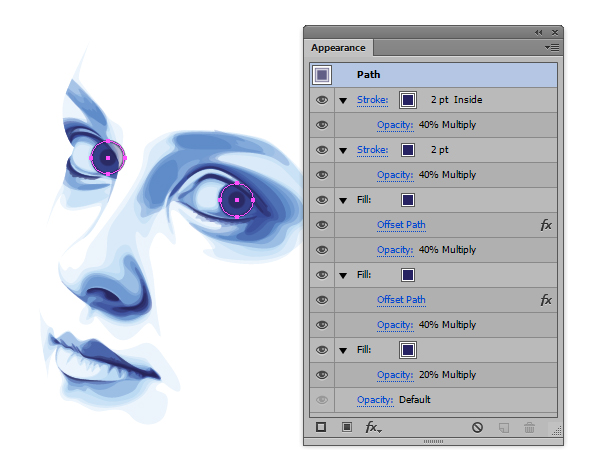
On to the eyes, I’ve drawn a circle with the Ellipse Tool (L) and then applied the below Appearance panel settings, using only the darkest blue for the fill and stroke. I’ve Offset Path for the pupil twice with about 1pt difference between them and set them to Blending Mode Multiply, Opacity 40%.
Step 2
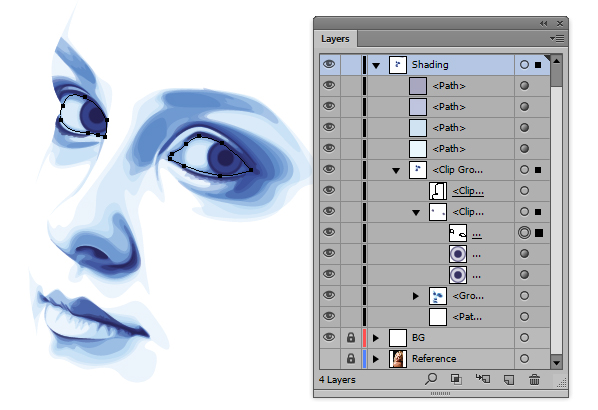
Using the Pen Tool (P), draw around the eyes and then make a Compound Path (CTRL + 8) and then a Clipping Mask (CTRL + 7) with them.
Step 3
Using the darkest blue, add additional shading over the eyeballs to add shadow to the iris and to shape the eyeball. Once done, Group them (CTRL + G) and place them in the face shadings Clipping Mask group.
7. Add Eyelashes & Eyebrows
Step 1
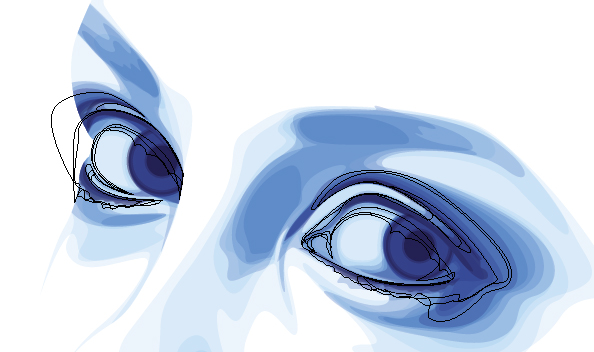
Using the darkest blue again, this time just applied to the Stroke, I’ve used my Width Profile brushes with the Paintbrush Tool (B) to add eyelashes to the top and bottom of the eyes. I’ve used Width Profile 1 in this instance.
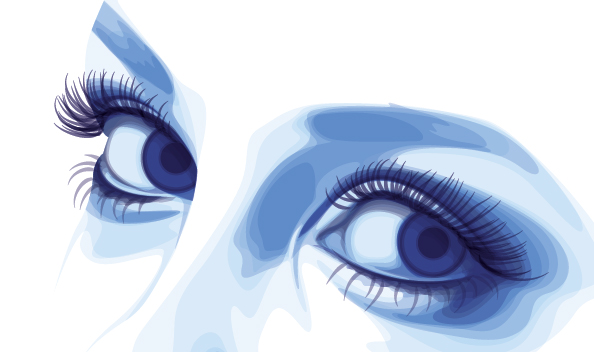
Step 2
With the 3rd darkest blue, draw in the eyebrows with the same brush as used with the eyelashes.
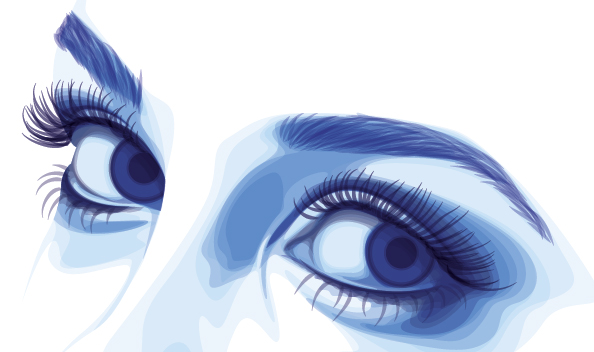
8. Add Highlights to the Eyes
Step 1
Using a white stroke set to Blending Mode Normal, Opacity 80%, add some white to the water line with the Paintbrush Tool (B).
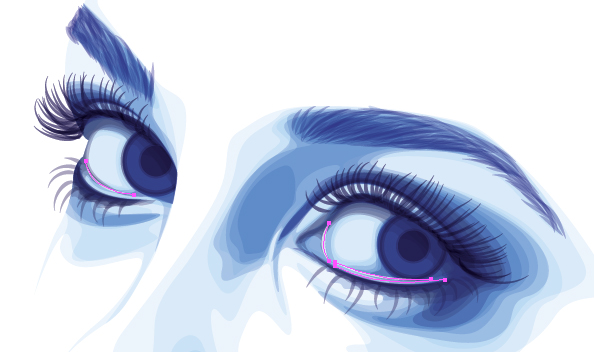
Step 2
Add some highlights to the eyeball and a light reflecting in the pupils and iris with the Pen Tool (P). These shapes have a white fill and are set to Blending Mode Normal, Opacity 30%.
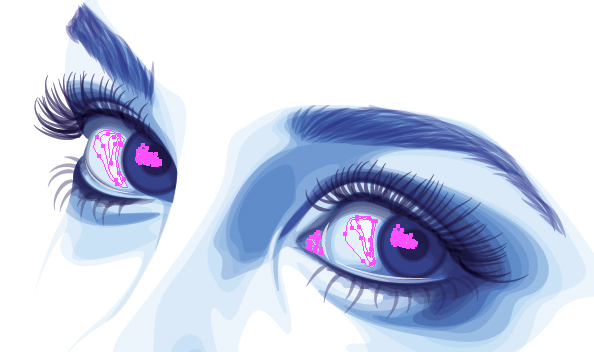
Step 3
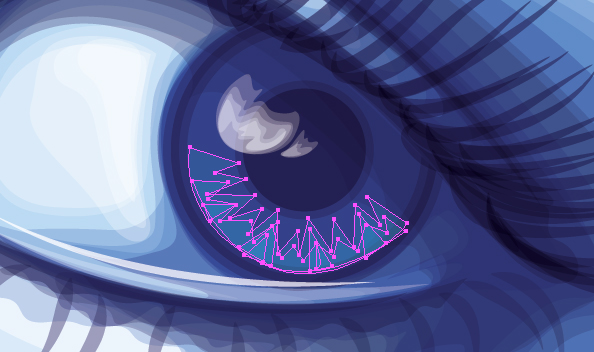
Using the lightest blue set to Blending Mode Normal, Opacity 20%, I’ve added triangle shapes around the iris, drawn with the Pen Tool (P). Layer them upon each other to create a varied tone effect.
9. Create a Glitter Effect using a Scatter Brush
Step 1
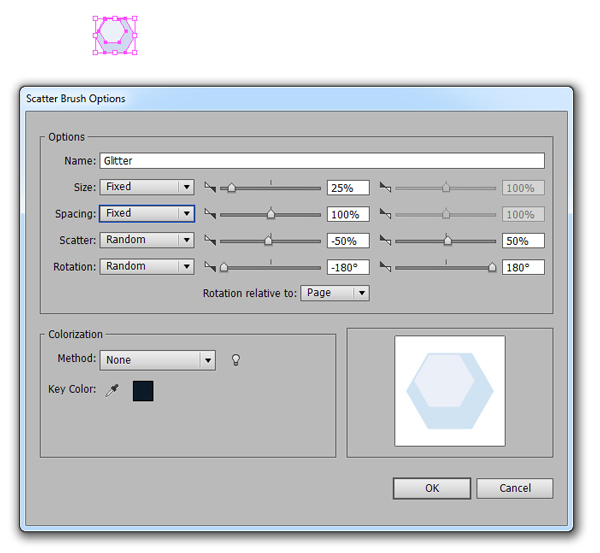
I’m going to add a glitter effect to around the eyes. Using the Polygon Tool, drawn two small hexagons. The smallest will have a white fill and set to 60% Opacity, the larger the 2nd darkest blue set to Opacity 20%. Group them together (CTRL + G) and then drag and drop them into the Brushes panel. Select the New Scatter Brush option and use the settings below to create your glitter scatter brush.
Step 2
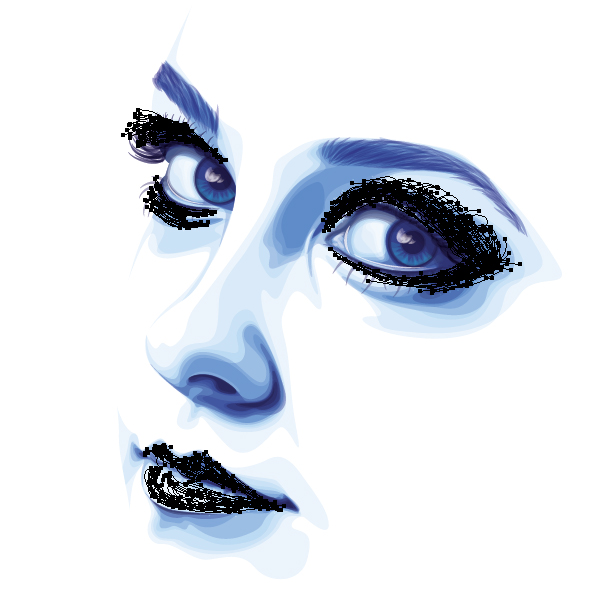
Using the glitter brush and the Paintbrush Tool (B), I’ve drawn around the eyes and also on the lips. These strokes are set to Blending Mode Overlay and Opacity 60%.
10. Add the Finishing Touches
Step 1
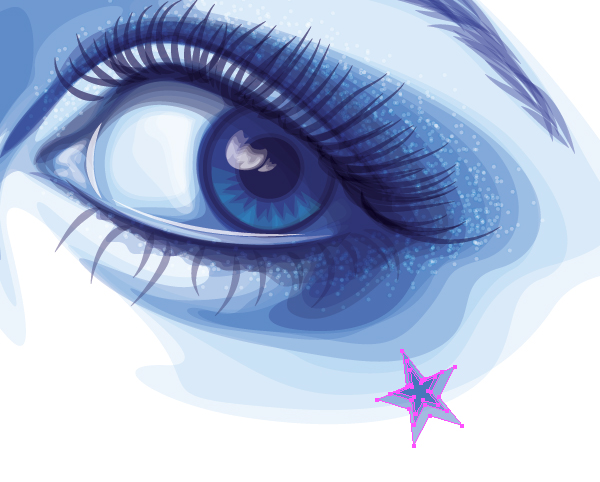
Using the Star Tool, I’ve draw a single star and used the Free Transform Tool (E) to resize and rotate it. I’ve then duplicated it twice and altered the size. Each star takes on the settings of the 2nd darkest blue and are Grouped together when done (CTRL + G).
Step 2
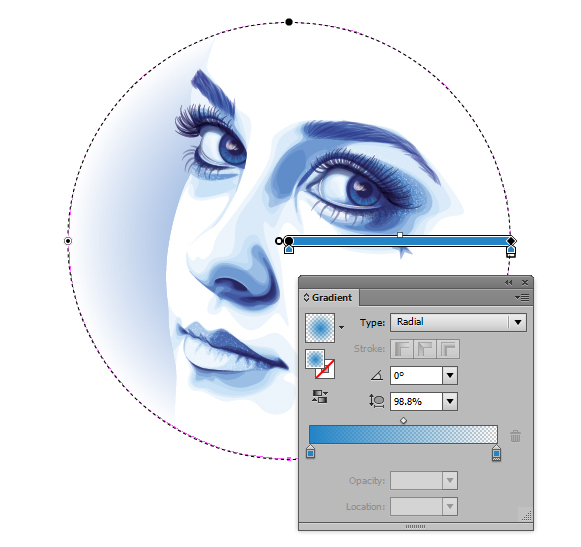
Time to work on the background. I’ve added a light blue radial gradient behind the portrait. This helps emphasis the edge of the face which is hidden by the white fill background.
Step 3
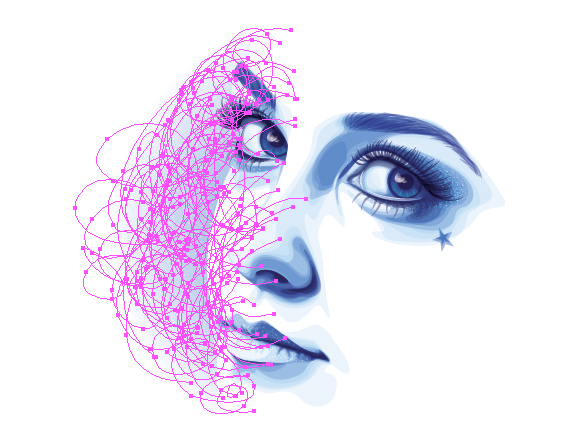
Time for some more glitter, as if the eyes weren’t enough! These are set to Blending Mode Color Dodge, Opacity 70%.
Step 4
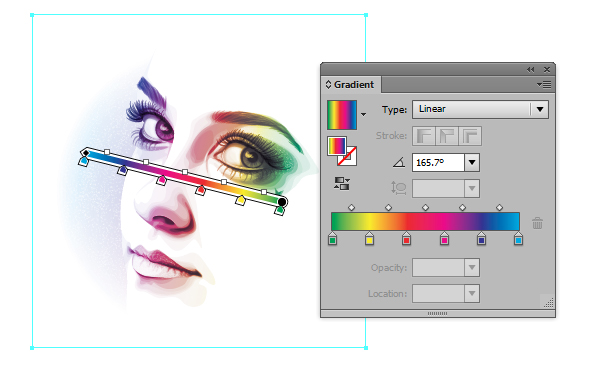
In the Swatches panel, click on the drill down menu and go to Open Swatch Library > Gradients > Spectrums and select the boldest gradient called “Spectrum”. Fill a Rectangle (M) over the top of your portrait with the gradient and use the Gradient Tool (G) to alter the angle. Set this shape to Blending Mode Color, Opacity 75%.
Awesome Job, You’re Now Finished!
Here we have the finished portrait. You can try mixing the different colors used in the portrait by using the Recolor Artwork option or even play with different gradients and Blending Modes over the top. Why not try it yourself?
