In this tutorial you will learn how to create a love message on the sand using basic Photoshop filters, brushes and layer styles. Create a realistic “writing on sand” effect in Photoshop!
![Create A Love Message On The Sand Photoshop Tutorial Create A Love Message On The Sand Photoshop Tutorial](https://cdn.idevie.com/wp-content/uploads/2012/02/heartsand-preview12.jpg)
Tutorial Details
Program: Adobe Photoshop CS5
Difficulty: Beginner
Estimated Completetion Time: 20 – 30 minutes
Tutorial Assets
The following assets were used during the production of this tutorial
Sand photo
Step 1
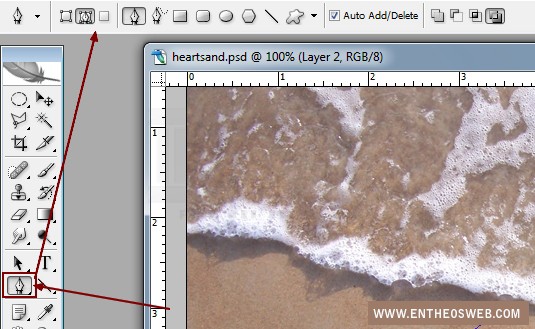
Open your beach (sand) stock. Press Cmd/Ctrl+Shift+N to make a new layer. Hit P to active Pen Tool with setting belows:
![Create A Love Message On The Sand](https://cdn.idevie.com/wp-content/uploads/2012/02/heartsand150.jpg)
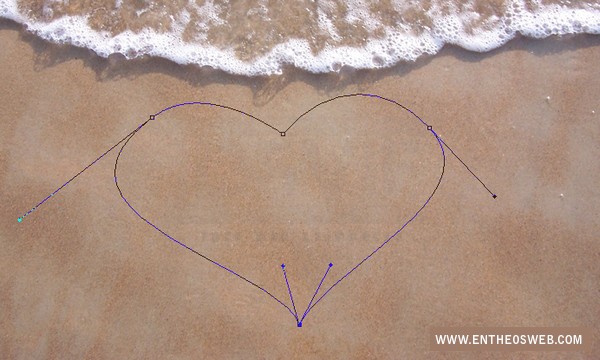
Make a path like heart shape:
![Create A Love Message On The Sand](https://cdn.idevie.com/wp-content/uploads/2012/02/heartsand1a12.jpg)
If you’re not familiar with Pen Tool you can use heart shape from shape gallery.
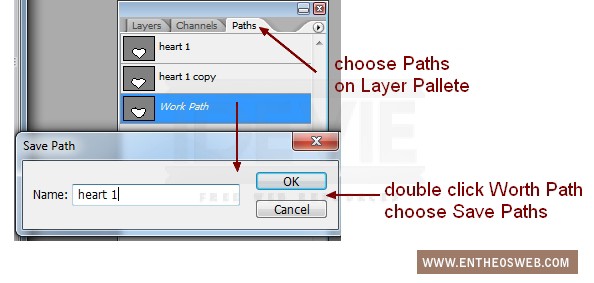
Choose Paths from Layer Pallete, then double click Work Path, choose Save Paths then name it whatever you want. It’s a good way to restore your path and you can active it anytime on any layers you want.
![Create A Love Message On The Sand](https://cdn.idevie.com/wp-content/uploads/2012/02/heartsand1b12.jpg)
Step 2
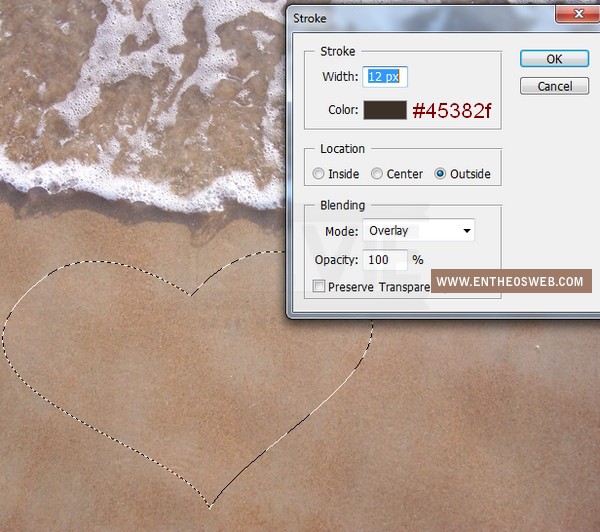
Hit Cmd/Ctrl+Enter to make selection from this path then go to Edit-Stroke with color # 45382f:
![](https://cdn.idevie.com/wp-content/uploads/2012/02/heartsand212.jpg)
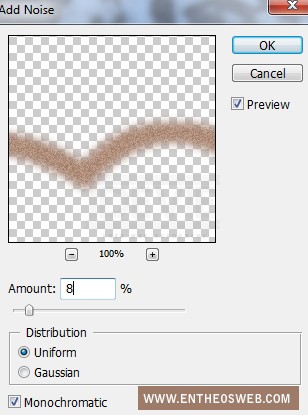
Choose Filter-Noise-Add Noise:
![Create A Love Message On The Sand](https://cdn.idevie.com/wp-content/uploads/2012/02/heartsand2a12.jpg)
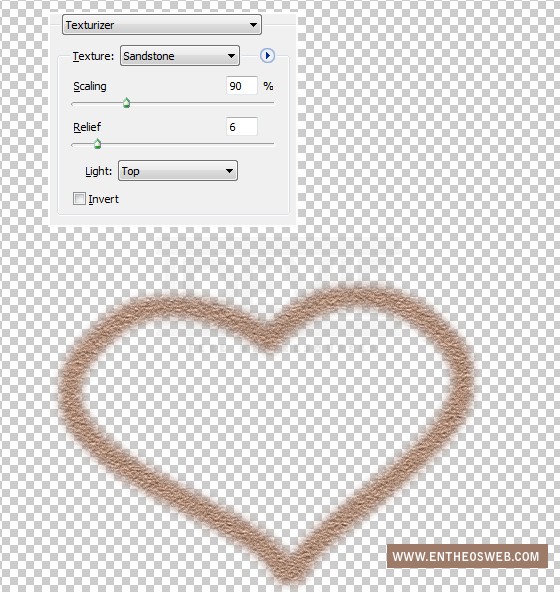
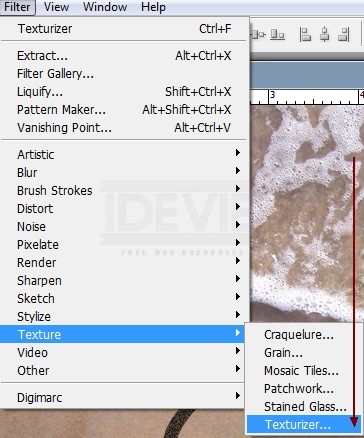
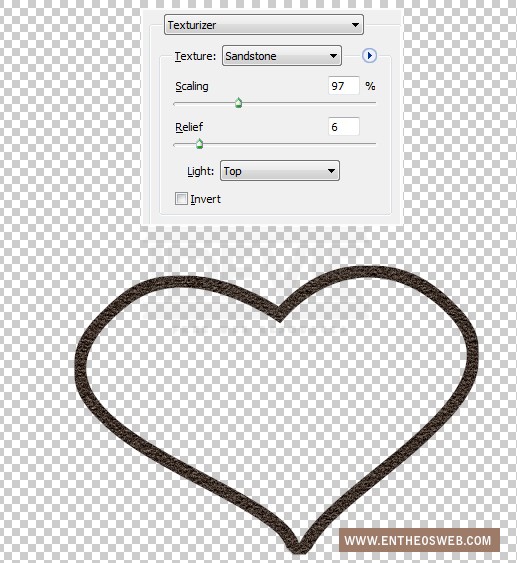
Go to Filter-Texture-Texturizer, choose Sandtone:
![Create A Love Message On The Sand](https://cdn.idevie.com/wp-content/uploads/2012/02/heartsand2b12.jpg)
![Create A Love Message On The Sand](https://cdn.idevie.com/wp-content/uploads/2012/02/heartsand2c12.jpg)
Step 3
Right click this layer, choose Blending options:
![Create A Love Message On The Sand](https://cdn.idevie.com/wp-content/uploads/2012/02/heartsand312.jpg)
![Create A Love Message On The Sand](https://cdn.idevie.com/wp-content/uploads/2012/02/heartsand3a12.jpg)
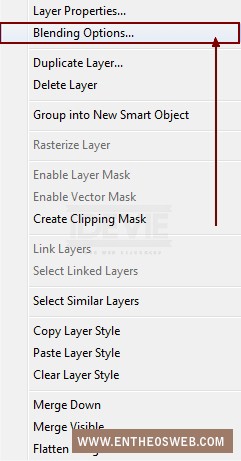
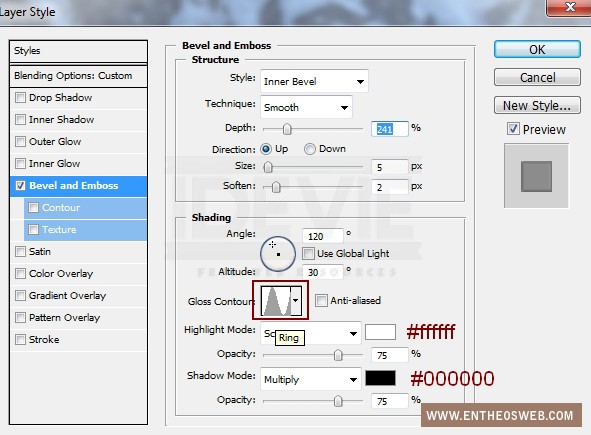
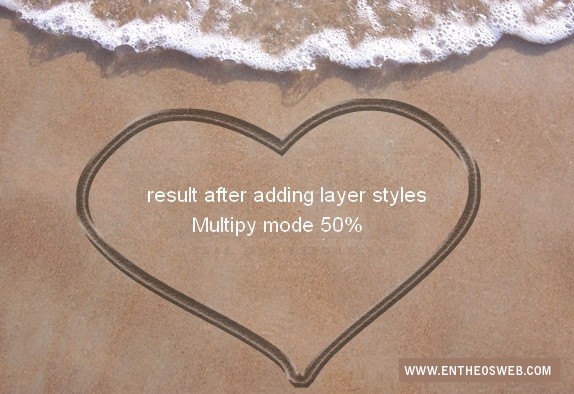
Then change the mode to Multipy 50%.
![Create A Love Message On The Sand](https://cdn.idevie.com/wp-content/uploads/2012/02/heartsand3b12.jpg)
Name this layer as “heart shape”.
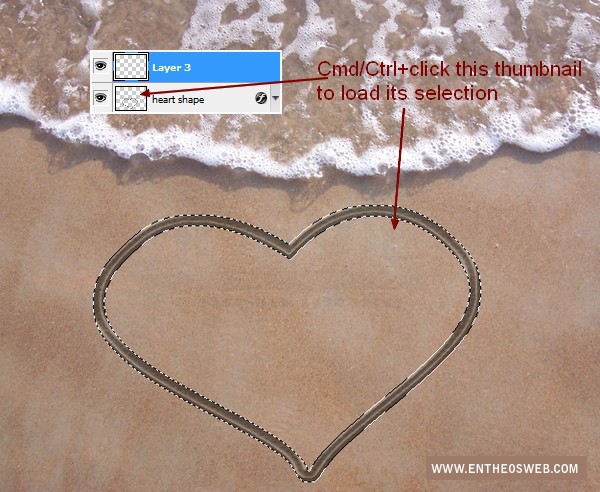
Step 4
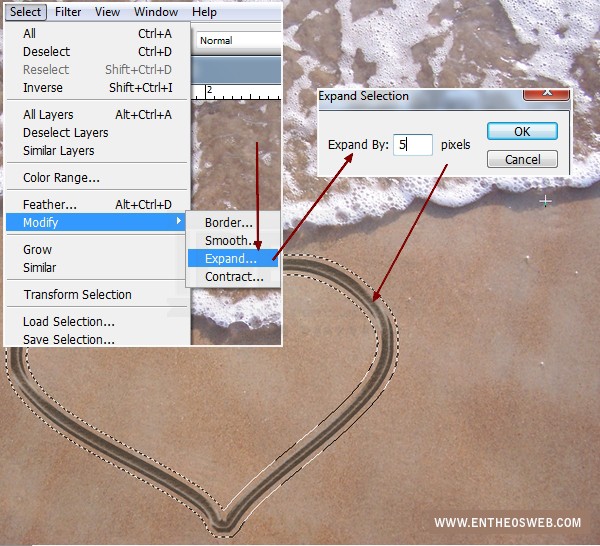
Make a new layer, hold the Cmd/Ctrl while clicking the thumbnail of heart shape layer to load its selection:
![Create A Love Message On The Sand](https://cdn.idevie.com/wp-content/uploads/2012/02/heartsand412.jpg)
Go to Select-Modify-Expand and set the value as 5:
![Create A Love Message On The Sand](https://cdn.idevie.com/wp-content/uploads/2012/02/heartsand4a12.jpg)
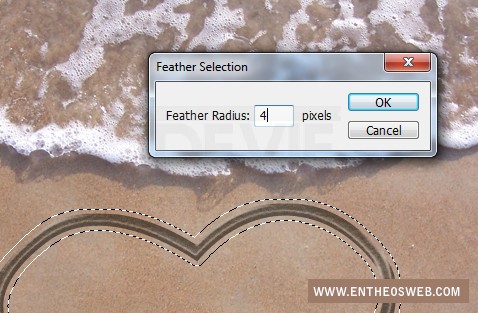
Set the feather as 4 ( right click this selection, choose Feather):
![Create A Love Message On The Sand](https://cdn.idevie.com/wp-content/uploads/2012/02/heartsand4b12.jpg)
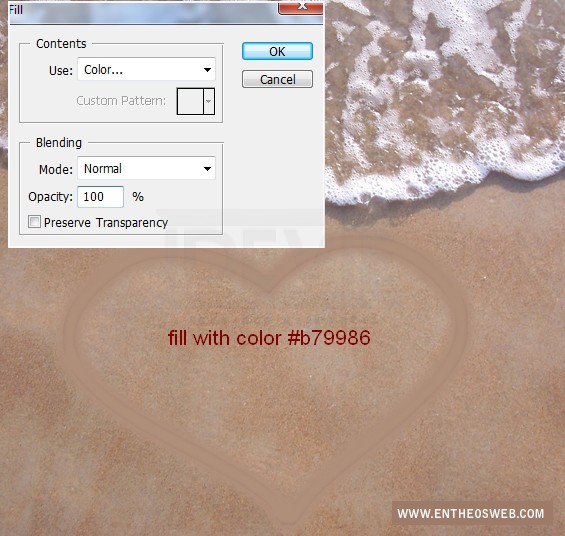
Choose Edit-Fill with color #b79986:
![Create A Love Message On The Sand](https://cdn.idevie.com/wp-content/uploads/2012/02/heartsand4c12.jpg)
Go to Filter-Add Noise then apply Texturizer filter again:
![Create A Love Message On The Sand](https://cdn.idevie.com/wp-content/uploads/2012/02/heartsand4d12.jpg)
![Create A Love Message On The Sand](https://cdn.idevie.com/wp-content/uploads/2012/02/heartsand4e12.jpg)