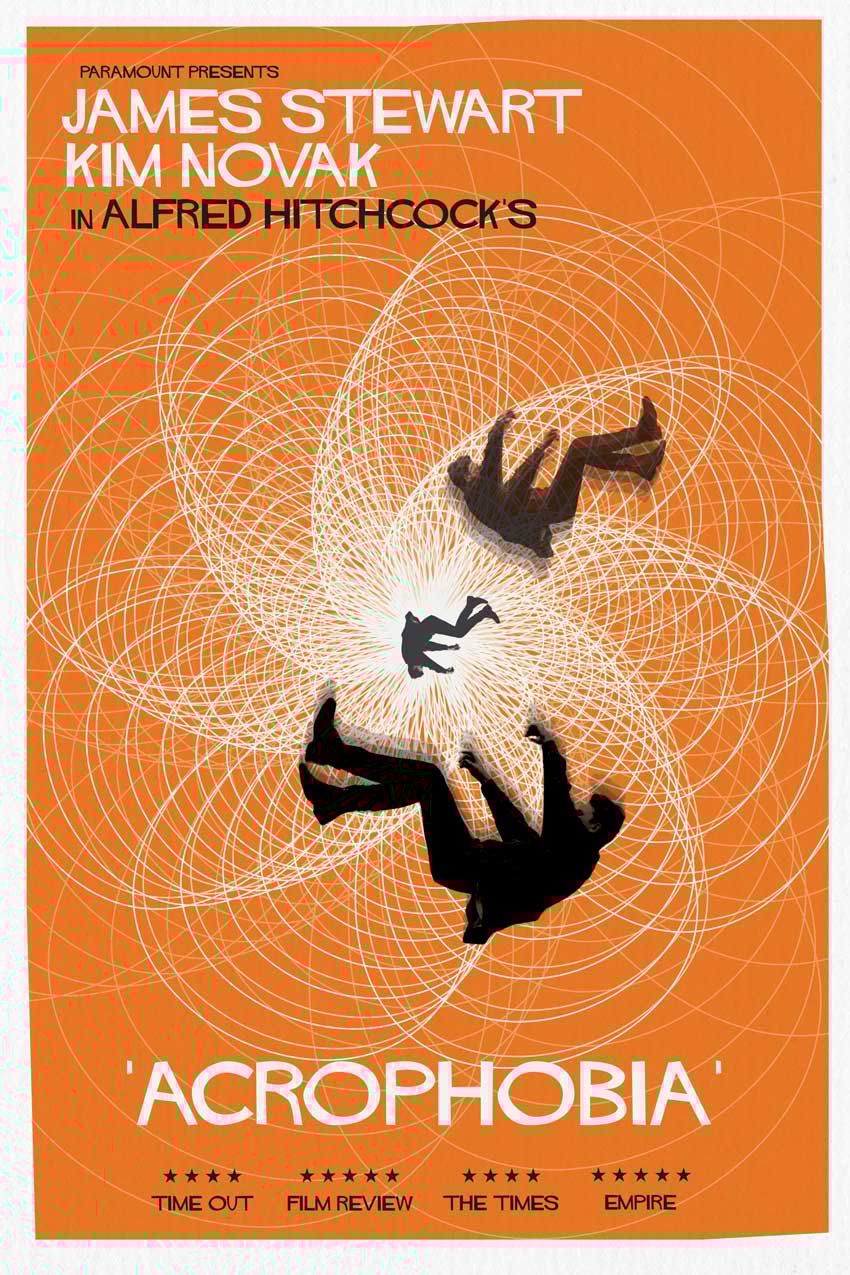
The Vertigo movie poster by Saul Bass used spiral graphics, a two-tone color palette and jaunty, unnerving text to create a feeling of unsettling instability for the viewer. Technically, vertigo is a symptom of acrophobia, which is an extreme fear of heights, so we’ve cheekily corrected Hitchcock’s original movie title!
Today we’ll be creating a Vertigo-inspired poster in Adobe InDesign, while also using Photoshop and Illustrator to edit graphics for the design.
The impact of Saul Bass design
First things first: who was Saul Bass? Academy Award-winning filmmaker and one of the all-time great graphic designers, Saul Bass was the mastermind behind some of the most iconic movie posters and title sequences.
No one mastered the balance between simplicity and complexity like Saul Bass. His work stood out because each element was cleverly positioned, resulting in interesting and eye-catching visuals. Every single trace seemed intentional, and the final design composition was always a masterclass of his craft.
His most popular creations include the posters for Alfred Hitchcock’s Vertigo, Stanley Kubrick’s The Shining, and Otto Preminger’s Anatomy of a Murder.
1. How to set up your poster in InDesign
We’ll set up our design as a large, standard format poster, ‘Architectural D’. If you want to adapt the Vertigo poster to a different size, you’ll have to adjust the sizing of elements like margins, fonts, and graphics.
Step 1
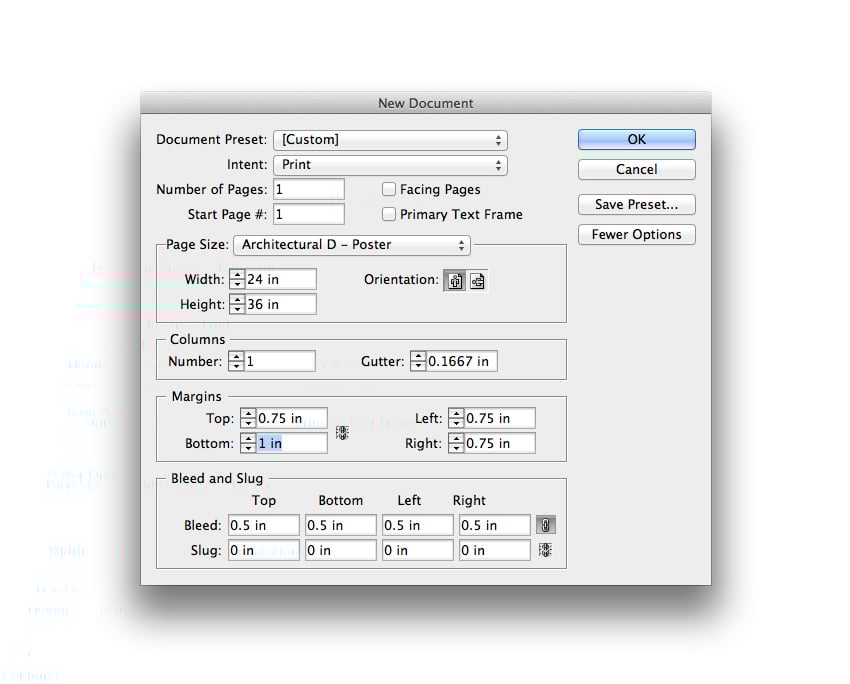
Open up InDesign and go to File > New > Document.
Keep the Intent set to Print and Number of Pages to 1. Uncheck the Facing Pages box. Set the Width of the page to 24 in and Height to 36 in, for an Architectural D size.
Set the Top, Left and Right Margins to 0.75 in, and the Bottom to a more generous 1 in. Add a Bleed of 0.5 in and then go ahead and click OK.

Step 2
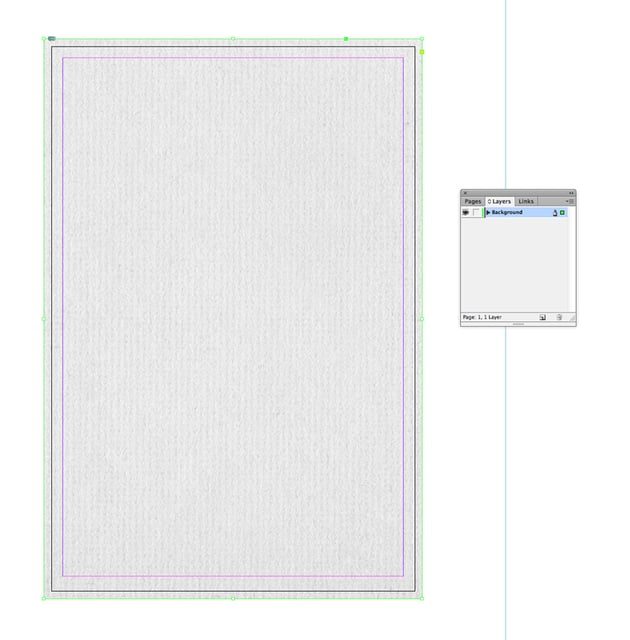
Expand the Layers panel (Window > Layers) and double-click on the Layer 1 title. Rename the layer Background and click OK.
Take the Rectangle Frame Tool (F) and drag to create a frame that extends across the whole page and up to the edge of the bleed on all sides. Go to File > Place, navigate to your paper texture image, and click Open. Allow it to fill up the whole frame.


Step 3
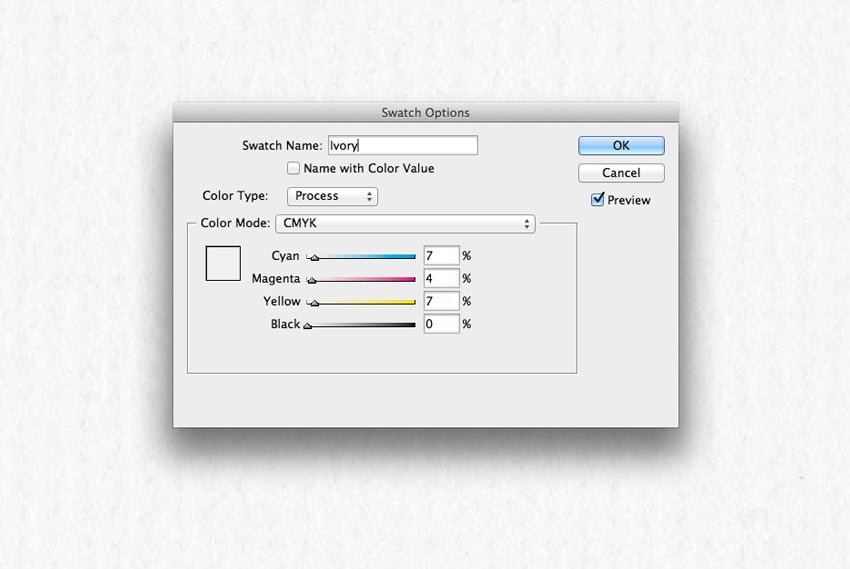
Expand the Swatches panel (Window > Color > Swatches) and click on the New Swatch button at the bottom of the panel. Double-click the new swatch to open the Swatch Options window.
Name the swatch Ivory, and set the CMYK levels below to C=7 M=4 Y=7 K=0. Click OK.
Switch to the Rectangle Tool (M) and drag across the page, creating a shape to match the dimensions of the image frame below. From the Swatches panel, set the Fill of this new shape to Ivory.
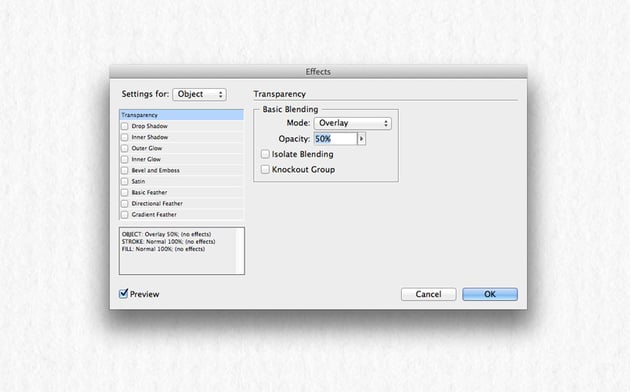
With the shape selected, go to Object > Effects > Transparency, setting the Mode to Overlay and Opacity to 50%. Click OK to exit the window.


Step 4
Create a new CMYK swatch called Orange, with the settings C=0 M=62 Y=90 K=0.
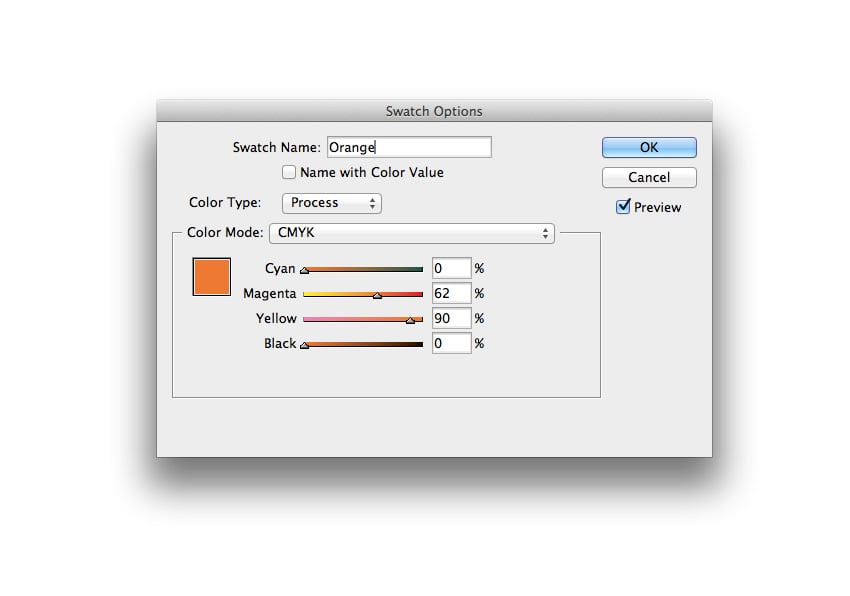


Then create a new layer above Background and name it Color, before locking the Background layer.
Take the Pen Tool (P) and roughly trace around the margin edge, allowing the line to have slight imperfections—this will add to the vintage design of your poster.
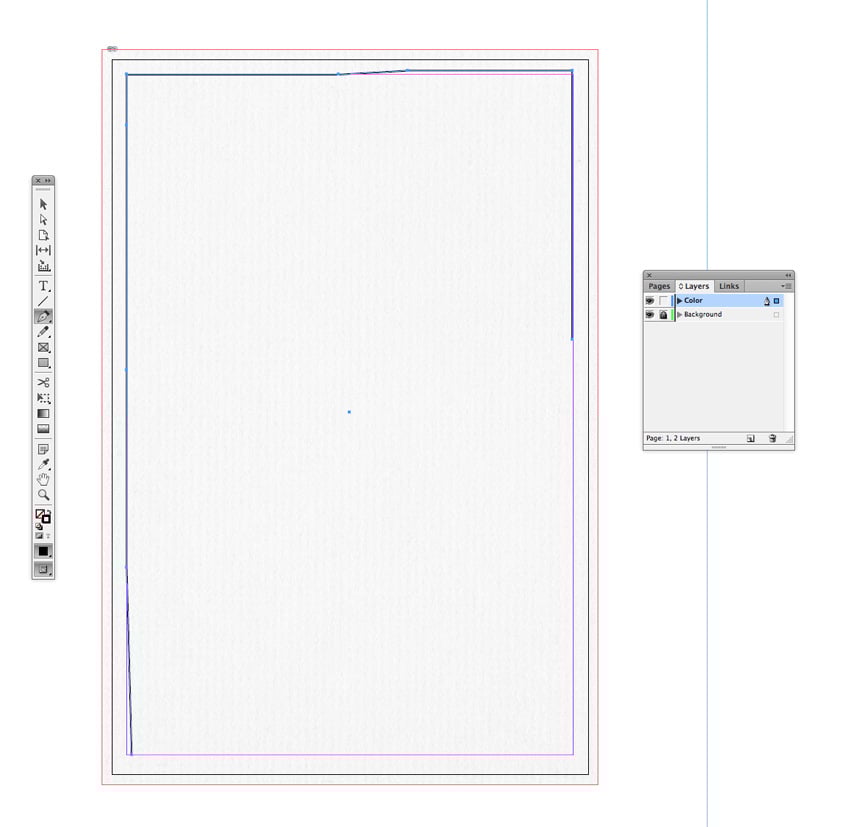
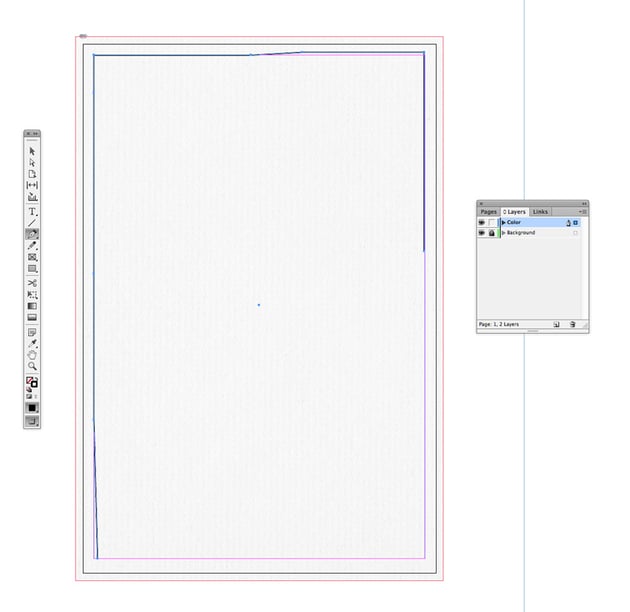
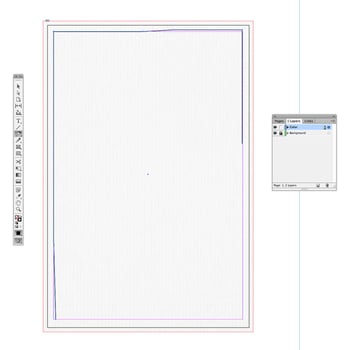
Keep working your way round until you’ve created a complete shape.
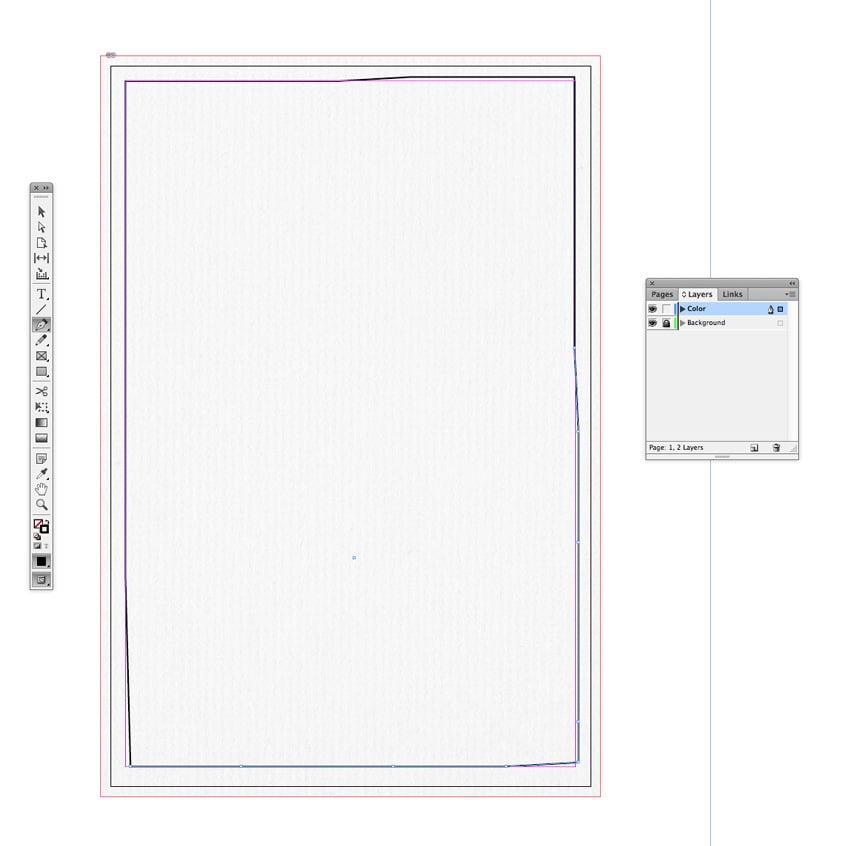
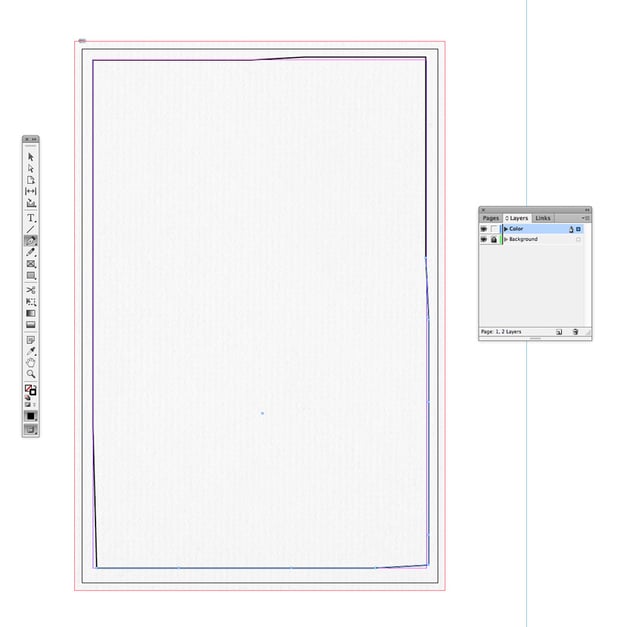
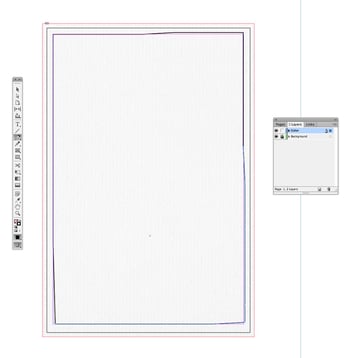
Set the Fill of your new shape to Orange and the Stroke Color to [None].
![Set new shape to Orange and the Stroke Color to [None].](https://cdn.idevie.com/wp-content/uploads/2025/05/1.4.3.jpg)
![Set new shape to Orange and the Stroke Color to [None].](https://cdn.idevie.com/wp-content/uploads/2025/05/1746857277_305_1.4.3.jpg)
![Set new shape to Orange and the Stroke Color to [None].](https://cdn.idevie.com/wp-content/uploads/2025/05/1746857277_211_1.4.3.jpg)
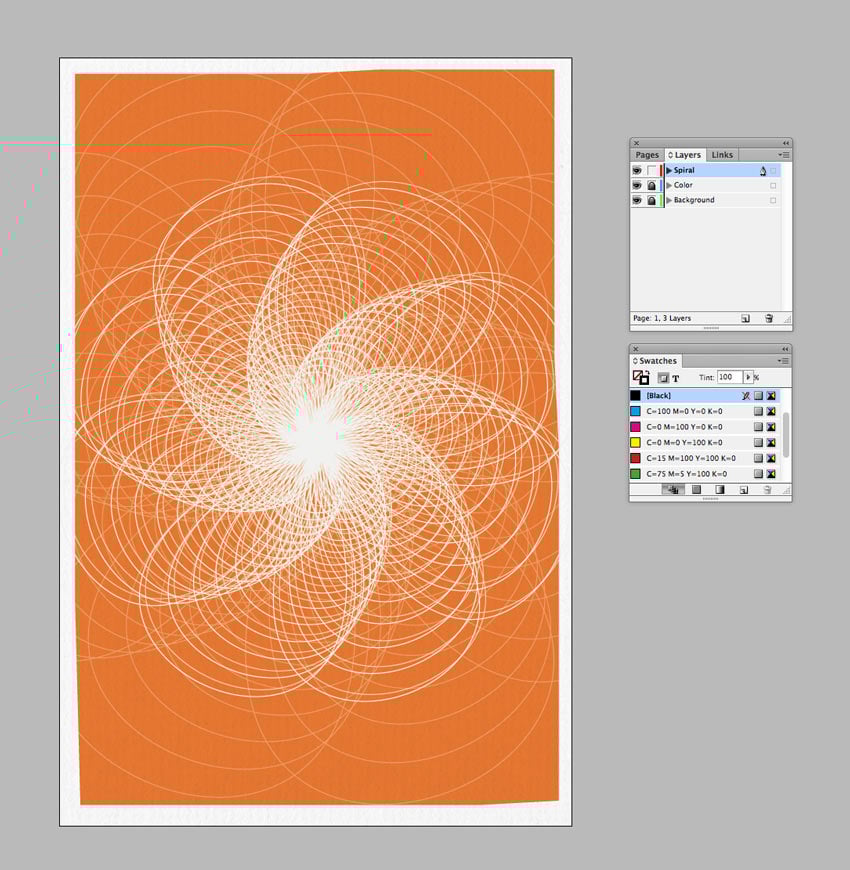
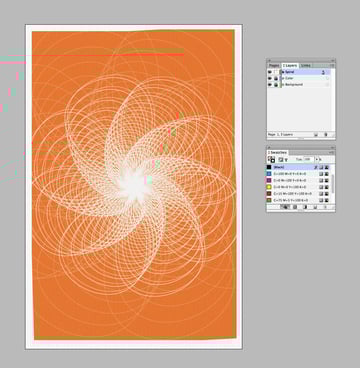
2. How to add a vintage spiral effect to your poster
Step 1
Open up the spirograph vector in Adobe Illustrator. Select the spirograph and Edit > Copy it.
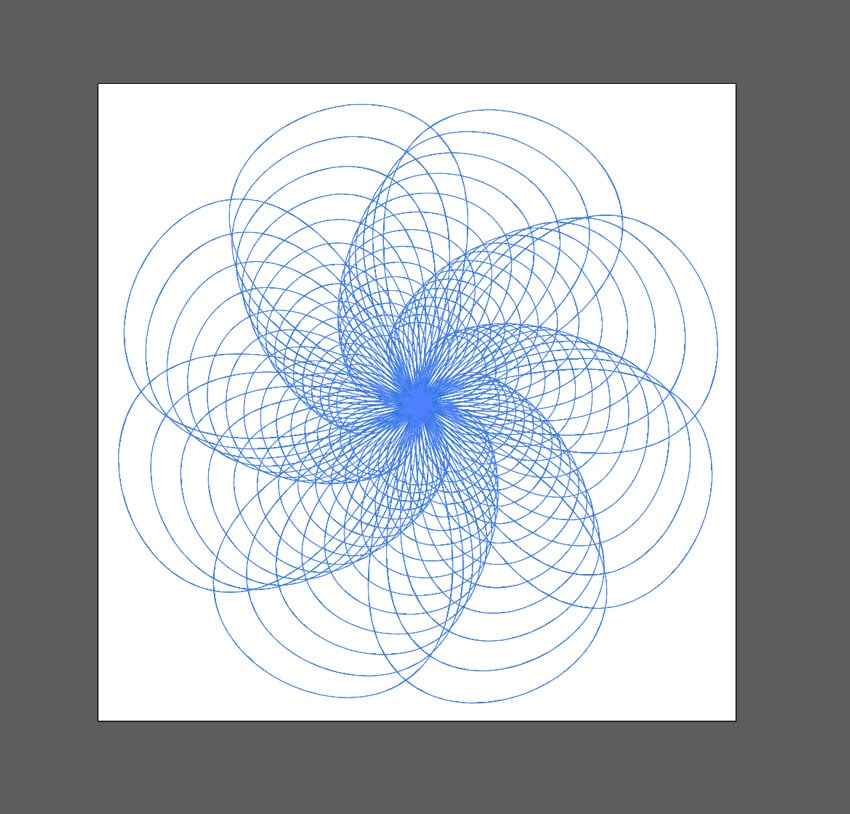
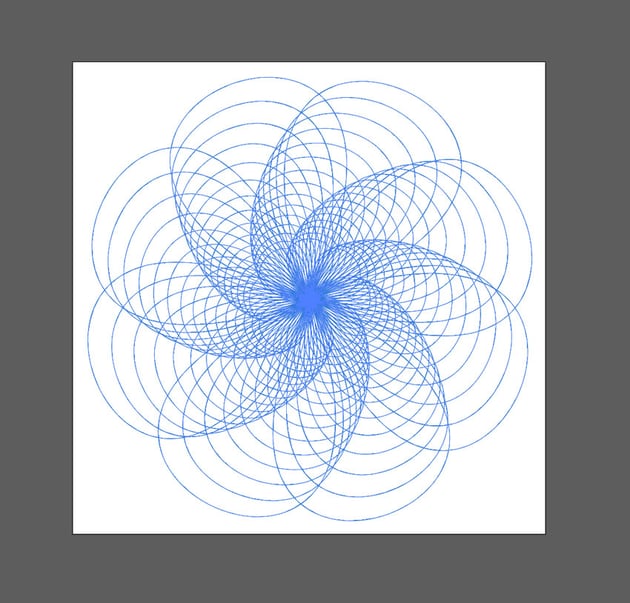
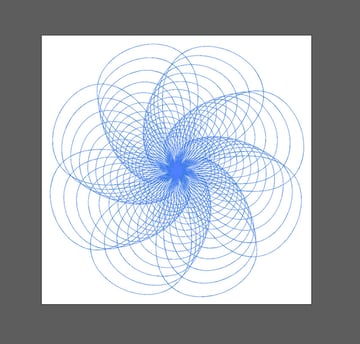
Back in your InDesign document, lock the Color layer and create a new layer above, naming it Spiral. Then Edit > Paste the graphic onto the poster. Edit the color of the spiral to your Ivory swatch.


Step 2
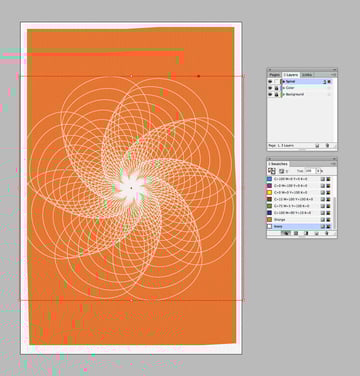
To create a dizzying effect on the poster, Edit > Copy the spiral and Edit > Paste in Place. Use the arrow keys to just slightly move it up and to the right.
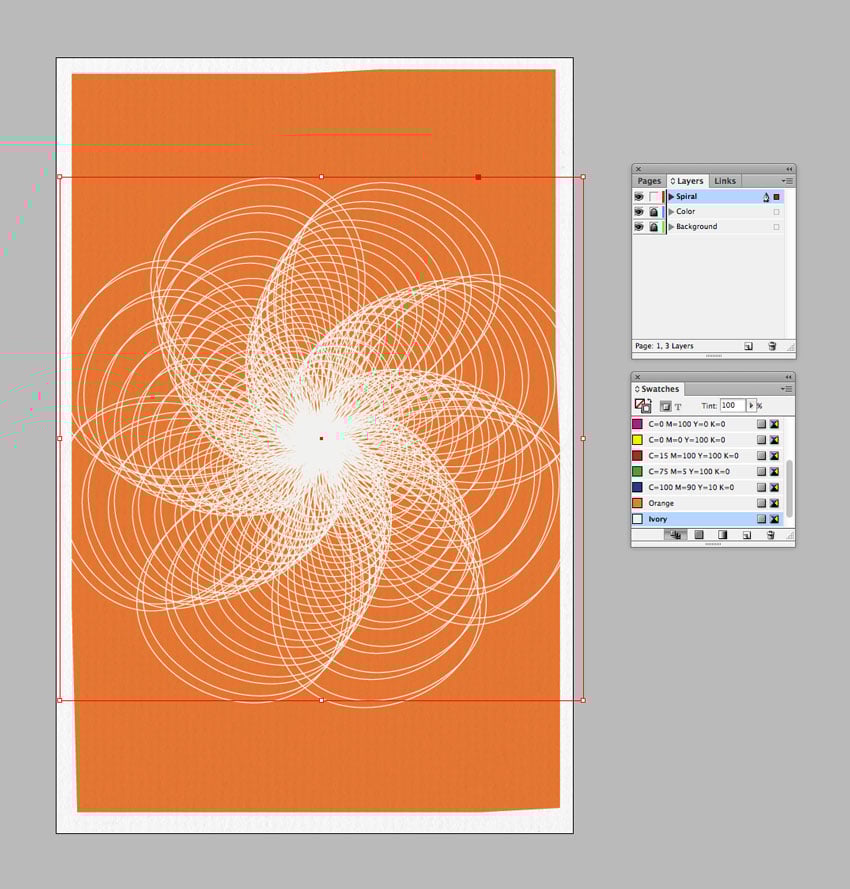


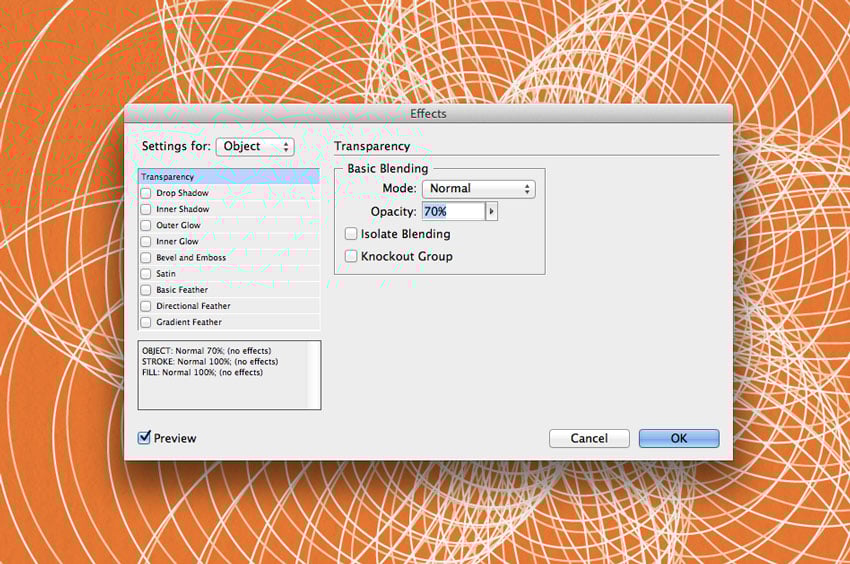
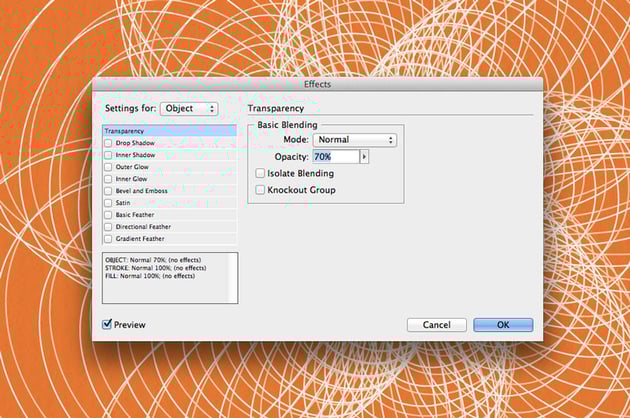
With this second spiral still selected, go to Object > Effects > Transparency and bring the Opacity down to 70%.

Step 3
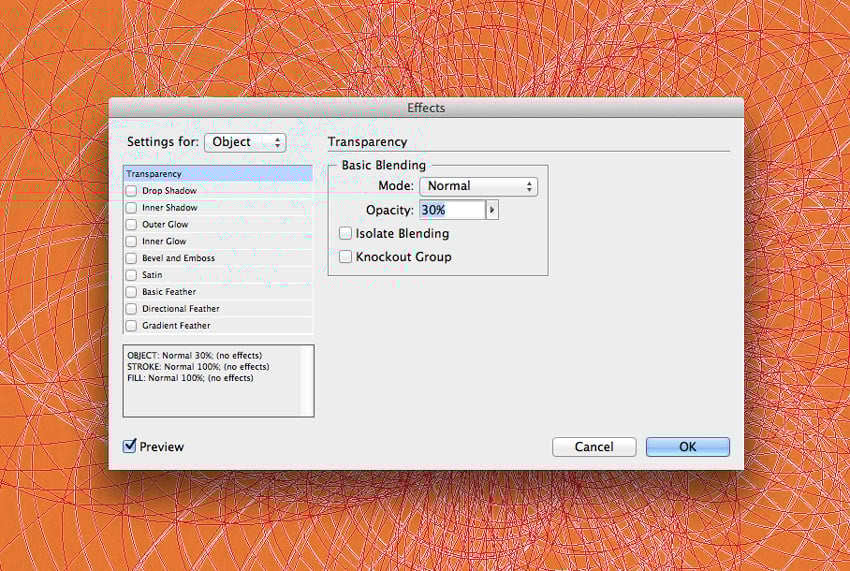
Edit > Paste in Place a third spiral onto the page. Scale this spiral up, holding Shift while you do, allowing it to spill past the edges of the page.

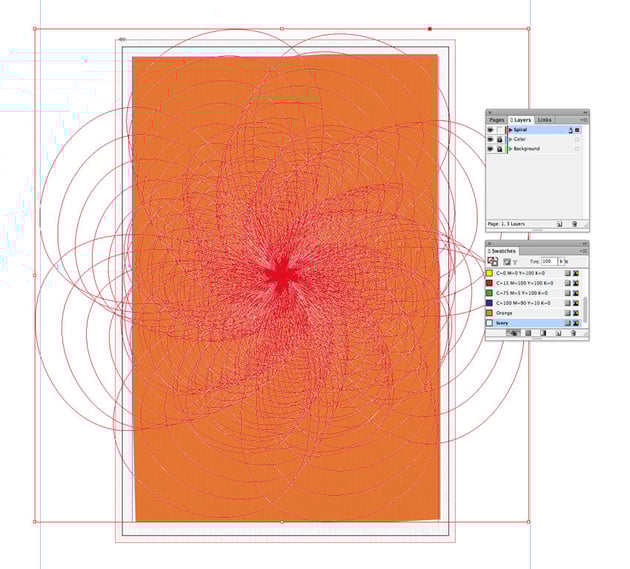
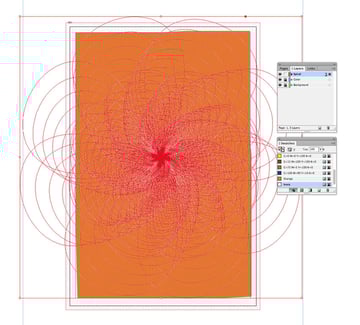
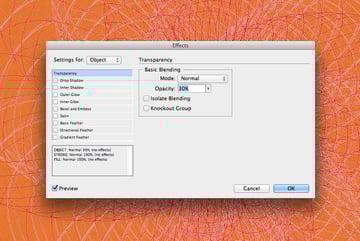
Go to Object > Effects > Transparency and bring the Opacity down to 30%.


3. How to add a falling man to your layout
Step 1
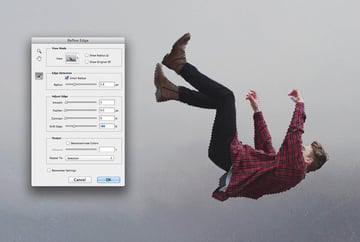
File > Save your poster layout for now, and open up your falling man photo in Adobe Photoshop. We want to edit this to make the photo feel more silhouetted, and remove the background too.
Duplicate the Background layer to preserve a copy, and work on the layer above. Use the Lasso Tool (L) to trace roughly around the outline of the figure.


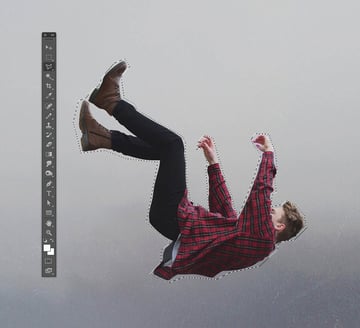
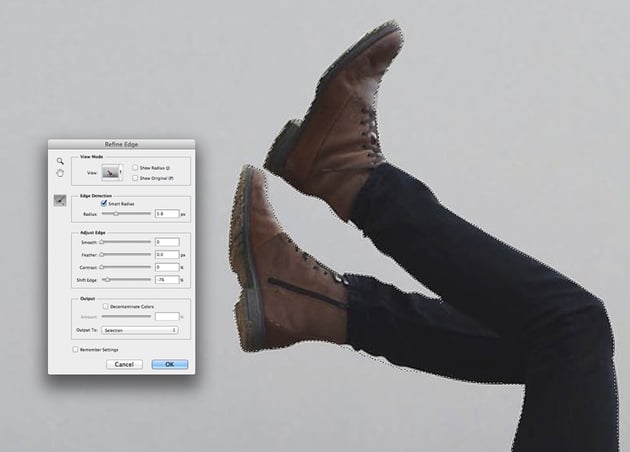
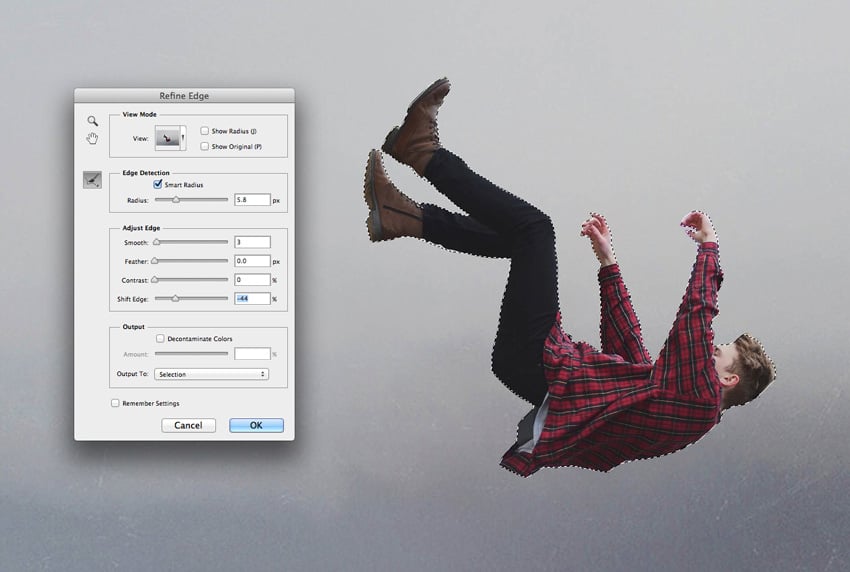
Click on Refine Edge in the top Controls panel. Check Smart Radius and adjust the Radius and Shift Edge sliders until the selection is as tight as possible.

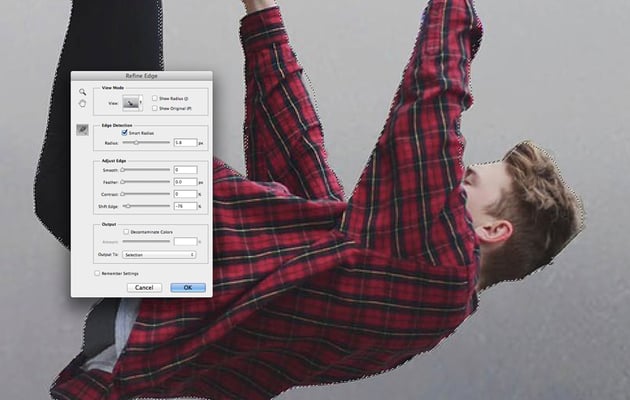

Use the Refine Radius Tool/Erase Refinements Tool (E) to refine your selection further, making it lie as close to the outline of the figure as possible.


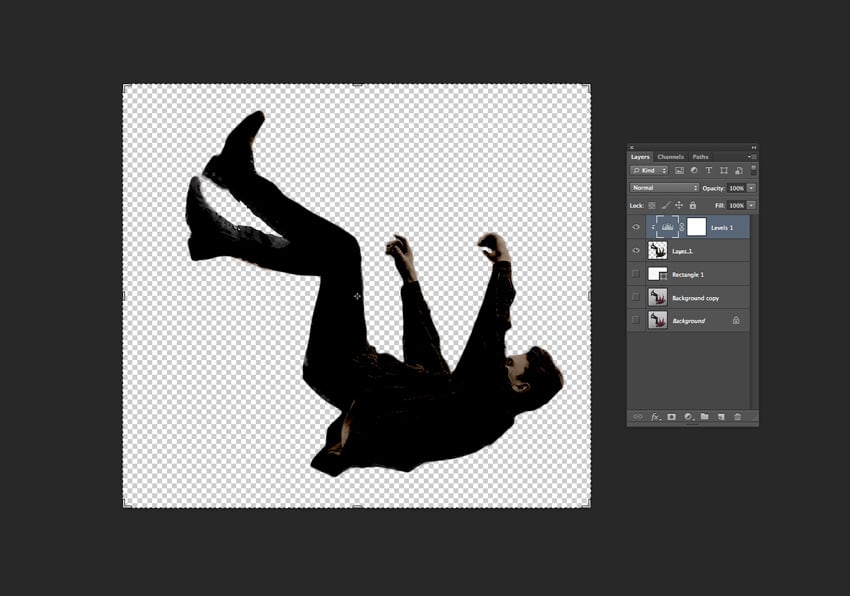
Step 2
Click OK to exit the Refine Edge window. Then Edit > Copy, Edit > Paste the selection onto a new layer, before switching off the visibility of the layers below.

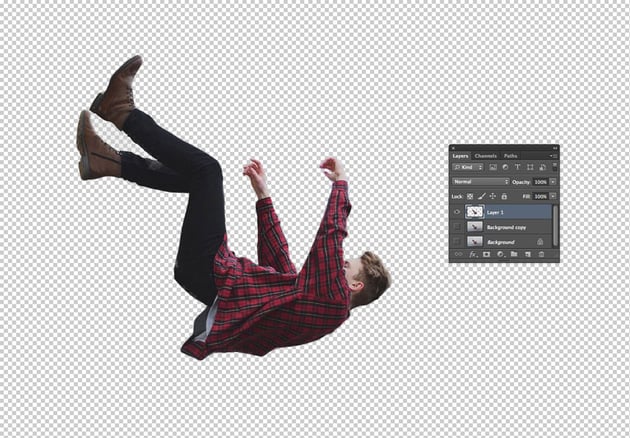

To check how clean the edge of your figure is, you might find it helpful to create a pale rectangle below the figure layer. You can then use the Magic Wand Tool (W) to isolate and delete any elements still sitting outside the edge of the figure.
Choose Levels from the Adjustment menu at the bottom of the Layers panel. Pull the two left-hand sliders across, darkening the image.


Step 3
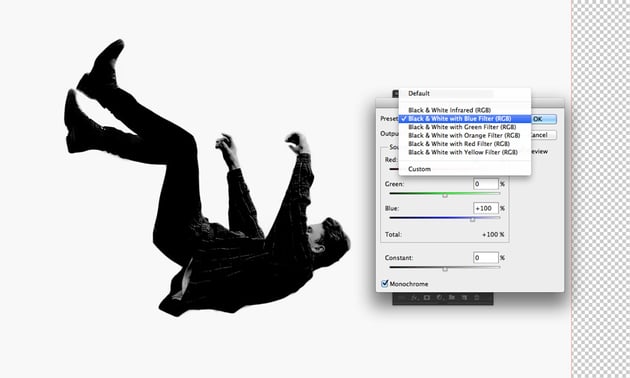
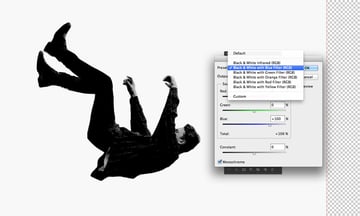
With the image layer selected, go to Image > Adjustments > Channel Mixer. From the Preset menu at the top, choose Black & White with Blue Filter (RGB), and check the Monochrome box at the bottom-left corner of the window. Click OK to exit.
This will remove a lot of the detail of the man’s checked shirt, creating a more silhouetted appearance.

Step 4
Go to Image > Adjustments > Photo Filter. Choose Sepia from the Filter menu, and set the Density to 60%. Click OK to exit the window.

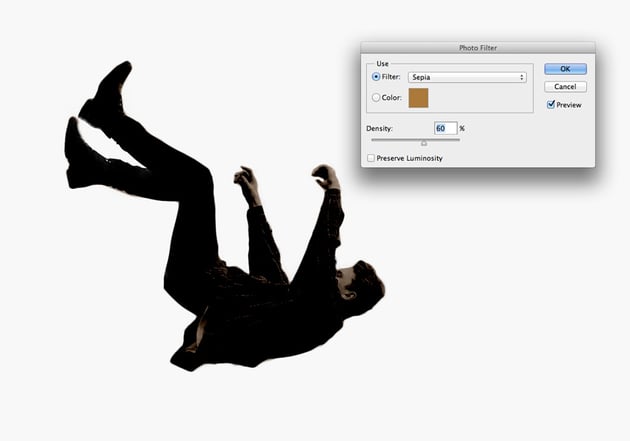

Switch off the visibility of any layers sitting below the figure layer and go to File > Save As, saving the image as a Photoshop (.psd) file.


Step 5
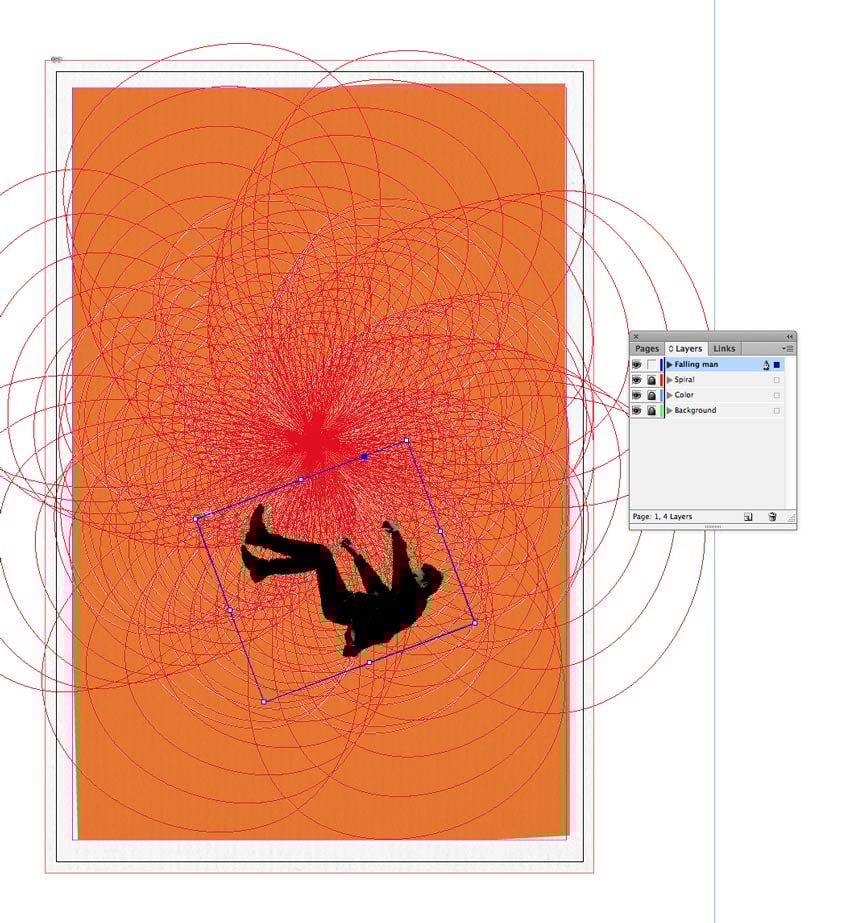
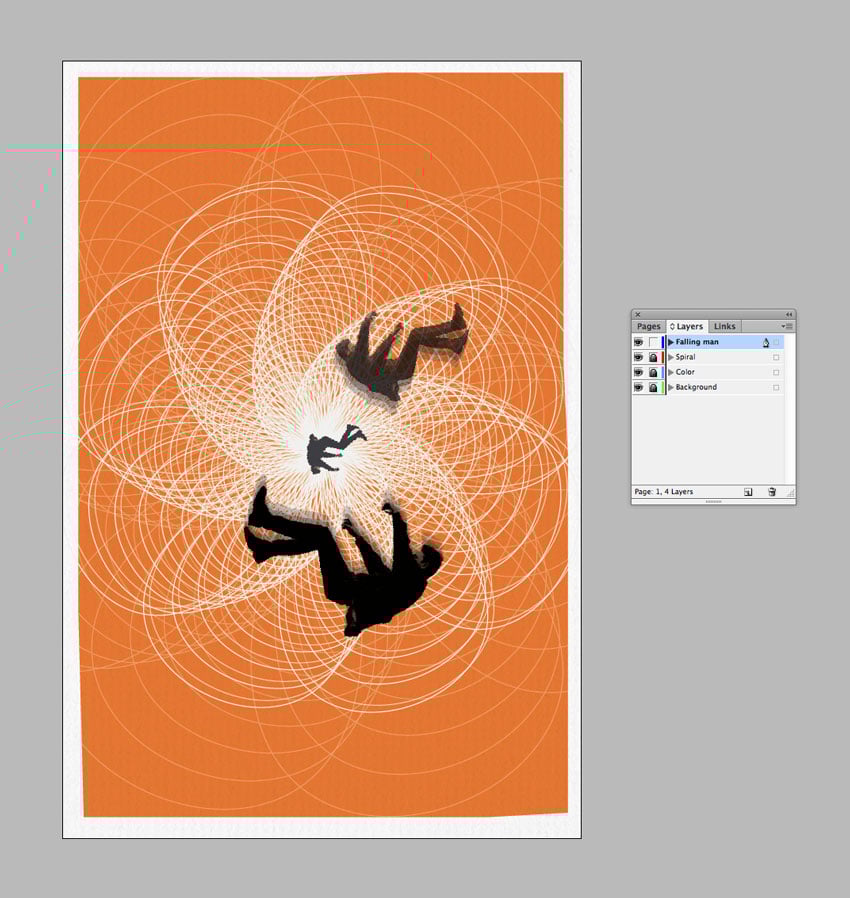
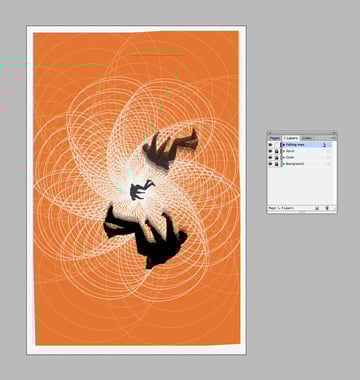
Head back to your InDesign document and lock the Spiral layer. Create a new layer above, naming it Falling man.
Create a new image frame using the Rectangle Frame Tool (F) and File > Place the falling man Photoshop file into the frame. Scale it to roughly the size shown below and rotate it slightly, curving the man’s shape around the edge of the inner spirals.

Step 6
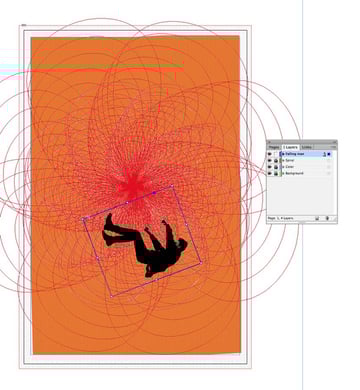
Edit > Copy, Edit > Paste in Place the image frame, and use the arrow keys to shift the copy a little upwards. With the copy selected, go to Object > Effects > Transparency. Set the Mode to Multiply and bring the Opacity down to 20%.
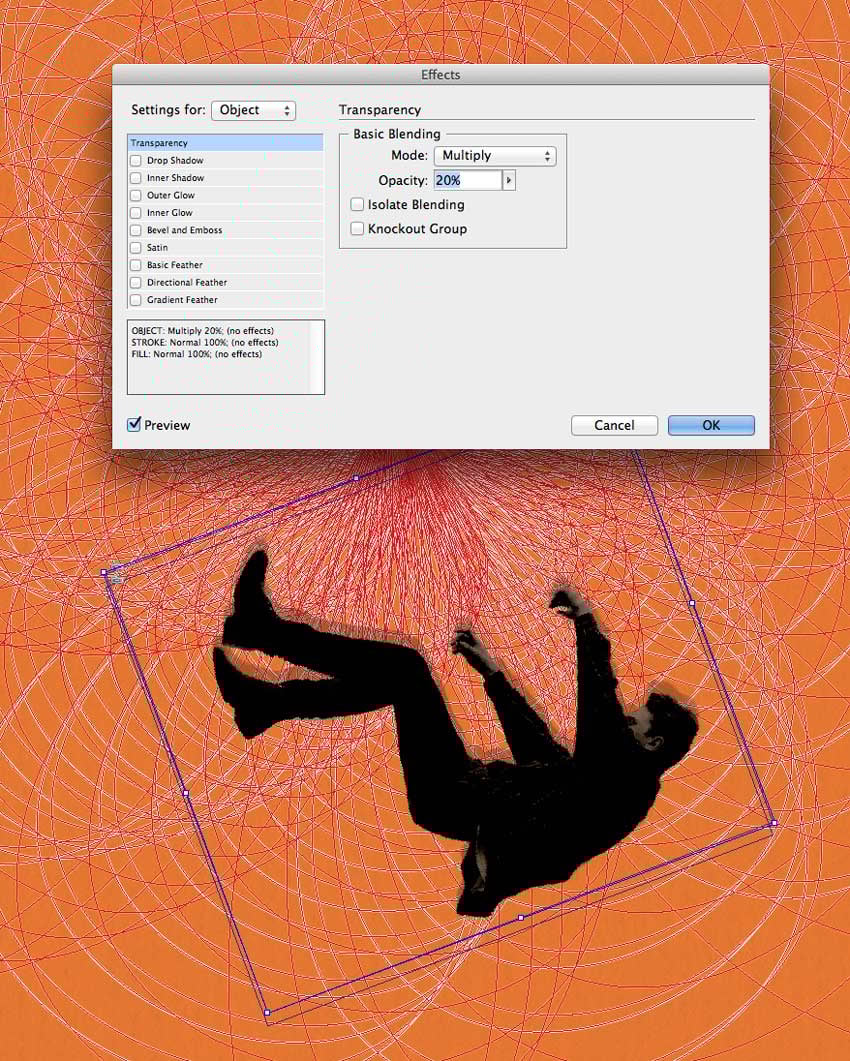
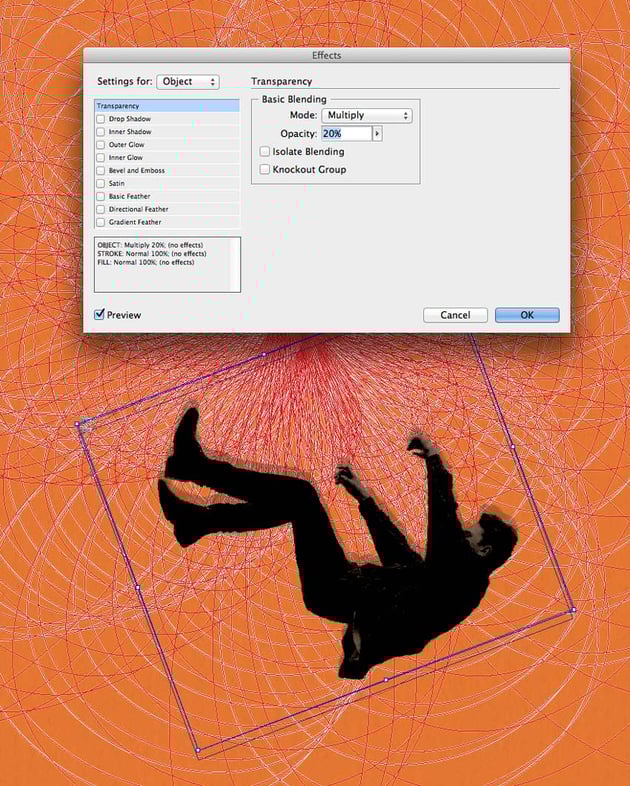
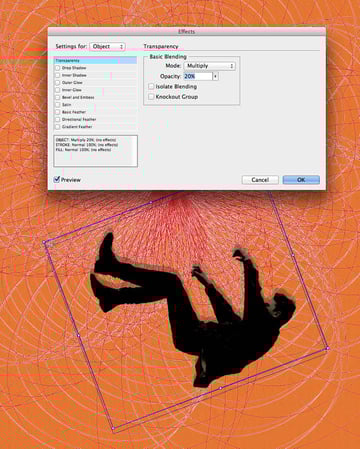
Edit > Copy this second image, and then Edit > Paste in Place. Move this copy slightly upwards, as before. Then go to Object > Effects > Transparency and bring the Opacity down to 15%.
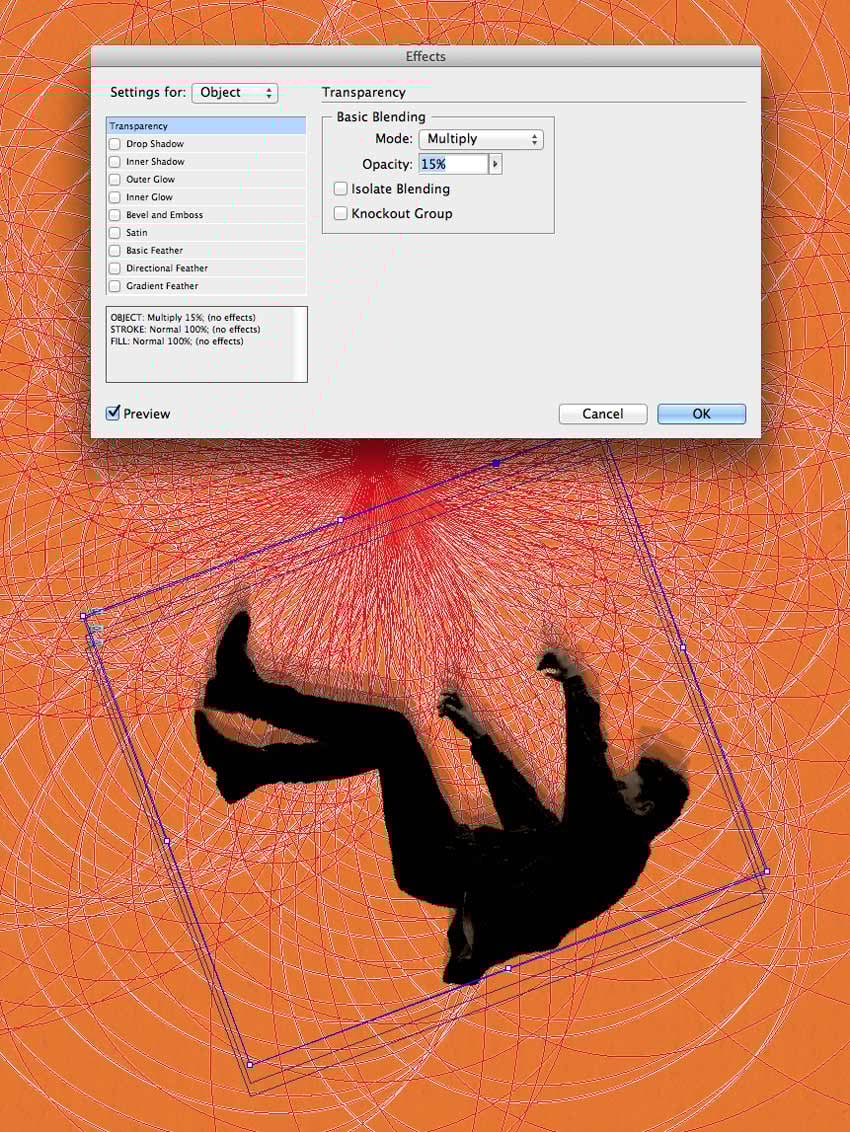


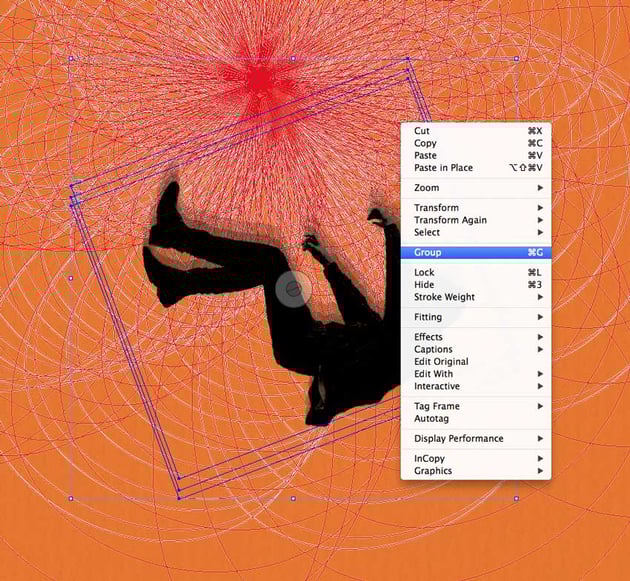
Select all three copies of the image and Right-Click > Group.


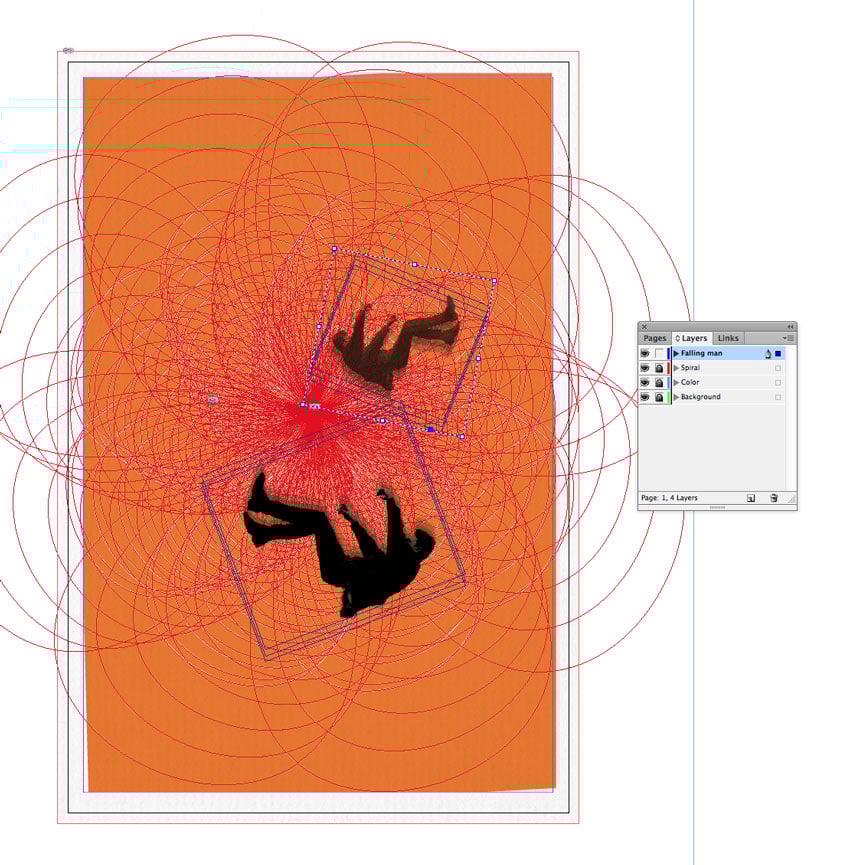
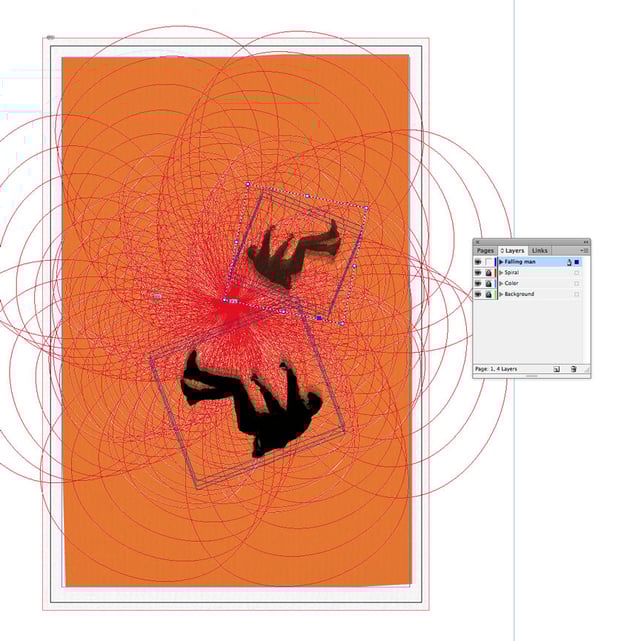
Step 7
Select the group and Edit > Copy, Edit > Paste. Reduce the size of this new group, using Shift to scale, and position it to the top-right of the first group. Rotate it to give a sense of movement around the spiral.

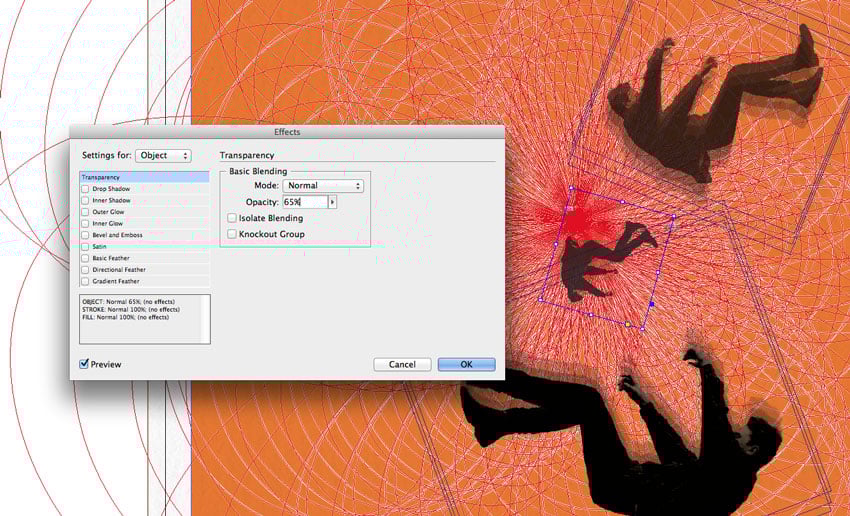
Create a small image frame in the center of the spiral, and File > Place the falling man PSD file. Rotate it a little and then go to Object > Effects > Transparency, bringing the Opacity down to 65%.


4. How to add Hitchcock-esque typography to your layout
Step 1
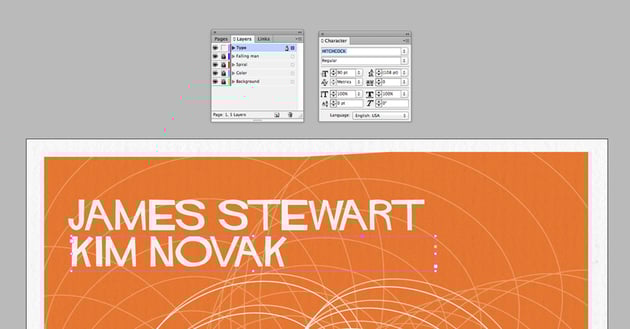
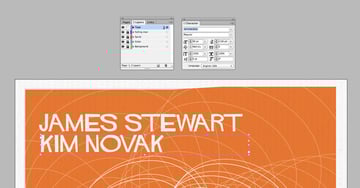
Lock the Falling man layer and create a new layer above, Type.
Take the Type Tool (T) and drag to create a new text frame at the top-left of the poster. Type in ‘JAMES STEWART’ and from either the Character panel (Window > Type & Tables > Character) or the top Controls panel, set the Font to Hitchcock, Size 90 pt. From the Swatches panel, set the Font Color to Ivory.
Select the text frame and Edit > Copy, Edit > Paste below the first. Edit the text to read ‘KIM NOVAK’.

Step 2
Create a few more smaller text frames above and below for supporting text. Set the Font to Hitchcock and the Font Color to [Black].


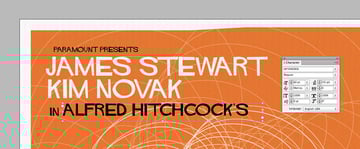
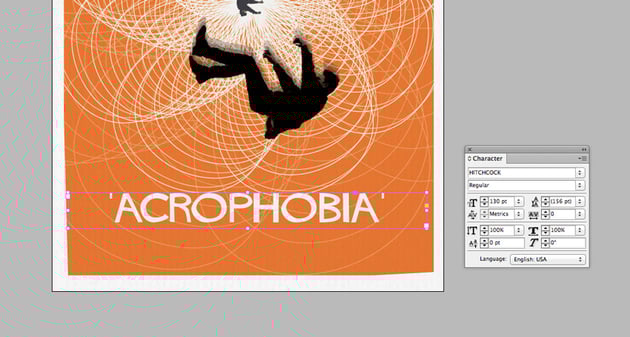
Create a large text frame at the bottom of the layout, typing in the film title and setting the Font to Hitchcock, Size 130 pt and text to Align Center.


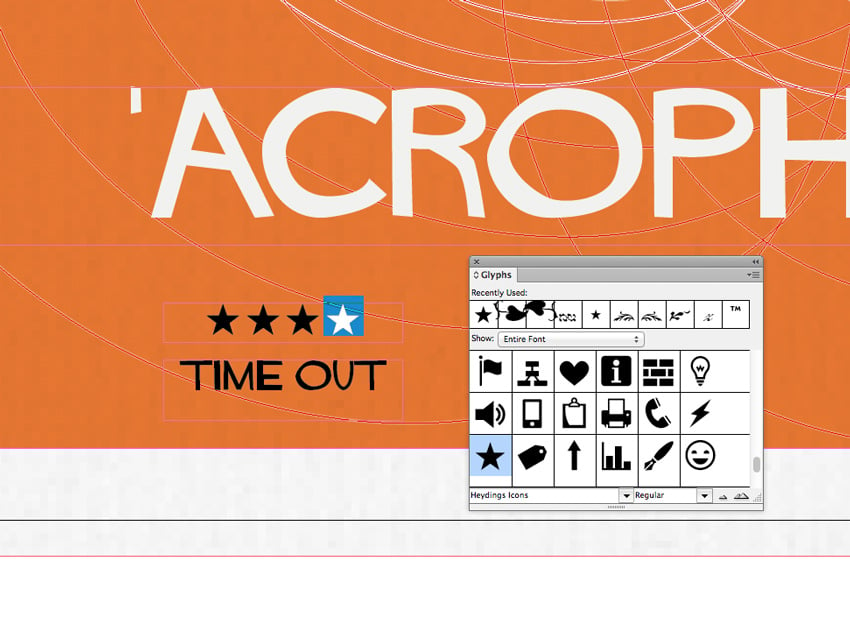
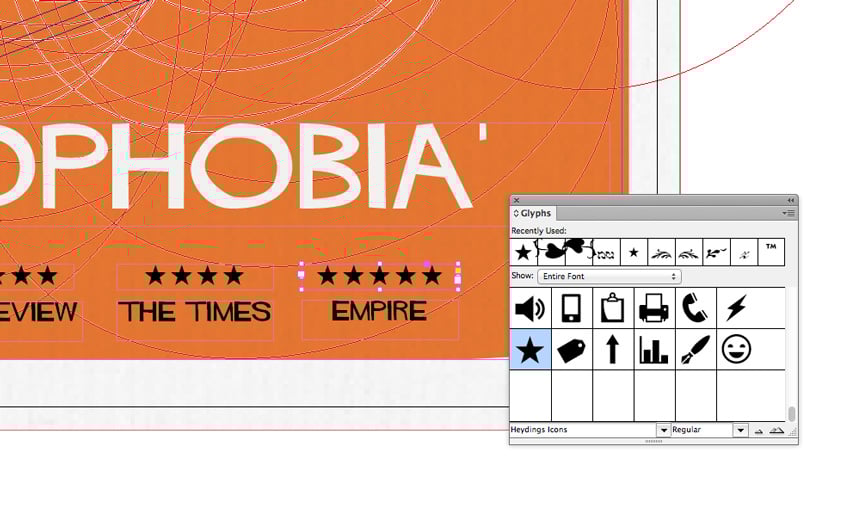
Step 3
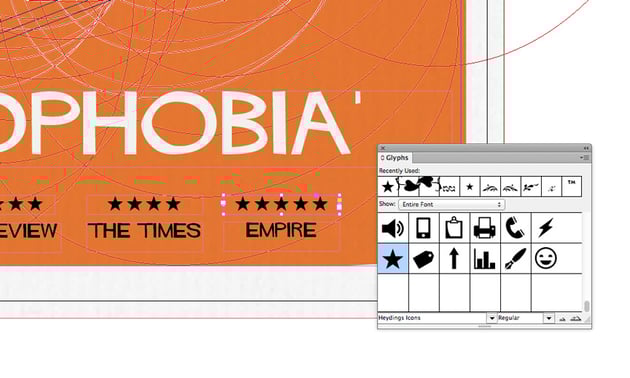
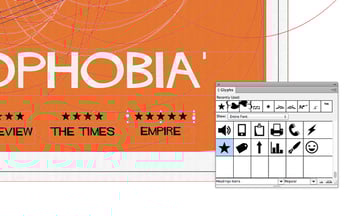
You can add reviews to your poster by placing them below the movie title. You can either insert a star graphic or use a font like Heydings Common Icons. Go to Window > Type & Tables > Glyphs, and double-click on a star glyph to insert it.


5. How to export your design
Your rendition of this iconic Saul Bass design is finished—great job! If you want to get your poster printed professionally, read on to find out how best to export it.
Step 1
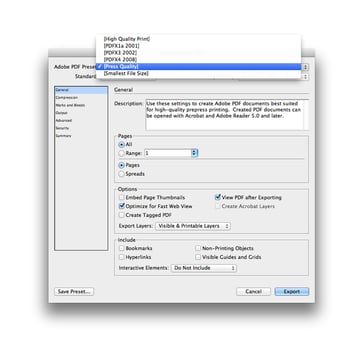
First up, check your poster for spelling errors and then File > Save it. Go to File > Export and choose Adobe PDF (Print) from the Format drop-down menu.
In the Export window that opens, choose [Press Quality] from the Adobe PDF Preset menu at the top.


Step 2
Click on Marks and Bleeds in the window’s left-hand menu. Check All Printer’s Marks and Use Document Bleed Settings.

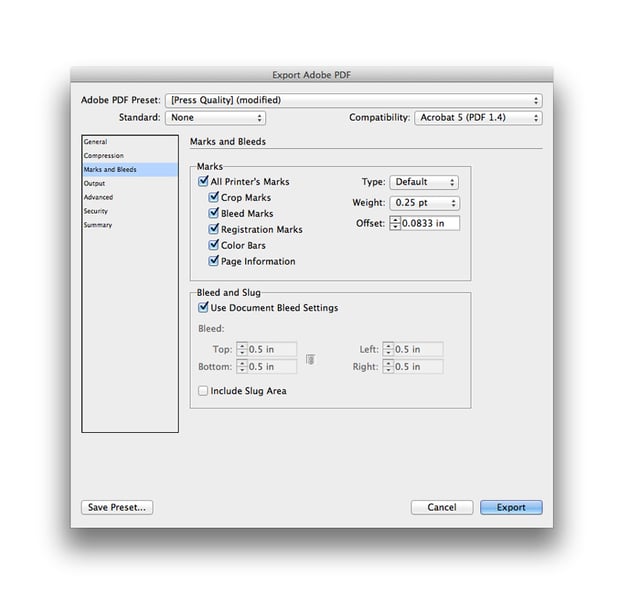
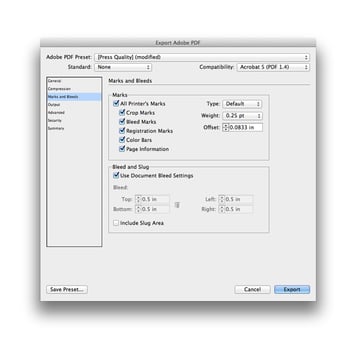
Click Export to create your print-ready file.

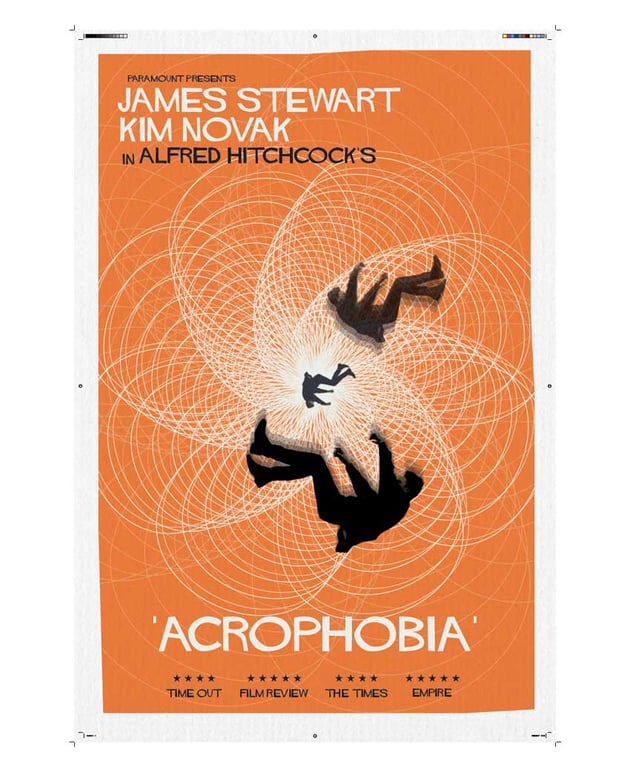
Here’s your finished poster!
Your own version of the Vertigo by Hitchcock poster is finished, and it’s looking brilliant—awesome work! As well as creating a cool vintage poster, you’ve also picked up some handy print design skills over the course of this tutorial, such as:
- How to prepare a poster template in InDesign.
- How to import vector graphics into your layout.
- How to edit photos for a print design.
- How to incorporate professional-standard typography into your design.
- How to export your hard work ready for professional printing.
On the hunt for more vintage elements to use in your designs? You can find more vintage backgrounds and textures and fonts for posters over on Envato.