
Remember back to when we had to spend a lot of time optimizing our project’s assets (images, CSS, etc..)? Well today, users have a much faster Internet connection and it appears that we can afford to use bigger images or bigger flash files with a lot of video and pictures inside. However, with the rise of mobile development, we are again back in that same situation. It is extremely important to create well optimized sites, so that we have faster applications, which download less content and respond immediately.
Images
Serve the Proper Size
Often times we use the same images for different parts of our websites. For example, in an online shop, all the products have an overview picture. Let’s say that we have three pages where we have to show those images – one page for listing the products, another page for the product’s details, and a third page which shows only the picture in its original size.
So, we need three different image sizes and if we use the same file for all three different places, then the browser will download the full size image even for the listing page, where we actually may only need a 200×200 picture. If the original file is around 1MB and we have ten products per page, then the user would download 10MB. That’s not a very good idea. If you can, try to generate different images for the different parts of your site, this will save a lot of KBs for your users. It is a good idea to have in mind the current screen resolution. For example, if somebody opens your site on their iPhone, there is no need to serve the giant header image, which you normally use. By using CSS media queries you are able to send an image with a smaller size:
@media only screen
and (min-device-width : 320px)
and (max-device-width : 480px) {
    .header {
        background-image: url(../images/background_400x200.jpg);
    }
}
Compression
Sending an image with just the proper dimensions is not always enough. Some file formats can be compressed a lot without losing their quality. There are many programs which can help you out. For example, Photoshop provides a nice feature called Save for Web and Devices:
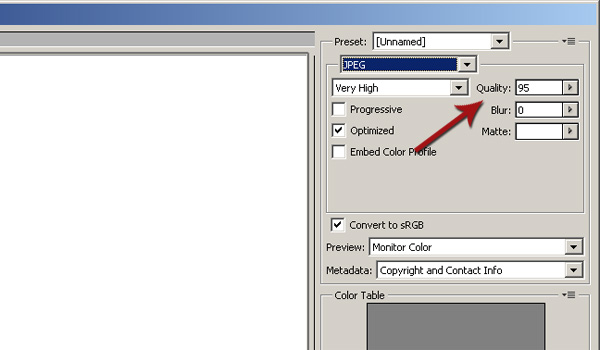
There are loads of options in this dialog, but one of the most important ones is Quality. Setting it to something like 80% could decrease the file size considerably.
Of course, you can use code to compress the files, but I personally prefer Photoshop and I’m using it whenever possible. Here is a simple example written in PHP:
function compressImage($source, $destination, $quality) {
    $info = getimagesize($source);
    switch($info['mime']) {
        case "image/jpeg":
            $image = imagecreatefromjpeg($source);
            imagejpeg($image, $destination, $quality);
        break;
        case "image/gif":
            $image = imagecreatefromgif($source);
            imagegif($image, $destination, $quality);
        break;
        case "image/png":
            $image = imagecreatefrompng($source);
            imagepng($image, $destination, $quality);
        break;
    }
}
compressImage('source.png', 'destination.png', 85);
Sprites
One of the things that you can do to increase the performance of your application is to reduce the number of requests to the server. So, every new image means a new request. It’s a good idea to combine your images into one. The resulting image is called a sprite and with changing the background-positionCSS style, you are able to show only the portion of the image that you need. For example, Twitter Bootstrap uses sprites for its internal icons:
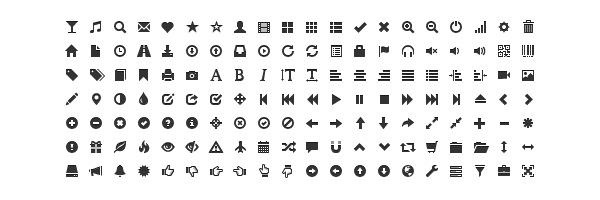
Then in the CSS, you can do something like this, to show whichever portion of the sprite you’d like:
.icon-edit {
    background-image: url("../img/glyphicons-halflings-white.png");
    background-position: -96px -72px;
}
Caching
The browser’s caching mechanism is your friend. Yes, sometimes during development it could lead to some very funny situations, but it really helps to improve your site’s performance. Every browser caches content like images, JavaScript or CSS. There are several ways to control the caching and I suggest that you check out this great article for a detailed review. In general, you can control the process by setting headers, like so:
$expire = 60 * 60 * 24 * 1;// seconds, minutes, hours, days
header('Cache-Control: maxage='.$expire);
header('Expires: '.gmdate('D, d M Y H:i:s', time() + $expire).' GMT');
header('Last-Modified: '.gmdate('D, d M Y H:i:s').' GMT');
Prefetching
HTML5 is moving forward every day. There is a nice feature called prefetching which tells the browser that you will need some resource in the near future and it should be downloaded now, in advance. For example:
<link rel="prefetch" href="/images/background.jpg">
Data URI Scheme / Inline Images
A couple of years ago I had to develop a simple web page, which was supposed to be just one HTML file. Of course there were several images, which I had to include. Data URI schemes helped me to solve the problem. The idea is to convert your images into a base64 encoded string and place it in the src attribute of the img tag. For example:
<img src="data:image/png;base64,iVBORw0KGgoAAAANSUhEUgAAAAUAAAAFCAYAAACNbyblAAAAHElEQVQI12P4//8/w38GIAXDIBKE0DHxgljNBAAO9TXL0Y4OHwAAAABJRU5ErkJggg==" alt="Red dot">
By using this approach, your image is actually in the HTML and you save one HTTP request. Of course, if you have a big image the string will be really long. Here is a simple PHP script which converts images to base64 strings: |
$picture = fread($fp,filesize($file));
fclose($fp);
// base64 encode the binary data, then break it
// into chunks according to RFC 2045 semantics
$base64 = base64_encode($picture);
$tag = '<img src="data:image/jpg;base64,'.$base64.'" alt="" />';
$css = 'url(data:image/jpg;base64,'.str_replace("\n", "", $base64).'); ';
You may find this useful in some cases, but keep in mind that it doesn’t work very well in IE.
CSS
I like to think that writing CSS is like writing code. You still have to organize your styles, to define different blocks and the relationship between them. That’s why I think CSS management is really important. Every part of the application should have its own styles and they should be nicely separated. Keeping everything in different files provides good organization, but also comes with its own problems.
We all know that the usage of the @import statement is not a very good idea. That’s because every new@import means a new request to the server. And if you have, for example, 20 different .css files it means that the browser will make 20 requests. And the browser doesn’t render/show the page before downloading all the styles. If some of your .css files are missing or are very large, you will get a big delay before seeing something on the screen.
Use CSS Preprocessors
CSS preprocessors solve all the problems above. You still divide your styles into different files, but at the end, the preprocessor compiles everything into a single .css file. They actually offer a bunch of cool features like variables, nested blocks, mixins and inheritance. The code still looks like CSS, but it is well formatted/structured. There are few popular preprocessors that are worth checking – Sass, LESS, andStylus. Here is a simple example written in LESS:
.position(@top: 0, @left: 0) {
    position: absolute;
    top: @top;
    left: @left;
    text-align: left;
    font-size: 24px;
}
.header {
    .position(20px, 30px);
    .tips {
        .position(10px, -20px);
    }
    .logo {
        .position(10px, 20px);
    }
}
will produce
.header {
    position: absolute;
    top: 20px;
    left: 30px;
    text-align: left;
    font-size: 24px;
}
.header .tips {
    position: absolute;
    top: 10px;
    left: -20px;
    text-align: left;
    font-size: 24px;
}
.header .logo {
    position: absolute;
    top: 10px;
    left: 20px;
    text-align: left;
    font-size: 24px;
}
Or, for example if you have styling for a button and want to produce just the same button but with another color for the text, you could do this:
.button {
    border: solid 1px #000;
    padding: 10px;
    background: #9f0;
    color: #0029FF;
}
.active-button {
    .button();
    color: #FFF;
}
Efficient CSS
Normally, most developers don’t think about efficient CSS. The efficiency of the CSS reflects on the page’s rendering and if your styles are inefficient your application will be rendered slowly by browsers. An interesting fact is that browsers parse the CSS selectors from right to left. Which means that the following code:
body ul li a {
    color: #F000;
    text-decoration: none;
}
… is not efficient at all. That’s because the engine will get all the <a> tags and will have to evaluate each of the parent elements to finally collect the needed style. You should also know that in terms of efficiency, the selectors are kind of ranked in the following order: ID, class, tag, and universal. This means that an element with an id set will be rendered faster than an element with just a tag selector. Of course, there is no sense to add ids on all the elements in the DOM tree, but you should definitely check your code and improve it where possible. For example, if you have something like this:
ul #navigation li {
    background: #ff0232;
}
You should remove the ul part, because you have only one #navigation element on the page. Or in the following selector:
body .content p {
    font-size: 20px;
}
It is clear that the .content element is a child of the body tag. All the elements are actually children of this element.
Here are two helpful links on the this topic: developers.google.com and css-tricks.com
File Size
As we mentioned above, it is good to have as little code as possible, because the browser doesn’t render the page before downloading the CSS. Here are few tips to reduce the file size.
Combine similar styles:
.header {
    font-size: 24px;
}
.content {
    font-size: 24px;
}
… transforms to:
.header, .content {
    font-size: 24px;
}
Use shorthands. Instead of:
.header {
    background-color: #999999;
    background-image: url(../images/header.jpg);
    background-position: top right;
}
Write it in this fashion:
.header {
    background: #999 url(../images/header.jpg) top right;
}
Minify your CSS code. You can do this by using a tool which generally removes all the spaces and new lines. For example CSSOptimiser or Minifycss. It’s a common practice to use such instruments on the server side of the application, i.e. something written in the language of the back-end. Normally these components minify your code and serve it to the user.
Put Your CSS Files in the <head> Tag
It is good practice to include your .css files in the head tag, that way the browser will download it first.
JavaScript
Reduce the Number of HTTP Requests
Same as with your CSS – it’s good to reduce the number of requests being to sent to the server. In most cases, the loading of the JavaScript files will not stop the rendering of the page, but it will make some portions of the page nonfunctional.
Minify Your Code
There are a bunch of libraries that do JavaScript minification. It’s something that will reduce the files’ size, but keep in mind that in a development environment it is good to keep your code clean. Most of these tools change the name of your variables and converts everything into a one-line string, which makes the debugging process almost impossible.
CommonJS, AMD, RequireJS – Give It a Try
JavaScript natively doesn’t have a mechanism for managing modules. So, all those things are invented to solve this problem. They provide an API which you can use to define and use modules. For example, here is an example taken from http://requirejs.org/:
<!DOCTYPE html>
<html>
    <head>
        <title>My Sample Project</title>
        <!-- data-main attribute tells require.js to load
             scripts/main.js after require.js loads. -->
        <script data-main="scripts/main" src="scripts/require.js"></script>
    </head>
    <body>
        <h1>My Sample Project</h1>
    </body>
</html>
Inside of main.js, you can use require() to load any other scripts you need:
require(["helper/util"], function(util) {
    //This function is called when scripts/helper/util.js is loaded.
    //If util.js calls define(), then this function is not fired until
    //util's dependencies have loaded, and the util argument will hold
    //the module value for "helper/util".
});
Use Namespaces
If we’re talking about code organization then we can’t skip the part about namespaces. Natively, there is no such feature in JavaScript, but you can still achieve the same thing with a little code. For example, if you want to build your own MVC framework, you will probably have the following classes:
var model = function() { ... };
var view = function() { ... };
var controller = function() { ... };
If you leave things as they are in the above code, then they become public and there is a greater chance of producing conflicts with other libraries in your project. So, grouping them in an independent object (namespace) makes the framework protected:
var MyAwesomeFramework = {
    model: function() { ... },
    view: function() { ... },
    controller: function() { ... }
}
Follow Design Patterns
There is no need to re-invent the wheel. JavasScript became really popular and there are a lot of good practices out there. Design patterns are reusable solutions for common problems in programming. Following some of them will help you to build a good application. However, if I try to cover them all here, I’d have to write a book, so here are just a few of them:
Constructor Pattern
Use this pattern to create an instance of a specific object type. Here’s an example:
var Class = function(param1, param2) {
    this.var1 = param1;
    this.var2 = param2;
}
Class.prototype = {
    method:function() {
        alert(this.var1 + "/" + this.var2);
    }
};
Or you may try this:
function Class(param1, param2) {
    this.var1 = param1;
    this.var2 = param2;
    this.method = function() {
        alert(param1 + "/" + param2);
    };
};

var instance = new Class("value1", "value2");
Module Pattern
The module pattern gives us the ability to create private and public methods. For example, in the code below, the variable _index and the method privateMethod are private. increment and getIndex are public.
var Module = (function() {
    var _index = 0;
    var privateMethod = function() {
        return _index * 10;
    }
    return {
        increment: function() {
            _index += 1;
        },
        getIndex: function() {
            return _index;
        }
    };
})();
Observer Pattern
Wherever you see subscription or dispatching of events, you’ll likely see this pattern. There are observers which are interested in something related to a specific object. Once the action occurs, the object notifies the observers. The example below shows how we can add an observer to the Users object:
var Users = {
    list: [],
    listeners: {},
    add: function(name) {
        this.list.push({name: name});
        this.dispatch("user-added");
    },
    on: function(eventName, listener) {
        if(!this.listeners[eventName]) this.listeners[eventName] = [];
        this.listeners[eventName].push(listener);
    },
    dispatch: function(eventName) {
        if(this.listeners[eventName]) {
            for(var i=0; i<this.listeners[eventName].length; i++) {
                this.listeners[eventName][i](this);
            }
        }
    },
    numOfAddedUsers: function() {
        return this.list.length;
    }
}

Users.on("user-added", function() {
    alert(Users.numOfAddedUsers());
});

Users.add("Krasimir");
Users.add("Tsonev");
Function Chaining Pattern
This pattern is a nice way to organize the public interface of your module. It saves time and improves readability:
var User = {
    profile: {},
    name: function(value) {
        this.profile.name = value;
        return this;
    },
    job: function(value) {
        this.profile.job = value;
        return this;
    },
    getProfile: function() {
        return this.profile;
    }
};

var profile = User.name("Krasimir Tsonev").job("web developer").getProfile();
console.log(profile);
I strongly recommend checking out this book by Addy Osmani. It’s one of the best resources that you could find about design patterns in JavaScript.
Assets-Pack
Now that we’re nearing the end of this article, I want to share a few thoughts on CSS and JavaScript code management on the server. It’s a very common technique to add merging, minification, and compiling into the logic of the application. Often there is some kind of caching mechanism, but all things are happening during runtime. So you probably have some code logic, which handles the request for .js or .css files and serves the proper content. Behind this process is the compilation, minification or whatever you are using to pack your assets.
In my latest projects I used a tool called assets-pack. It’s really helpful and I’ll explain in detail what exactly it does, but the more interesting part is how I used it. This library is meant to be used only in development mode, it’s not something that stays in your codebase and it’s not something that you should deploy on your production server.
The idea is to use the packer only while you are working on the assets (CSS, JS). It actually watches for changes in specific directories and compiles/packs the code into a single file. By using this approach you don’t need to think about the minification or compilation. All you have to do is just send the compiled static file to the user. This increases the performance of your application, because it only serves static files and of course makes things simpler. You don’t need to set anything on your server or implement unnecessary logic.
Here is how you can setup and use assets-pack.
Installation
This tool is a Nodejs module, so you should have Node already installed. If you don’t, just go tonodejs.org/download and grab the package for your operating system. After that:
npm install -g assetspack
Usage
The module works with JSON configuration. When it is used via the command line, you should place your settings in a .json file.
Via the Command Line
Create an assets.json file and execute the following command in the same directory:
assetspack
If your configuration file uses another name or is in another directory, use:
assetspack --config [path to json file]
In Code
var AssetsPack = require("assetspack");
var config = [
    {
        type: "css",
        watch: ["css/src"],
        output: "tests/packed/styles.css",
        minify: true,
        exclude: ["custom.css"]
    }
];
var pack = new AssetsPack(config, function() {
    console.log("AssetsPack is watching");
});
pack.onPack(function() {
    console.log("AssetsPack did the job");
});
Configuration
The configuration should be a valid JSON file/object. It’s just an array of objects:
[
    (asset object),
    (asset object),
    (asset object),
    ...
]
Asset Object
The basic structure of the asset object is like so:
{
    type: (file type /string, could be css, js or less for example),
    watch: (directory or directories for watching /string or array of strings/),
    pack: (directory or directories for packing /string or array of strings/. ),
    output: (path to output file /string/),
    minify: /boolean/,
    exclude: (array of file names)
}
The pack property is not mandatory. If you miss it, then its value is equal to watch. minify by default is false.
Here are a few examples:
Packing CSS
{
    type: "css",
    watch: ["tests/data/css", "tests/data/css2"],
    pack: ["tests/data/css", "tests/data/css2"],
    output: "tests/packed/styles.css",
    minify: true,
    exclude: ["header.css"]
}
Packing JavaScript
{
    type: "js",
    watch: "tests/data/js",
    pack: ["tests/data/js"],
    output: "tests/packed/scripts.js",
    minify: true,
    exclude: ["A.js"]
}
Packing .less Files
The packing of .less files is a little bit different. The pack property is mandatory and it is basically your entry point. You should import all the other .less files there. The exclude property is not available here.
{
    type: "less",
    watch: ["tests/data/less"],
    pack: "tests/data/less/index.less",
    output: "tests/packed/styles-less.css",
    minify: true
}
If you find any problems, please check the tests/packing-less.spec.js of the repository in GitHub.
Packing Other File Formats
assets-pack works with any file format. For example, we can combine HTML templates into a single file by doing something like this:
{
    type: "html",
    watch: ["tests/data/tpl"],
    output: "tests/packed/template.html",
    exclude: ["admin.html"]
}
The only one thing that you should know here is that there is no minification.
Conclusion
As front-end web developers, we should try to deliver the best performance possible for our users. The tips above aren’t supposed to cover all aspects of asset organization and performance, but they are the ones I have dealt with personally during my daily work. Please feel free to share some of your tips below, in the comments.