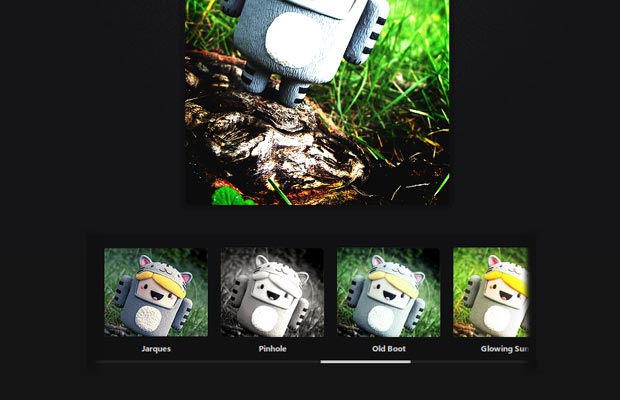
In this tutorial, we are going to make a simple web app that allows you to drag a photo from your computer into the browser window, and apply instagram-like filters on it. For this purpose we are going to use a number of JavaScript libraries and plugins:
- Caman.js – this is a powerful canvas manipulation library that allows you to apply various effects and filters on an image. It comes with 18 preset filters which we will be using in this example (you can create more if you wish);
- Filereader.js – this is a lightweight wrapper around the HTML5 drag/drop events that makes them much easier to work with. It also adds a method to jQuery, so you can bind the events to a specific element;
- jQuery Mousewheel – I am using this plugin to scroll the filter container;
- In addition, we are using the latest version jQuery at the time of writing.
Also a big thanks goes to Jenn and Tony Bot for their photo.
The HTML
The first step is to write the HTML of the example:
index.html
<!DOCTYPE html><html>
<head>
<meta charset="utf-8"/>
<title>Instagram-like Filters with jQuery | Tutorialzine Demo</title>
<link href="assets/css/style.css" rel="stylesheet"/>
<!-- Include the Yanone Kaffeesatz font -->
<link href="http://fonts.googleapis.com/css?family=Yanone+Kaffeesatz:400,200" rel="stylesheet"/>
</head>
<body>
<h1>Instagram <b>Filters</b></h1>
<div id="photo">
</div>
<div id="filterContainer">
	<ul id="filters">
		<li><a href="#" id="normal">Normal</a></li>
		<li><a href="#" id="vintage">Vintage</a></li>
		<li><a href="#" id="lomo">Lomo</a></li>
		<li><a href="#" id="clarity">Clarity</a></li>
		<li><a href="#" id="sinCity">Sin City</a></li>
		<!-- 14 More filters go here -->
	</ul>
</div>
<!-- Libraries -->
<script src="https://ajax.googleapis.com/ajax/libs/jquery/1.9.0/jquery.min.js"></script>
<script src="assets/js/filereader.min.js"></script>
<script src="assets/js/caman.full.js"></script>
<script src="assets/js/jquery.mousewheel.min.js"></script>
<script src="assets/js/script.js"></script>
</body>
</html>
In addition to the libraries mentioned in the intro, I am also including the script.js file which hosts the code that we will be writing in a few moments. In the head section, I am including the Yanone Kaffeesatz font from Google Web Fonts.
The JavaScript/jQuery
To make the app work, we will have to do the following:
- Accept an image on drag and drop;
- Create a new canvas element (original), with a max sizeof 500x500px (customizable) and keep it in memory;
- Listen for clicks on the filters. When one is selected:
- Create a clone of the original canvas;
- Remove any canvas elements currently on the page;
- Append the clone to the #photo div;
- If the selected filter is different from the “Normal” one, call the Caman library. Otherwise do nothing;
- Mark the selected filter with the “active” class.
- Trigger the “Normal” filter.
Now that we know what has to be done, let’s start coding!
assets/js/script.js
$(function () {
var maxWidth = 500,
maxHeight = 500,
photo = $('#photo'),
originalCanvas = null,
filters = $('#filters li a'),
filterContainer = $('#filterContainer'); // Use the fileReader plugin to listen for
// file drag and drop on the photo div:
photo.fileReaderJS({
on: {
load: function (e, file) { // An image has been dropped.
var img = $('![]() ').appendTo(photo),
imgWidth, newWidth, imgHeight, newHeight, ratio; // Remove canvas elements left on the page
// from previous image drag/drops.
photo.find('canvas').remove();
filters.removeClass('active'); // When the image is loaded successfully,
// we can find out its width/height:
img.load(function () {
imgWidth = this.width;
imgHeight = this.height; // Calculate the new image dimensions, so they fit
// inside the maxWidth x maxHeight bounding box
if (imgWidth >= maxWidth || imgHeight >= maxHeight) { // The image is too large,
// resize it to fit a 500x500 square!
if (imgWidth > imgHeight) { // Wide
ratio = imgWidth / maxWidth;
newWidth = maxWidth;
newHeight = imgHeight / ratio;
} else { // Tall or square
ratio = imgHeight / maxHeight;
newHeight = maxHeight;
newWidth = imgWidth / ratio;
}
} else {
newHeight = imgHeight;
newWidth = imgWidth;
} // Create the original canvas.
originalCanvas = $('
').appendTo(photo),
imgWidth, newWidth, imgHeight, newHeight, ratio; // Remove canvas elements left on the page
// from previous image drag/drops.
photo.find('canvas').remove();
filters.removeClass('active'); // When the image is loaded successfully,
// we can find out its width/height:
img.load(function () {
imgWidth = this.width;
imgHeight = this.height; // Calculate the new image dimensions, so they fit
// inside the maxWidth x maxHeight bounding box
if (imgWidth >= maxWidth || imgHeight >= maxHeight) { // The image is too large,
// resize it to fit a 500x500 square!
if (imgWidth > imgHeight) { // Wide
ratio = imgWidth / maxWidth;
newWidth = maxWidth;
newHeight = imgHeight / ratio;
} else { // Tall or square
ratio = imgHeight / maxHeight;
newHeight = maxHeight;
newWidth = imgWidth / ratio;
}
} else {
newHeight = imgHeight;
newWidth = imgWidth;
} // Create the original canvas.
originalCanvas = $('
This example works in all browsers which support file drag/drop. Some of the filters are computationally intensive, so you will get a bit of a lag before the results show on screen. I have limited the maximum width/height of the image to be 500px in order to speed things up a bit, but you can change these values to your liking.
Done!
It would be cool to combine this example with our Photobooth tutorial and end up with a real Instagram-like app in your browser. But I will leave this as an exercise for the reader

