Interested in learning how to add an image to a mockup in Illustrator? Follow this tutorial and learn how you can achieve this in just a few clicks. You can use any photo and graphic. Let’s begin!
If you don’t have time to make an Illustrator mockup, you can always try Envato Elements, where you can get unlimited downloads of graphics, photos, fonts, and much more—all ready to be used in your projects.
Step 1
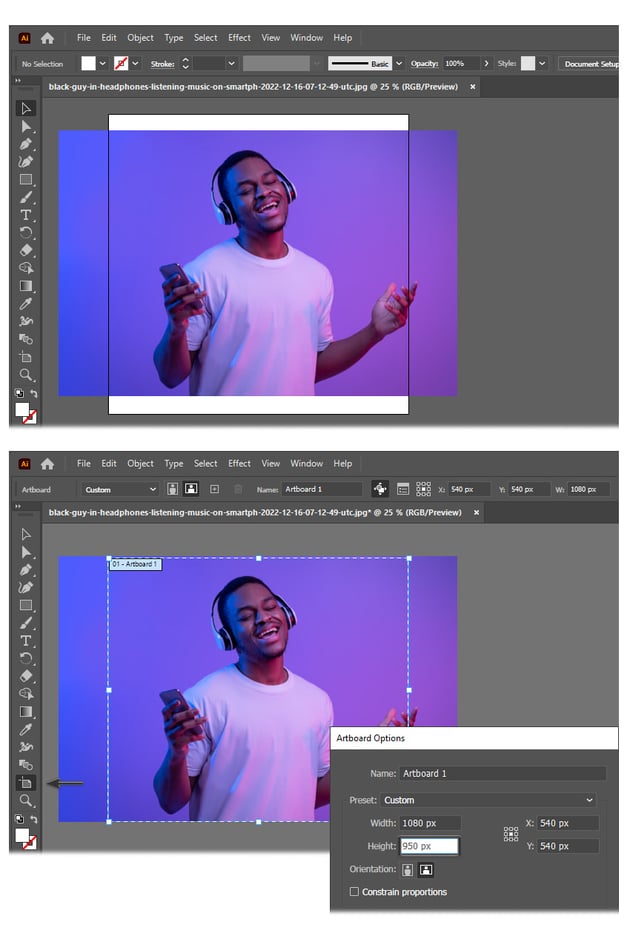
Launch Adobe Illustrator 2024 and go to File > Open. Locate the image on your computer and open it. I am using the Guy in headphones listening to music on smartphone photo to demonstrate this technique.
This is how Illustrator opened my image and, as you can see, the artboard needs to be adjusted. Double-click on the Artboard Tool (Shift-O) to open the Artboard Options window, and set the Height accordingly. In my case, the Height is 950 px.


Step 2
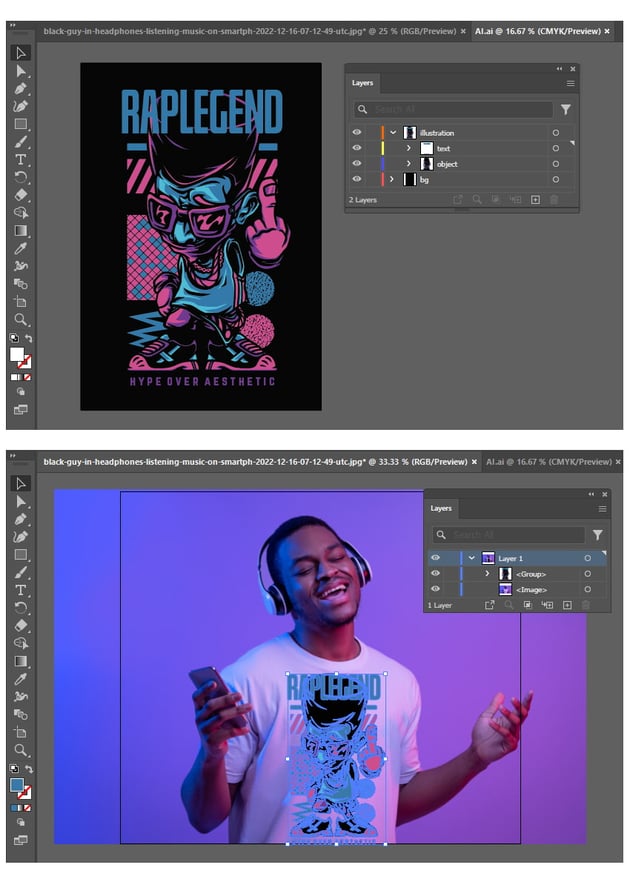
Go to File > Open again and locate the graphic on your computer. It can be any kind of artwork, logo, illustration, or any other vector. I am using the Rap Legend illustration, which looks as if it will work perfectly on the guy’s T-shirt. Once it’s opened, Copy (Control-C) and Paste (Control-V) it into the photo document. Do not include the background of the illustration.
Scale it down and position it on the T-shirt.


Step 3
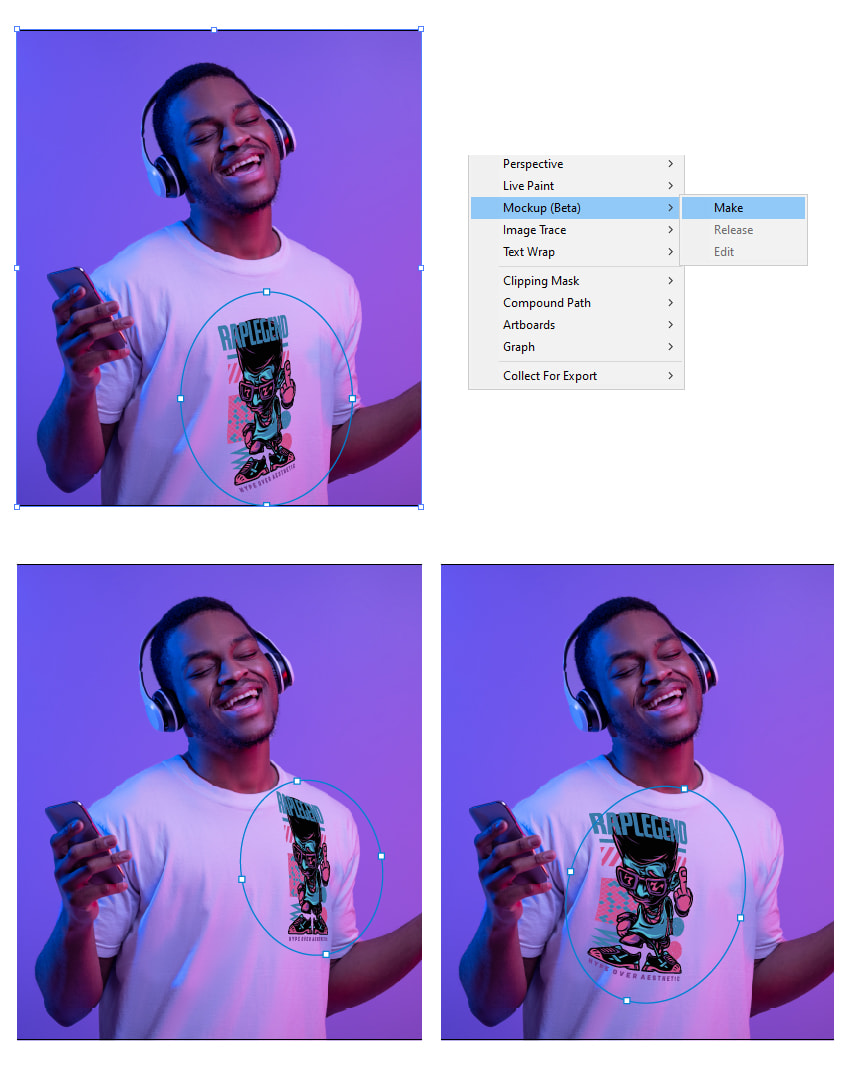
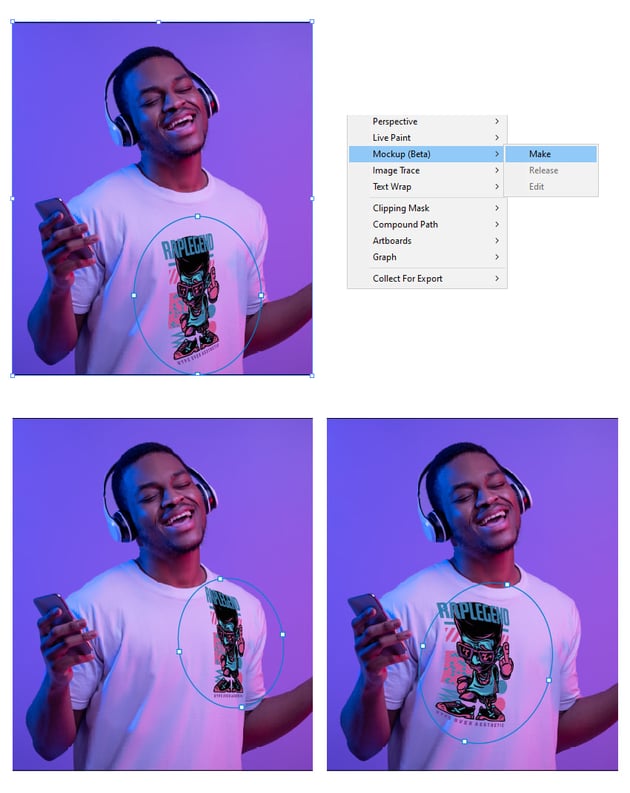
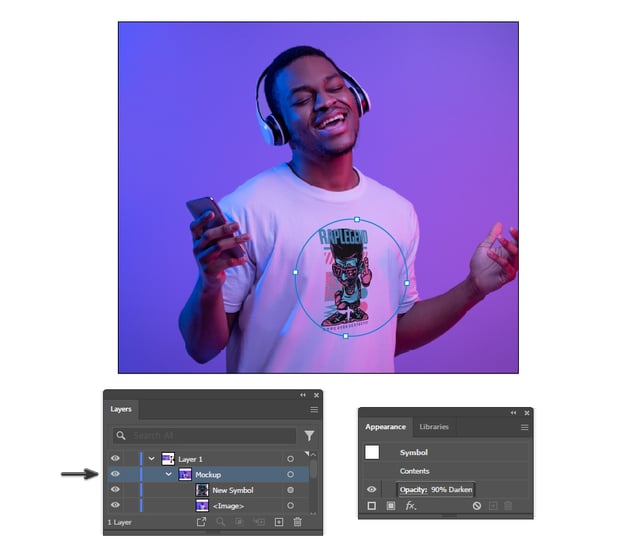
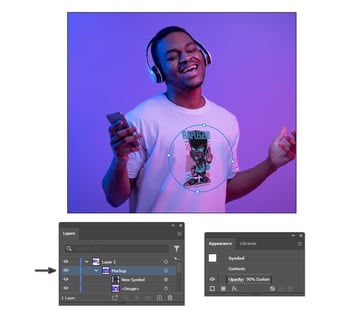
Now, to create the T-shirt mockup, Illustrator has the Mockup feature, which is very easy to use. This works very similarly to how you map graphics to 3D objects.
All you have to do is select your photo and your vector graphic, and go to Object > Mockup > Make. Wait for Illustrator to generate the mesh result. The graphic will turn into a circle that you can move and drag onto the subject’s body, and it will map and adapt to any area. Cool, right?
You can scale it up or down using the Selection Tool (V), holding the Shift key to keep the proportions. Also, rotate the graphic if needed. You get to decide what the final Illustrator mockup will look like.

Step 4
When you’re happy with the position of the graphic, an extra adjustment that you can make is to set the Blending mode to Darken, although in most cases Multiply will work great. I also recommend setting the Opacity to 90% so the graphic blends a little with the texture of the T-shirt.
If you decide to make adjustments later, you can do so. Just double-click on the Mockup group in the Layers panel to enter Isolation mode and select the graphic again. Changes can be made at any time. To exit the Mockup group, double-click anywhere on the workspace.

Congratulations!
Now you know how to add an image to a mockup in Illustrator. Feel free to test this further by using any other graphics and photos. It’s so easy and fast, with an awesome result to showcase.
Make sure to check out Envato Elements, where you will find plenty of resources that might inspire you to create cool designs from graphics, illustrations, logos, typography, and so much more. Download unlimited creative assets, all ready to use.
Want to Learn More About Adobe Illustrator?
We have loads of tutorials on Envato Tuts+ that teach many other useful techniques. Here is a list of tutorials specially made for you. Take a look!