Running a successful restaurant is no small feat. But, in order to be successful, you need a constant stream of patrons who will visit your venue on a regular basis.
The best way to ensure this is to create a website for your restaurant. By doing so you will be able to share your menu, your opening hours, and your locations. That way, people looking for a place to eat will have no problems finding you.
Aside from showing what your restaurant has to offer, you can also use your website to accept online reservations. This allows you to decrease the time spent on the phone and makes it easy for your customers to book even when your restaurant is closed.
In this tutorial, we’ll walk you through the steps to follow to quickly make a website for your restaurant. With a new restaurant website you can increase the number of customers you bring in on a regular basis as you spread the word online about your delicious meals.
What Are The Key Features Your Restaurant Website Needs?
Before you begin creating your website, it’s a good idea to spend some time planning what sort of information you want your website to include. Here are some of the essential elements every great restaurant website should have:
1. Your Menu and Service Hours
The menu will probably be one of the most viewed pages on your site. People want to know what type of food you offer and whether you serve meals all day long or if you are open just for lunch and dinner. A menu will show them what’s available so they can decide whether they want to visit your restaurant or not.
2. High Quality Restaurant Images
While a certain meals can sound very alluring, it’s even more attractive when you pair that with a high-quality image. Consider including images not only on your menu pages but throughout your site. Show them your food but do make sure to also include images of your establishment as well to convey the atmosphere of your restaurant.
Here are a few high quality examples of restaurant photos available through Envato Elements:

With Envato Elements, you get inspiring, ready-to-use photos, templates, fonts and creative assets—all with unlimited downloads for a single monthly fee.
3. Online Booking Forms
As mentioned earlier, an online booking form can greatly increase the number of reservations you get, while decreasing the amount of time you spend on the phone taking reservations.
4. Highly Rated Customer Reviews
Showcasing reviews from past patrons can help potential visitors make their final decision and encourage them to book a table. Consider asking your regulars to share their experience on your website so others can see their satisfaction.
5. Address and Map Integration
Having a map of your location makes it easy for potential visitors to find you and get directions to your restaurant, instead of having to manually find it. Be sure to place directions on your contact page and the footer of your website for easy access.
Now that you know what your website should include, let’s walk through the steps of setting up your site:
How to Prepare Your Restaurant Website (Gather Your Resources)
Now that you’ve decided what your website should include, it’s time to gather your assets and address the technical side of your site setup. You’ll need to invest in a domain name, a hosting plan, a restaurant WordPress theme, and all the content that will go on your site. Let’s quickly look at that in a bit more detail:
1. Your Restaurant Site Domain Name
First, you’ll need to buy a domain name that reflect the name of your restaurant. If possible, opt for a .COM extension as it is the most popular one and most people will enter it by default when typing a business name or a search term into their address bar. If the name is taken, consider adding the word ‘restaurant’ to the name.
2. Reliable WordPress Hosting
You’ll also need a server that will host all the website files for your site and make it possible to find it online. A good idea is to read the reviews of the hosting companies that support WordPress, and as you do you research, ensure that their current customers have had a good experience.
3. Premium Restaurant WordPress Theme
The easiest way to start your site is with a premade restaurant theme. You’ll get an attractive design, all the features geared for restaurant websites, and support from the theme author.
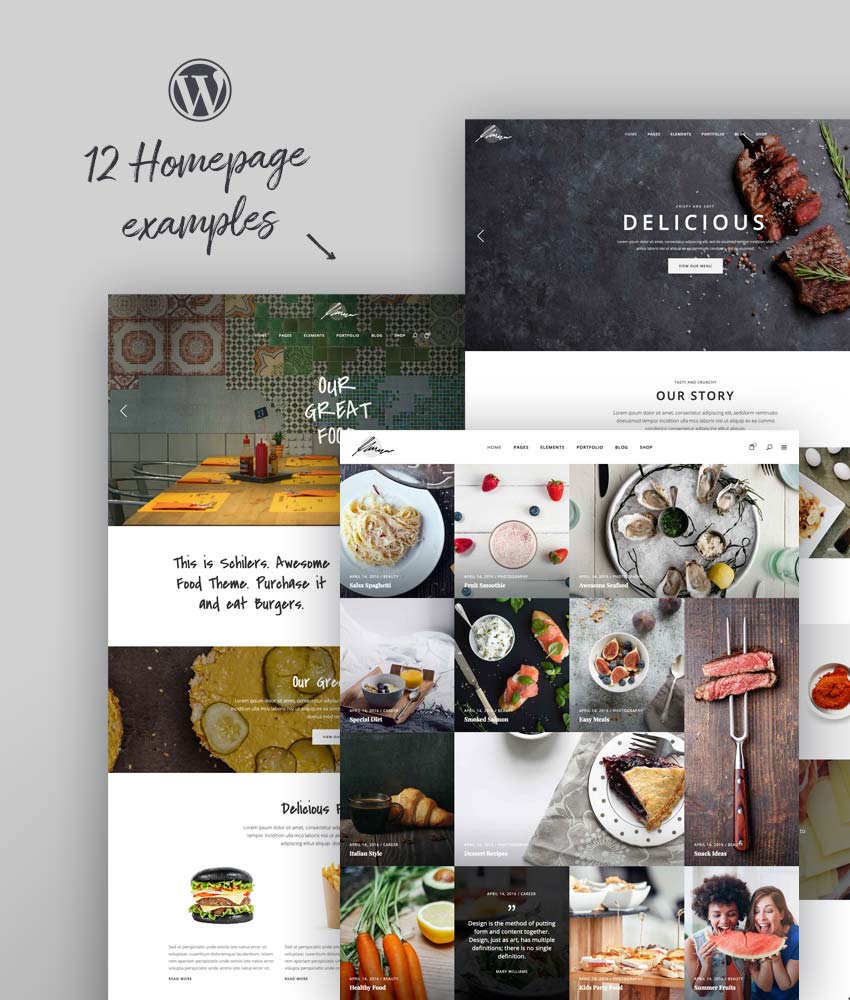
For the purposes of this tutorial, I am using the Savory restaurant website WordPress theme which offers several pre-made demos, one-click demo import, and plenty of options to customize the theme to your liking. Here is a quick look at this WP theme design:

Discover more great WordPress restaurant themes, available for download from ThemeForest:
![]()
WordPress Themes
22+ Best Restaurant WordPress Themes: With Premium Responsive Designs
Brenda Barron

4. All Your Content and Images
Finally, you’ll also need your menus, written material about your restaurant and staff, images of your signature dishes, shots of the interior, as well as reviews from your past customers.
Consider the pages you will have on your website and if you want to start writing a few blog posts about your restaurant. That way, potential customers can get to know what you have to offer.
How to Quickly Make Your Restaurant Website (Tutorial Steps)
Now it’s time to start setting up your site. You’ll need to install WordPress, setup your theme, and add the required WP plugins yourself. In either case, you’ll also need to create your restaurant site pages and add your unique restaurant assets. Let’s dive into how to do that:
1. Installing WordPress
The first step is to install WordPress. To do this, you will need to log in to your cPanel with the username and password provided to your by your host. Then, scroll down to the section called Website Installers or One Click Installers. Locate WordPress and select the Install button.
Fill in your site name, your username and password and click on the Install button.
When the installation is complete, you’ll see a message that prompts you to login to your WordPress dashboard. Visit the link and enter your login details.
2. Installing Your New WordPress Theme
In the WordPress dashboard, go to Appearance > Themes > Add new. On the next screen, select Upload Theme.

Click on the button and pick the zipped folder that contains the theme’s files. Click Upload. After the installation process is completed, click Activate.
3. Install the Required Plugins
The last step is to activate the required plugins. Click the link that says Begin Installing Plugins.

On the page that loads, select all the plugins and then click Install in the drop down menu.
Now that all the plugins have been installed, it’s time to setup your site.
How to Create an Irresistible Restaurant Website Homepage
Once everything is setup, it’s time to create an irresistible homepage for your new WordPress restaurant website, which will help you get more reservations. You can start by creating a new page from scratch by going to Pages > Add New and then using Visual Composer elements to add images, galleries, slideshows, menu items, and more.

But if you want to save some time, the easiest way is to import the demo content that comes with your WordPress restaurant website template. It contains several pre-made demos with structure in place so all you have to do is replace the content with your own.

To import the demo content, go to Elated Options > Import. Select All, tick the box next to the Import attachments, and click the Import button.

When the import is complete, visit your site by hovering over the site’s name in the admin menu and selecting Visit Site. You’ll notice that the default demo has been installed. It has all the right elements in place that are sure to capture the attention of your visitors, such as: a large featured slider, images of delicious food, the menu, reviews from past customers, and a booking form.

To replace the content with your own, click the Edit Page in the admin bar. You’ll be greeted with a screen that shows the backend editor for Visual Composer, which is a drag-and-drop page builder. If you were starting from scratch, you should select the desired element, such as an image or a text block, and then drag it into place in the editor.
Since all the elements are in place, all you have to do now is click on the pencil icon to customize the content.
If you want to select a different demo for your restaurant, head over to Pages > All pages and then hover the page name so you can click on the View link. This will allow you to see how the pages look so you can find one that you like.
When you’ve settled on the demo, make note of the page name and head to Settings > Reading and select that page from the drop down menu next to the text that reads Front Page Displays a Static page. Save your changes and your home page is set. Finally, customize it with your restaurant website content and images.
It’s worth mentioning that you can set up the rest of the pages in a similar fashion as Savory comes with pre-made restaurant site templates for the about page, full menu pages, contact, reservations, and more.
How to Customize Your Restaurant WordPress Theme
Customizing the Savory theme is done through the Elated Options page. Here, you’ll find settings for colors, fonts, your header, footer, place to upload your logo, favicon, and more.
Once you’ve tweaked the settings to your liking and incorporated your brand’s colors and fonts, click on Save changes to apply them to your site.
How to Create Your Restaurant Website Booking Form
Now that you’ve customized the theme and setup your homepage and the rest of the pages you want, let’s go over the steps needed to create your booking form. The first thing you’ll need is an account with OpenTable. If you already have it, you’ll need your OpenTable ID. If not, creating an account is rather straightforward process so sign up with OpenTable and then come back to your site.

Go to Pages and choose the page you’d like to display the reservation form on. In the backend editor, click on the plus icon to add a new row and a new element. Scroll down and find the Reservation Form block and enter your OpenTable ID. Choose a skin for the form, click Save Changes, and click the Update button to have the form display on your site.

How Best to Advertise Your Restaurant Site, to Attract New Customers
Now that your restaurant website is ready to go, you need to spread the word about it so you can reach more customers and increase your number of new reservations. Here are a few tips that will help you advertise your new restaurant website and bring in new customers:
1. Add the Link to Your Social Media Profiles
One of the easiest ways to start advertising your new restaurant site is to link to it in all of your social media profiles. Most networks like Facebook, Twitter, and Instagram have a place to add a website link—so make sure you take advantage of it.
2. Post Meal Photos On Instagram
Instagram is a very popular social network at the time, with over 700 million active users. Many restaurants are already taking advantage of the platform and sharing daily photos of their meals as well as their staff, restaurant interior, and photos that portray their brand in a fun and creative way. With the proper use of hashtags and geo-tagging your photos, you are bound to attract a few new patrons your way on a regular basis.
3. Partner With Popular Food Apps
Consider participating in loyalty programs with popular online apps like Belly or LevelUp. The apps encourage their visitors to check out your restaurant using gamification and loyalty programs, which often offer a discount for visiting a place a certain number of times.
4. Use Food Blogger Outreach
Food bloggers usually have a substantial following, both on their blogs and on social media. Consider partnering with them and inviting them to your restaurant. You could offer them a free meal in exchange for an honest review.
5. Offer a Coupon to New Customers
Now that you have a website, consider starting a newsletter as well. You can offer a meal coupon in exchange for an email address and more importantly, once visitors sign up for your email list, you can send them targeted emails that invite them to stop by when you host a special event or have a new signature dish on your menu.
Make a Great Restaurant Website Quickly
Starting your restaurant website is not as hard as it seems. Use the tips above and browse through our restaurant WordPress themes to find a perfect theme design for your site, which will give you an online platform to promote your restaurant and reach more customers.