Welcome to the exciting realm of digital audio editing! If you’re embarking on a journey as a budding podcaster, an aspiring musician, a dedicated audiobook creator, or simply someone curious about the world of sound, Audacity is your perfect companion. This remarkable tool is not just any software; it’s a gateway to unleashing your creative potential in audio production. Audacity, renowned for its versatility and ease of use, is an excellent starting point for those new to audio editing, as well as a reliable tool for seasoned professionals.
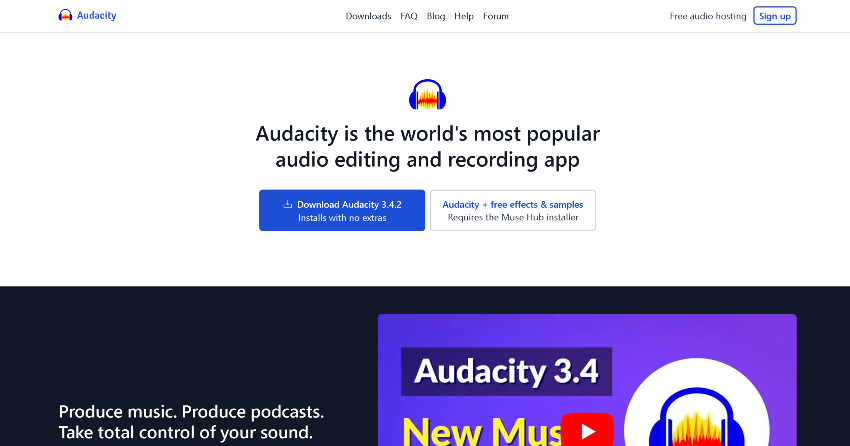

Audacity website thumbnail for Audacity download tutorial.
This comprehensive guide is tailored for beginners and intermediates alike, aiming to demystify the process of getting started with Audacity. We understand that diving into a new software can be daunting, but worry not! We’ve broken down the process into simple, easy-to-follow steps. You’ll learn how to download and install this powerful software on both Windows and Mac systems, ensuring you’re well-equipped to begin your audio editing adventures.
Moreover, Audacity is a testament to the power of open-source software. Being free doesn’t just mean it’s without cost – it symbolizes a collaborative effort of a global community dedicated to making high-quality audio editing accessible to everyone. With a plethora of features for recording, editing, and mixing audio, Audacity stands out as a robust tool in your creative arsenal.
So, whether you’re aiming to produce your first podcast episode, compose a new music track, or simply experiment with sound editing, this article will be your guide through the initial steps of downloading and installing Audacity. Let’s embark on this sonic adventure together!
Downloading and Installing Audacity on Windows
For Windows 11 Users
Windows 11, Microsoft’s latest operating system, offers a streamlined and user-friendly interface that is perfect for running applications like Audacity. The process of downloading and installing Audacity on Windows 11 is straightforward and accessible, even for those who are not tech-savvy.
Step 1: Accessing the Microsoft Store
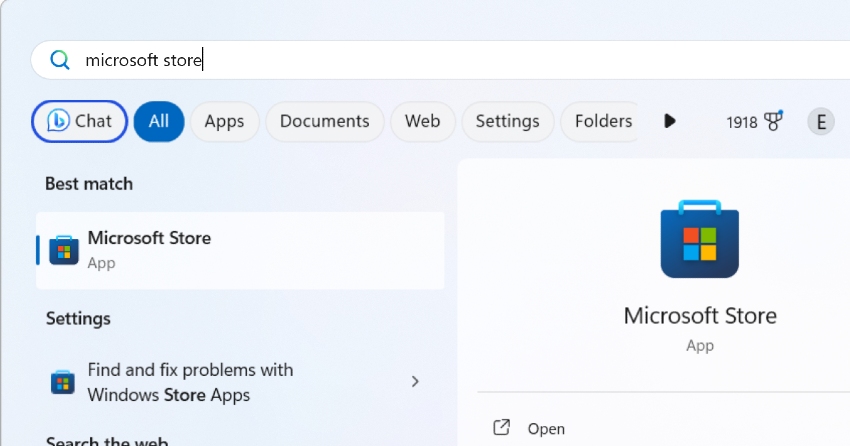
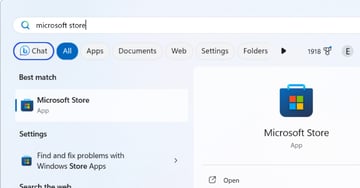
User Accessing the Microsoft Store for guide on audacity download for Mac and PC.
Begin by accessing your Start menu, a gateway to all the applications and settings on your Windows 11. In the search bar, type ‘Microsoft Store‘. This digital distribution platform is where you can safely and securely find a wide array of applications, including Audacity. Once you open the Microsoft Store, you’re one step closer to starting your audio editing journey.
Step 2: Finding Audacity
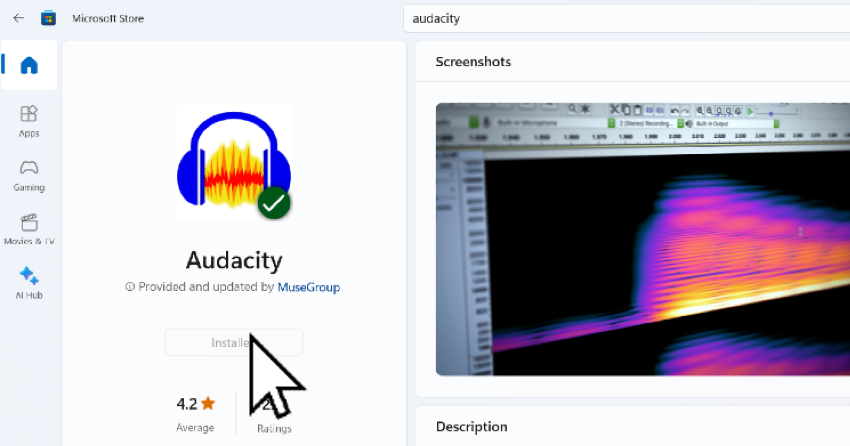
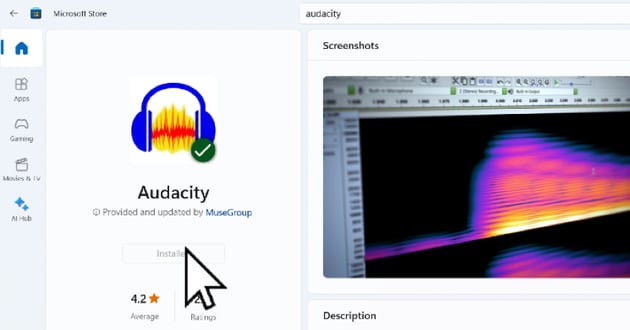
Within the Microsoft Store, you’ll find a simple yet powerful search tool. Here, enter ‘Audacity‘ and press enter. Audacity, celebrated for its user-friendly interface and a wide range of editing capabilities, is an official offering on the Microsoft Store. This ensures that you’re getting a version of the software that’s safe, reliable, and up-to-date. The search result will lead you directly to Audacity’s download page.
Step 3: Installation
Once you locate Audacity in the search results, it’s time to install it. Click on the ‘Install‘ button, and the Microsoft Store will handle the rest. The software will download and install automatically onto your Windows 11 system. Keep an eye on the progress bar to track the installation process. Depending on your internet connection, this might take a few moments.
Highlights for Windows Users
- Audacity’s integration with Windows 11 is seamless, offering an intuitive experience for users of all skill levels. The interface complements Windows’ modern design, making audio editing both enjoyable and efficient.
- The software’s feature set on Windows includes advanced options for audio recording, editing, and mixing. This makes it suitable for a variety of audio projects, from simple recordings to complex productions.
- Windows users also benefit from the ability to integrate a variety of open-source plugins with Audacity. This expands the software’s capabilities, allowing for more creativity and flexibility in audio editing.
- Additionally, Audacity on Windows supports various audio formats, ensuring compatibility with most audio files you might need to work with.
Downloading and Installing Audacity on Mac
Steps for macOS
Mac users will find that installing Audacity on their systems is a smooth and straightforward process. macOS, known for its intuitive design and strong security features, complements Audacity’s user-friendly nature. Whether you’re using the latest version of macOS or an older one, these steps will guide you through the process of setting up Audacity on your Mac.
Step 1: Downloading the Software
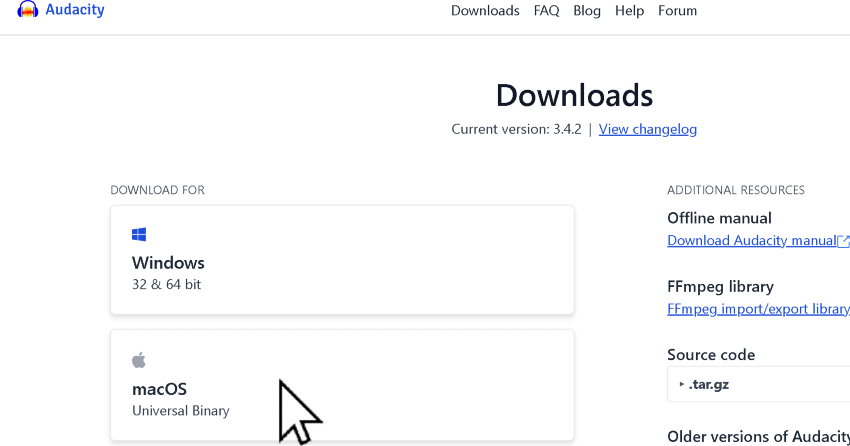
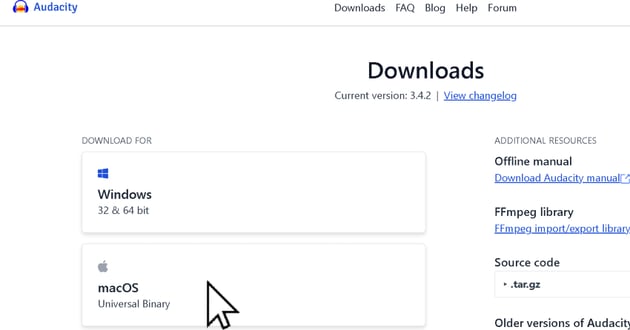
User clicking download button for article on how to use Audacity with free download for Mac or PC.
Start by opening your preferred web browser on your Mac. To download Audacity, directly visit their official website. This site is the trusted and primary source for downloading the latest and legitimate version of Audacity, ensuring you get a safe and up-to-date software for your macOS.
Step 2: Downloading the File
On the Audacity website, you may encounter a simple human verification step – a small but essential measure to ensure secure downloads. Once verified, the Audacity file, usually a DMG (Disk Image File) of approximately 39.5 MB, will begin downloading. After the download completes, locate the file in your Downloads folder. This DMG file is your key to unlocking Audacity on your Mac.
Step 3: Installing Audacity
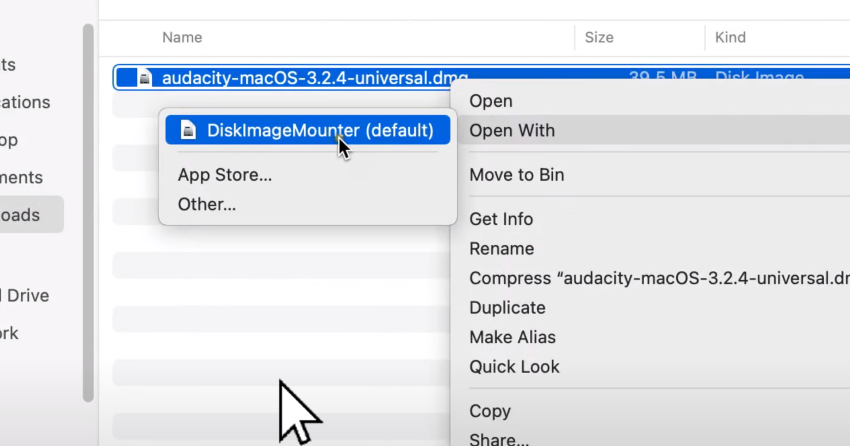
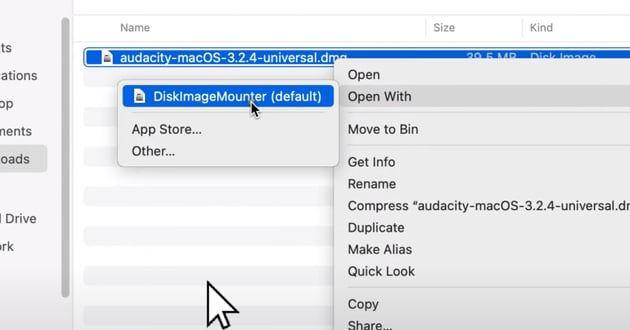
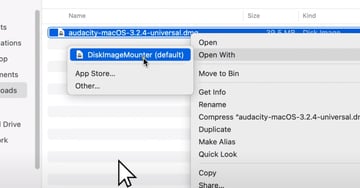
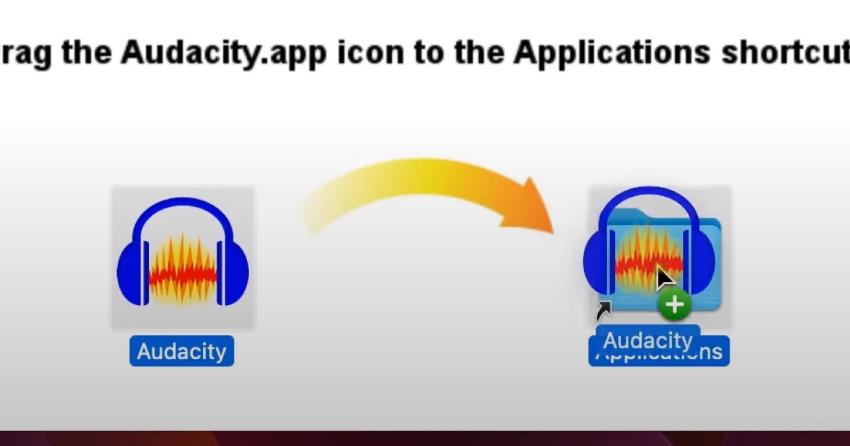
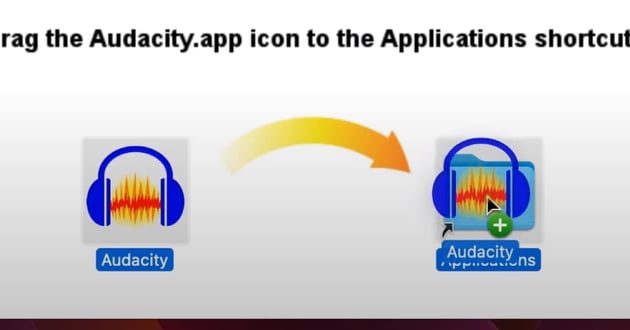
To install Audacity, right-click on the downloaded DMG file and select ‘Open with Disk Image Mounter.’ This action will mount the disk image and reveal the Audacity application. Drag and drop the Audacity icon into your Applications folder, a common method of installing applications on macOS. This simple drag-and-drop motion is all it takes to install Audacity on your Mac.
Step 4: Launching Audacity
After installation, open your LaunchPad to find the newly installed Audacity app. Click on the Audacity icon to open it. Upon first launch, macOS may prompt you with a security message asking for permission to open the app. Click ‘Open‘ to proceed. This is a standard macOS security feature to ensure the safety of your system. Now, Audacity is ready for use on your Mac, fully installed and operational.
Highlights for Mac Users
- Audacity’s interface on macOS is particularly user-friendly. It’s designed to be intuitive and straightforward, making it accessible even for those who are new to audio editing.
- The software offers a comprehensive set of tools and features, displayed in an organized menu and toolbar. For instance, version 3.2.4 of Audacity on macOS showcases an array of editing tools and effects, tailored to enhance your audio projects.
- Mac users will appreciate the software’s compatibility with macOS’s security and privacy settings. Audacity respects user privacy and integrates well with macOS’s system preferences.
- The high-quality audio processing capabilities of Audacity complement the robust performance of Mac systems. Whether it’s simple audio trimming or complex multi-track editing, Audacity on Mac handles it seamlessly.
Tips and Shortcuts
Mastering Audacity not only involves understanding its basic functions but also learning how to streamline your workflow. This can be achieved through a combination of keyboard shortcuts and a thorough exploration of the software’s diverse effects and plugins. Whether you’re a Windows or Mac user, these tips and shortcuts will significantly enhance your efficiency and creativity in audio editing.
Keyboard Shortcuts for Quick Editing
Keyboard shortcuts are essential tools that can dramatically speed up your editing process in Audacity. They allow you to perform common tasks with just a few keystrokes, eliminating the need to navigate through menus. Here are some key shortcuts to remember:
- Play/Stop and Play/Stop and Set Cursor: ‘Space‘ is your basic toggle for playing and stopping audio. To stop and set the cursor position, use ‘X‘. This is useful for pinpointing exact positions in your audio track.
- Zooming In and Out: Use ‘Ctrl + 1‘ (Windows) or ‘Cmd + 1‘ (Mac) to zoom in and ‘Ctrl + 3‘ (Windows) or ‘Cmd + 3‘ (Mac) to zoom out. This is crucial for fine-tuning your edits.
- Selection Tool: Press ‘F1‘ to quickly select the Selection Tool, enabling you to choose specific sections of your audio.
- Cut, Copy, and Paste: Familiar shortcuts like ‘Ctrl/Cmd + X‘ for cut, ‘Ctrl/Cmd + C‘ for copy, and ‘Ctrl/Cmd + V‘ for paste are invaluable for efficient editing.
- Undo and Redo: ‘Ctrl/Cmd + Z‘ for undo and ‘Ctrl/Cmd + Y‘ or ‘Ctrl/Cmd + Shift + Z‘ for redo are life-savers in reversing mistakes or reinstating changes.
Remember, practicing these shortcuts will help you become more proficient and intuitive in using Audacity.
Exploring Effects and Plugins
Audacity comes packed with an extensive range of effects and plugins that can elevate the quality of your audio projects. These features enable you to add professional touches to your recordings, from simple noise reduction to complex soundscapes:
- Noise Reduction: One of the most popular tools, the Noise Reduction effect helps clean up audio clips by removing unwanted background noise.
- Equalization: Adjust the balance of different frequency components in your audio using the Equalization effect. This is great for enhancing the clarity and color of your sound.
- Compression: Use the Compression effect to even out the dynamic range of your audio, ensuring that the volume levels are consistent throughout your recording.
- Reverb and Echo: Add depth and space to your audio with reverb and echo effects, which can create everything from subtle ambiance to dramatic soundscapes.
- Custom Plugins: Audacity supports various third-party plugins, expanding its capabilities even further. You can explore and add these plugins based on your specific editing needs.
FAQs
Is Audacity Really Free?
Yes, Audacity stands out as a completely free, open-source software. This means that it is developed by a community of contributors who are dedicated to making a powerful audio editing tool accessible to everyone. There are no hidden costs or trial periods – Audacity is free for personal and commercial use. Its open-source nature also ensures regular updates and improvements, reflecting the needs and feedback of its diverse user base.
Can I Use Audacity for Professional Audio Editing?
Absolutely! Audacity is not just for amateurs or beginners; it is equipped with a range of features that professionals find invaluable. Its capabilities include multi-track editing, a wide array of effects, and support for various file formats, making it suitable for complex audio editing tasks. Whether you are working on podcasts, music production, or sound design, Audacity provides a robust platform for high-quality audio editing. Its versatility and depth make it a popular choice among professionals looking for a reliable and efficient tool.
Are There Any System Requirements for Audacity?
While Audacity is known for being quite lightweight and adaptable to a variety of systems, there are some basic requirements to ensure optimal performance. Generally, Audacity is compatible with most modern Windows, macOS, and Linux systems. For specifics, such as operating system version, processor, and RAM requirements, it’s best to refer to the official Audacity website. This is where you’ll find the most up-to-date information on system compatibility and any additional requirements for running the latest version of Audacity efficiently. It’s always a good idea to ensure your system meets these requirements for a smooth and uninterrupted audio editing experience.
Envato Elements A Treasure Trove for Audacity Users
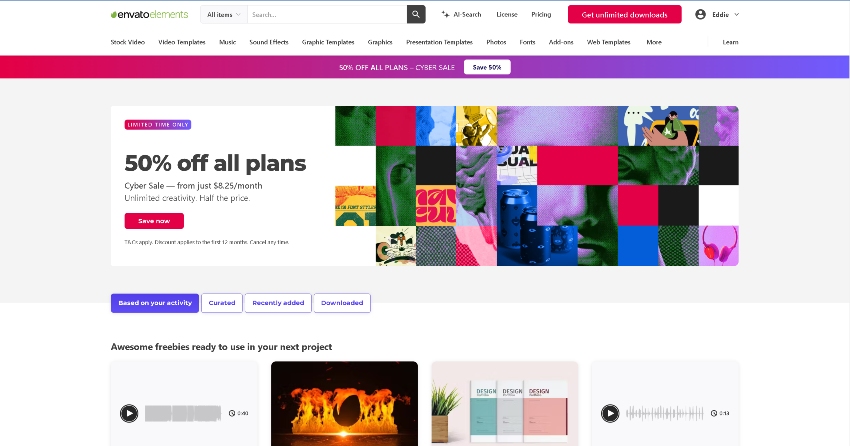


Envato Elements is a valuable resource for Audacity users looking to enhance their audio projects. As a subscription-based service, it provides a vast and diverse library of high-quality digital assets, including royalty-free music, sound effects, and professional audio loops, all compatible with Audacity for seamless integration. The affordable monthly subscription offers unlimited access, encouraging experimentation with different sounds and effects, and the continuously updated content ensures a fresh and inspiring array of choices. For anyone aiming to produce professional-grade audio in Audacity, Envato Elements is an essential tool for creative and sophisticated audio creation.
Conclusion
Downloading and installing Audacity on both Windows and Mac is a straightforward process. This versatile audio editing software is an excellent starting point for anyone interested in the field. Remember, for more digital assets, Envato Elements is your go-to resource. Happy editing!