The CSS3 @font-face rule and services like Google Fonts have really opened up the doors for people to be more creative with web typography. Google Fonts has over 630 fonts available to choose from, and in this article, I’m going to show you an extremely easy way to use them in your WordPress site – not all of them at once, of course. Because that would just be crazy.
On the Google Fonts site, they do a good job of providing instructions that are simple and straight forward. However, following their instructions requires that you modify the header.php or functions.php files of your WordPress theme to import the fonts. And you’ll also need to add the necessary CSS to the style.css file. While this isn’t an extremely difficult task, there is a better way.
First, you’ll need to download and install the Google Fonts plugin from ThemeTrust. The cool thing about this plugin, is that it integrates directly with the WordPress Customizer, allowing you to instantly see how your typography will look as you set your fonts.
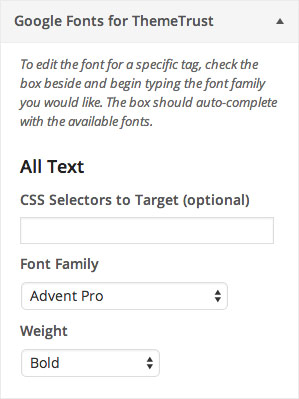
Once you have the plugin installed, go to Appearance->Customize, and click on the Google Fonts for ThemeTrust tab.

Within the panel, you’ll see eight different sections:
All Text, Paragraph Text, Header 1, Header 2, Header 3, Links, Blockquote, List Item
In each section, you can select a font and set the weight for that font. There is also a field to enter custom CSS selector. So for example, if you wanted to only set a custom font for the h3 tags in the footer, you would enter something like this in the Custom Selectors field in the h3 section: #footer
You can also add multiple selectors by separating them with commas, like this: #footer, #sidebar
Conclusion
As you can see, this is a much simpler solution for using Google Fonts in your WordPress themes, especially for those who don’t want to get their hands dirty by editing theme files. And having the options integrated directly into the WordPress Customizer allows you to quickly see what fonts will and won’t work with your site.
