People set up an eCommerce store in the hope of selling as many of their products as possible. This requires a lot of work on your part—from choosing the right platform to promoting your store. Simply creating a store will not automatically bring in sales. You will have to actively work on optimizing your content and your purchase funnel.
Fortunately, things get relatively easier if you are using WooCommerce to create your eCommerce store on WordPress. This plugin has a big ecosystem of helper plugins to do all kinds of tasks. In this tutorial, we will learn how to add a WooCommerce product table to our store for free.
Advantages of a Product Table
Lets say you have a large eCommerce store that sells a lot of products. Some of these products will probably be used for doing the same task but have different specifications like someone looking for a laptop for some casual day-to-day use. Creating a product table in such a scenario will provide a lot of benefits to you as well as your users.
Easy Comparisons
When comparing similar products, your users will just want to look at the differences in their key specs. A product table that lists all these differences and similarities will save them a lot of time spent in switching between multiple tabs.
Reducing Customer Doubt
Another benefit of product tables is that they have the potential of increasing your sales. This basically comes down to giving users more options if they are having doubts about buying a product. There have been a few times when I was not entirely sure about buying a product because something felt missing. However, a product table at the end that showed related products with the exact features I needed helped me instantly make a purchasing decision.
I am sure you have come across product tables yourself when shopping. It is time to add one to your own store now!
Options for Adding a Product Table
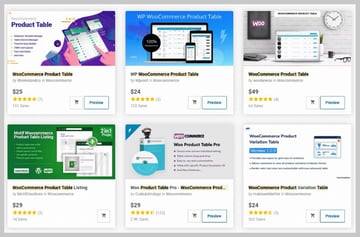
Product tables serve an important purpose and are used by a lot of people. As a result, there are a lot of free and paid product table plugins out there that you can install on your website. Free plugins will usually be enough if you don’t need a big set of features and can do basic troubleshooting yourself. However, premium plugins will give you more features and are also more likely to give better support and regular updates. You can take a look at the best-selling WooCommerce product table plugins on CodeCanyon for some examples.


Since this post is about free plugins, we will use the WooCommerce Product Table Lite plugin from WordPress plugin directory. It is entirely free, top rated and comes with a decent set of features.
Go ahead. Install and activate the plugin. You will see a menu item labelled Product Tables in the WordPress admin dashboard.
Creating a WooCommerce Product Table
You can navigate to Product Tables > Add New Table from the admin dashboard menu in order to create a new product table. The plugin comes with two preset templates to quickly create a table and a blank option to create everything from scratch.
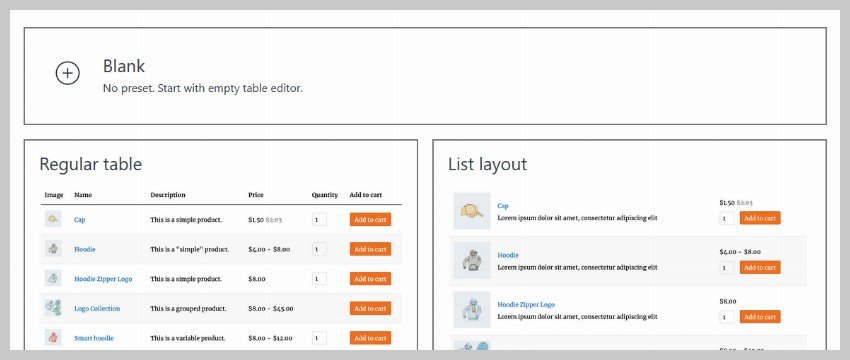


Hover over the Regular Table section and you will see a Use button. Click on it to create a new product table. This will show you a section that says that your product table has been created. You will also get a shortcode similar to [product_table id="111"] which you can use to show the product table anywhere on your website. This will show you a product table similar to the image below.
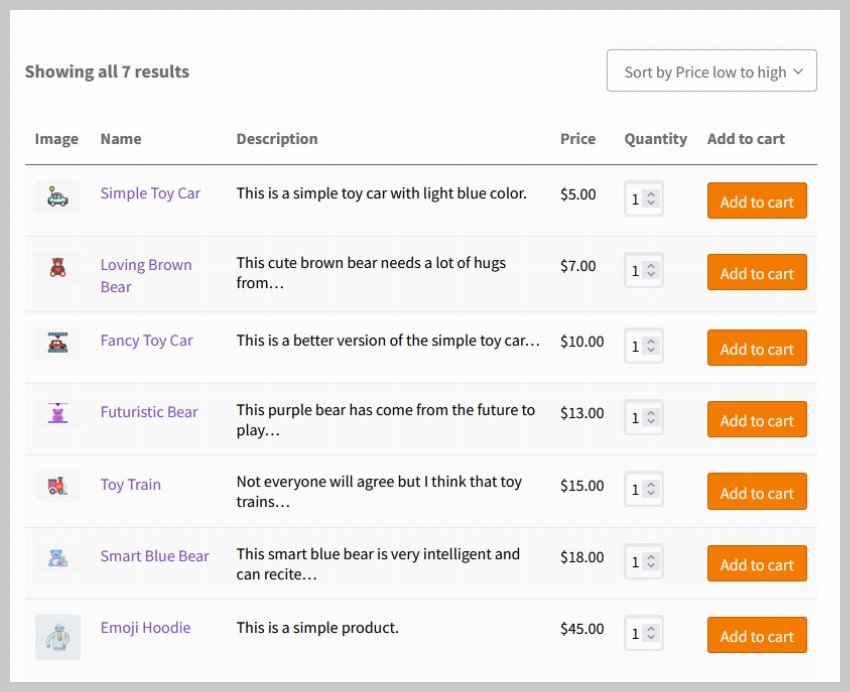

Remember that the above image is just based on default values. You can change a lot of things in these tables by simply by configuring some options. Also note that there is a dropdown in the top-right corner for you to choose how products shown in the table should be sorted. Items are sorted based on price (from lower to higher) by default.
The list of products is from one of our previous tutorials where we learned how to customize a WooCommerce product page for free. You can see that they are mostly toys but there is a hoodie at the bottom of the list. We will make several changes to our table now.
Customizing the Product Table
You can go to Product Tables > Product Tables from the dashboard navigation menu in order to see a list of all the tables that we have created. We have only created a single table from the Regular Table preset. Therefore, we will see only one table named Regular Table. Click on the name to edit the table. Now rename the table to Toy Table.
The plugin gives you the option to use shortcodes as well as its own interface to specify what should be included in the tables and how it behaves.
We will begin by making some changes to the Query tab. Our table will only show toys and no clothing items so it makes sense to set the category to only Toys. This is the main parent category but you can also pick one of the subcategories if you have a lot of products or want to be more specific about the type of products shown.
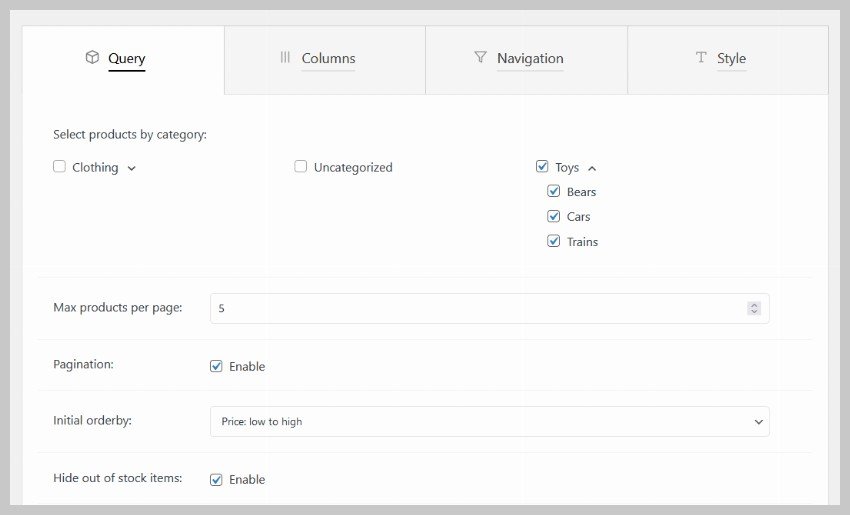
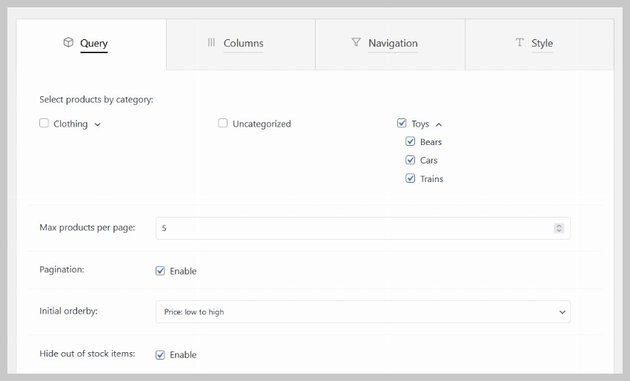
We will also set the maximum number of products to five and enable pagination while hiding out of stock items. The ordering is kept set to its default value of Price: low to high.
Adding and Removing Columns
We will head over to the Columns tab now. It gives us the options to specify which columns or what information is shown on different screen widths. There is a long list of options here.
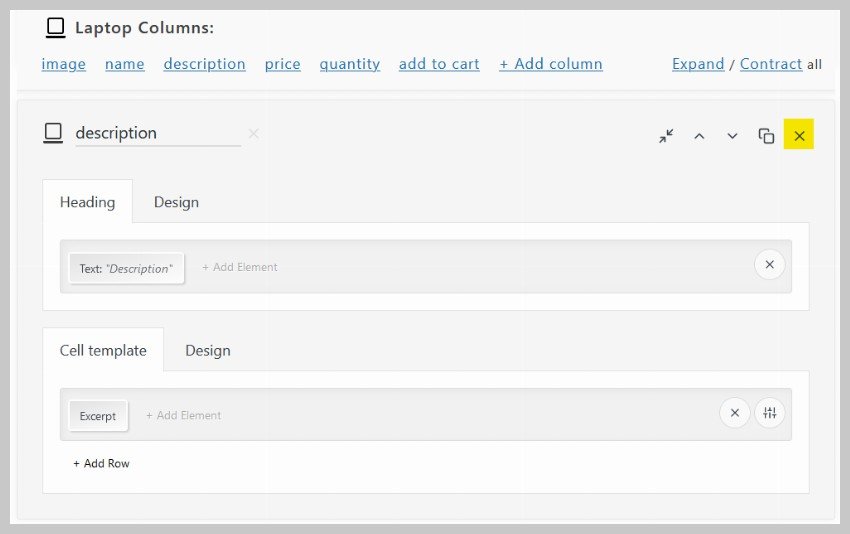
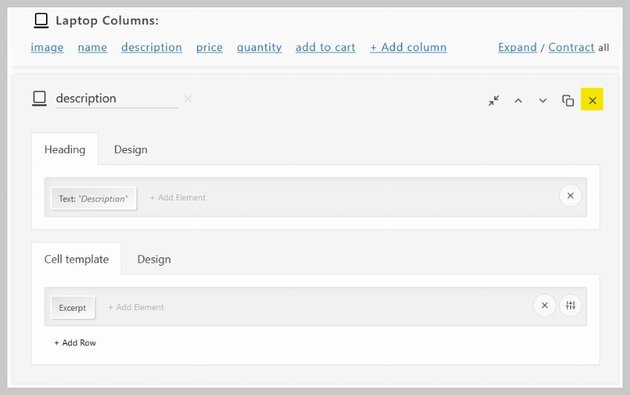
You will see the Laptop Columns at the top. These are six different columns here that will be shown on big screens. By default, the plugin shows a product image, its name, description, price, quantity and an Add to cart button. You can remove any existing columns or add extra ones of your own. We will get rid of the Description column by clicking on the cross button. You can also change the position of columns or duplicate them by clicking one of those buttons.
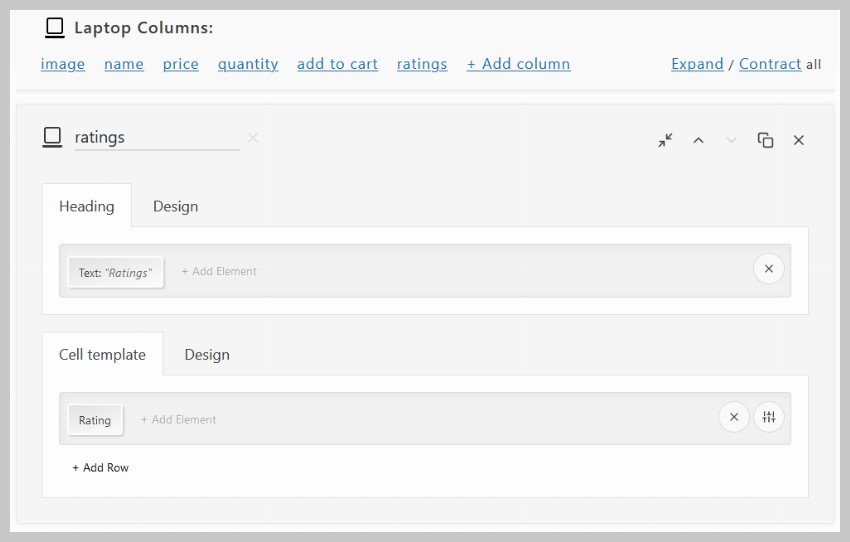
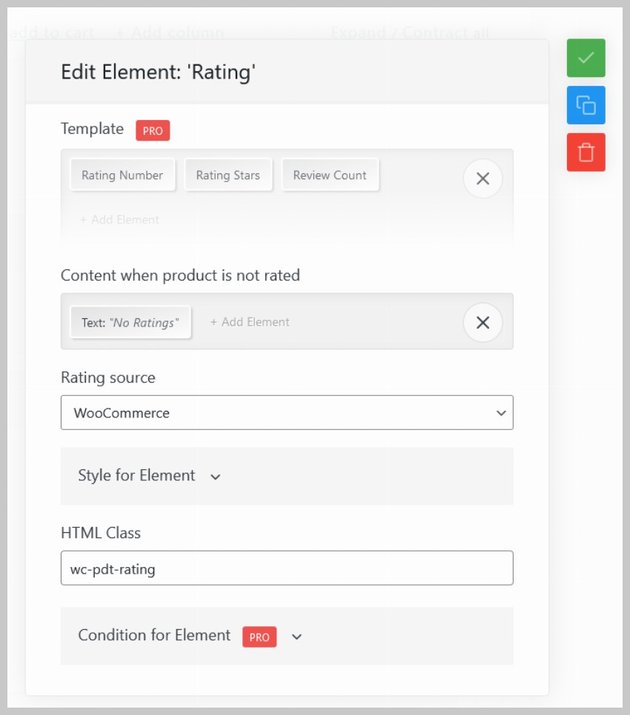
Click on the + Add column button to add a new column for product ratings. The first ratings text next to the laptop icon is meant as an identifier for you. The second Ratings text specified under the Heading tab is shown to your viewers. It can also be some other custom HTML instead of plain text. For example, you could show an icon along with some text in the heading.

The Design tab allows you to set a bunch of styling options like text color, background color, padding or text alignment. I have set the font color for the heading as well as the actual ratings to rgb(19, 138, 98) as an example.
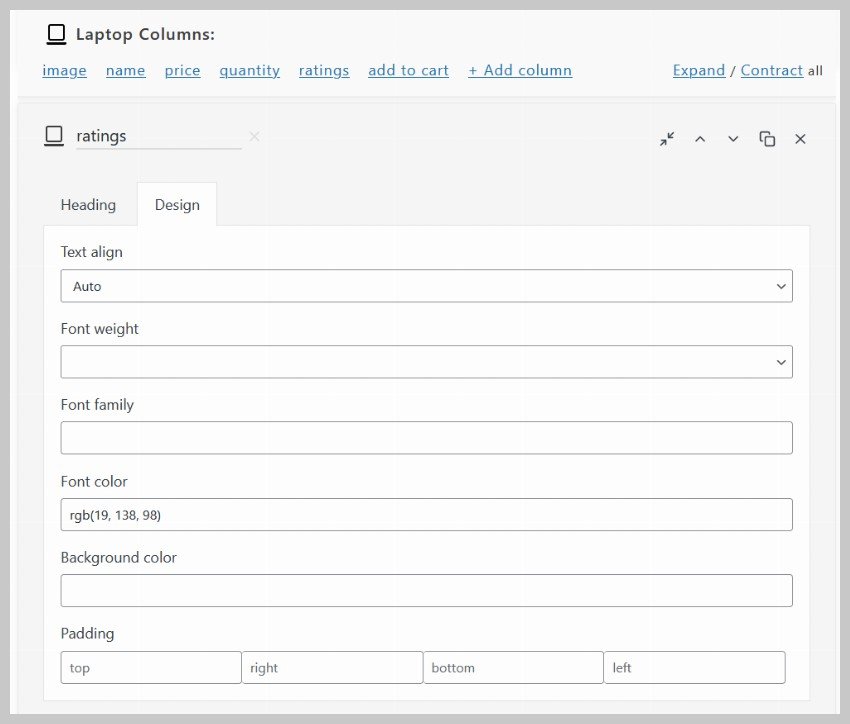
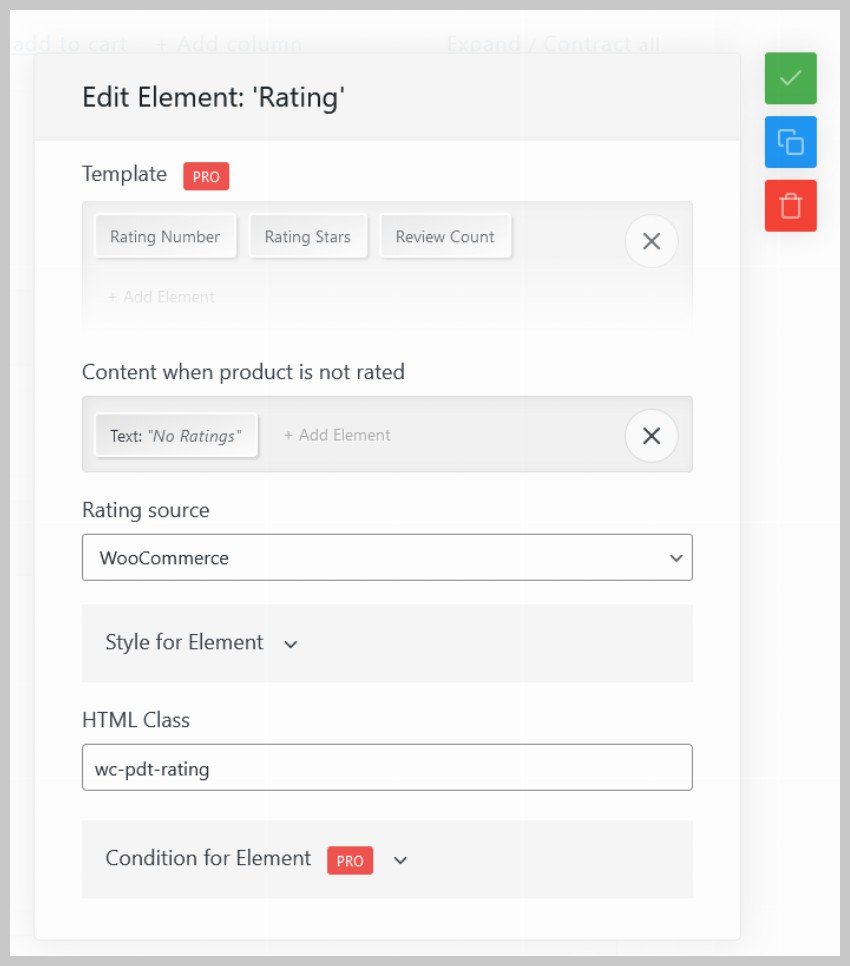
The Cell Template tab determines the content that will be shown to users in different product rows. Not all our products will have user provided ratings. We set the field value to No Ratings in that case. We also attach our own wc-pdt-rating class to the ratings so that we can apply custom CSS rules. The columns are also reordered so that product ratings are now next to their names.
Adding Filters to the Product Table
The default product table consists of a dropdown menu in top-right corner that gives users the option to sort different products based on a number of criteria like name, price, and user rating.
We will now add a bunch of other filters to the table so that users can opt-in to only see products from a specific subcategory or within a particular price range. You can add these filters either in a header row or in the left sidebar. I decided to place them in second row of our table in my case.
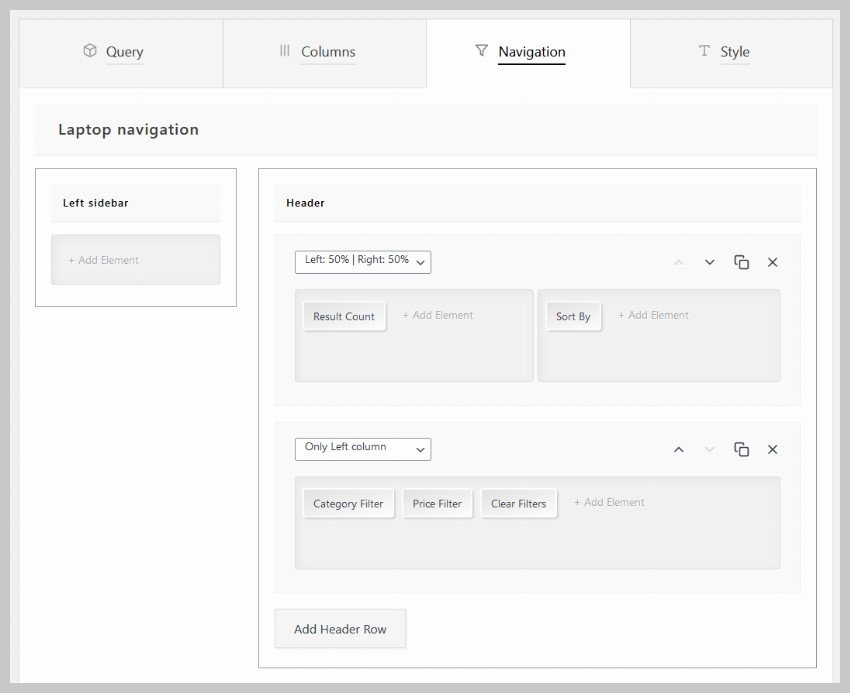
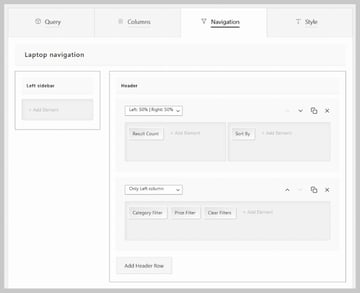
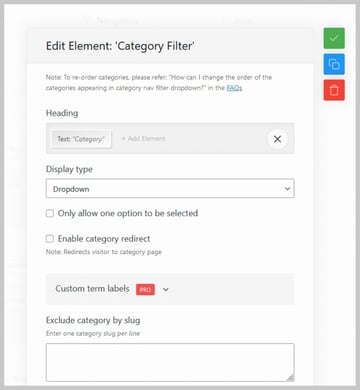
Click the + Add Element button in the second header row and then select Category Filter. All the default options are fine in this case but you can play around with them to add a custom CSS class or styling to elements. You can also enable the option to only let users select a single category if you want.


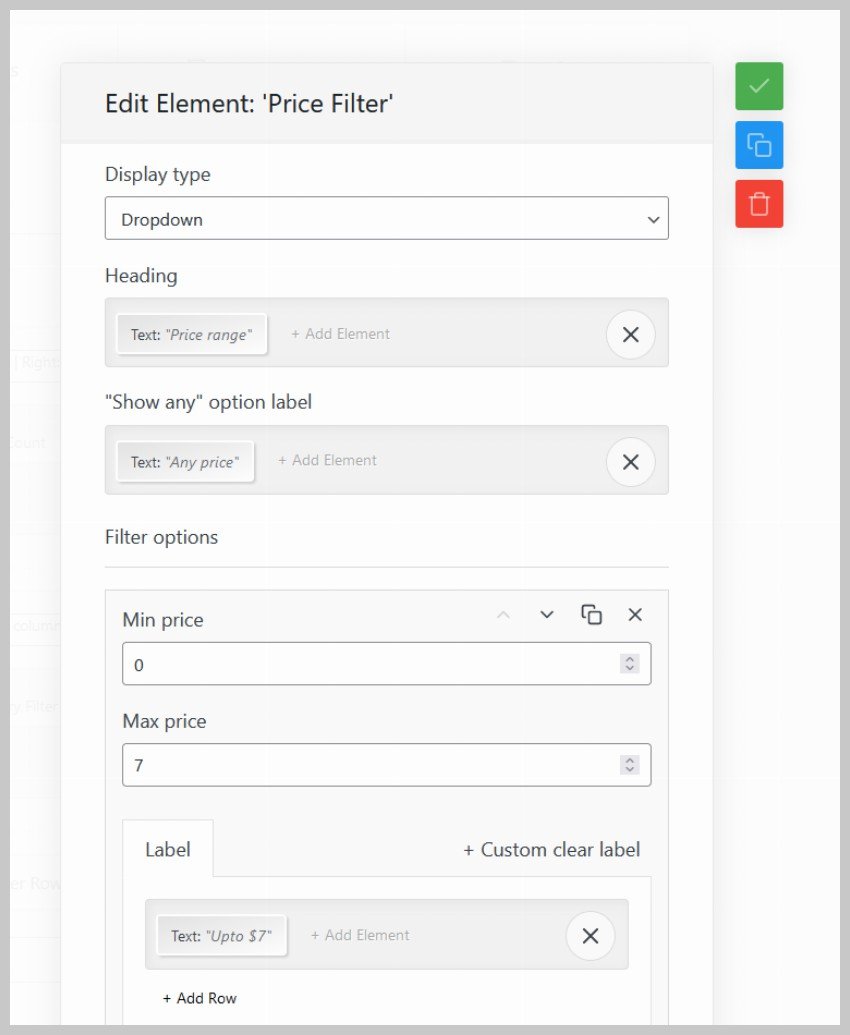
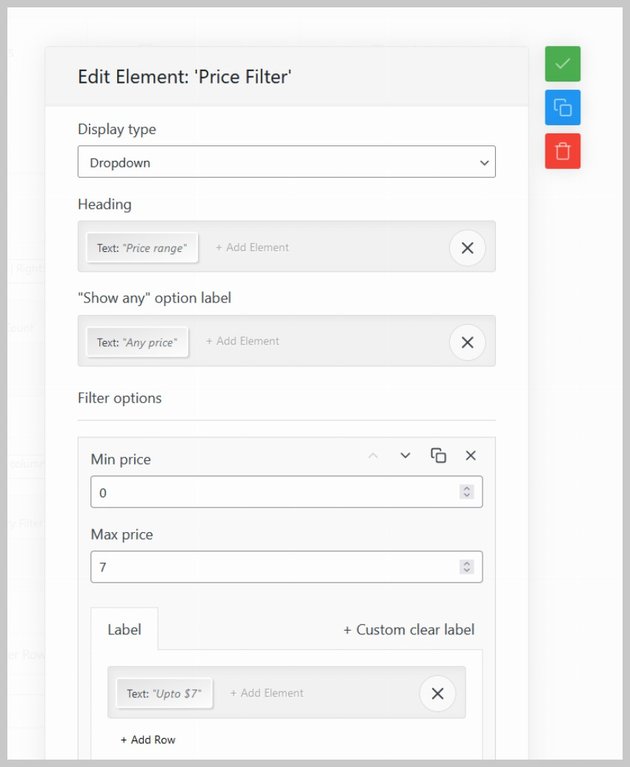
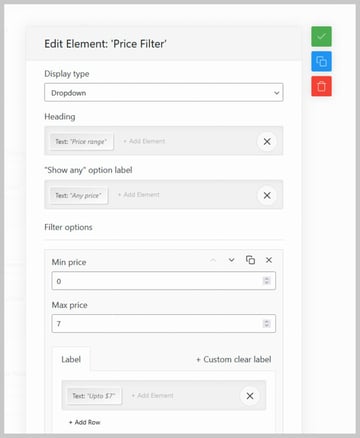
Now click on + Add Element again to add a Price Filter. Change the Filter options to reflect price ranges that are better representative of the products that you are displaying. In this case, I have split the prices ranges in three segments: up to $7, $7 to $15, and over $15. Click on the Save Settings button once you are done.
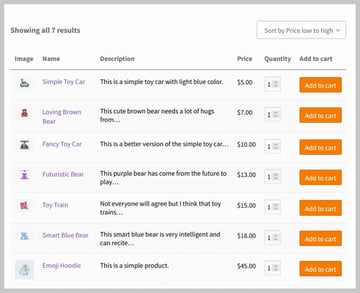
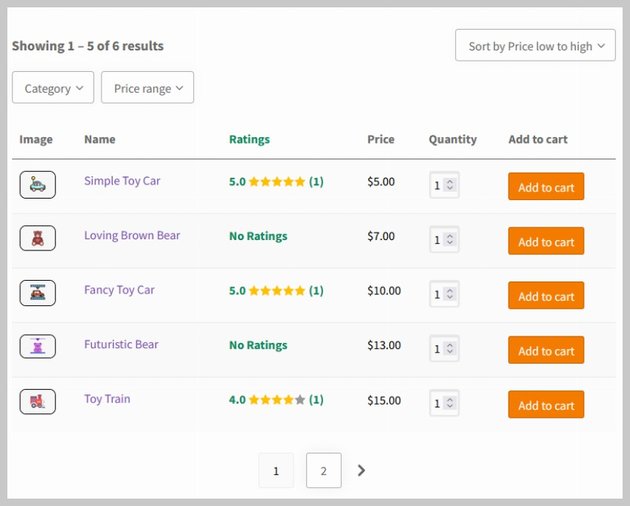
Your pricing table should look like the following image at this point.

Adding Own Style
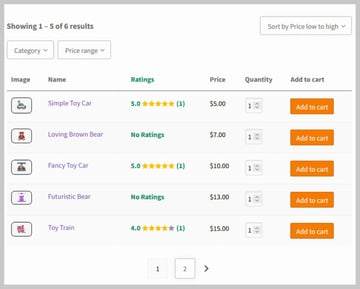
While the plugin itself comes with a lot of built-in styling options for different items, they might not always cover all you needs. You can switch to the Style tab in that case and add a bunch of CSS rules yourself.
WC Product Table does not directly expose all the element selectors to us but it does provide us with placeholders to target those elements. For example, you can apply styling to the heading row by using [heading_row] as your selector. You can also use your own set of selectors. Here is the CSS that I applied to our product table.
[heading_row] {
     text-transform: uppercase;
     color: #333;
     border-top: 1px solid black;
}
 [heading_cell] {
     background: #ddd;
}
 body .wcpt-table a.wcpt-button, body .wcpt-table a.wcpt-link_button {
     font-weight: bold;
     border-radius: 0;
}
 body .wcpt-table a.wcpt-button:hover, body .wcpt-table a.wcpt-link_button:hover {
     background: yellowgreen;
}
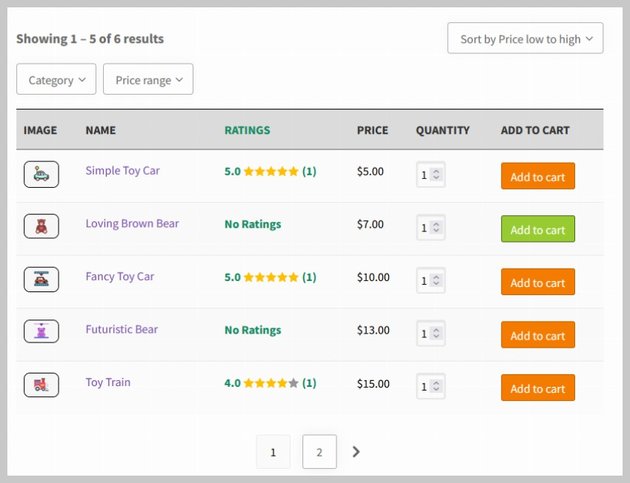
The table looks like the following image now. Hovering over the cart buttons will turn them from orange to green.


Final Thoughts
In this tutorial, we looked at the advantages of using WooCommerce product tables, some different options for adding product tables to your website, and how to create and customize them. The WooCommerce Product Table plugin I used in this tutorial comes with a decent set of features to meet all your basic requirements, but for more advanced features and UI, take a look at the best-selling WooCommerce product table plugins on CodeCanyon for some examples.
