HTML Structure
Okay, let’s get started. The HTML structure will consist of the following elements;
- A timer button
-
An
<h3>tag containing the text to be typed. - An input text for typing the words.
- A reset button that will prompt the user to retake the test once the timer runs out.
We will be using Bootstrap to build the interface.
Let’s start by adding the heading inside the universal container.
1 |
<div class="container mt-5 text-center"> |
2 |
<div class="row"> |
3 |
<div class="col"> |
4 |
<h1>TYPING SPEED TEST</h1> |
5 |
</div>
|
6 |
</div>
|
7 |
</div>
|
8 |
|
Next, add the timer countdown button and an empty <h3> element to update the typing results.
1 |
<div class="row mt-5"> |
2 |
<div class="col"> |
3 |
<button id="countdown" class="btn btn-primary btn-lg mb-3">60s</button> |
4 |
<h3 id="wpm" class="mt-3"></h3> |
5 |
</div>
|
6 |
</div>
|
The next row will contain the following elements
-
An
<h3>tag containing the text to be typed. The text will be added dynamically with JavaScript as the user types to ensure it doesn’t take up too much space. -
Below the
<h3>tag, we will have thetextareainput where the user will be typing.
1 |
<div class="row mt-5" id="main"> |
2 |
<div class="col-9 mx-auto"> |
3 |
<h3 id="word" class="display-6"></h3> |
4 |
<textarea
|
5 |
class="form-control text_input mb-3" |
6 |
placeholder="Start typing here..." |
7 |
></textarea>
|
8 |
</div>
|
9 |
</div>
|
The last element is the reset button which, when clicked, will let the user play again: This row containing the button will be hidden by default.
1 |
<div class="row mt-5" id="reset"> |
2 |
<div class="col"> |
3 |
<button id="reset_btn" class="btn btn-success btn-lg h3">Take the Test Again</button> |
4 |
</div>
|
5 |
</div>
|
6 |
</div>
|
CSS Functionality
On top of what Bootstrap gives us, we will also use some custom CSS styles as shown below.
1 |
@import url("https://fonts.googleapis.com/css2?family=DM+Mono:ital,wght@0,300;0,400;0,500;1,300;1,400;1,500&display=swap"); |
2 |
|
3 |
body { |
4 |
font-family: "DM Mono", monospace; |
5 |
}
|
6 |
|
7 |
h1 { |
8 |
font-weight: 900; |
9 |
}
|
10 |
|
11 |
#word { |
12 |
min-height: 11rem; |
13 |
|
14 |
}
|
15 |
|
16 |
.correct { |
17 |
color: green; |
18 |
}
|
19 |
|
20 |
.incorrect { |
21 |
color: red; |
22 |
}
|
23 |
|
24 |
#reset { |
25 |
display: none; |
26 |
}
|
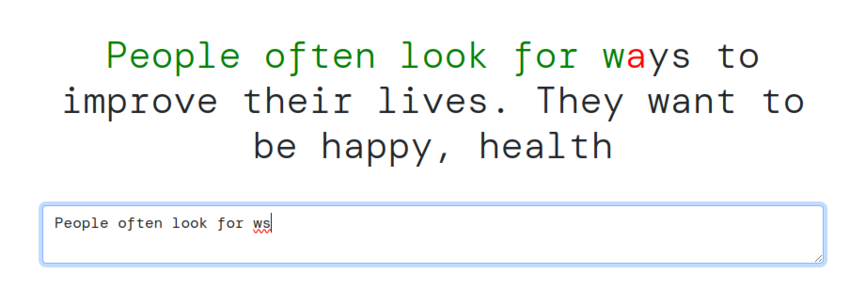
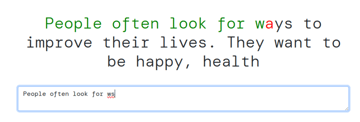
The green color will be applied to the letters typed correctly, while the red color will be applied to the incorrectly typed letters. When the user is typing, it will look something like this:

JavaScript Functionality
With the structure and the styling taken care of, let’s get stuck into the behaviour with some JavaScript. We’ll start by creating the timer, so get the timer button element.
1 |
const timerElement = document.getElementById("countdown"); |
Then, define a duration constant, this represents the timer duration of 1 min(60s)
Next create a function called startTimer() . Inside the function, define a timer variable and initialize it with the duration constant .
1 |
function startTimer() { |
2 |
let timer = duration; |
3 |
|
4 |
|
5 |
}
|
Next, we will use the setInterval() method which runs a function repeatedly at specified intervals. In our case, it will decrease the timer by 1 every second and update the timerElement with the new timer value. When the timer reaches 0, the interval will be cleared to stop the countdown.
1 |
function startTimer() { |
2 |
let timer = duration; |
3 |
interval = setInterval(() => { |
4 |
timer--; |
5 |
timerElement.textContent = `${timer}s`; |
6 |
|
7 |
}, 1000); |
8 |
}
|
If the timer reaches 0, we will clear it with the clearInterval() method and set the text content of the timerElement to “Time’s up.” Update the startTimer() function like this:
1 |
function startTimer() { |
2 |
let timer = duration; |
3 |
|
4 |
interval = setInterval(() => { |
5 |
timer--; |
6 |
timerElement.textContent = `${timer}s`; |
7 |
|
8 |
if (timer <= 0) { |
9 |
clearInterval(interval); |
10 |
timerElement.textContent = "Time's up!"; |
11 |
|
12 |
}
|
13 |
}, 1000); |
14 |
}
|
The Phrase to Type
The next step is to display a piece of the text to be typed. The text looks like this:
1 |
const phrase = `People often look for ways to improve their lives. They want to be happy, healthy, and successful. |
2 |
To achieve these goals, they work hard, spend time with family and friends, and enjoy hobbies.
|
3 |
Eating well and staying active are important for health.
|
4 |
Learning new things and setting goals can help people grow.
|
5 |
Everyone has challenges, but staying positive and focused can make a big difference.
|
6 |
Helping others and being kind can also bring joy.
|
7 |
Life is a journey, and every day is a chance to make it better.
|
8 |
Enjoy the little things and appreciate what you have.
|
9 |
It's important to stay connected with others, communicate openly, and listen carefully.
|
10 |
Reading books, exploring new places, and trying new activities can expand our horizons.
|
11 |
Balancing work and relaxation helps maintain a healthy lifestyle.
|
12 |
Remember to laugh often, love deeply, and live fully.
|
13 |
Taking time to reflect on our experiences and learn from them can lead to personal growth.
|
14 |
The support of loved ones can provide strength and comfort.
|
15 |
Every moment is an opportunity to create lasting memories and build a fulfilling life.
|
16 |
In the end, it's not the years in your life that count. It's the life in your years. - Abraham Lincoln`; |
Since we are using template literals to format the text, at the end of each line, we have white space, so we need to format the text to ensure the text has no unnecessary breaks and extra spaces.
1 |
const text = phrase.replace(/[\r\n]+\s*/g, ' ') .replace(/\s{2,}/g, ' '); ; |
In the code above, we use regular expressions to clean up the text by removing line breaks and reducing multiple consecutive whitespace characters to a single space.
When the app loads for the first time, we will show only a portion of the text. Let’s use the splice() method to get the first 10 words of the text and then set the textContent of the word element to this string of the first 10 words.
1 |
const word = document.getElementById("word"); |
2 |
word.textContent = text.split(" ").slice(0 |
3 |
, 10).join(" "); |
As the user types, we also want to continuously add a portion of the text depending on where the user has reached typing. For example, three lines of text at every instance will be an ideal number.
Create a constant displayLength to define the length of the visible portion of the text based on the typing position.
1 |
const displayLength = 80; |
Next, we will get the text input and listen for the input event. The input event is triggered when a user types or deletes anything in the input area. We will also create a timerStarted variable and set it to false. timerStarted variable will ensure the timer doesn’t reset to 0 when the user is typing.
1 |
let timerStarted = false; |
2 |
|
3 |
const textInput = document.querySelector(".text_input"); |
4 |
textInput.addEventListener("input", (e) => { |
5 |
|
6 |
}
|
In the event listener function, we will create an if statement that will ensure that the timer is started only once when the input event is fired.
1 |
textInput.addEventListener("input", (e) => { |
2 |
if (!timerStarted) { |
3 |
startTimer(); |
4 |
timerStarted = true; |
5 |
|
6 |
}
|
7 |
}
|
Fetch the Typed Text
Next, let’s get the value of the typedtext. typedtext is the text the user has typed and is obtained from the value of the input element. Initialise displayText, a variable which represents the portion of the text to be typed that will be shown to the user:
1 |
const typedText = textInput.value; |
2 |
let displayText = ""; |
Next, create a startIndex and a stopIndex, which will determine the starting index of the text to be typed based on the user’s typing position.
1 |
let startIndex = Math.max(0, typedText.length - displayLength / 2); |
2 |
let endIndex = startIndex + displayLength; |
Next, we want to create a for loop that will iterate from the startIndex up to the endIndex and within the bounds of the text to be typed.
Inside the for loop, we will continuously check if the current index is within the bounds of the typed text. If the character at the current index of the typed text matches the character at the same index in the text to be typed, it means the user is typing correctly. In this case, we will wrap the correct character in a span with a class that applies a green color to it.
If there is an index mismatch, the user has misspelled the current index, we will wrap it in a span class and apply a red color.
As the user types, the color highlighting will be displayed on the element containing the displayed text in real-time.
Update the Results
The last step is to update the results once the timer reaches 0. Create a function called updateResults() which will look like this:
1 |
function updateTyping() { |
2 |
mainContainer = document.getElementById("main"); |
3 |
mainContainer.style.display = "none"; |
4 |
const wordsTypedValue = document.querySelector(".text_input").value; |
5 |
const wordsTyped = wordsTypedValue.trim().split(/\s+/).length |
6 |
wpm.textContent = `Your speed was: ${ |
7 |
(wordsTyped * 60) / duration |
8 |
} WPM `; |
9 |
|
10 |
resetContainer.style.display = "block"; |
11 |
}
|
After the timer duration reaches 0:
- we will hide the text being typed and the textarea input element.
- Then, we will get the value of the input, which will represent the number of words the user has typed in the duration of the 1-minute timer.
const wordsTyped=wordsTypedValue.trim().split(/\s+/).lengthwill split the content typed and get the total number of words typed.- Then we will update the typing speed with the formula
(wordsTyped*60) /duration. - Finally, we will display the reset button. The button will prompt the user to retake the text.
In your startTimer() function, update it to invoke the updateResults() when the timer reaches 0.
1 |
function startTimer() { |
2 |
let timer = duration; |
3 |
// let interval;
|
4 |
interval = setInterval(() => { |
5 |
timer--; |
6 |
timerElement.textContent = `${timer}s`; |
7 |
|
8 |
if (timer <= 0) { |
9 |
clearInterval(interval); |
10 |
timerElement.textContent = "Time's up!"; |
11 |
updateTyping(); |
12 |
}
|
13 |
}, 1000); |
14 |
}
|
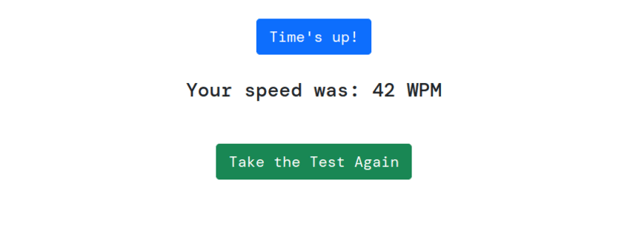
When the timer ends, you should see something like this:


As a reminder, here is the demo:
Conclusion
This tutorial has covered how to create a fully functioning typing test application with Vanilla JavaScript. You’ve learned a lot! We covered many JavaScript concepts, such as event handling, DOM manipulation, string manipulation, the Math function, conditional logic, for loops, and working with intervals.
You can improve the application by adding more features, such as different time limits, accuracy, errors and so on. Good luck!