Optimizing your website’s content (pages and posts) for search engines increases the likelihood of them showing up in search results, which is a great way to drive organic traffic to your website.
One vital SEO practice is to include a sitemap on your website. This is what search engines will use to access the different pages and assets on your site in order to crawl and index them.
In this article, I’ll explain what a sitemap is and show you different ways to set it up in WordPress.
What Is a Sitemap?
A sitemap is basically a document containing the layout of your website. Search engines use this document to crawl and index your website’s content and to determine the most important pages on the site.
The common kind of sitemap is an XML sitemap. Typically, this sitemap contains links to the pages, posts, and assets on your website.
The other kinds of sitemaps are:
- Video sitemap: Search engines use this specific sitemap to comprehend the video content on your site.
- News sitemap: Google uses this sitemap to discover and index content on Google News-approved websites.
- Image sitemap: Search engines use this specific sitemap to comprehend the images on your site.
Why Are Sitemaps Important?
Sitemaps provide search engines like Google and Bing with links to your website’s pages, posts, and categories so that they can be indexed correctly.
Sitemaps aren’t necessary in all cases. For example, if your website already has a substantial amount of external links and a detailed internal linking system, then you may not need a sitemap as search engines can use these links to index your site’s content.
However, if your website is brand new and doesn’t have many external links, then you’ll need to set up a sitemap to introduce search engines to your website and get your content indexed as soon as possible.
Adding a Sitemap to WordPress
Starting from version 5.5, WordPress automatically generates a sitemap for your website, so you’ll no longer need a plugin to generate one.
To check your WordPress version:
- Log in to your WordPress admin panel.
- Navigate to Tools > Site Health.
- Click on the Info tab.
- Expand the WordPress section. You’ll find your WordPress version there.
After confirming that your WordPress version is 5.5 or higher, you can access your sitemap by navigating your web browser to the wp-sitempa.xml file on your website. The URL will look like this: https:///wp-sitemap.xml.
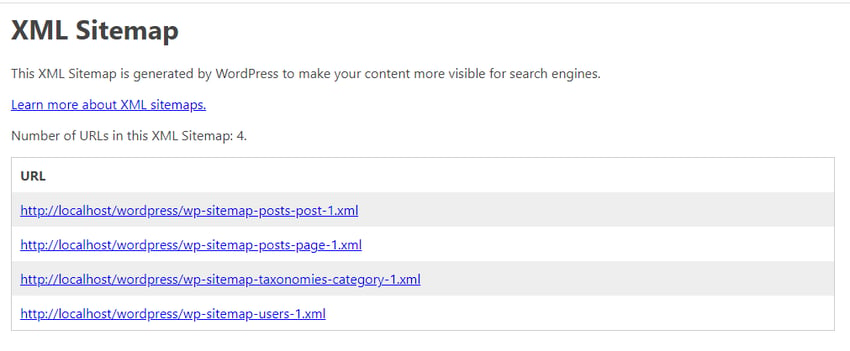

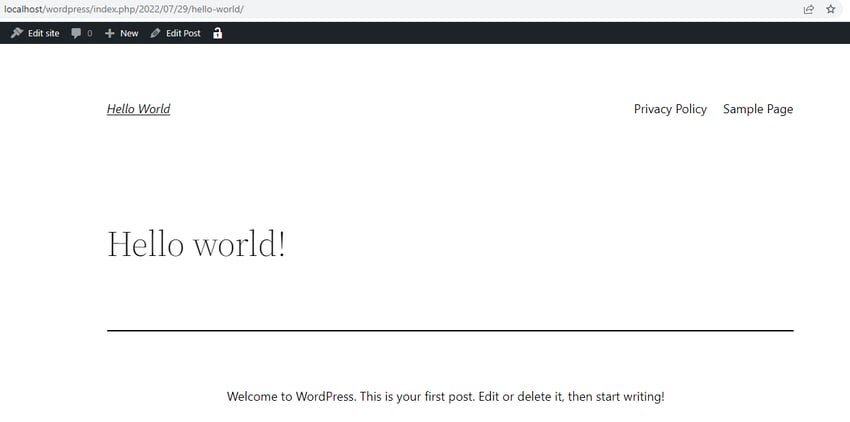
In the image above, you can see that my XML sitemap is linking to other child sitemaps which show all of my posts, pages, categories, and users (authors). If I click on the first post’s link, I’ll be led to the full post on my website.
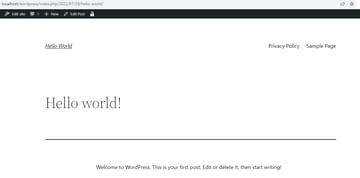
This is how search engines are able to access the content of a website: by following the links specified in the sitemap.
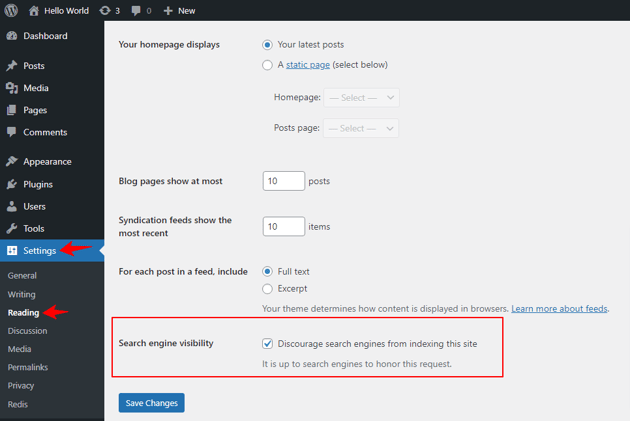
By the way, if you got a 404: Page Not Found error while attempting to access the sitemap document, then you’ll need to turn on search engine visibility in WordPress. To do that, navigate to Settings > Reading, scroll to Search engine visibility and uncheck the radio button to enable search engines to find your site.


Next up, plugins.
Use Yoast SEO to Generate a Sitemap
If you’re using an older version of WordPress that doesn’t automatically generate the sitemap for you, you can add a sitemap using a plugin like Yoast SEO.
Yoast SEO is used for SEO optimization of WordPress content. After you install and activate Yoast SEO, it’ll automatically generate a sitemap for you without requiring any actions from your end.
In addition, Yoast SEO will add meta descriptions for your site to help it perform better in search results. Meta descriptions are basically the little snippets that you’ll see on your posts in Google search results.
Submit Your Sitemap to Google
You’ll be submitting to something called Google Search Console. To do this, you’ll need to install Google’s Site Kit plugin.
Navigate to Plugins > Add New and use the search box to search for “Site Kit by Google“. Install and activate it.


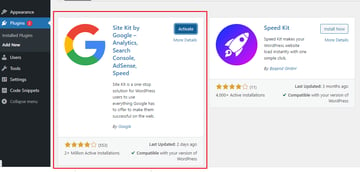
After installing and activating Site Kit, the Site Kit area will appear on the sidebar of your dashboard. Navigating to Site Kit > Search Console will take you to the Google Console page, and you’ll be prompted to provide the location of your sitemap.
Conclusion
Adding a sitemap to your site is very important for SEO, especially if your site is brand new and without many external links.
Even with established sites, you can still add a sitemap to be safe. Doing so will not have any negative impact on your site’s SEO performance.