In this tutorial, we’re going to build a PHP/MySQL powered forum from scratch. This tutorial is perfect for getting used to basic PHP and database usage.
Step 1: Creating Database Tables
It’s always a good idea to start by creating a good data model when building an application. Let’s see what we are going to build in our application briefly. We are going to make a forum which has users who can create topics in various categories. Other users can post replies to topics. As you can see, I’ve highlighted a couple of nouns which represent our table names.
- Categories
- Topics
- Posts
- Users
Let’s have a quick look at the database diagram:


Looks pretty neat, huh? Every square is a database table. All the columns are listed in it, and the lines between them represent the relationships. I’ll explain them further, so it’s okay if it doesn’t make a lot of sense to you right now.
I’ll discuss each table by explaining the SQL, which I’ve created using the schema above. Some editors like MySQL Workbench (the one I used) can generate .sql files too, but I would recommend learning SQL because it’s more fun to do it yourself. You can find a SQL introduction at W3Schools.
Users Table
1 |
CREATE TABLE users ( |
2 |
user_id INT(8) NOT NULL AUTO_INCREMENT, |
3 |
user_name VARCHAR(30) NOT NULL, |
4 |
user_pass VARCHAR(255) NOT NULL, |
5 |
user_email VARCHAR(255) NOT NULL, |
6 |
user_date DATETIME NOT NULL, |
7 |
user_level INT(8) NOT NULL, |
8 |
UNIQUE INDEX user_name_unique (user_name), |
9 |
PRIMARY KEY (user_id) |
10 |
) TYPE=INNODB; |
The CREATE TABLE statement is used to indicate we want to create a new table. The statement is followed by the name of the table and all the columns are listed between the brackets. The names of all the fields are self-explanatory, so we’ll only discuss the data types below.
user_id
The type of this field is INT, which means this field holds an integer. The field cannot be empty (NOT NULL) and increments when each record is inserted. At the bottom of the table you can see the user_id field is also declared as a primary key. A primary key is used to uniquely identify each row in a table. No two distinct rows in a table can have the same value (or combination of values) in all columns. That might be a bit unclear, so here’s a little example.
Let’s assume that there is a user called John Doe. If another user registers with the same name, there’s a problem because it’s difficult to identify which user is which. You can’t tell, and the database can’t tell either. By using a primary key, this problem is solved because both topics are unique.
All the other tables have primary keys too, and they work the same way.
user_name
This is a text field, called a VARCHAR field in MySQL. The number between brackets is the maximum length. A user can choose a username up to 30 characters long. This field cannot be NULL. At the bottom of the table, you can see this field is declared UNIQUE, which means the same username cannot be registered twice. The UNIQUE INDEX part tells the database we want to add a unique key. Next, we’ve defined the name of the unique key, user_name_unique in this case. Between brackets is the field the unique key applies to, which is user_name.
user_pass
This field is equal to the user_name field, except the maximum length. Since the user password, no matter what length, is hashed with sha1(), the password will always be 40 characters long.
user_email
This field is equal to the user_pass field.
user_date
This is a field in which we’ll store the date the user is registered on. Its data type is DATETIME, and the field cannot be NULL.
user_level
This field contains the level of the user, for example ‘0’ for a regular user and ‘1’ for an admin. More about this later.
Categories Table
1 |
CREATE TABLE categories ( |
2 |
cat_id INT(8) NOT NULL AUTO_INCREMENT, |
3 |
cat_name VARCHAR(255) NOT NULL, |
4 |
cat_description VARCHAR(255) NOT NULL, |
5 |
UNIQUE INDEX cat_name_unique (cat_name), |
6 |
PRIMARY KEY (cat_id) |
7 |
) TYPE=INNODB; |
These data types basically work the same way as the ones in the users table. This table also has a primary key, and the name of the category must be a unique one.
Topics Table
1 |
CREATE TABLE topics ( |
2 |
topic_id INT(8) NOT NULL AUTO_INCREMENT, |
3 |
topic_subject VARCHAR(255) NOT NULL, |
4 |
topic_date DATETIME NOT NULL, |
5 |
topic_cat INT(8) NOT NULL, |
6 |
topic_by INT(8) NOT NULL, |
7 |
PRIMARY KEY (topic_id) |
8 |
) TYPE=INNODB; |
This table is almost the same as the other tables, except for the topic_by field. That field refers to the user who created the topic. The topic_cat refers to the category the topic belongs to. We cannot force these relationships by just declaring the field. We have to let the database know this field must contain an existing user_id from the users table or a valid cat_id from the categories table. We’ll add some relationships a bit later.
Posts Table
1 |
CREATE TABLE posts ( |
2 |
post_id INT(8) NOT NULL AUTO_INCREMENT, |
3 |
post_content TEXT NOT NULL, |
4 |
post_date DATETIME NOT NULL, |
5 |
post_topic INT(8) NOT NULL, |
6 |
post_by INT(8) NOT NULL, |
7 |
PRIMARY KEY (post_id) |
8 |
) TYPE=INNODB; |
This is the same as the rest of the tables; there’s also a field which refers to a user_id here: the post_by field. The post_topic field refers to the topic the post belongs to.
Now that we’ve executed these queries, we have a pretty decent data model, but the relations are still missing. Let’s start with the definition of a relationship. We’re going to use something called a foreign key. A foreign key is a referential constraint between two tables. The foreign key identifies a column or a set of columns in one (referencing) table that refers to a column or set of columns in another (referenced) table. Some conditions:
- The column in the referencing table the foreign key refers to must be a primary key.
- The values that are referred to must exist in the referenced table.
By adding foreign keys, the information is linked together, which is very important for database normalization. Now you know what a foreign key is and why we’re using them. It’s time to add them to the tables we’ve already made by using the ALTER statement, which can be used to change an existing table.
We’ll link the topics to the categories first:
1 |
ALTER TABLE topics ADD FOREIGN KEY(topic_cat) REFERENCES categories(cat_id) ON DELETE CASCADE ON UPDATE CASCADE; |
The last part of the query already says what happens. When a category gets deleted from the database, all the topics will be deleted too. If the cat_id of a category changes, every topic will be updated too. That’s what the ON UPDATE CASCADE part is for. Of course, you can reverse this to protect your data, so that you can’t delete a category as long as it still has topics linked to it. If you wanted to do that, you could replace the ON DELETE CASCADE part with ON DELETE RESTRICT. There are also SET NULL and NO ACTION, which speak for themselves.
Every topic is linked to a category now. Let’s link the topics to the user who creates one.
1 |
ALTER TABLE topics ADD FOREIGN KEY(topic_by) REFERENCES users(user_id) ON DELETE RESTRICT ON UPDATE CASCADE; |
This foreign key is the same as the previous one, but there’s one difference: the user can’t be deleted as long as there are still topics with the user id of the user. We don’t use CASCADE here because there might be valuable information in our topics. We wouldn’t want that information to get deleted if someone decided to delete their account. To still give users the opportunity to delete their account, you could build a feature that anonymizes all their topics and then deletes their account. Unfortunately, that is beyond the scope of this tutorial.
Link the posts to the topics:
1 |
ALTER TABLE posts ADD FOREIGN KEY(post_topic) REFERENCES topics(topic_id) ON DELETE CASCADE ON UPDATE CASCADE; |
And finally, link each post to the user who made it:
1 |
ALTER TABLE posts ADD FOREIGN KEY(post_by) REFERENCES users(user_id) ON DELETE RESTRICT ON UPDATE CASCADE; |
That’s the database part! It was quite a lot of work, but the result is a great data model which is definitely worth the effort.
Each page of our forum needs a few basic things, like a Doctype and some markup. That’s why we’ll include a header.php file at the top of each page and a footer.php at the bottom. The header.php file contains a Doctype, a link to the stylesheet, and some important information about the forum, such as the title tag and metatags.
The header.php File
1 |
<!DOCTYPE html PUBLIC "-//W3C//DTD XHTML 1.0 Strict//EN"
|
2 |
"https://www.w3.org/TR/xhtml1/DTD/xhtml1-strict.dtd">
|
3 |
<html xmlns="http://www.w3.org/1999/xhtml" xml:lang="nl" lang="nl"> |
4 |
<head>
|
5 |
<meta http-equiv="Content-Type" content="text/html; charset=UTF-8" /> |
6 |
<meta name="description" content="A short description." /> |
7 |
<meta name="keywords" content="put, keywords, here" /> |
8 |
<title>PHP-MySQL forum</title> |
9 |
<link rel="stylesheet" href="style.css" type="text/css"> |
10 |
</head>
|
11 |
|
12 |
<body>
|
13 |
<h1>My forum</h1> |
14 |
<div id="wrapper"> |
15 |
<div id="menu"> |
16 |
<a class="item" href="/forum/index.php">Home</a> - |
17 |
<a class="item" href="/forum/create_topic.php">Create a topic</a> - |
18 |
<a class="item" href="/forum/create_cat.php">Create a category</a> |
19 |
|
20 |
<div id="userbar"> |
21 |
<div id="userbar">Hello Example. Not you? Log out.</div> |
22 |
</div>
|
23 |
|
24 |
<div id="content"> |
The wrapper div will be used to make it easier to style the entire page. The menu div obviously contains a menu with links to pages we still have to create, but it helps to see where we’re going a little bit.
The userbar div is going to be used for a small top bar which contains some information like the username and a link to the logout page. The content page holds the actual content of the page, obviously.
The attentive reader might have already noticed we’re missing some things. There is no </body> or </html> tag. They’re in the footer.php file, as you can see below.
1 |
</div><!-- content --> |
2 |
</div><!-- wrapper --> |
3 |
<div id="footer">Created for tutsplus</div> |
4 |
</body>
|
5 |
</html>
|
When we include header and footer components on each page, the rest of the page gets embedded between the header and the footer. This method has some advantages. First and foremost, everything will be styled correctly. A short example:
1 |
<?php
|
2 |
$error = false; |
3 |
|
4 |
if($error = false) |
5 |
{
|
6 |
//the beautifully styled content, everything looks good
|
7 |
echo '<div id="content">some text</div>'; |
8 |
}
|
9 |
else
|
10 |
{
|
11 |
//bad looking, unstyled error :-(
|
12 |
}
|
13 |
?>
|
As you can see, a page without errors will result in a nice page with the content. But if there’s an error, everything looks really ugly; that’s why it’s better to make sure not only real content is styled correctly, but also the errors we might get.
Another advantage is the possibility of making quick changes. You can see for yourself by editing the text in footer.php when you’ve finished this tutorial; you’ll notice that the footer changes on every page immediately. Finally, we’ve added a stylesheet which provides some basic markup—nothing too fancy.
1 |
body { |
2 |
background-color: #4E4E4E; |
3 |
text-align: center; /* make sure IE centers the page too */ |
4 |
}
|
5 |
|
6 |
#wrapper { |
7 |
width: 900px; |
8 |
margin: 0 auto; /* center the page */ |
9 |
}
|
10 |
|
11 |
#content { |
12 |
background-color: #fff; |
13 |
border: 1px solid #000; |
14 |
float: left; |
15 |
font-family: Arial; |
16 |
padding: 20px 30px; |
17 |
text-align: left; |
18 |
width: 100%; /* fill up the entire div */ |
19 |
}
|
20 |
|
21 |
#menu { |
22 |
float: left; |
23 |
border: 1px solid #000; |
24 |
border-bottom: none; /* avoid a double border */ |
25 |
clear: both; /* clear:both makes sure the content div doesn't float next to this one but stays under it */ |
26 |
width:100%; |
27 |
height:20px; |
28 |
padding: 0 30px; |
29 |
background-color: #FFF; |
30 |
text-align: left; |
31 |
font-size: 85%; |
32 |
}
|
33 |
|
34 |
#menu a:hover { |
35 |
background-color: #009FC1; |
36 |
}
|
37 |
|
38 |
#userbar { |
39 |
background-color: #fff; |
40 |
float: right; |
41 |
width: 250px; |
42 |
}
|
43 |
|
44 |
#footer { |
45 |
clear: both; |
46 |
}
|
47 |
|
48 |
/* begin table styles */
|
49 |
|
50 |
table { |
51 |
border-collapse: collapse; |
52 |
width: 100%; |
53 |
}
|
54 |
|
55 |
table a { |
56 |
color: #000; |
57 |
}
|
58 |
|
59 |
table a:hover { |
60 |
color:#373737; |
61 |
text-decoration: none; |
62 |
}
|
63 |
|
64 |
th { |
65 |
background-color: #B40E1F; |
66 |
color: #F0F0F0; |
67 |
}
|
68 |
|
69 |
td { |
70 |
padding: 5px; |
71 |
}
|
72 |
|
73 |
/* Begin font styles */
|
74 |
|
75 |
h1, #footer { |
76 |
font-family: Arial; |
77 |
color: #F1F3F1; |
78 |
}
|
79 |
|
80 |
h3 {margin: 0; padding: 0;} |
81 |
|
82 |
/* Menu styles */
|
83 |
|
84 |
.item { |
85 |
background-color: #00728B; |
86 |
border: 1px solid #032472; |
87 |
color: #FFF; |
88 |
font-family: Arial; |
89 |
padding: 3px; |
90 |
text-decoration: none; |
91 |
}
|
92 |
|
93 |
.leftpart { |
94 |
width: 70%; |
95 |
}
|
96 |
|
97 |
.rightpart { |
98 |
width: 30%; |
99 |
}
|
100 |
|
101 |
.small { |
102 |
font-size: 75%; |
103 |
color: #373737; |
104 |
}
|
105 |
|
106 |
#footer { |
107 |
font-size: 65%; |
108 |
padding: 3px 0 0 0; |
109 |
}
|
110 |
|
111 |
.topic-post { |
112 |
height: 100px; |
113 |
overflow: auto; |
114 |
}
|
115 |
|
116 |
.post-content { |
117 |
padding: 30px; |
118 |
}
|
119 |
|
120 |
textarea { |
121 |
width: 500px; |
122 |
height: 200px; |
123 |
}
|
Step 3: Getting Ready for Action
Before we can read anything from our database, we need a connection. That’s what connect.php is used for. We’ll include it in every file we are going to create.
1 |
<?php
|
2 |
// connect.php
|
3 |
$server = 'localhost'; |
4 |
$username = 'usernamehere'; |
5 |
$password = 'passwordhere'; |
6 |
$database = 'databasenamehere'; |
7 |
|
8 |
$conn = mysqli_connect($server, $username, $password, $database); |
9 |
|
10 |
// Check connection
|
11 |
if (!$conn) { |
12 |
exit('Error: could not establish database connection'); |
13 |
}
|
14 |
|
15 |
// Select database
|
16 |
if (!mysqli_select_db($conn, $database)) { |
17 |
exit('Error: could not select the database'); |
18 |
}
|
19 |
?>
|
Simply replace the default values of the variables at the top of the page with your own, save the file, and you’re good to go!
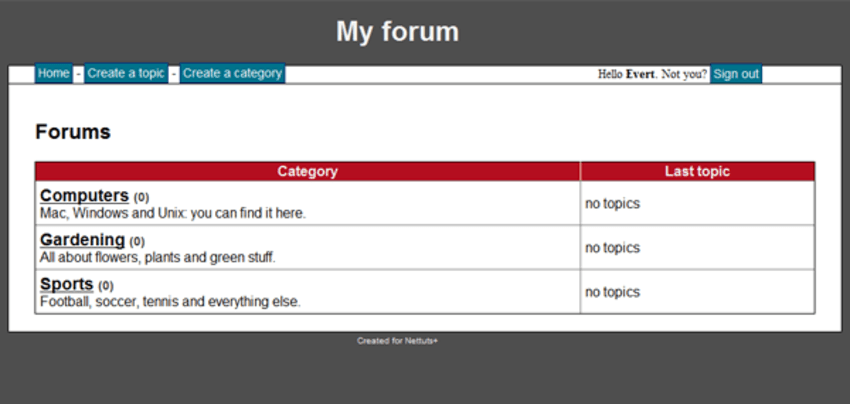
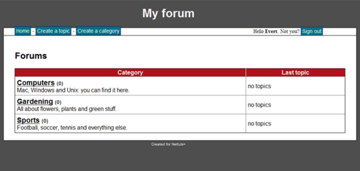
Step 4: Displaying the Forum Overview
Since we’re just getting started with some basic techniques, we’re going to make a simplified version of the forum overview for now.
1 |
<?php
|
2 |
//create_cat.php
|
3 |
include 'connect.php'; |
4 |
include 'header.php'; |
5 |
|
6 |
echo '<tr>'; |
7 |
echo '<td class="leftpart">'; |
8 |
echo '<h3><a href="category.php?id=">Category name</a></h3> Category description goes here'; |
9 |
echo '</td>'; |
10 |
echo '<td class="rightpart">'; |
11 |
echo '<a href="topic.php?id=">Topic subject</a> at 10-10'; |
12 |
echo '</td>'; |
13 |
echo '</tr>'; |
14 |
include 'footer.php'; |
15 |
?>
|
There you have it: a nice, clean overview. We are going to update this page throughout the tutorial so that it becomes more like the end result, step by step!
Step 5: Signing Up a User
Let’s start by making a simple HTML form so that a new user can register.
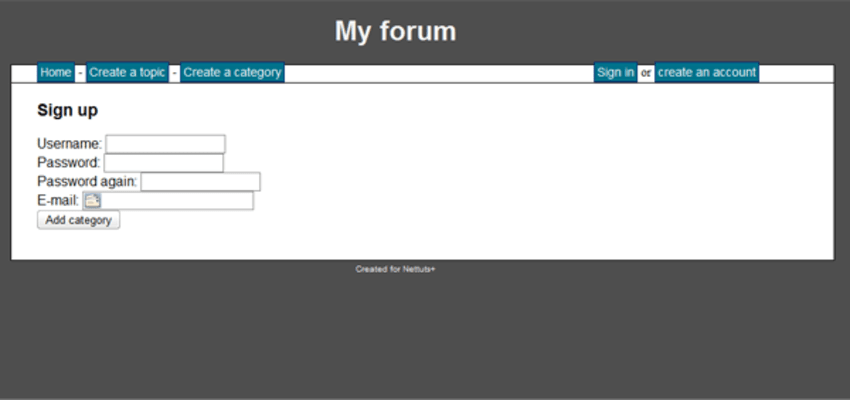


A PHP page is needed to process the form. We’re going to use a $_SERVER variable. The $_SERVER variable is an array with values that are automatically set with each request. One of the values of the $_SERVER array is REQUEST_METHOD. When a page is requested with GET, this variable will hold the value GET. When a page is requested via POST, it will hold the value POST. We can use this value to check if a form has been posted. The signup.php file looks like the following snippet.
1 |
<?php
|
2 |
//signup.php
|
3 |
include 'connect.php'; |
4 |
include 'header.php'; |
5 |
|
6 |
echo '<h3>Sign up</h3>'; |
7 |
|
8 |
if($_SERVER['REQUEST_METHOD'] != 'POST') |
9 |
{
|
10 |
/*the form hasn't been posted yet, display it
|
11 |
note that the action="" will cause the form to post to the same page it is on */
|
12 |
|
13 |
echo '<form method="post" action=""> |
14 |
Username: <input type="text" name="user_name" />
|
15 |
Password: <input type="password" name="user_pass">
|
16 |
Password again: <input type="password" name="user_pass_check">
|
17 |
E-mail: <input type="email" name="user_email">
|
18 |
<input type="submit" value="Add category" />
|
19 |
</form>'; |
20 |
}
|
21 |
else
|
22 |
{
|
23 |
/* so, the form has been posted, we'll process the data in three steps:
|
24 |
1. Check the data
|
25 |
2. Let the user refill the wrong fields (if necessary)
|
26 |
3. Save the data
|
27 |
*/
|
28 |
|
29 |
$errors = array(); /* declare the array for later use */ |
30 |
|
31 |
if(isset($_POST['user_name'])) |
32 |
{
|
33 |
//the user name exists
|
34 |
if(!ctype_alnum($_POST['user_name'])) |
35 |
{
|
36 |
$errors[] = 'The username can only contain letters and digits.'; |
37 |
}
|
38 |
if(strlen($_POST['user_name']) > 30) |
39 |
{
|
40 |
$errors[] = 'The username cannot be longer than 30 characters.'; |
41 |
}
|
42 |
}
|
43 |
else
|
44 |
{
|
45 |
$errors[] = 'The username field must not be empty.'; |
46 |
}
|
47 |
|
48 |
if(isset($_POST['user_pass'])) |
49 |
{
|
50 |
if($_POST['user_pass'] != $_POST['user_pass_check']) |
51 |
{
|
52 |
$errors[] = 'The two passwords did not match.'; |
53 |
}
|
54 |
}
|
55 |
else
|
56 |
{
|
57 |
$errors[] = 'The password field cannot be empty.'; |
58 |
}
|
59 |
|
60 |
if(!empty($errors)) /*check for an empty array, if there are errors, they're in this array (note the ! operator)*/ |
61 |
{
|
62 |
echo 'Uh-oh.. a couple of fields are not filled in correctly..'; |
63 |
echo '<ul>'; |
64 |
|
65 |
foreach($errors as $key => $value) /* walk through the array so all the errors get displayed */ |
66 |
{
|
67 |
echo '<li>' . $value . '</li>'; /* this generates a nice error list */ |
68 |
}
|
69 |
echo '</ul>'; |
70 |
}
|
71 |
else
|
72 |
{
|
73 |
//the form has been posted without, so save it
|
74 |
//notice the use of mysql_real_escape_string, keep everything safe!
|
75 |
//also notice the sha1 function which hashes the password
|
76 |
// Prepare the SQL statement with placeholders
|
77 |
$sql = "INSERT INTO users(user_name, user_pass, user_email, user_date, user_level) |
78 |
VALUES (?, ?, ?, NOW(), 0)"; |
79 |
|
80 |
// Create a prepared statement
|
81 |
$stmt = mysqli_prepare($conn, $sql); |
82 |
|
83 |
// Bind parameters to the prepared statement
|
84 |
mysqli_stmt_bind_param($stmt, 'sss', $_POST['user_name'], sha1($_POST['user_pass']), $_POST['user_email']); |
85 |
|
86 |
// Execute the prepared statement
|
87 |
$result = mysqli_stmt_execute($stmt); |
88 |
|
89 |
if(!$result) |
90 |
{
|
91 |
//something went wrong, display the error
|
92 |
echo 'Something went wrong while registering. Please try again later.'; |
93 |
//echo mysql_error(); //debugging purposes, uncomment when needed
|
94 |
}
|
95 |
else
|
96 |
{
|
97 |
echo 'Successfully registered. You can now <a href="signin.php">sign in</a> and start posting! :-)'; |
98 |
}
|
99 |
}
|
100 |
}
|
101 |
|
102 |
include 'footer.php'; |
103 |
?>
|
A lot of explanation is in the comments that I’ve provided along with the code, so be sure to check them out. The processing of the data takes place in three parts:
- validating the data
- if the data is not valid, show the form again
- if the data is valid, save the record in the database
The PHP part is quite self-explanatory. The SQL query, however, probably needs a little more explanation.
1 |
// Prepare the SQL statement with placeholders
|
2 |
$sql = "INSERT INTO users(user_name, user_pass, user_email, user_date, user_level) |
3 |
VALUES (?, ?, ?, NOW(), 0)"; |
4 |
|
5 |
// Create a prepared statement
|
6 |
$stmt = mysqli_prepare($conn, $sql); |
7 |
|
8 |
// Bind parameters to the prepared statement
|
9 |
mysqli_stmt_bind_param($stmt, 'sss', $_POST['user_name'], sha1($_POST['user_pass']), $_POST['user_email']); |
10 |
|
11 |
// Execute the prepared statement
|
12 |
$result = mysqli_stmt_execute($stmt); |
We’ve used prepared statements with placeholders (?) to safely bind parameters to the SQL statement. It helps to prevent SQL injection attacks. We’ve used the mysqli_prepare() function to create a prepared statement and the mysqli_stmt_bind_param() function to bind the parameters to the statement. Next, we’ve used the mysqli_stmt_execute() function to execute the prepared statement.
Also, you can see that the function sha1() is used to encrypt the user’s password. This is also a very important thing to remember. Never insert a plain password as-is. You must encrypt it. Imagine a hacker who somehow manages to get access to your database. If they can see all the plain-text passwords, they could log into any (admin) account they want to. If the password columns contain sha1 strings, they have to crack them first, which is almost impossible.
Apart from that, it’s also possible to use md5, but I always prefer to use sha1 because benchmarks have proved it’s a tiny bit faster.
If the signup process was successful, you should see something like this:
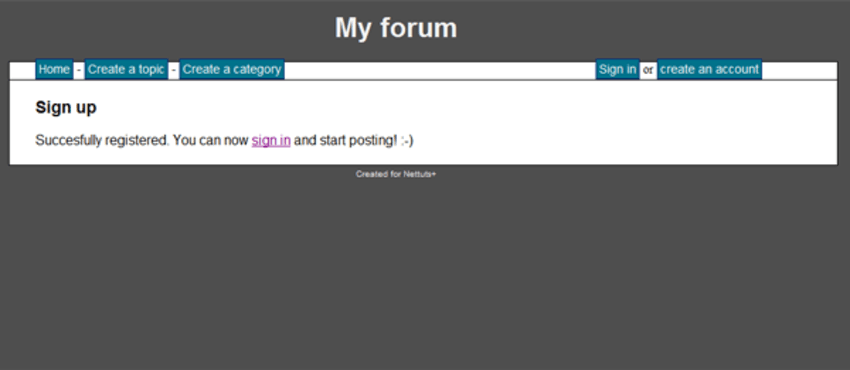
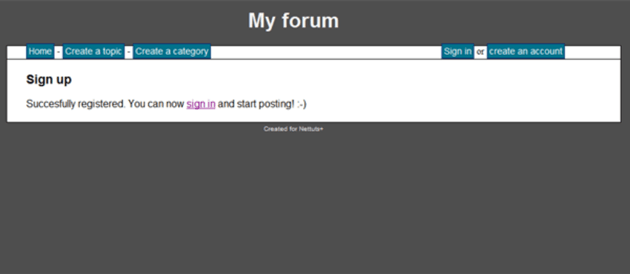

Try refreshing your phpMyAdmin screen. A new record should be visible in the users table.
Step 6: Adding Authentication and User Levels
An important aspect of a forum is the difference between regular users and admins/moderators. Since this is a small forum and creating features like adding new moderators would take way too much time, we’ll focus on the login process and build some admin features like creating new categories and closing a thread.
Now that you’ve completed the previous step, we’re going to make your freshly created account an admin account. In phpMyAdmin, click on the users table, and then Browse. Your account will probably pop up right away. Click the edit icon and change the value of the user_level field from 0 to 1. That’s it for now. You won’t notice any difference in our application immediately, but when we add admin features, a normal account and your account will have different capabilities.
The sign-in process works the following way:
- A visitor enters user data and submits the form.
- If the username and password are correct, we can start a session.
- If the username and password are incorrect, we show the form again with a message.


The signin.php file is shown in the following snippet. I’m not going to explain what I’m doing, but check out the comments in the file. It’s much easier to understand that way.
1 |
<?php
|
2 |
//signin.php
|
3 |
include 'connect.php'; |
4 |
include 'header.php'; |
5 |
echo '<h3>Sign in</h3>'; |
6 |
|
7 |
//first, check if the user is already signed in. If that is the case, there is no need to display this page
|
8 |
if(isset($_SESSION['signed_in']) && $_SESSION['signed_in'] == true) |
9 |
{
|
10 |
echo 'You are already signed in, you can <a href="signout.php">sign out</a> if you want.'; |
11 |
}
|
12 |
else
|
13 |
{
|
14 |
if($_SERVER['REQUEST_METHOD'] != 'POST') |
15 |
{
|
16 |
/*the form hasn't been posted yet, display it
|
17 |
note that the action="" will cause the form to post to the same page it is on */
|
18 |
|
19 |
echo '<form method="post" action=""> |
20 |
Username: <input type="text" name="user_name" />
|
21 |
Password: <input type="password" name="user_pass">
|
22 |
<input type="submit" value="Sign in" />
|
23 |
</form>'; |
24 |
}
|
25 |
else
|
26 |
{
|
27 |
/* so, the form has been posted, we'll process the data in three steps:
|
28 |
1. Check the data
|
29 |
2. Let the user refill the wrong fields (if necessary)
|
30 |
3. Varify if the data is correct and return the correct response
|
31 |
*/
|
32 |
$errors = array(); /* declare the array for later use */ |
33 |
|
34 |
if(!isset($_POST['user_name'])) |
35 |
{
|
36 |
$errors[] = 'The username field must not be empty.'; |
37 |
}
|
38 |
|
39 |
if(!isset($_POST['user_pass'])) |
40 |
{
|
41 |
$errors[] = 'The password field must not be empty.'; |
42 |
}
|
43 |
|
44 |
if(!empty($errors)) /*check for an empty array, if there are errors, they're in this array (note the ! operator)*/ |
45 |
{
|
46 |
echo 'Uh-oh.. a couple of fields are not filled in correctly..'; |
47 |
echo '<ul>'; |
48 |
foreach($errors as $key => $value) /* walk through the array so all the errors get displayed */ |
49 |
{
|
50 |
echo '<li>' . $value . '</li>'; /* this generates a nice error list */ |
51 |
}
|
52 |
echo '</ul>'; |
53 |
}
|
54 |
else
|
55 |
{
|
56 |
//the form has been posted without errors, so save it
|
57 |
//notice the use of mysql_real_escape_string, keep everything safe!
|
58 |
//also notice the sha1 function which hashes the password
|
59 |
$sql = "SELECT user_id, user_name, user_level FROM users WHERE user_name = ? AND user_pass = ?"; |
60 |
|
61 |
$stmt = mysqli_prepare($conn, $sql); |
62 |
|
63 |
mysqli_stmt_bind_param($stmt, 'ss', $_POST['user_name'], sha1($_POST['user_pass'])); |
64 |
|
65 |
$result = mysqli_stmt_execute($stmt); |
66 |
|
67 |
if(!$result) |
68 |
{
|
69 |
//something went wrong, display the error
|
70 |
echo 'Something went wrong while signing in. Please try again later.'; |
71 |
//echo mysql_error(); //debugging purposes, uncomment when needed
|
72 |
}
|
73 |
else
|
74 |
{
|
75 |
//the query was successfully executed, there are 2 possibilities
|
76 |
//1. the query returned data, the user can be signed in
|
77 |
//2. the query returned an empty result set, the credentials were wrong
|
78 |
$result = mysqli_stmt_get_result($stmt); |
79 |
|
80 |
if (mysqli_num_rows($result) == 0) { |
81 |
{
|
82 |
echo 'You have supplied a wrong user/password combination. Please try again.'; |
83 |
}
|
84 |
else
|
85 |
{
|
86 |
//set the $_SESSION['signed_in'] variable to TRUE
|
87 |
$_SESSION['signed_in'] = true; |
88 |
|
89 |
//we also put the user_id and user_name values in the $_SESSION, so we can use it at various pages
|
90 |
while ($row = mysqli_fetch_assoc($result)) { |
91 |
{
|
92 |
$_SESSION['user_id'] = $row['user_id']; |
93 |
$_SESSION['user_name'] = $row['user_name']; |
94 |
$_SESSION['user_level'] = $row['user_level']; |
95 |
}
|
96 |
|
97 |
echo 'Welcome, ' . $_SESSION['user_name'] . '. <a href="index.php">Proceed to the forum overview</a>.'; |
98 |
}
|
99 |
}
|
100 |
}
|
101 |
}
|
102 |
}
|
103 |
|
104 |
include 'footer.php'; |
105 |
?>
|
The following query in signin.php is important to understand.
1 |
$sql = "SELECT user_id, user_name, user_level FROM users WHERE user_name = ? AND user_pass = ?"; |
It’s obvious we need a check to tell if the supplied credentials belong to an existing user. A lot of scripts retrieve the password from the database and compare it using PHP. If we do this directly via SQL, the password will be stored in the database once during registration and never leave it again. This is safer because all the real action happens in the database layer and not in our application.
If the user is signed in successfully, we’re doing a few things:
1 |
<?php
|
2 |
//set the $_SESSION['signed_in'] variable to TRUE
|
3 |
$_SESSION['signed_in'] = true; |
4 |
//we also put the user_id and user_name values in the $_SESSION, so we can use it at various pages
|
5 |
while ($row = mysqli_fetch_assoc($result)) |
6 |
{
|
7 |
$_SESSION['user_id'] = $row['user_id']; |
8 |
$_SESSION['user_name'] = $row['user_name']; |
9 |
}
|
10 |
?>
|
First, we’ve set the signed_in session variable to TRUE, so we can use it on other pages to make sure the user is signed in. We also put the username and user id in the $_SESSION variable for use on a different page. Finally, we display a link to the forum overview so the user can get started right away.
Of course, signing in requires another function: signing out! The sign-out process is actually a lot easier than the sign-in process. Because all the information about the user is stored in $_SESSION variables, all we have to do is unset them and display a message.
Now that we’ve set the $_SESSION variables, we can determine if someone is signed in. Let’s make a last simple change to header.php:
Replace:
1 |
<div id="userbar">Hello Example. Not you? Log out.</div> |
With:
1 |
<?php
|
2 |
<div id="userbar"> |
3 |
if($_SESSION['signed_in']) |
4 |
{
|
5 |
echo 'Hello' . $_SESSION['user_name'] . '. Not you? <a href="signout.php">Sign out</a>'; |
6 |
}
|
7 |
else
|
8 |
{
|
9 |
echo '<a href="signin.php">Sign in</a> or <a href="sign up">create an account</a>.'; |
10 |
}
|
11 |
</div> |
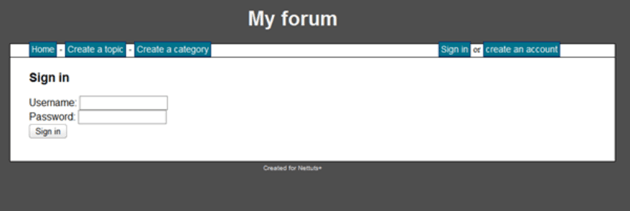
If a user is signed in, they will see their name displayed on the front page with a link to the sign-out page. The authentication part is done! By now, our forum should look like this:

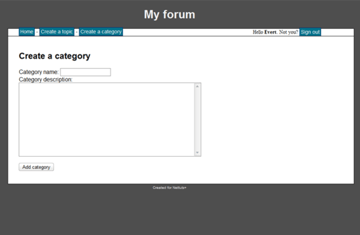
Step 7: Creating a Category
We want to create categories, so let’s start by making a form.
1 |
<form method="post" action=""> |
2 |
Category name: <input type="text" name="cat_name" /> |
3 |
Category description: <textarea name="cat_description" /></textarea> |
4 |
<input type="submit" value="Add category" /> |
5 |
</form>
|
This step looks a lot like Step 4 (Signing up a user’), so I’m not going to do an in-depth explanation here. If you followed all the steps, you should be able to understand this somewhat quickly.
1 |
<?php
|
2 |
// create_cat.php
|
3 |
include 'connect.php'; |
4 |
|
5 |
if ($_SERVER['REQUEST_METHOD'] != 'POST') { |
6 |
// The form hasn't been posted yet, display it
|
7 |
echo "<form method='post' action=''> |
8 |
Category name: <input type='text' name='cat_name' />
|
9 |
Category description: <textarea name='cat_description'></textarea>
|
10 |
<input type='submit' value='Add category' />
|
11 |
</form>"; |
12 |
} else { |
13 |
// The form has been posted, so save it
|
14 |
$cat_name = $_POST['cat_name']; |
15 |
$cat_description = $_POST['cat_description']; |
16 |
|
17 |
// Prepare the SQL statement with placeholders
|
18 |
$sql = "INSERT INTO categories (cat_name, cat_description) |
19 |
VALUES (?, ?)"; |
20 |
|
21 |
// Create a prepared statement
|
22 |
$stmt = mysqli_prepare($conn, $sql); |
23 |
|
24 |
// Bind parameters to the prepared statement
|
25 |
mysqli_stmt_bind_param($stmt, 'ss', $cat_name, $cat_description); |
26 |
|
27 |
// Execute the prepared statement
|
28 |
$result = mysqli_stmt_execute($stmt); |
29 |
|
30 |
if (!$result) { |
31 |
// Something went wrong, display the error
|
32 |
echo 'Error: ' . mysqli_error($conn); |
33 |
} else { |
34 |
echo 'New category successfully added.'; |
35 |
}
|
36 |
|
37 |
// Close the prepared statement
|
38 |
mysqli_stmt_close($stmt); |
39 |
}
|
40 |
?>
|
As you can see, we’ve started the script with the $_SERVER check, after checking if the user has admin rights, which is required for creating a category. The form gets displayed if it hasn’t been submitted already. If it has, the values are saved. Once again, a SQL query is prepared and then executed.


Step 8: Adding Categories to index.php
We’ve created some categories, so now we’re able to display them on the front page. Let’s add the following query to the content area of index.php.
1 |
SELECT
|
2 |
categories.cat_id, |
3 |
categories.cat_name, |
4 |
categories.cat_description, |
5 |
FROM
|
6 |
categories; |
This query selects all categories and their names and descriptions from the categories table. We only need a bit of PHP to display the results. If we add that part just like we did in the previous steps, the code will look like this.
1 |
<?php
|
2 |
// create_cat.php
|
3 |
include 'connect.php'; |
4 |
include 'header.php'; |
5 |
|
6 |
$sql = "SELECT |
7 |
cat_id,
|
8 |
cat_name,
|
9 |
cat_description
|
10 |
FROM
|
11 |
categories"; |
12 |
|
13 |
$result = mysqli_query($conn, $sql); |
14 |
|
15 |
if (!$result) { |
16 |
echo 'The categories could not be displayed, please try again later.'; |
17 |
} else { |
18 |
if (mysqli_num_rows($result) == 0) { |
19 |
echo 'No categories defined yet.'; |
20 |
} else { |
21 |
// Prepare the table
|
22 |
echo '<table border="1"> |
23 |
<tr>
|
24 |
<th>Category</th>
|
25 |
<th>Last topic</th>
|
26 |
</tr>'; |
27 |
|
28 |
while ($row = mysqli_fetch_assoc($result)) { |
29 |
echo '<tr>'; |
30 |
echo '<td class="leftpart">'; |
31 |
echo '<h3><a href="category.php?id">' . $row['cat_name'] . '</a></h3>' . $row['cat_description']; |
32 |
echo '</td>'; |
33 |
echo '<td class="rightpart">'; |
34 |
echo '<a href="topic.php?id=">Topic subject</a> at 10-10'; |
35 |
echo '</td>'; |
36 |
echo '</tr>'; |
37 |
}
|
38 |
}
|
39 |
}
|
40 |
|
41 |
include 'footer.php'; |
42 |
?>
|
Notice how we’re using the cat_id to create links to category.php. All the links to this page will look like this: category.php?cat_id=x, where x can be any numeric value. This may be new to you. We can check the URL with PHP for $_GET values. For example, we have this link:
The statement echo $_GET['cat_id']; will display 23. In the next few steps, we’ll use this value to retrieve the topics when viewing a single category, but topics can’t be viewed if we haven’t created them yet. So let’s create some topics!
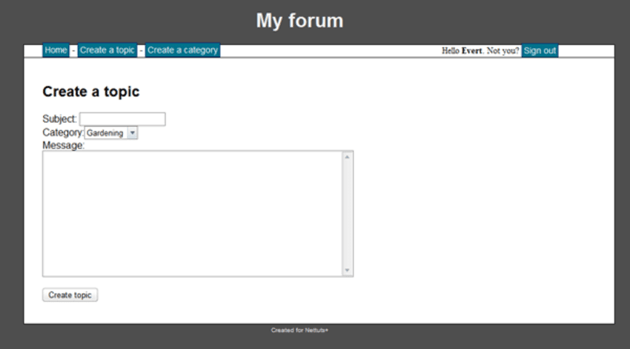
Step 9: Creating a Topic
In this step, we’re combining the techniques we’ve learned in the previous steps. We’re checking if a user is signed in, and then we’ll use an input query to create the topic and add some basic HTML forms.
The structure of the create_topic.php file can hardly be explained in a list or something, so I rewrote it in pseudo-code.
1 |
<?php
|
2 |
if(user is not signed in) |
3 |
{
|
4 |
//the user is not signed in
|
5 |
}
|
6 |
else
|
7 |
{
|
8 |
//the user is signed in
|
9 |
if(form has not been posted) |
10 |
{
|
11 |
//show form
|
12 |
}
|
13 |
else
|
14 |
{
|
15 |
//process form
|
16 |
}
|
17 |
}
|
18 |
?>
|
Here’s the code for this part of our forum. Check out the explanations below the code to see what it’s doing.
1 |
<?php
|
2 |
//create_cat.php
|
3 |
include 'connect.php'; |
4 |
include 'header.php'; |
5 |
|
6 |
echo '<h2>Create a topic</h2>'; |
7 |
if($_SESSION['signed_in'] == false) |
8 |
{
|
9 |
//the user is not signed in
|
10 |
echo 'Sorry, you have to be <a href="http://code.tutsplus.com/forum/signin.php">signed in</a> to create a topic.'; |
11 |
}
|
12 |
else
|
13 |
{
|
14 |
//the user is signed in
|
15 |
if($_SERVER['REQUEST_METHOD'] != 'POST') |
16 |
{
|
17 |
//the form hasn't been posted yet, display it
|
18 |
//retrieve the categories from the database for use in the dropdown
|
19 |
$sql = "SELECT |
20 |
cat_id,
|
21 |
cat_name,
|
22 |
cat_description
|
23 |
FROM
|
24 |
categories"; |
25 |
|
26 |
$result = mysqli_query($link, $sql); |
27 |
|
28 |
if(!$result) |
29 |
{
|
30 |
//the query failed, uh-oh :-(
|
31 |
echo 'Error while selecting from database. Please try again later.'; |
32 |
}
|
33 |
else
|
34 |
{
|
35 |
if(mysqli_num_rows($result) == 0) |
36 |
{
|
37 |
//there are no categories, so a topic can't be posted
|
38 |
if($_SESSION['user_level'] == 1) |
39 |
{
|
40 |
echo 'You have not created categories yet.'; |
41 |
}
|
42 |
else
|
43 |
{
|
44 |
echo 'Before you can post a topic, you must wait for an admin to create some categories.'; |
45 |
}
|
46 |
}
|
47 |
else
|
48 |
{
|
49 |
echo '<form method="post" action=""> |
50 |
Subject: <input type="text" name="topic_subject" />
|
51 |
Category:'; |
52 |
|
53 |
echo '<select name="topic_cat">'; |
54 |
while($row = mysqli_fetch_assoc($result)) |
55 |
{
|
56 |
echo '<option value="' . $row['cat_id'] . '">' . $row['cat_name'] . '</option>'; |
57 |
}
|
58 |
echo '</select>'; |
59 |
|
60 |
echo 'Message: <textarea name="post_content" /></textarea> |
61 |
<input type="submit" value="Create topic" />
|
62 |
</form>'; |
63 |
}
|
64 |
}
|
65 |
}
|
66 |
else
|
67 |
{
|
68 |
mysqli_begin_transaction($link); |
69 |
|
70 |
//start the transaction
|
71 |
$query = "BEGIN WORK;"; |
72 |
$result = mysqli_query($link, $query); |
73 |
|
74 |
if(!$result) |
75 |
{
|
76 |
//Damn! the query failed, quit
|
77 |
echo 'An error occured while creating your topic. Please try again later.'; |
78 |
}
|
79 |
else
|
80 |
{
|
81 |
$topic_subject = mysqli_real_escape_string($link, $_POST['topic_subject']); |
82 |
$topic_cat = mysqli_real_escape_string($link, $_POST['topic_cat']); |
83 |
$topic_by = $_SESSION['user_id']; |
84 |
|
85 |
//the form has been posted, so save it
|
86 |
//insert the topic into the topics table first, then we'll save the post into the posts table
|
87 |
$sql = "INSERT INTO |
88 |
topics(topic_subject,
|
89 |
topic_date,
|
90 |
topic_cat,
|
91 |
topic_by)
|
92 |
VALUES('$topic_subject', |
93 |
NOW(),
|
94 |
'$topic_cat', |
95 |
'$topic_by' |
96 |
)"; |
97 |
|
98 |
$result = mysqli_query($link, $sql); |
99 |
|
100 |
if(!$result) |
101 |
{
|
102 |
//something went wrong, display the error
|
103 |
echo 'An error occurred while inserting your data. Please try again later.' . mysqli_error($link); |
104 |
$sql = "ROLLBACK;"; |
105 |
$result = mysqli_query($link, $sql); |
106 |
}
|
107 |
else
|
108 |
{
|
109 |
//the first query worked, now start the second, posts query
|
110 |
//retrieve the id of the freshly created topic for usage in the posts query
|
111 |
$topicid = mysqli_insert_id($link); |
112 |
|
113 |
$post_content = mysqli_real_escape_string($link, $_POST['post_content']); |
114 |
$post_topic = $topicid; |
115 |
$post_by = $_SESSION['user_id']; |
116 |
|
117 |
$sql = "INSERT INTO |
118 |
posts(post_content,
|
119 |
post_date,
|
120 |
post_topic,
|
121 |
post_by)
|
122 |
VALUES
|
123 |
('$post_content', |
124 |
NOW(),
|
125 |
'$post_topic', |
126 |
'$post_by' |
127 |
)"; |
128 |
|
129 |
$result = mysqli_query($link, $sql); |
130 |
|
131 |
if(!$result) |
132 |
{
|
133 |
//something went wrong, display the error
|
134 |
echo 'An error occured while inserting your post. Please try again later.' . mysql_error(); |
135 |
$sql = "ROLLBACK;"; |
136 |
$result = mysqli_query($link, $sql); |
137 |
}
|
138 |
else
|
139 |
{
|
140 |
$sql = "COMMIT;"; |
141 |
$result = mysqli_query($link, $sql); |
142 |
|
143 |
//after a lot of work, the query succeeded!
|
144 |
echo 'You have successfully created <a href="topic.php?id='. $topicid . '">your new topic</a>.'; |
145 |
}
|
146 |
}
|
147 |
}
|
148 |
}
|
149 |
}
|
150 |
|
151 |
include 'footer.php'; |
152 |
?>
|
I’ll discuss this page in two parts, showing the form and processing the form.
Showing the Form
We’re starting with a simple HTML form. There’s actually something special here because we use a dropdown. This dropdown is filled with data from the database, using this query:
1 |
SELECT
|
2 |
cat_id, |
3 |
cat_name, |
4 |
cat_description
|
5 |
FROM
|
6 |
categories
|
That’s the only potentially confusing part here; it’s quite a piece of code, as you can see when looking at the create_topic.php file at the bottom of this step.
Processing the Form
The process of saving the topic consists of two parts: saving the topic in the topics table and saving the first post in the posts table. This requires something quite advanced that goes a bit beyond the scope of this tutorial. It’s called a transaction, which basically means that we start by executing the start command and then roll back when there are database errors and commit when everything went well. Learn more about transactions.
1 |
<?php
|
2 |
//start the transaction
|
3 |
$query = "BEGIN WORK;"; |
4 |
$result = mysqli_query($query); |
5 |
//stop the transaction
|
6 |
$sql = "ROLLBACK;"; |
7 |
$result = mysqli_query($sql); |
8 |
//commit the transaction
|
9 |
$sql = "COMMIT;"; |
10 |
$result = mysqli_query($sql); |
11 |
?>
|
The first query being used to save the data is the topic creation query, which looks like this:
1 |
$sql = "INSERT INTO |
2 |
topics(topic_subject,
|
3 |
topic_date,
|
4 |
topic_cat,
|
5 |
topic_by)
|
6 |
VALUES('$topic_subject', |
7 |
NOW(),
|
8 |
'$topic_cat', |
9 |
'$topic_by' |
10 |
)"; |
First the fields are defined, then the values to be inserted. We’ve seen the first one before; it’s just a string which is made safe by using the mysqli_real_escape_string() function. The second value, NOW(), is a SQL function for the current time. The third value, however, is a value we haven’t seen before. It refers to a (valid) id of a category. The last value refers to an (existing) user_id which is, in this case, the value of $_SESSION[ëuser_id']. This variable was declared during the sign-in process.
If the query executed without errors, we proceed to the second query. Remember, we are still doing a transaction here. If we’d got errors, we would have used the ROLLBACK command.
1 |
$sql = "INSERT INTO |
2 |
posts(post_content,
|
3 |
post_date,
|
4 |
post_topic,
|
5 |
post_by)
|
6 |
VALUES
|
7 |
('$post_content', |
8 |
NOW(),
|
9 |
'$post_topic', |
10 |
'$post_by' |
11 |
)"; |
The first thing we do in this code is use the mysql_insert_id() function to retrieve the latest generated id from the topic_id field in the topics table. As you may remember from the first steps of this tutorial, the id is generated in the database using auto-increment.
Then the post is inserted into the posts table. This query looks a lot like the topics query. The only difference is that this post refers to the topic, and the topic referred to a category. From the start, we decided to create a good data model, and here is the result: a nice hierarchical structure.


Step 10: Category View
We’re going to make an overview page for a single category. We’ve just created a category, and it would be handy to be able to view all the topics in it. First, create a page called category.php.
Here’s a short list of the things we need:
Fields to display the category information:
Fields to display the topic information:
- topic_id
- topic_subject
- topic_date
- topic_cat
Let’s create the SQL queries that retrieve exactly this data from the database.
1 |
SELECT
|
2 |
cat_id, |
3 |
cat_name, |
4 |
cat_description
|
5 |
FROM
|
6 |
categories
|
7 |
WHERE
|
8 |
cat_id = " . mysqli_real_escape_string($_GET['id']) |
The above query selects all the categories from the database.
1 |
SELECT
|
2 |
topic_id, |
3 |
topic_subject, |
4 |
topic_date, |
5 |
topic_cat
|
6 |
FROM
|
7 |
topics
|
8 |
WHERE
|
9 |
topic_cat = " . mysqli_real_escape_string($_GET['id']) |
The above query is executed in the while loop in which we print the category information. By doing it this way, we’ll see all the categories and the latest topic for each of them. The complete code of category.php will be the following:
1 |
<?php
|
2 |
// create_cat.php
|
3 |
include 'connect.php'; |
4 |
include 'header.php'; |
5 |
|
6 |
// first select the category based on $_GET['cat_id']
|
7 |
$sql = "SELECT |
8 |
cat_id,
|
9 |
cat_name,
|
10 |
cat_description
|
11 |
FROM
|
12 |
categories
|
13 |
WHERE
|
14 |
cat_id = " . mysqli_real_escape_string($conn, $_GET['id']); |
15 |
|
16 |
$result = mysqli_query($conn, $sql); |
17 |
|
18 |
if(!$result) |
19 |
{
|
20 |
echo 'The category could not be displayed, please try again later.' . mysqli_error($conn); |
21 |
}
|
22 |
else
|
23 |
{
|
24 |
if(mysqli_num_rows($result) == 0) |
25 |
{
|
26 |
echo 'This category does not exist.'; |
27 |
}
|
28 |
else
|
29 |
{
|
30 |
// display category data
|
31 |
while($row = mysqli_fetch_assoc($result)) |
32 |
{
|
33 |
echo '<h2>Topics in ′' . $row['cat_name'] . '′ category</h2>'; |
34 |
}
|
35 |
|
36 |
// do a query for the topics
|
37 |
$sql = "SELECT |
38 |
topic_id,
|
39 |
topic_subject,
|
40 |
topic_date,
|
41 |
topic_cat
|
42 |
FROM
|
43 |
topics
|
44 |
WHERE
|
45 |
topic_cat = " . mysqli_real_escape_string($conn, $_GET['id']); |
46 |
|
47 |
$result = mysqli_query($conn, $sql); |
48 |
|
49 |
if(!$result) |
50 |
{
|
51 |
echo 'The topics could not be displayed, please try again later.'; |
52 |
}
|
53 |
else
|
54 |
{
|
55 |
if(mysqli_num_rows($result) == 0) |
56 |
{
|
57 |
echo 'There are no topics in this category yet.'; |
58 |
}
|
59 |
else
|
60 |
{
|
61 |
// prepare the table
|
62 |
echo '<table border="1"> |
63 |
<tr>
|
64 |
<th>Topic</th>
|
65 |
<th>Created at</th>
|
66 |
</tr>'; |
67 |
|
68 |
while($row = mysqli_fetch_assoc($result)) |
69 |
{
|
70 |
echo '<tr>'; |
71 |
echo '<td class="leftpart">'; |
72 |
echo '<h3><a href="topic.php?id=' . $row['topic_id'] . '">' . $row['topic_subject'] . '</a><h3>'; |
73 |
echo '</td>'; |
74 |
echo '<td class="rightpart">'; |
75 |
echo date('d-m-Y', strtotime($row['topic_date'])); |
76 |
echo '</td>'; |
77 |
echo '</tr>'; |
78 |
}
|
79 |
}
|
80 |
}
|
81 |
}
|
82 |
}
|
83 |
|
84 |
include 'footer.php'; |
85 |
?>
|
And here is the final result of our categories page:


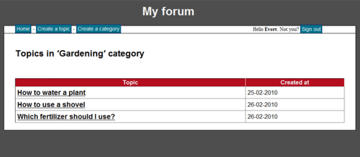
Step 11: Topic View
The SQL queries in this step are complicated. The PHP part is similar to what you’ve seen before. Let’s take a look at the queries. The first one retrieves the basic information about the topic:
1 |
SELECT
|
2 |
topic_id, |
3 |
topic_subject
|
4 |
FROM
|
5 |
topics
|
6 |
WHERE
|
7 |
topics.topic_id = '" . mysqli_real_escape_string($_GET['id']) . "'"; |
This information is displayed in the head of the table, which we will use to display all the data. Next, we retrieve all the posts in this topic from the database. The following query gives us exactly what we need:
1 |
SELECT
|
2 |
posts.post_topic, |
3 |
posts.post_content, |
4 |
posts.post_date, |
5 |
posts.post_by, |
6 |
users.user_id, |
7 |
users.user_name |
8 |
FROM
|
9 |
posts
|
10 |
LEFT JOIN |
11 |
users
|
12 |
ON
|
13 |
posts.post_by = users.user_id |
14 |
WHERE
|
15 |
posts.post_topic = '" . mysqli_real_escape_string($_GET['id']) . "'"; |
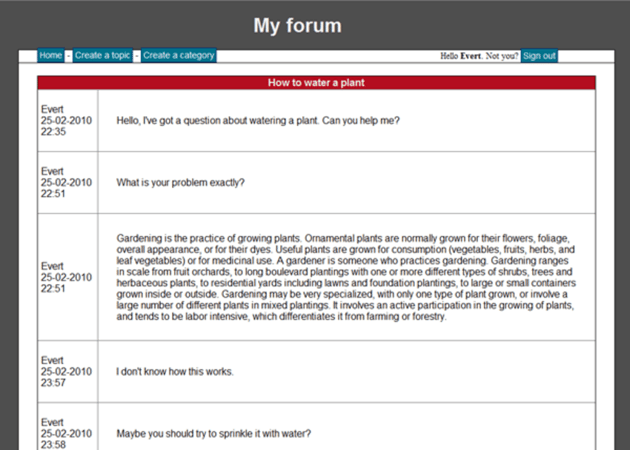
This time, we want information from the users and the posts table, so we use the LEFT JOIN again. The condition is: the user id should be the same as the post_by field. This way we can show the username of the user who replied to each post.
The final topic view looks like this:


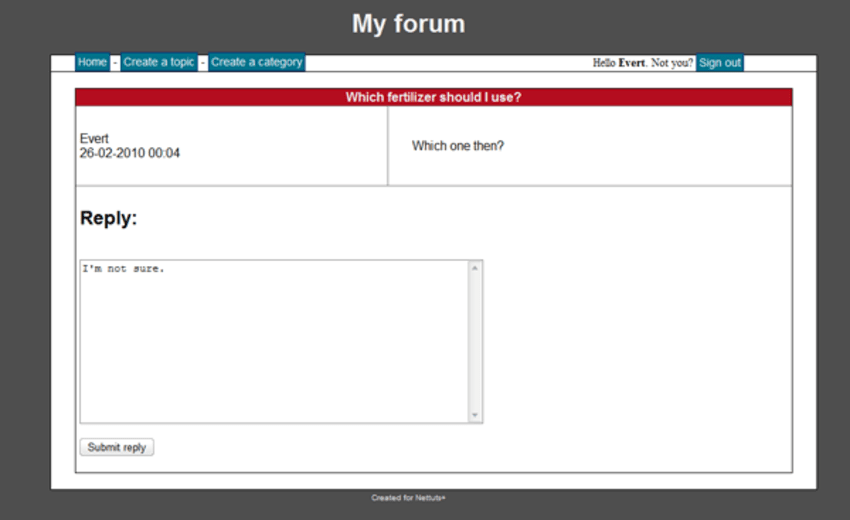
Step 12: Adding a Reply
Let’s create the last missing part of this forum, the possibility to add a reply. We’ll start by creating a form:
1 |
<form method="post" action="reply.php?id=5"> |
2 |
<textarea name="reply-content"></textarea> |
3 |
<input type="submit" value="Submit reply" /> |
4 |
</form>
|


The complete reply.php code looks like this.
1 |
<?php
|
2 |
//create_cat.php
|
3 |
include 'connect.php'; |
4 |
include 'header.php'; |
5 |
|
6 |
if($_SERVER['REQUEST_METHOD'] != 'POST') |
7 |
{
|
8 |
//someone is calling the file directly, which we don't want
|
9 |
echo 'This file cannot be called directly.'; |
10 |
}
|
11 |
else
|
12 |
{
|
13 |
//check for sign in status
|
14 |
if(!$_SESSION['signed_in']) |
15 |
{
|
16 |
echo 'You must be signed in to post a reply.'; |
17 |
}
|
18 |
else
|
19 |
{
|
20 |
//a real user posted a real reply
|
21 |
$sql = "INSERT INTO |
22 |
posts(post_content,
|
23 |
post_date,
|
24 |
post_topic,
|
25 |
post_by)
|
26 |
VALUES (?, NOW(), ?, ?)"; |
27 |
|
28 |
$stmt = mysqli_prepare($conn, $sql); |
29 |
mysqli_stmt_bind_param($stmt, "sii", $_POST['reply-content'], $_GET['id'], $_SESSION['user_id']); |
30 |
mysqli_stmt_execute($stmt); |
31 |
|
32 |
if(mysqli_stmt_errno($stmt)) |
33 |
{
|
34 |
echo 'Your reply has not been saved, please try again later.'; |
35 |
}
|
36 |
else
|
37 |
{
|
38 |
echo 'Your reply has been saved, check out <a href="topic.php?id=' . htmlentities($_GET['id']) . '">the topic</a>.'; |
39 |
}
|
40 |
}
|
41 |
}
|
42 |
|
43 |
include 'footer.php'; |
44 |
?>
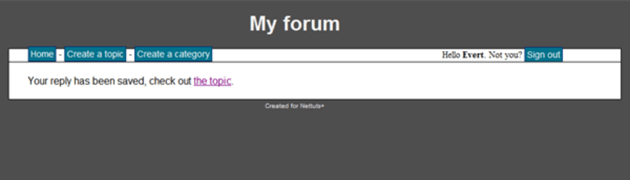
|
The comments in the code pretty much explain what’s happening. We’re checking for a real user and then inserting the post into the database.


Finishing Up
Now that you’ve finished this tutorial, you should have a much better understanding of what it takes to build a forum. I hope my explanations were clear enough! Thanks again for reading.