It’s that time again, the most wonderful time of the year, at least that’s what the old song says. I love the holidays, and Abduzeedo was born at this time back in 2006, which makes me even more nostalgic. But the reason of this post is not to talk about the past but to showcase a tutorial that illustrates the future at least in terms of how mobile tools can be incorporated in your design process replacing old things like scanners. This tutorial is a courtesy of Von Glitschka. He shows us how to create a Holiday Card using Adobe tools like Capture and the old classic Illustrator.
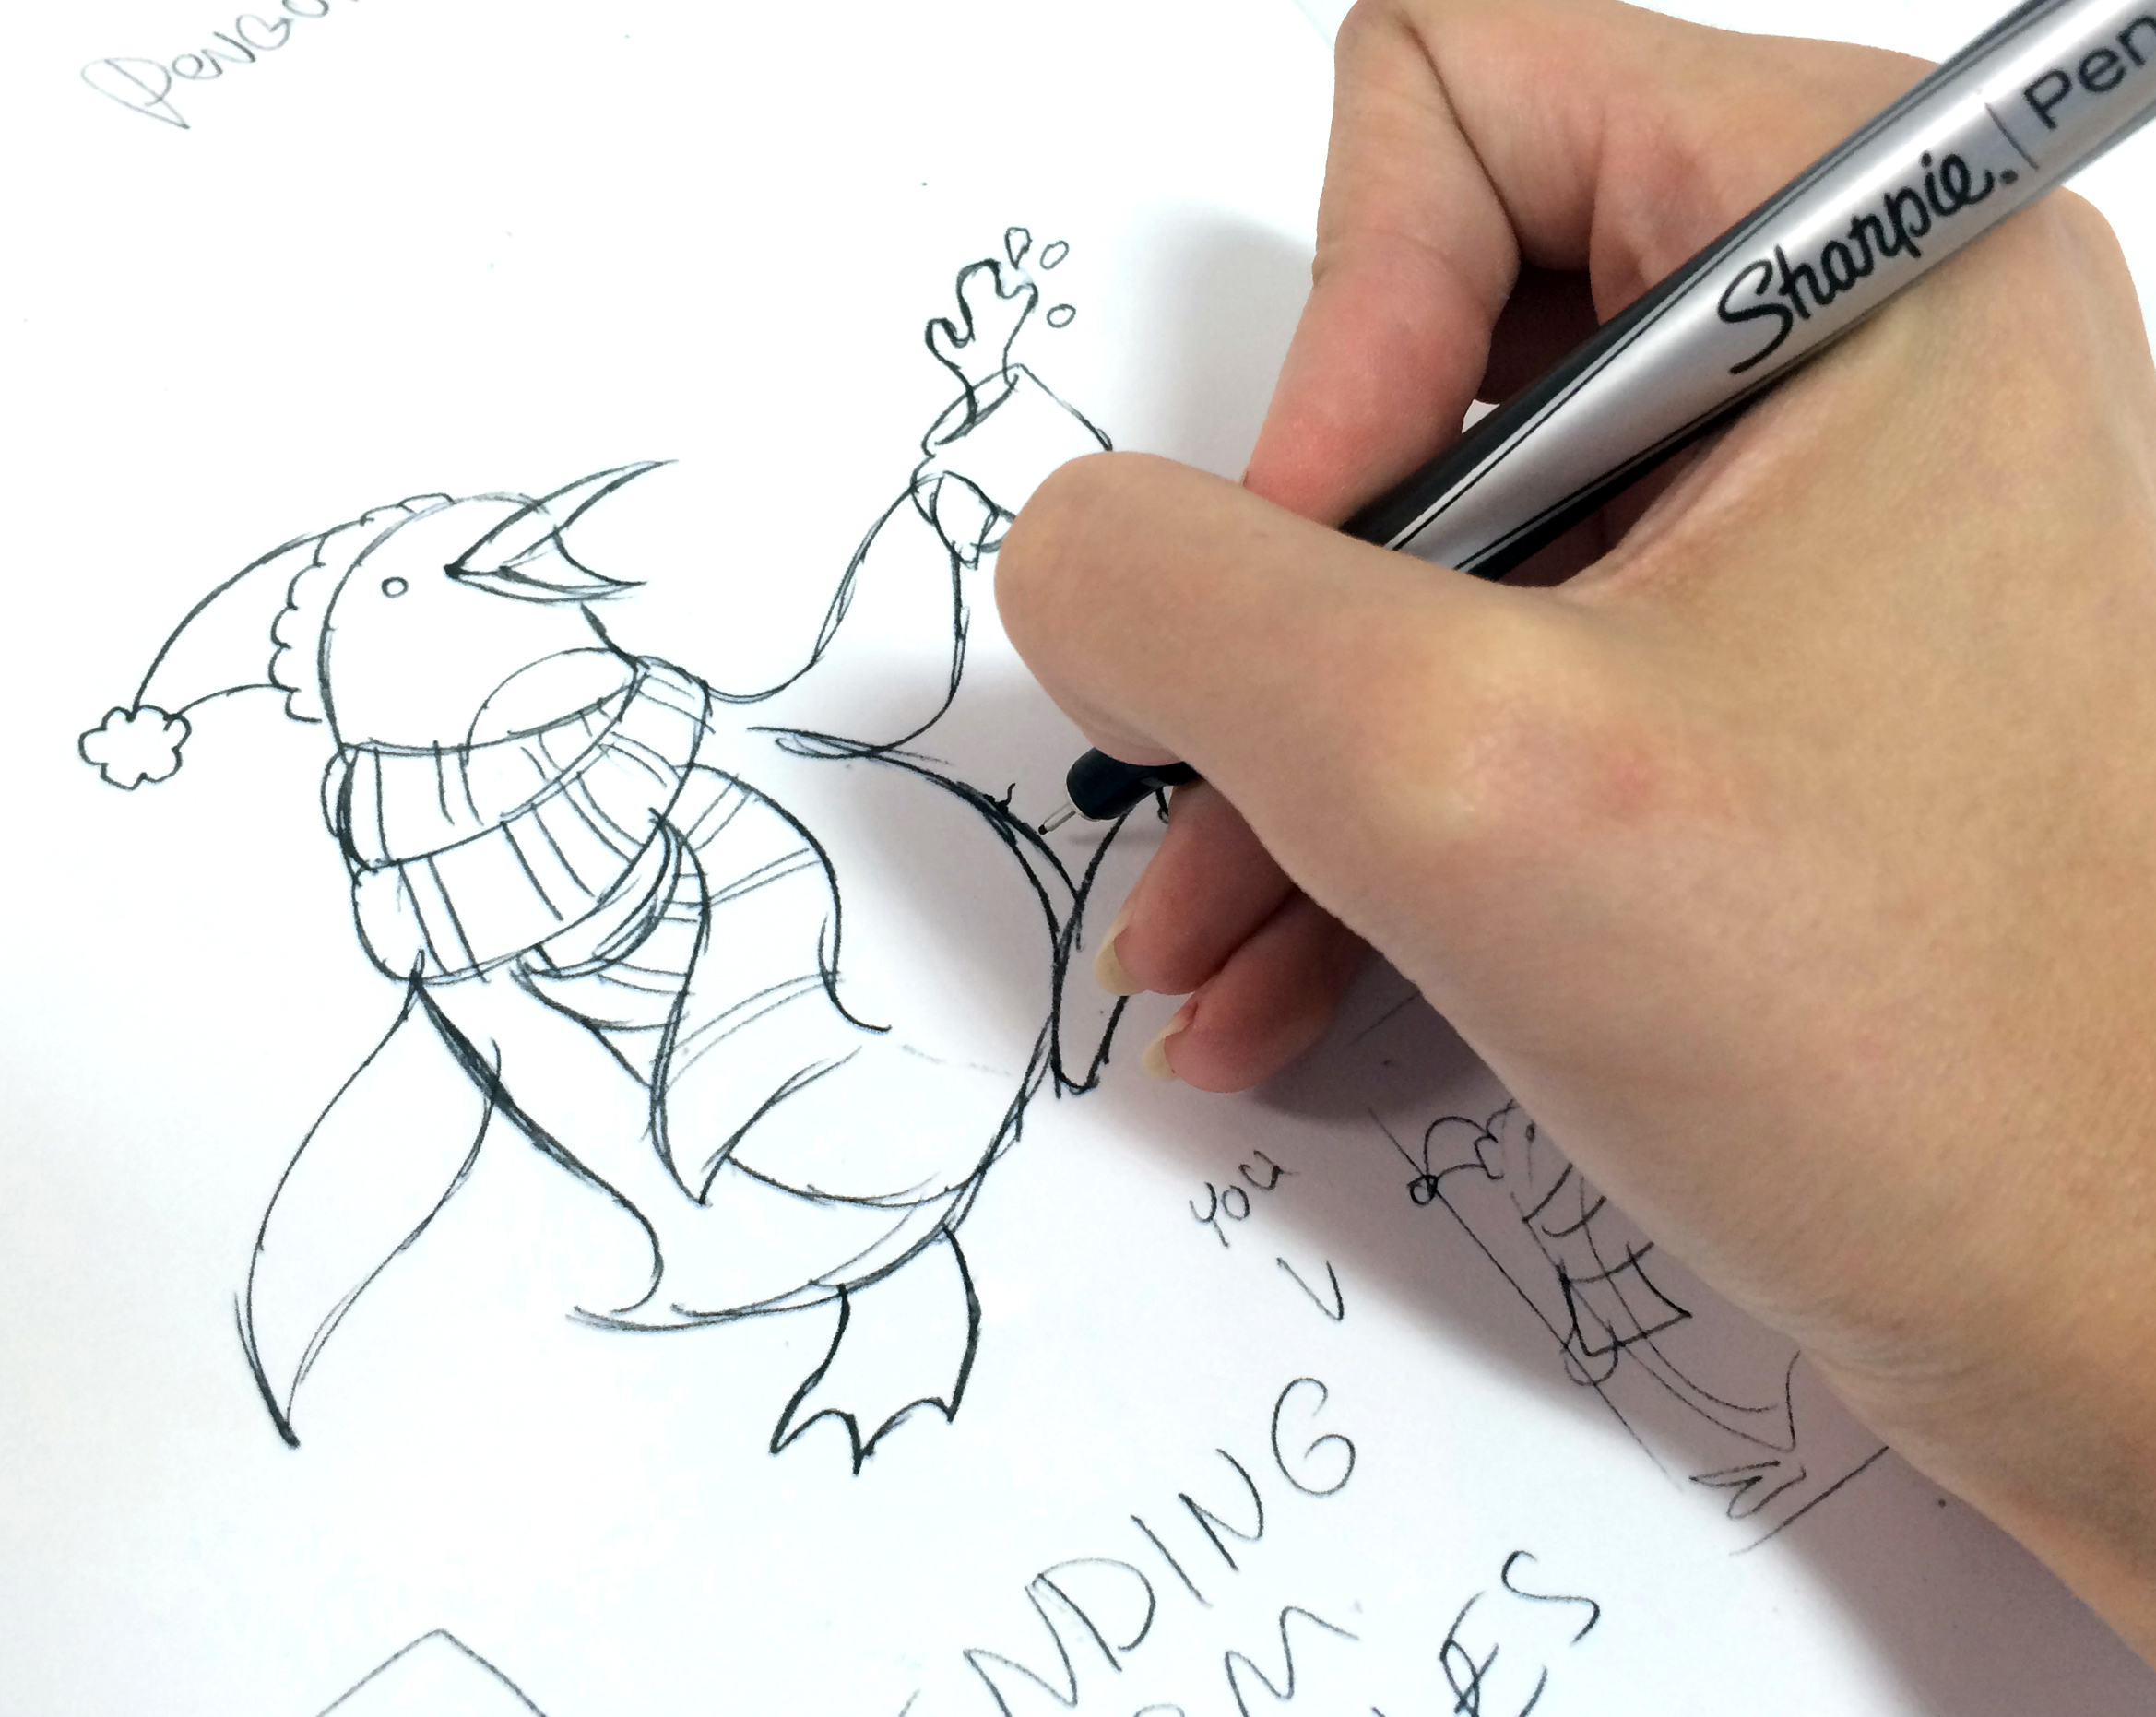
Step 1
Even in a digital age, I like to begin with a pen and paper. This design started off as a rough sketch to work out the main art for our design’s theme.
Step 2
Working from our rough sketch, I inked the final line work with a brush pen to imbue it with nice thick and thin lines.

Step 3
Using Adobe Capture CC, I transformed my art from ink on paper to a digital vector image. I also used the slide control to adjust the exposure and add/subtract detail.
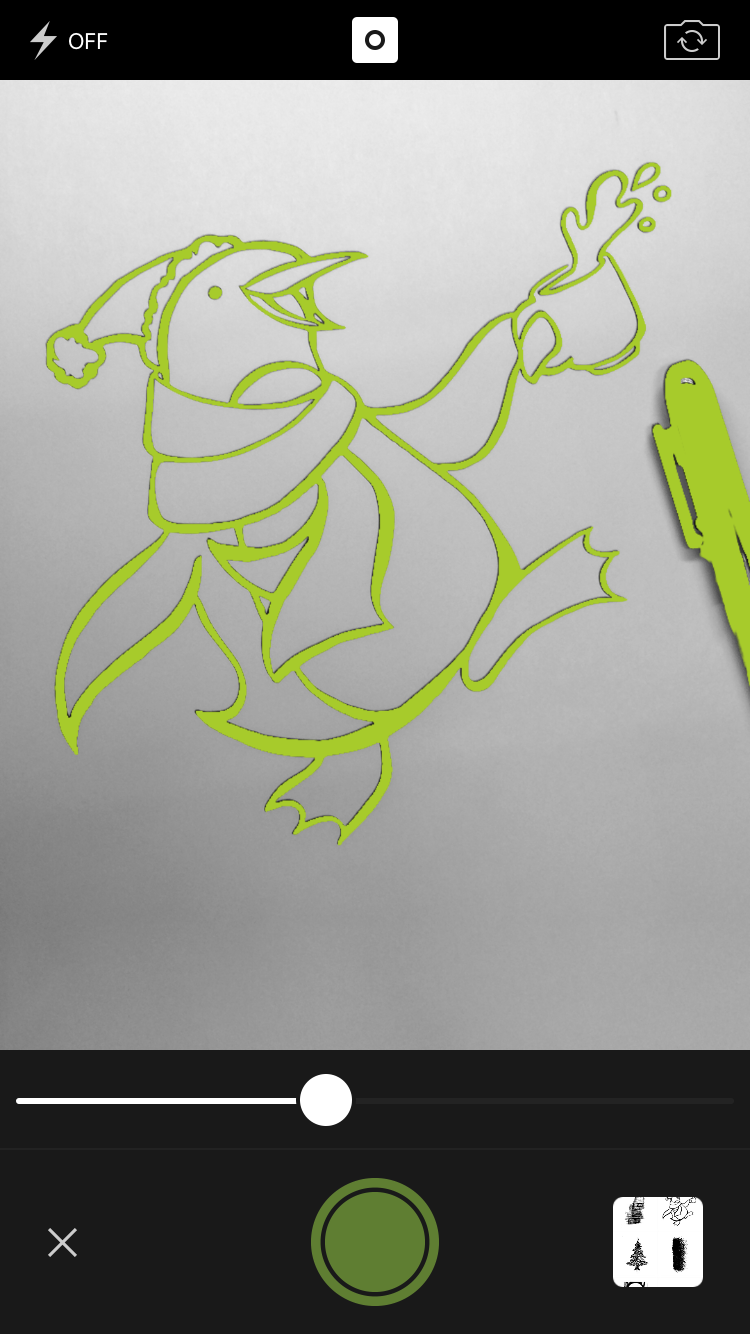
Step 4
Once I’ve captured my artwork, I quickly removed the unwanted content, including the pen captured in this image, using the select/deselect slider.

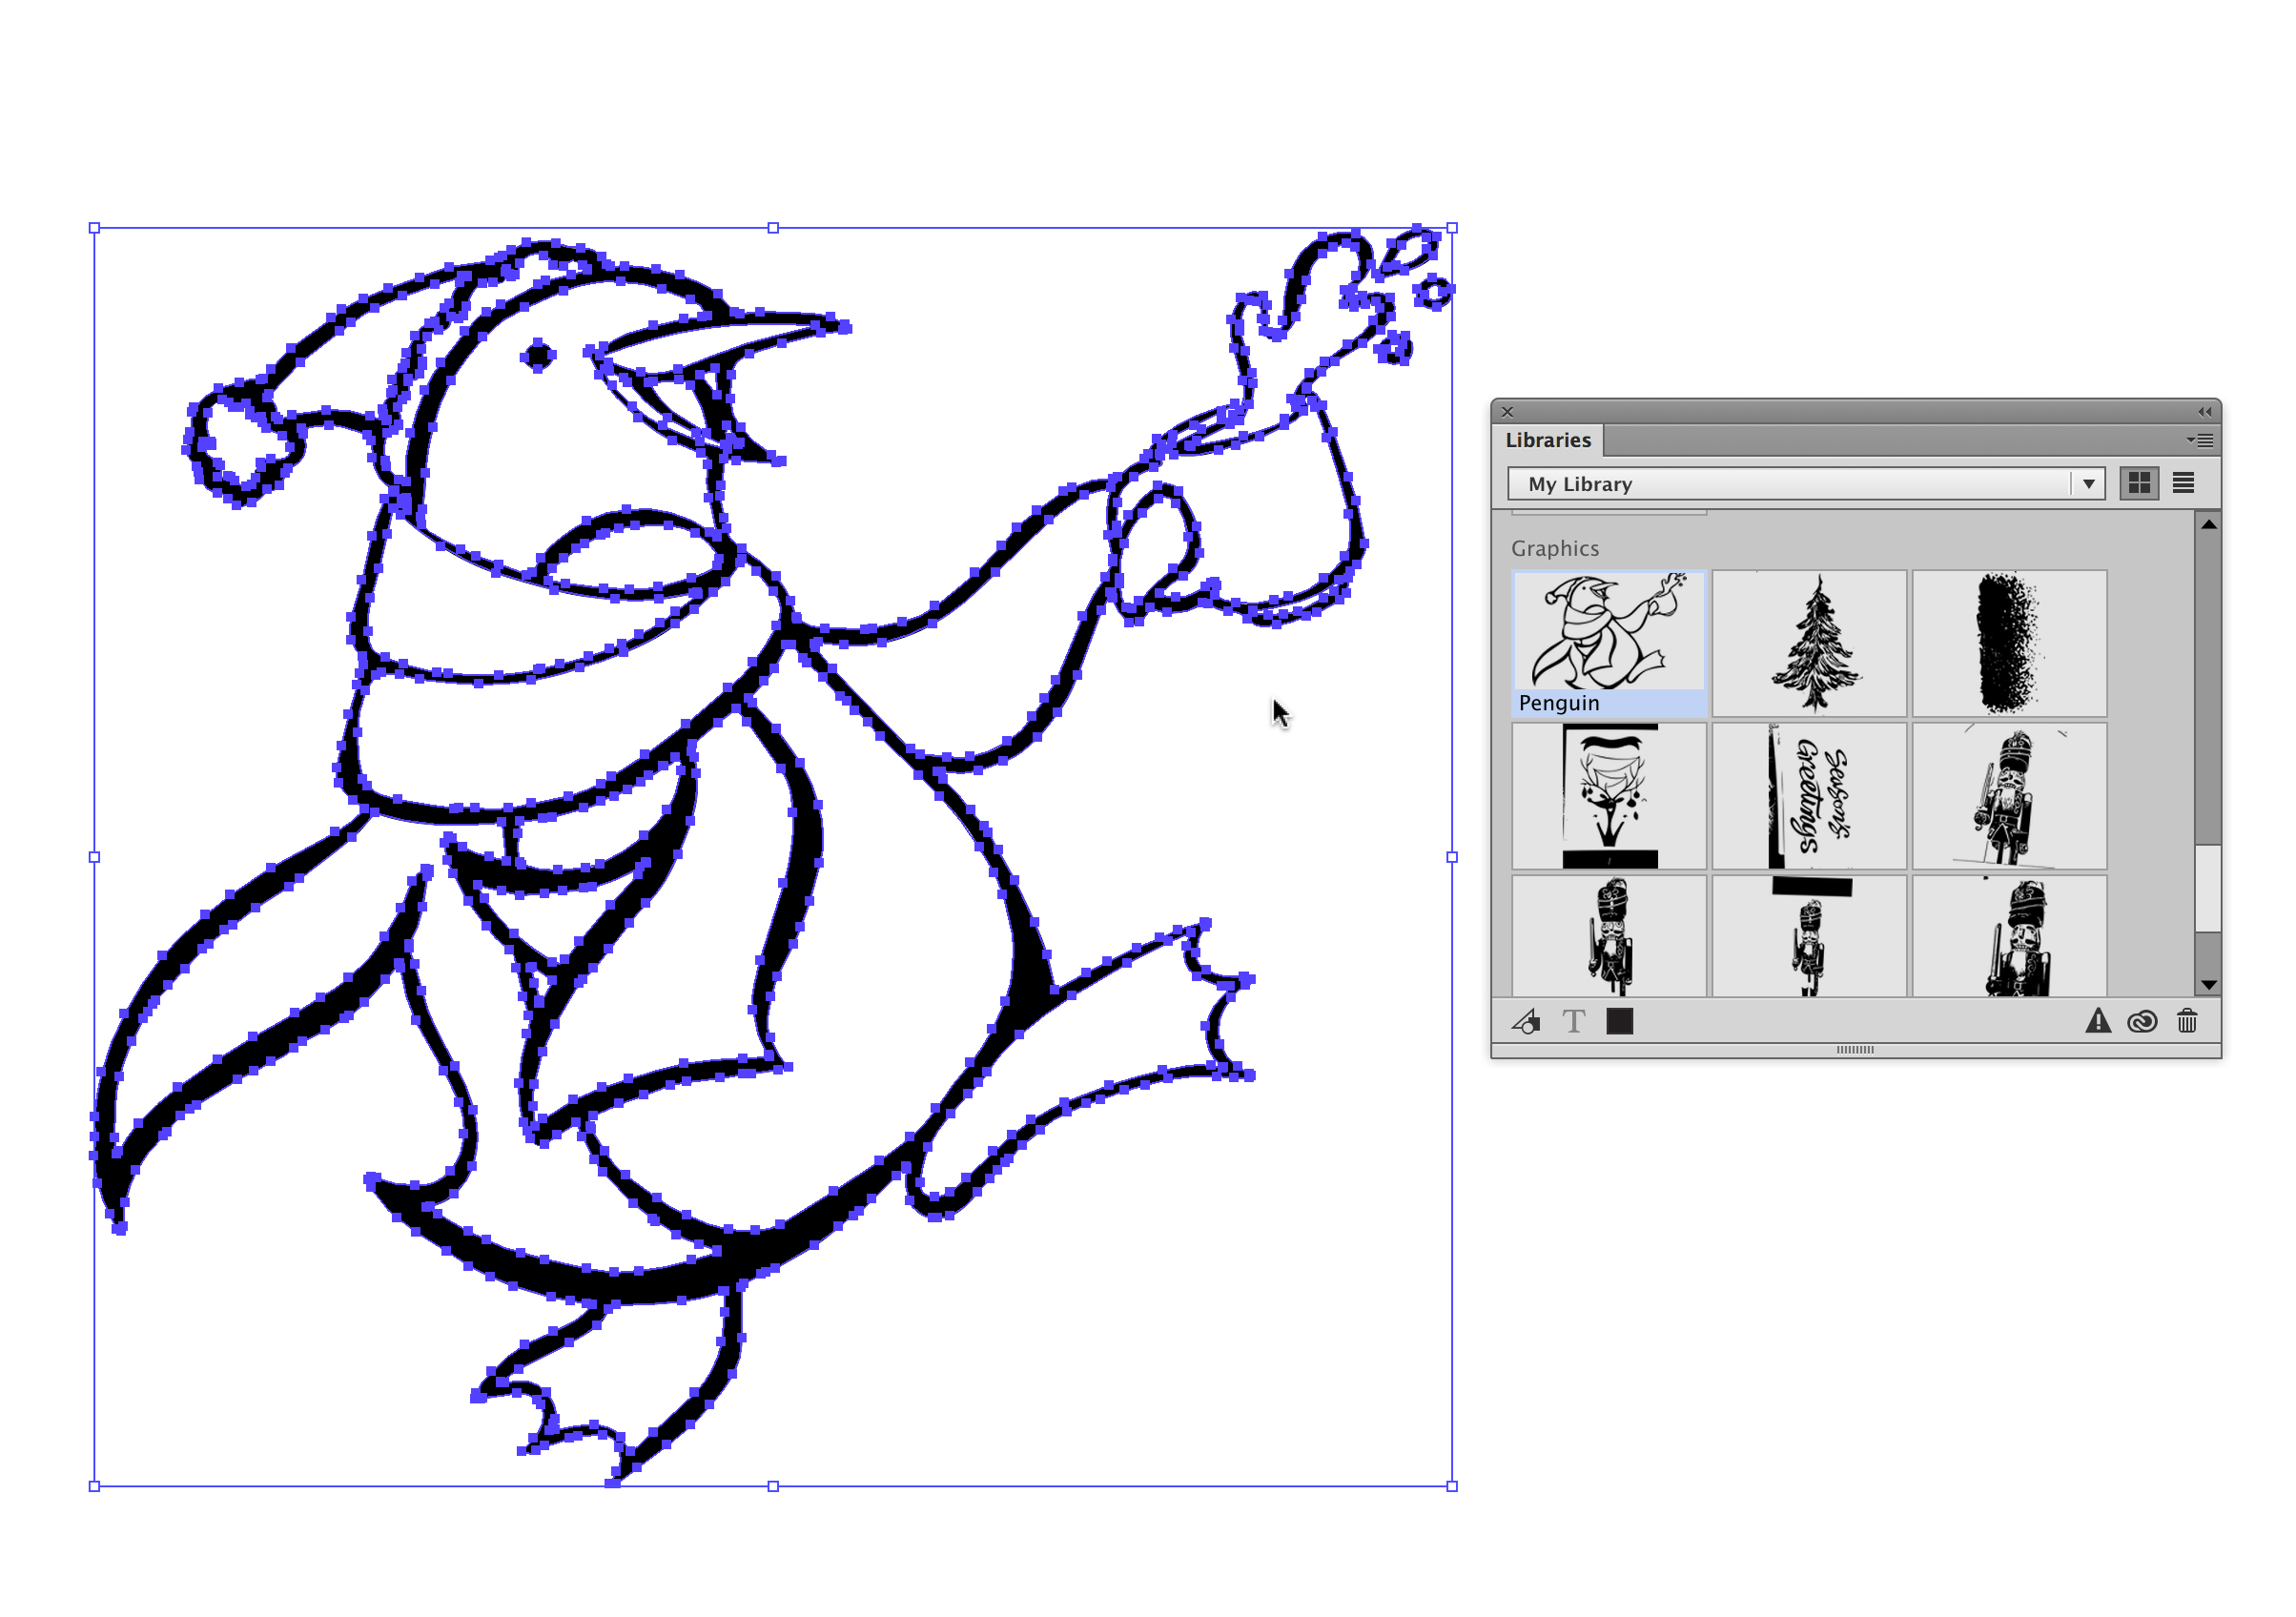
Step 5
Using Creative Cloud’s CreativeSync feature, I easily saved my captured assets into Creative Cloud Libraries. From there, I was able to access my vector artwork across Illustrator CC and Photoshop CC within seconds.
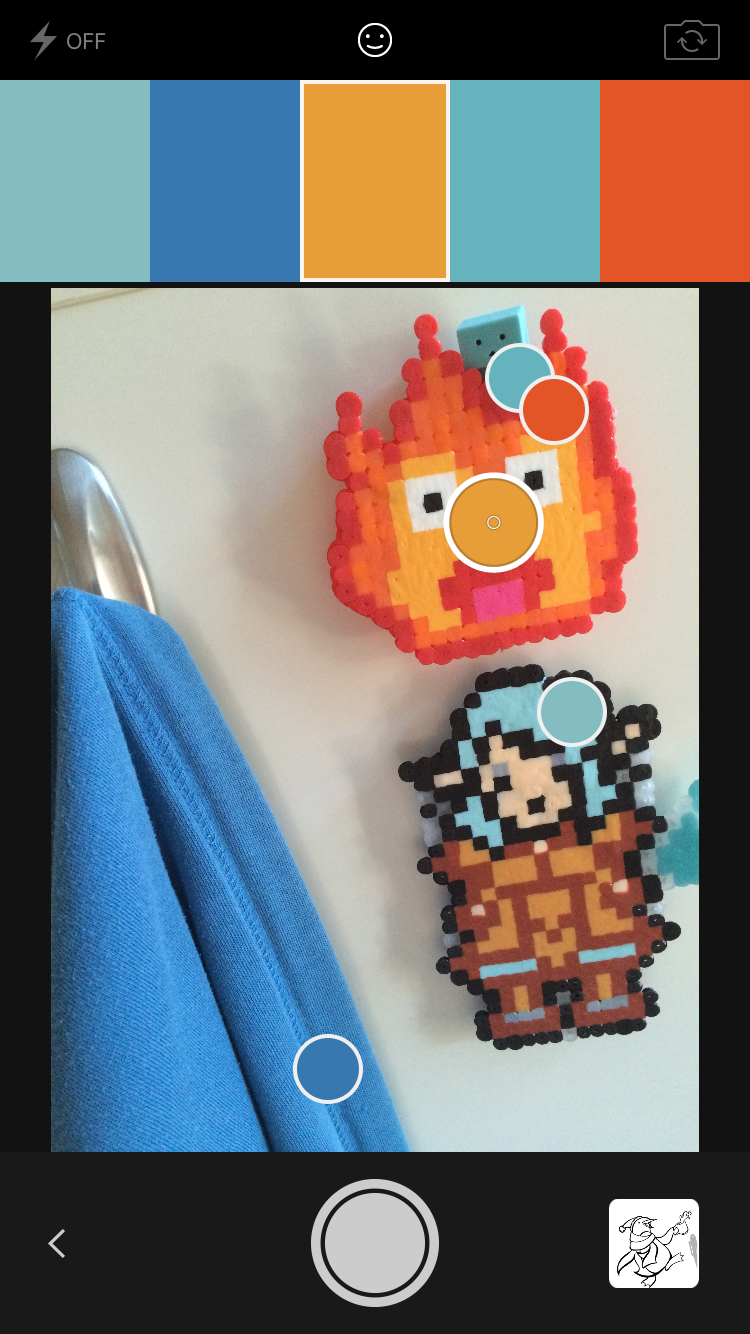
Step 6
Since installing Adobe Capture CC, I take pictures of anything and everything for inspiration! I’m particularly fond of these anime manga patches, which I used to develop my color theme. The best part – all of these swatches can be easily saved to CC Libraries and acessed in Illustrator CC, InDesign CC and Photoshop CC.
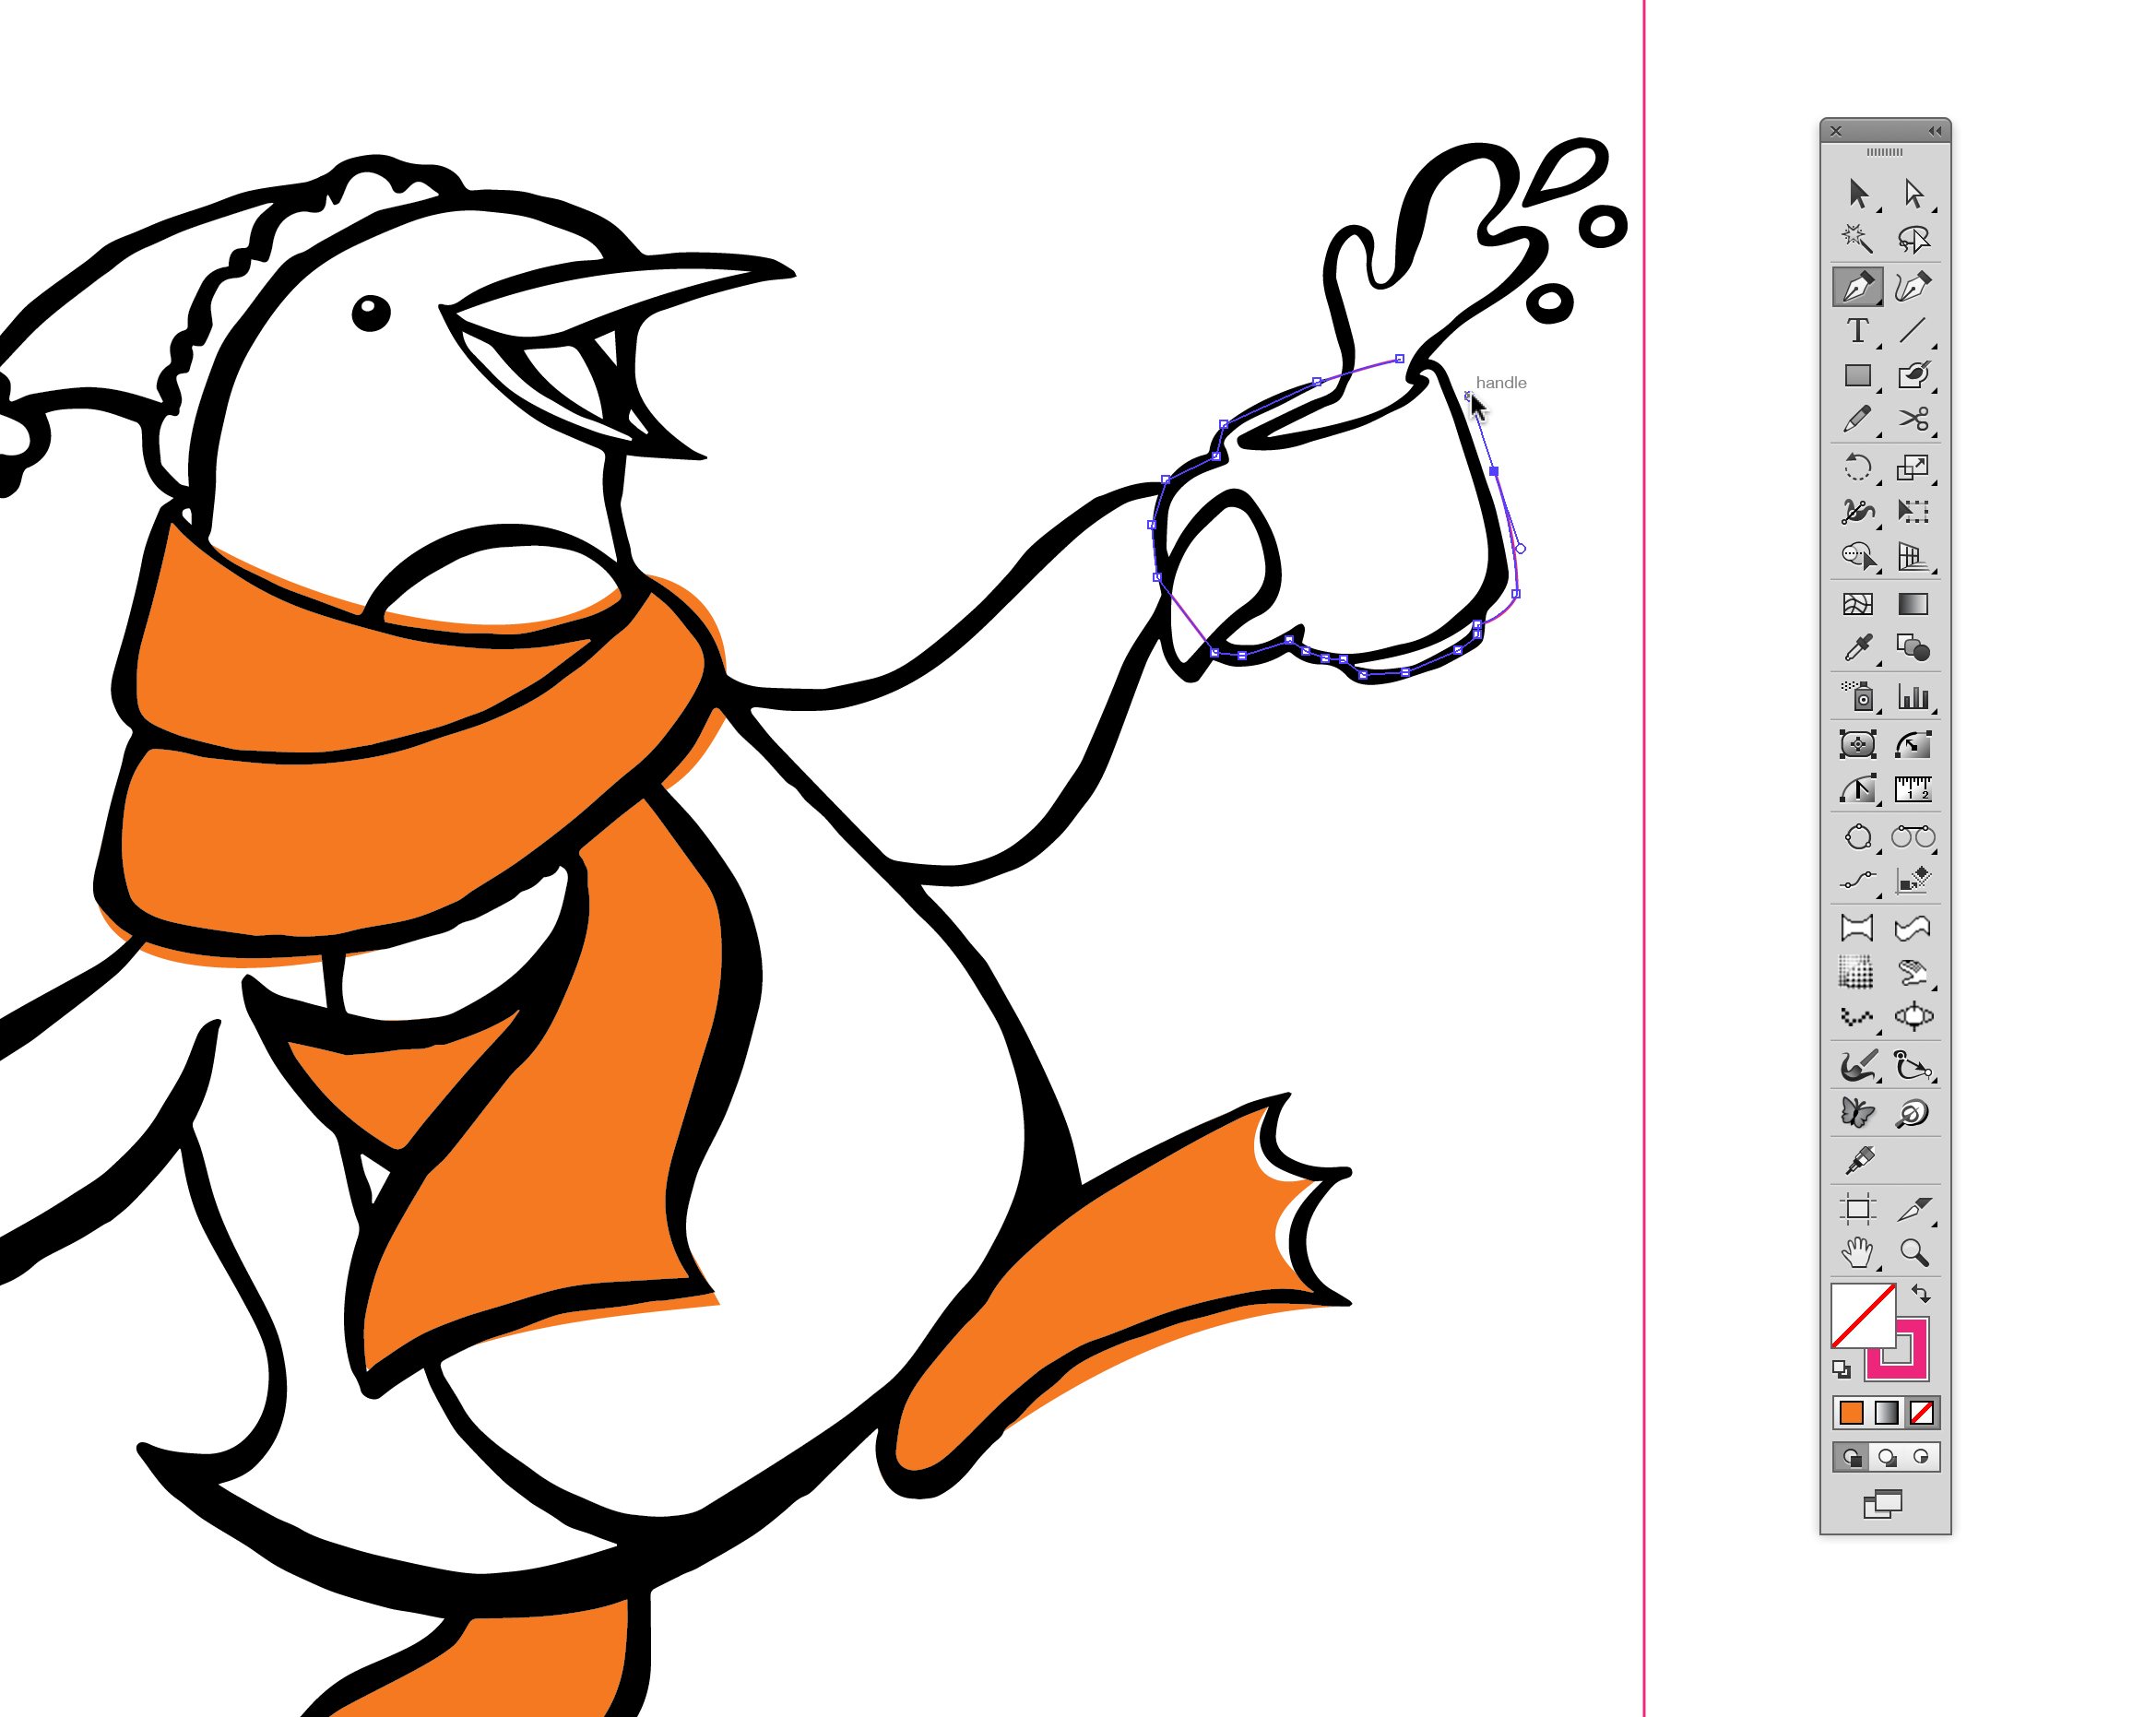
Step 7
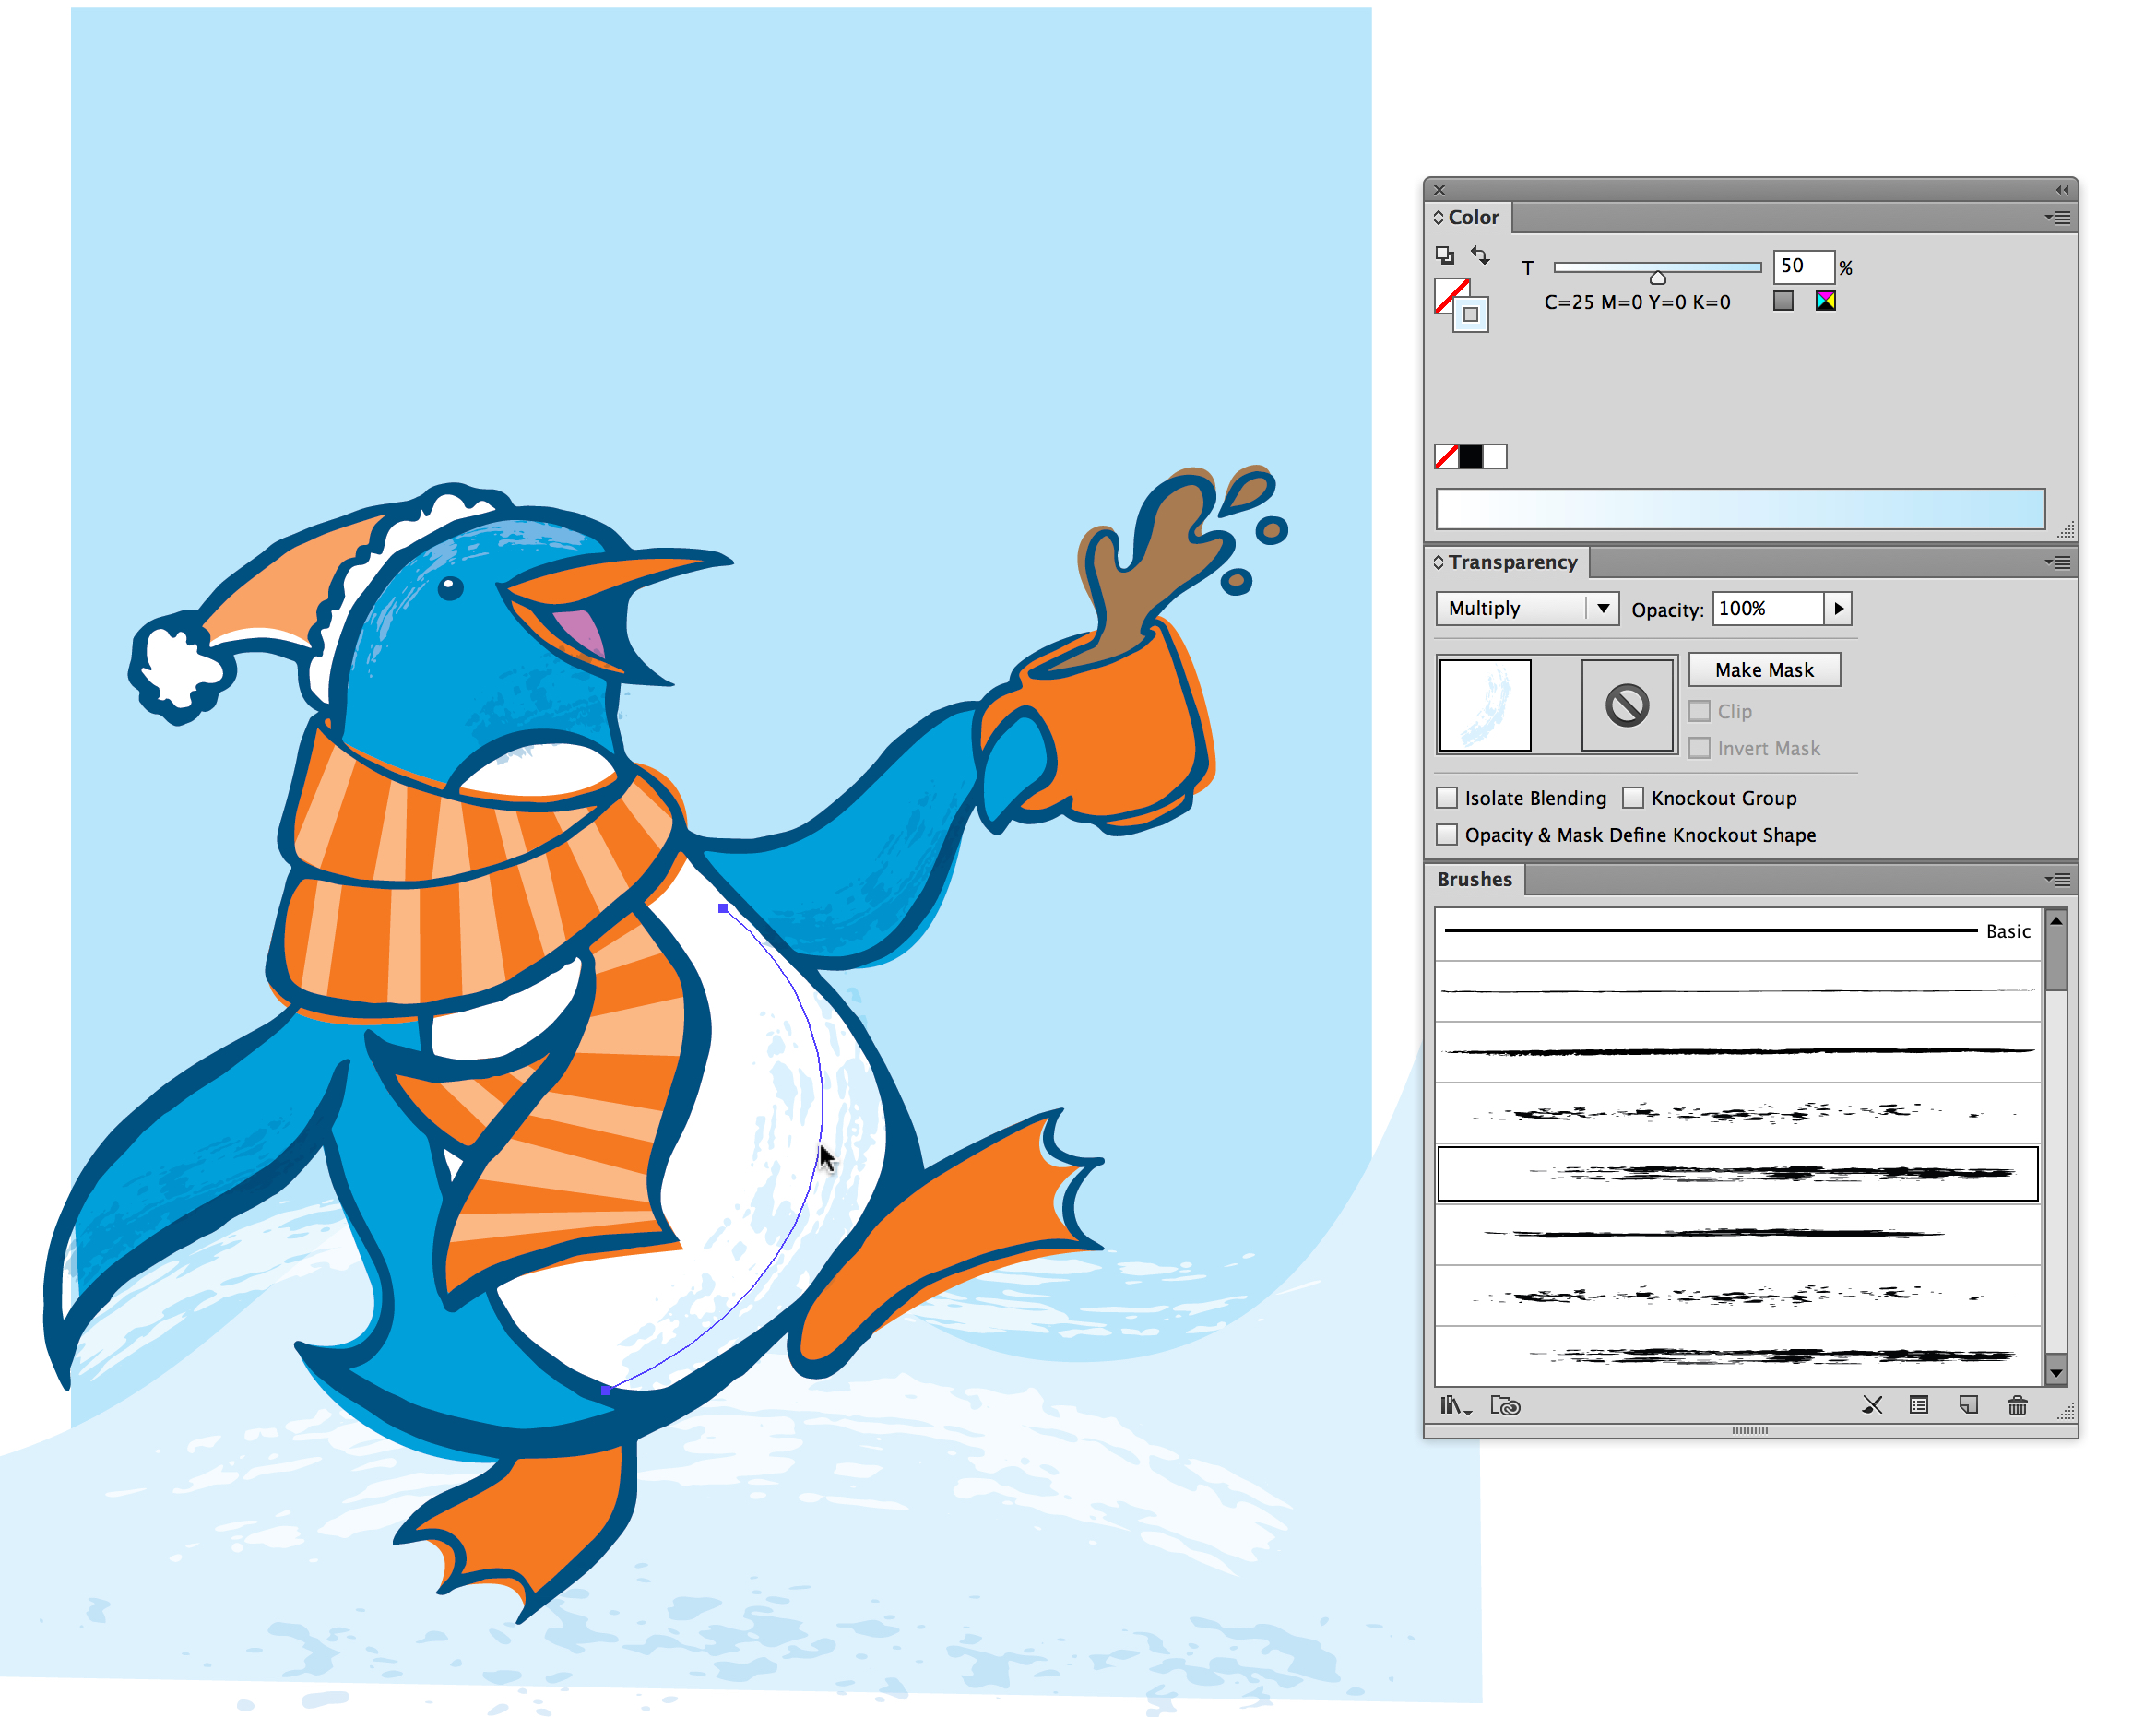
Once I transferred my artwork from Adobe Capture CC into Illustrator CC, I began to add colors to my penguin. I wanted the color to loosely fit within the lines, so I used the Pen tool and loosely followed the shapes.
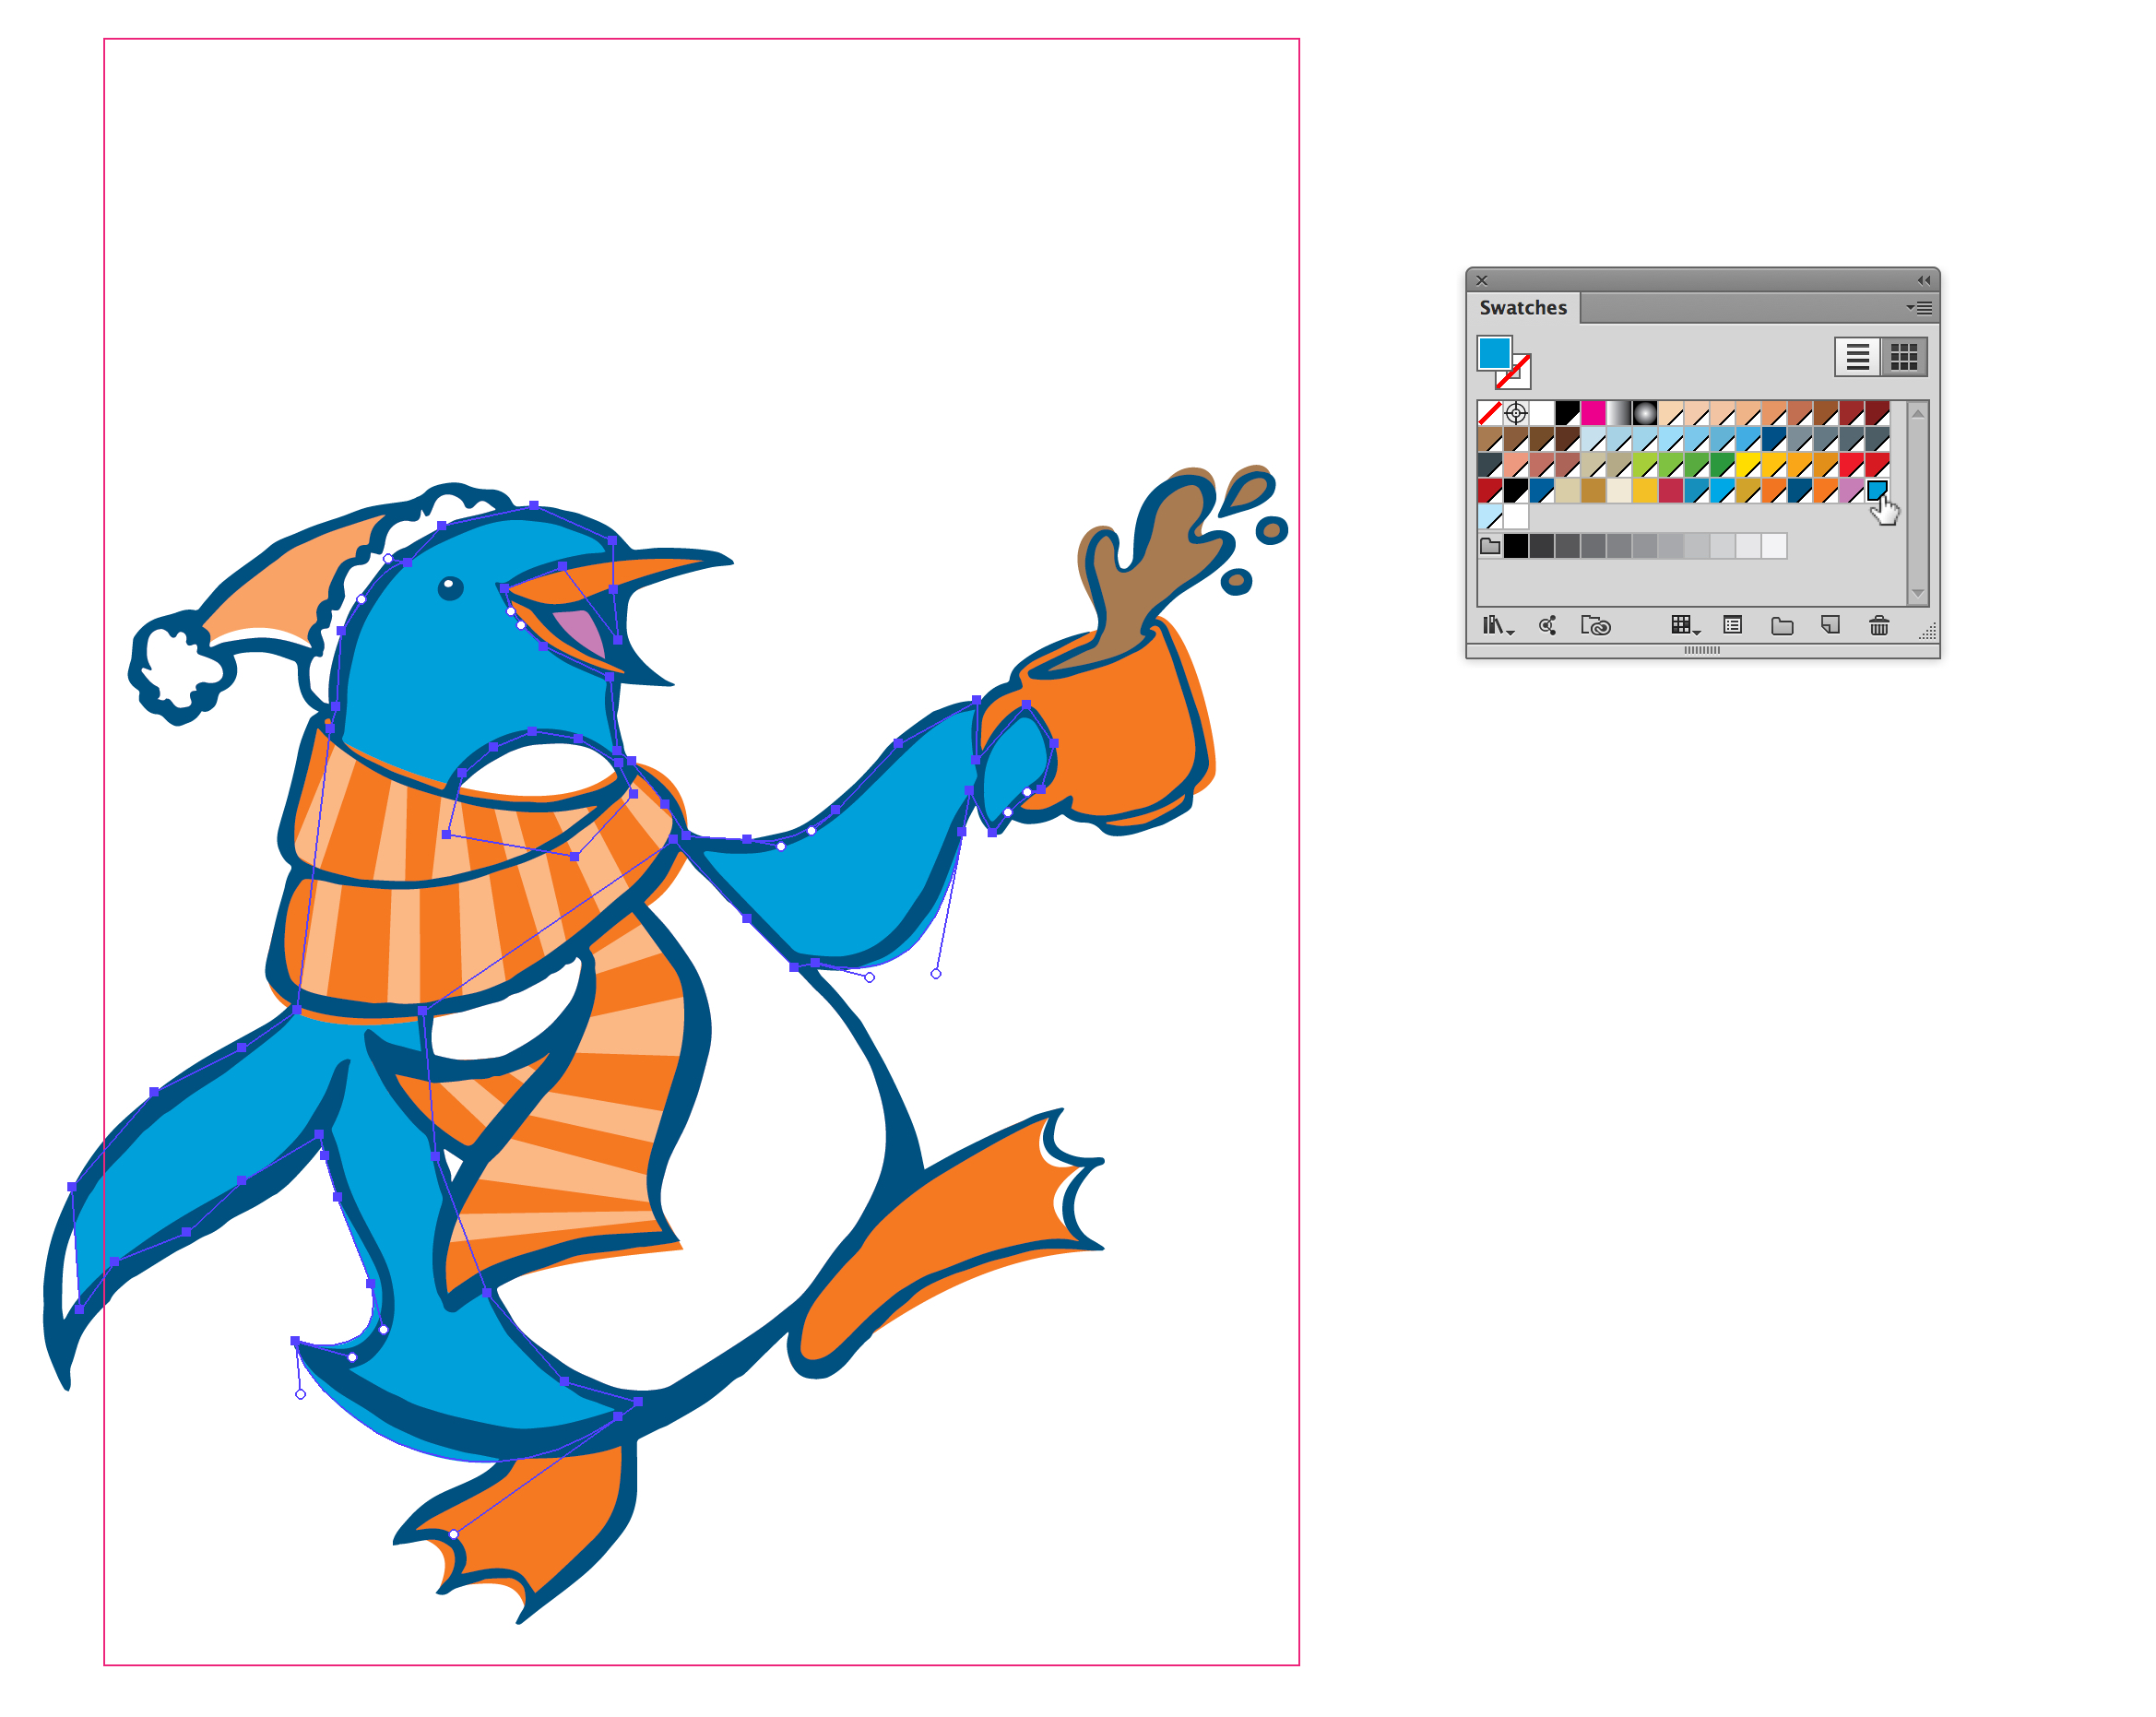
Step 8
Seeing the colors captured with Adobe Capture CC helped me adjust my overall color scheme to improve my design. Instead of black, I shifted the line work to a darker blue. This kind of fluid workflow is facilitated by Adobe Capture CC because it allows me to easily experiment with a wide range of swatches at a moment’s notice and consider color themes I might not have thought of before.

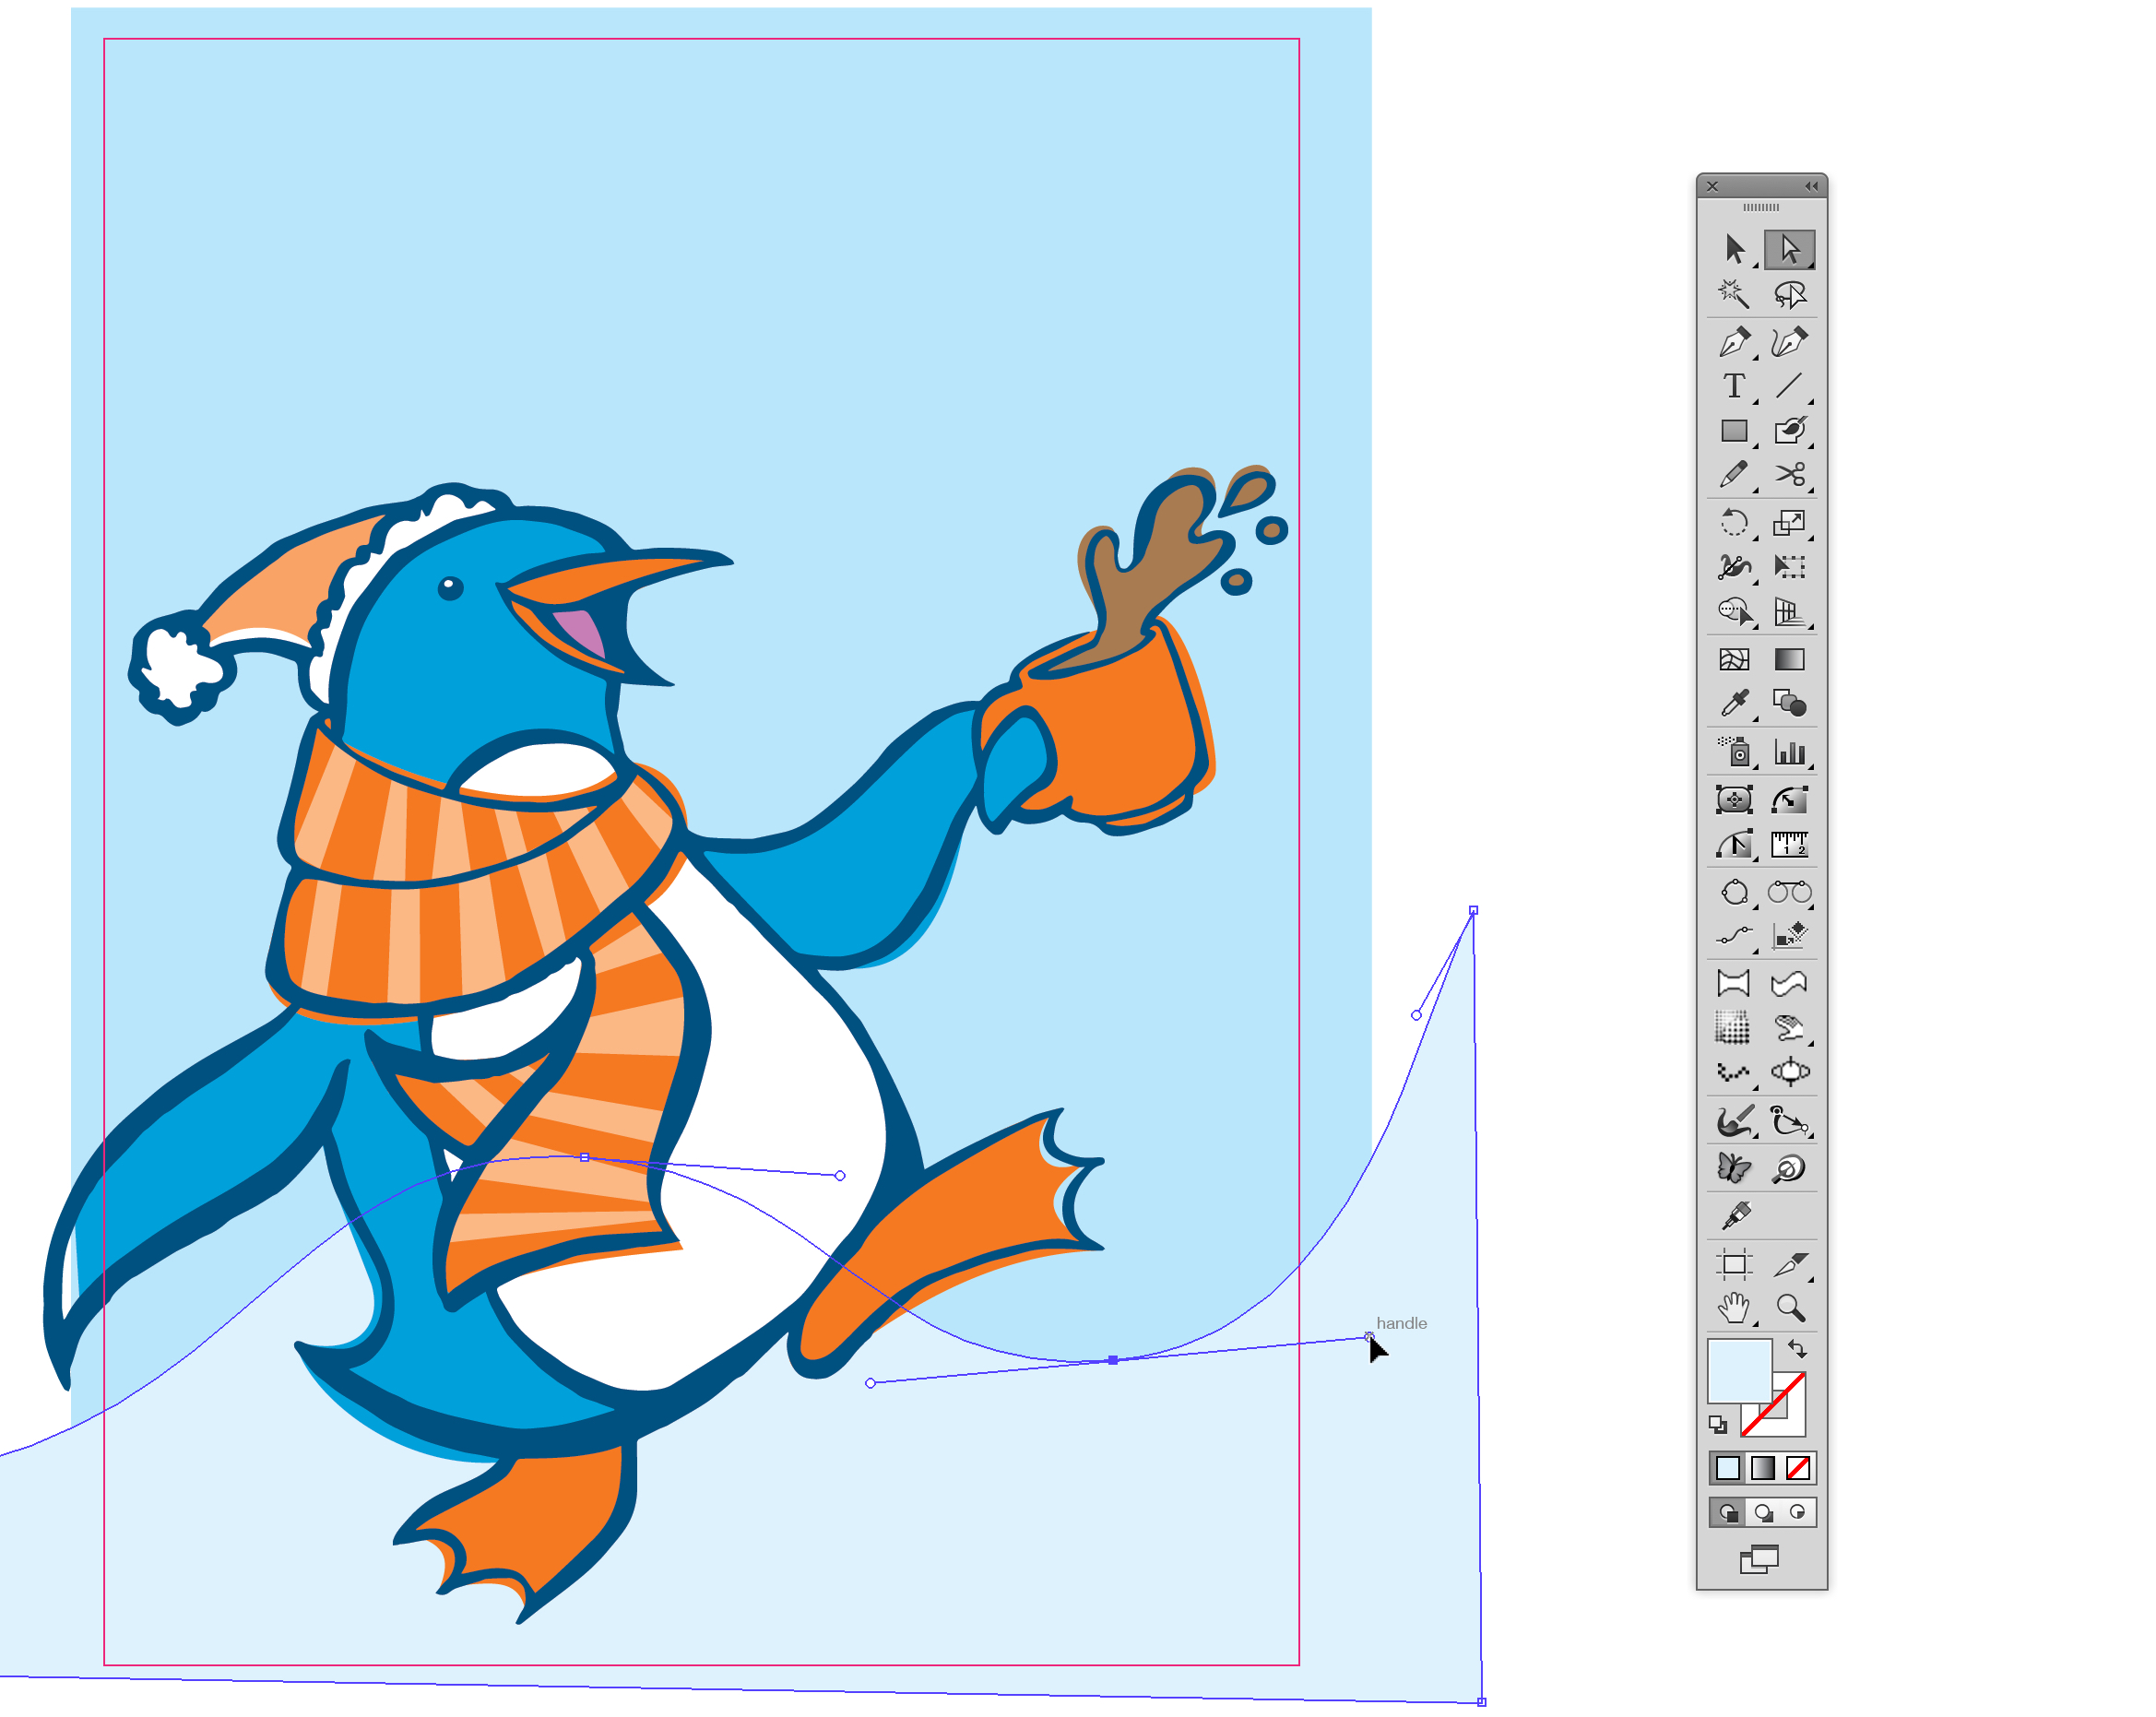
Step 9
Focusing on the background, I used my custom color theme to build out the background image and snow.
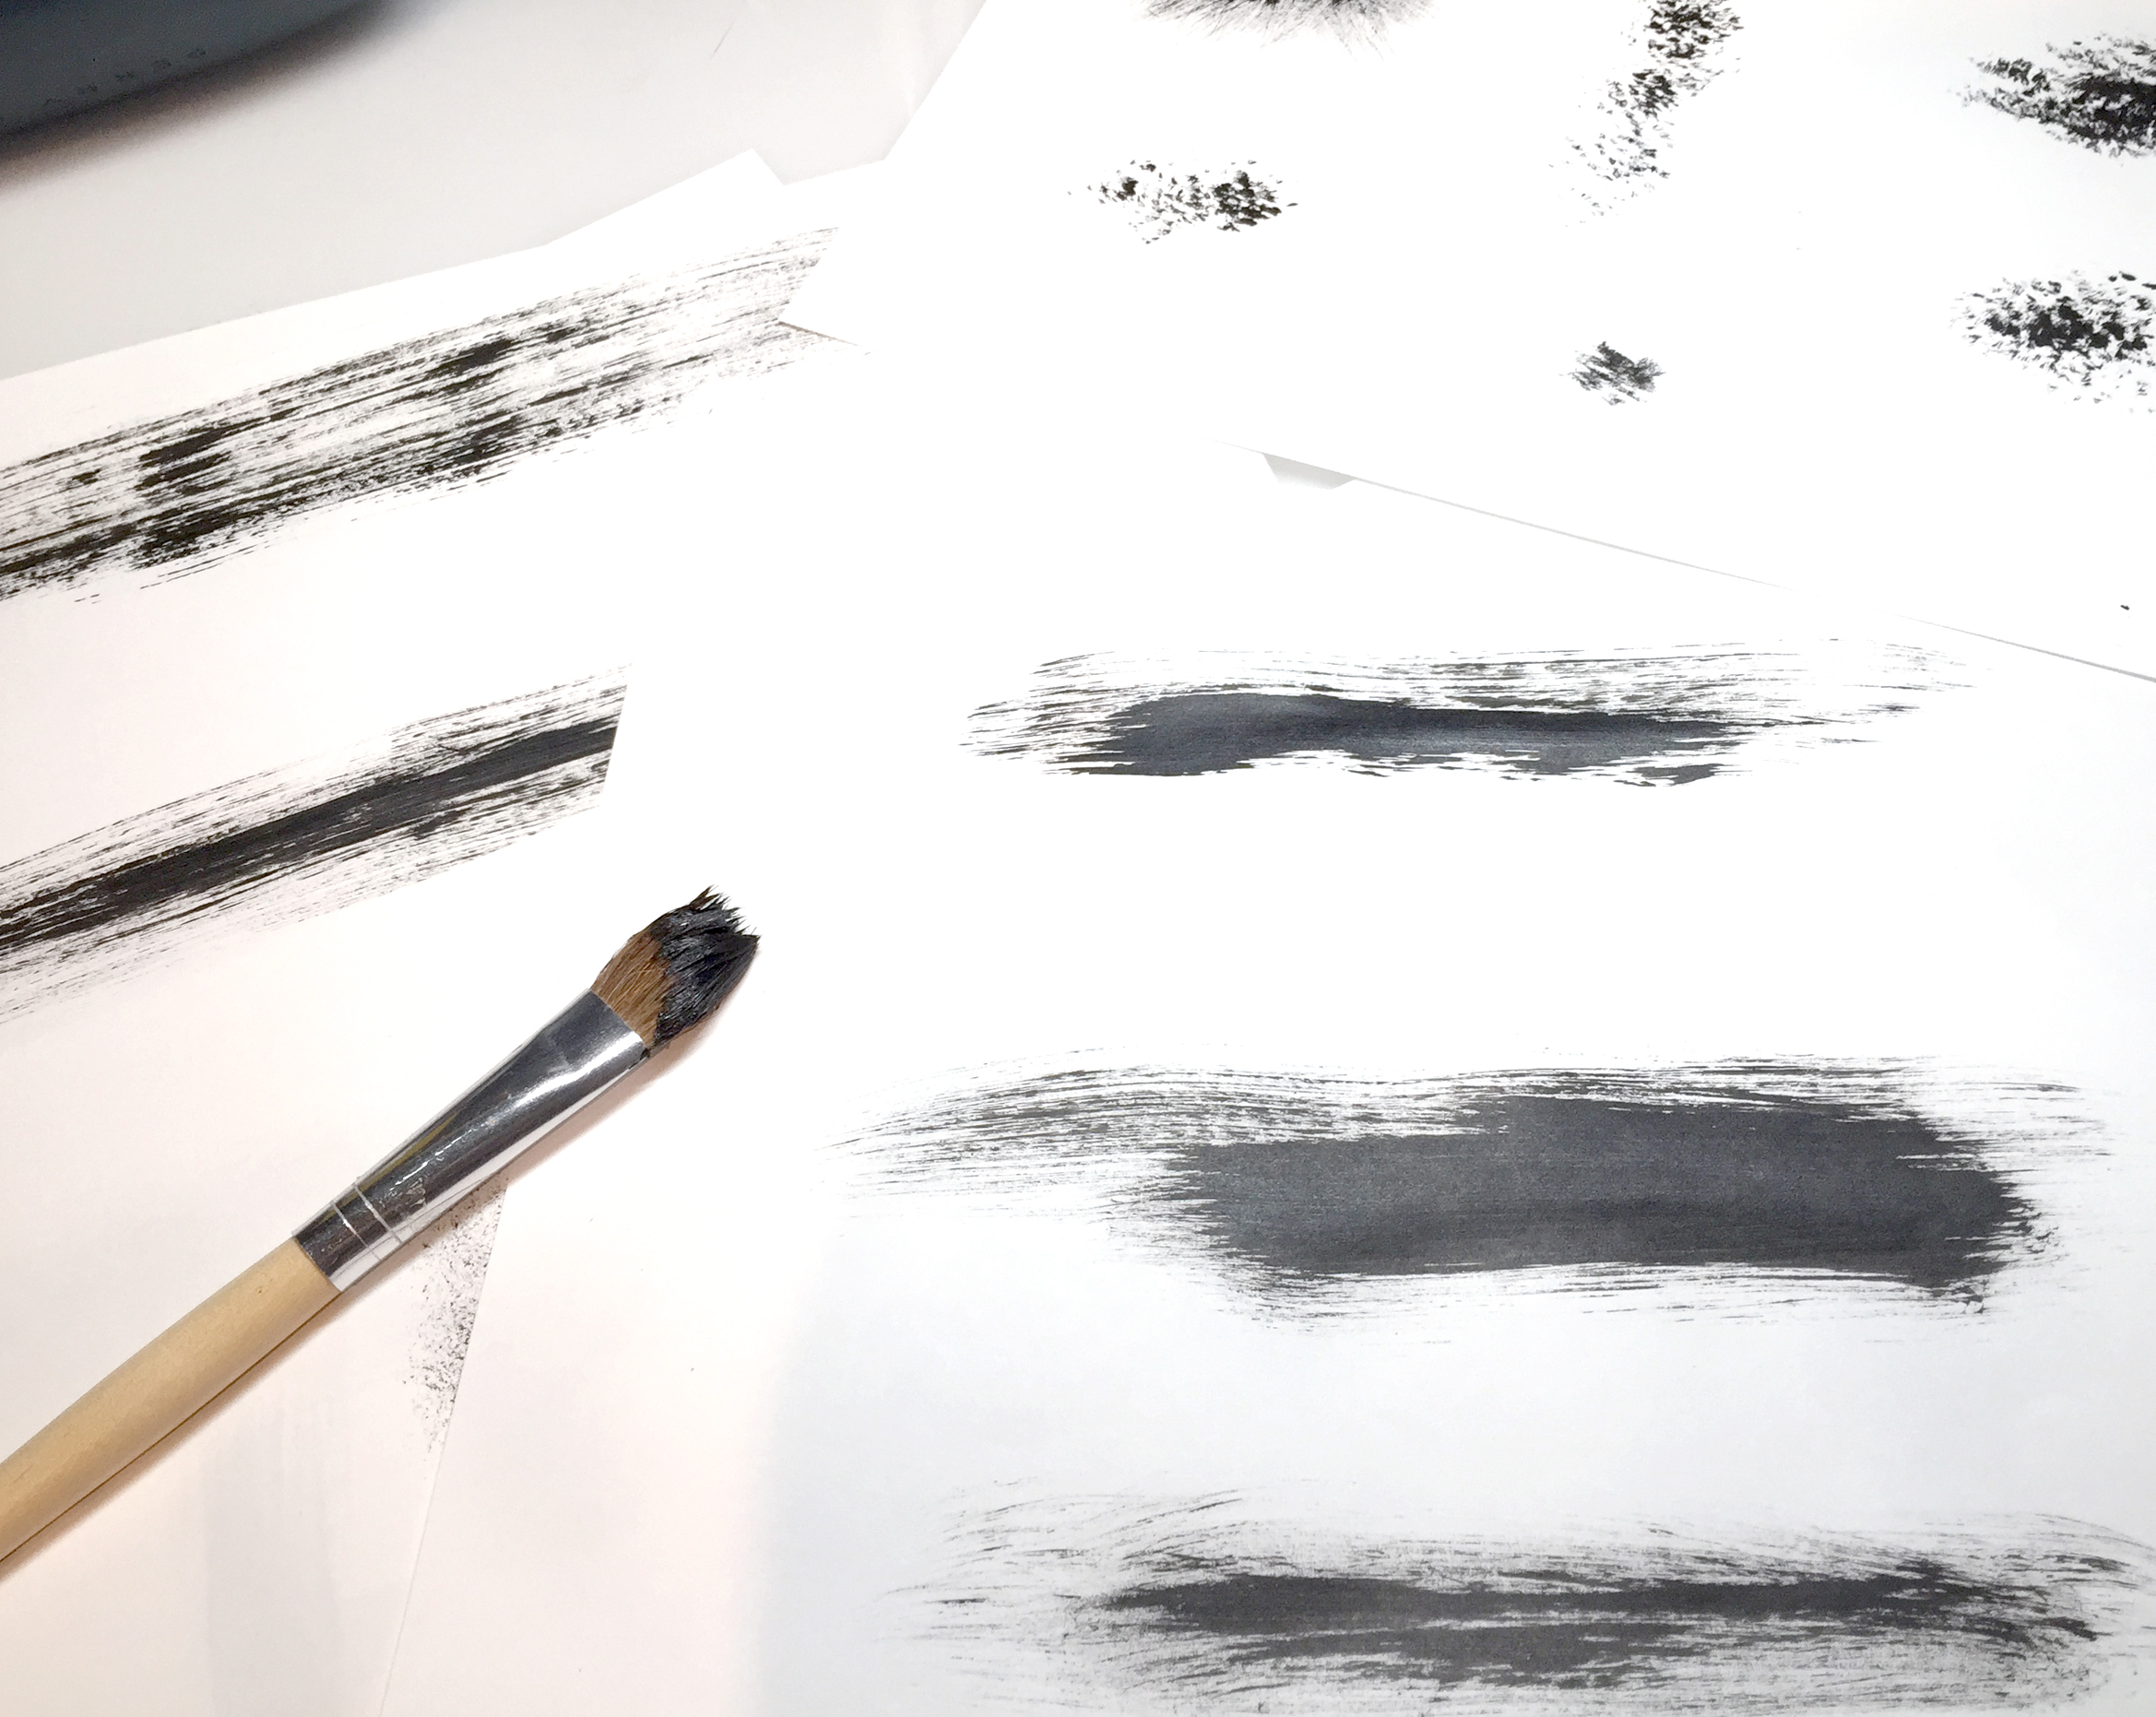
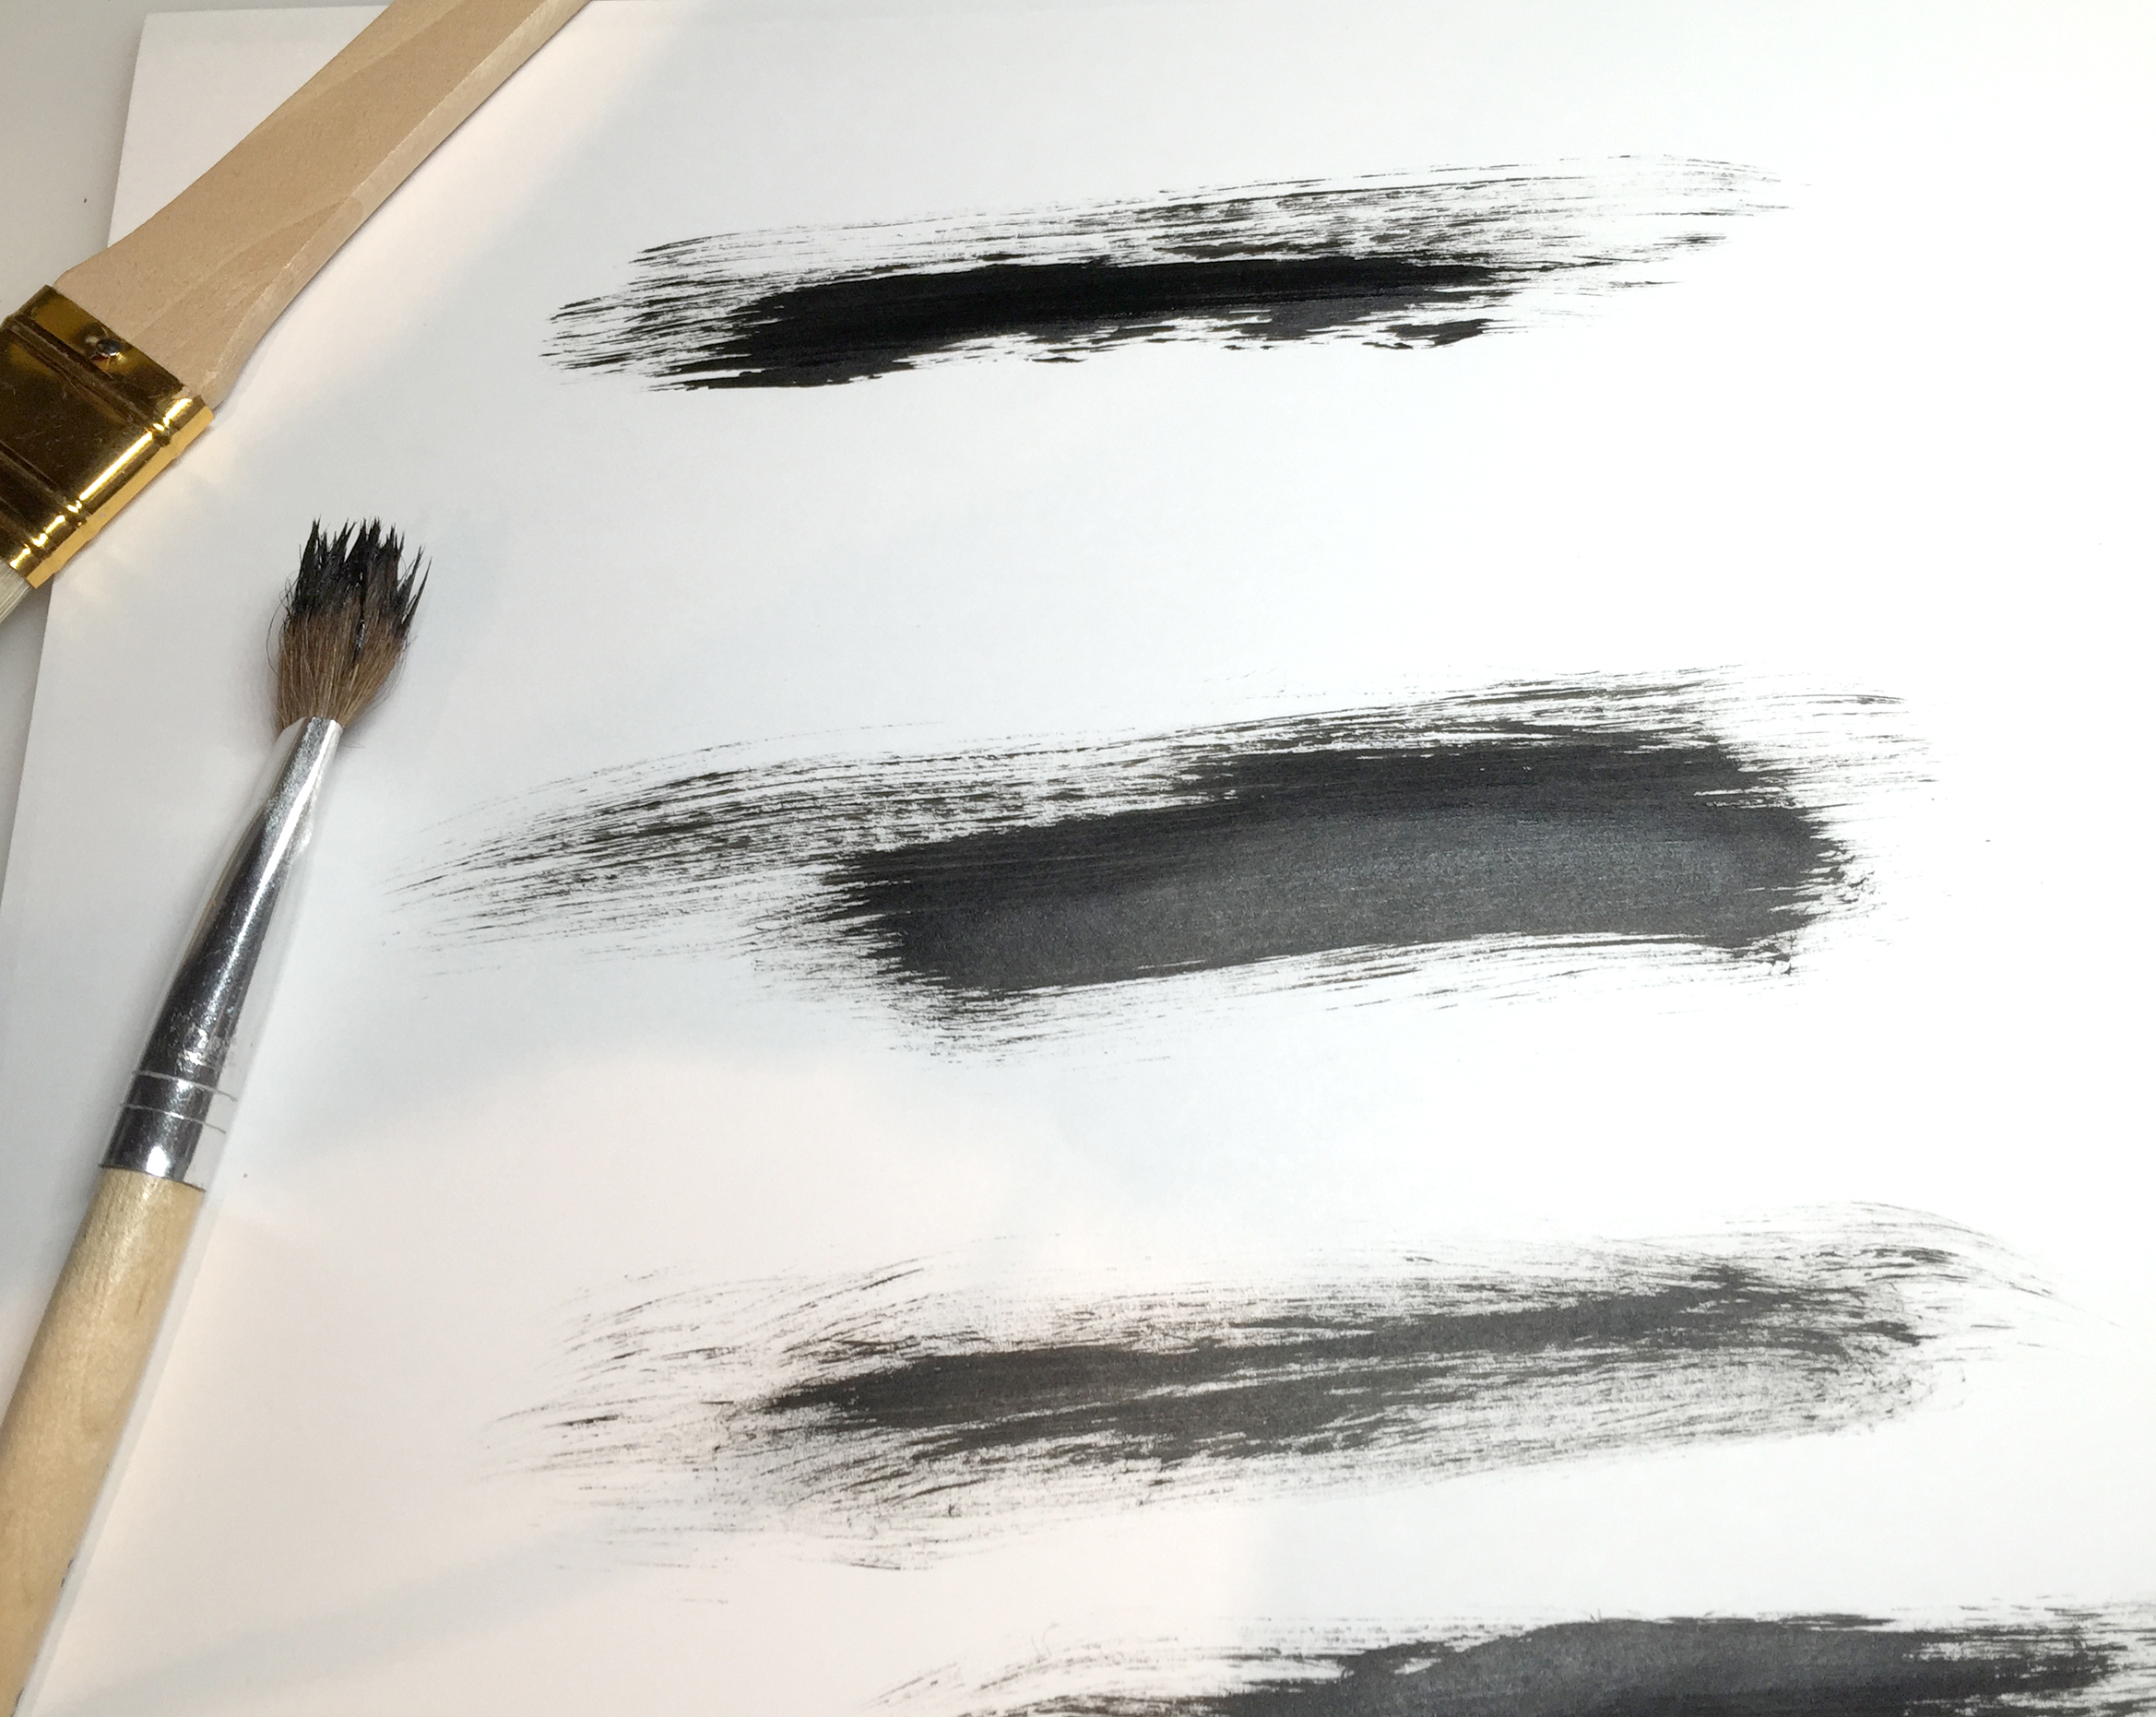
Step 10
With Adobe Capture CC, you can leverage analog methods and easily integrate them into a digital workflow. For this design, I wanted authentic-looking brush strokes, so I used an actual paint brush and black acrylic paint to create the artwork.
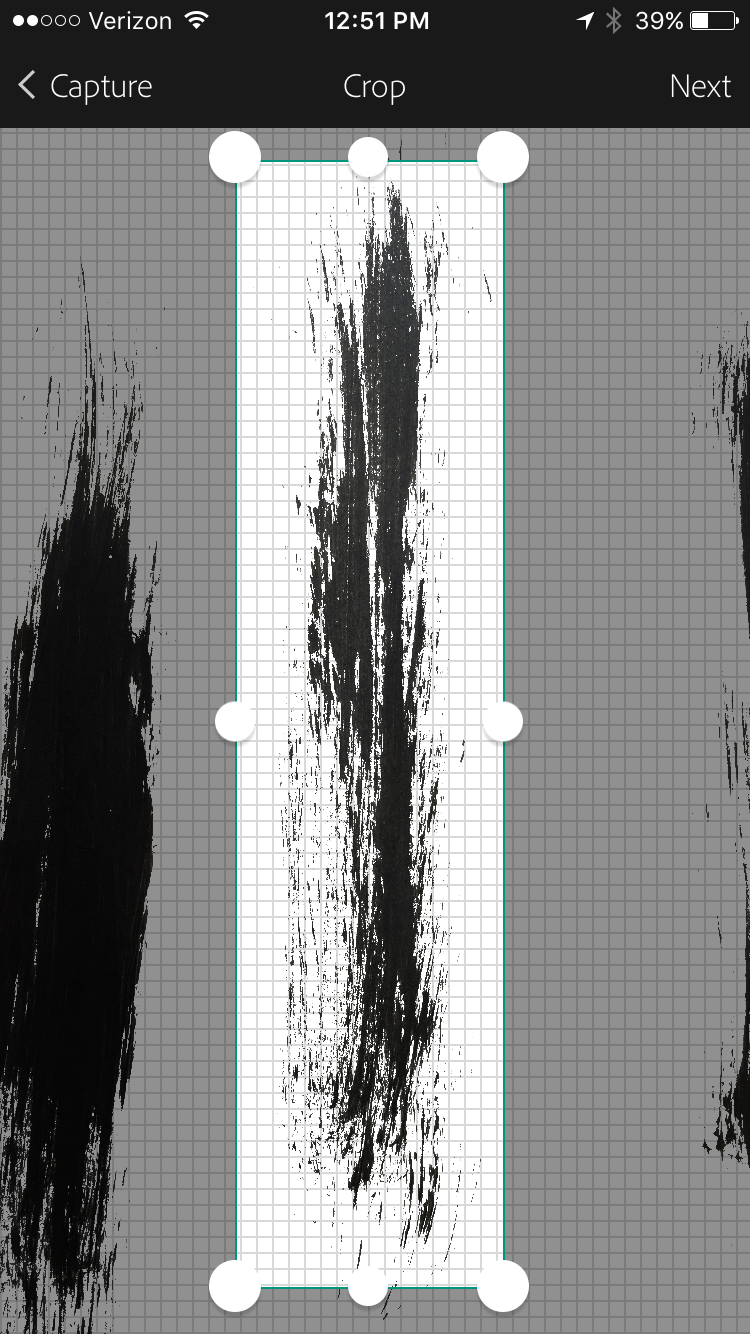
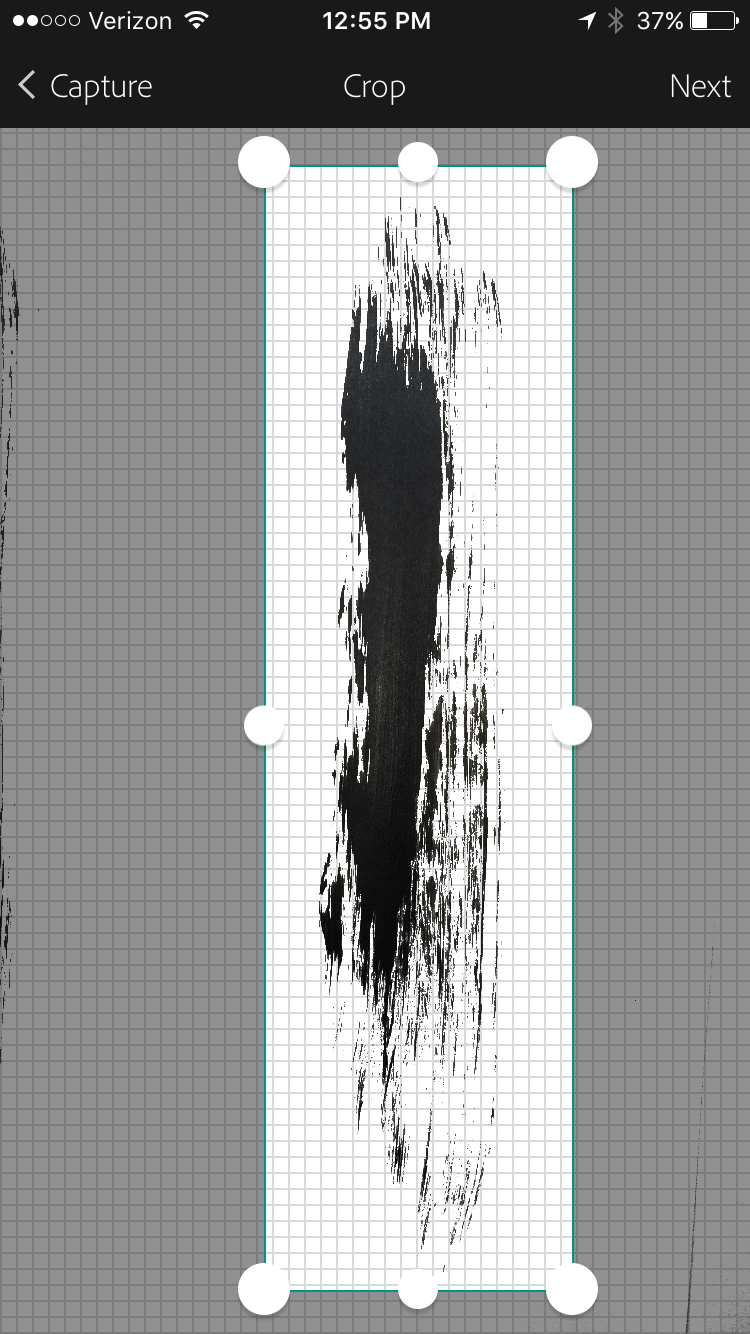
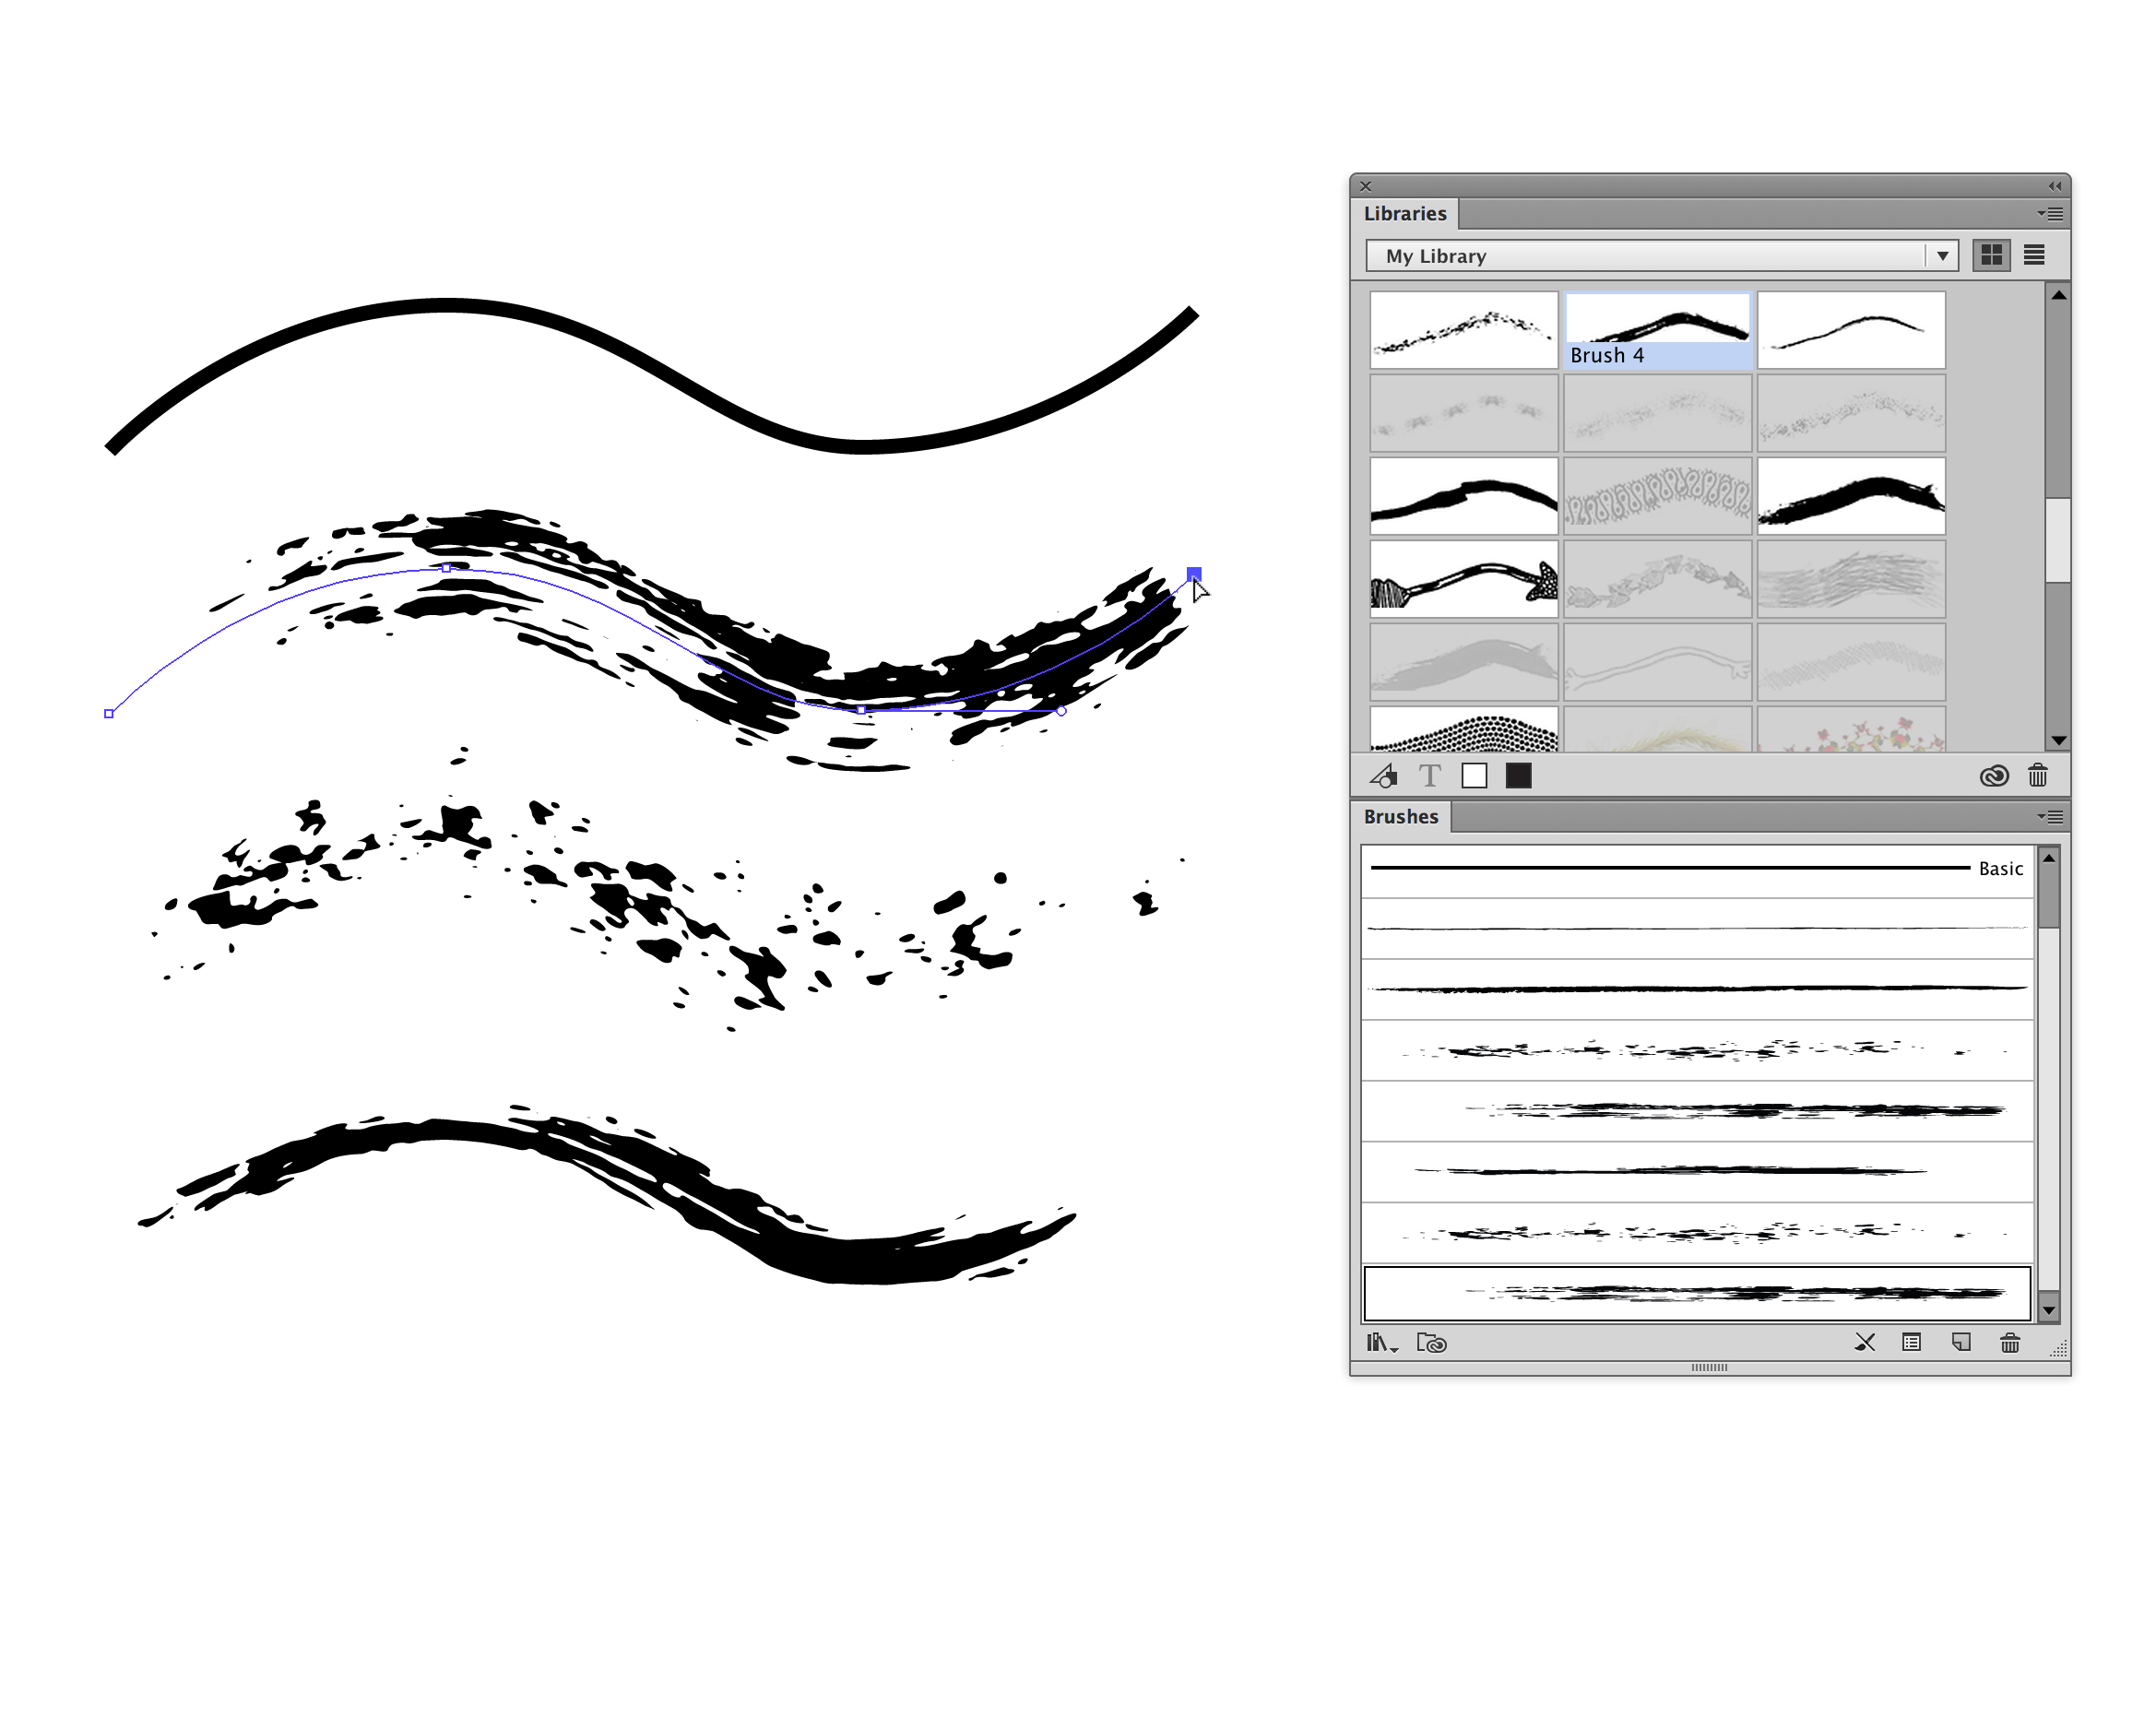
Step 11
I love making custom brushes with Adobe Capture CC. For this, I captured my hand-painted strokes, then cropped out what I didn’t need. Using the filters, I adjusted and customized my brush stroke to transpose it into an asset. Adobe Capture CC allowed me to test drive the brush within the app so I could see how it would look once I accessed it in Photoshop CC or Illustrator CC via CC Libraries.
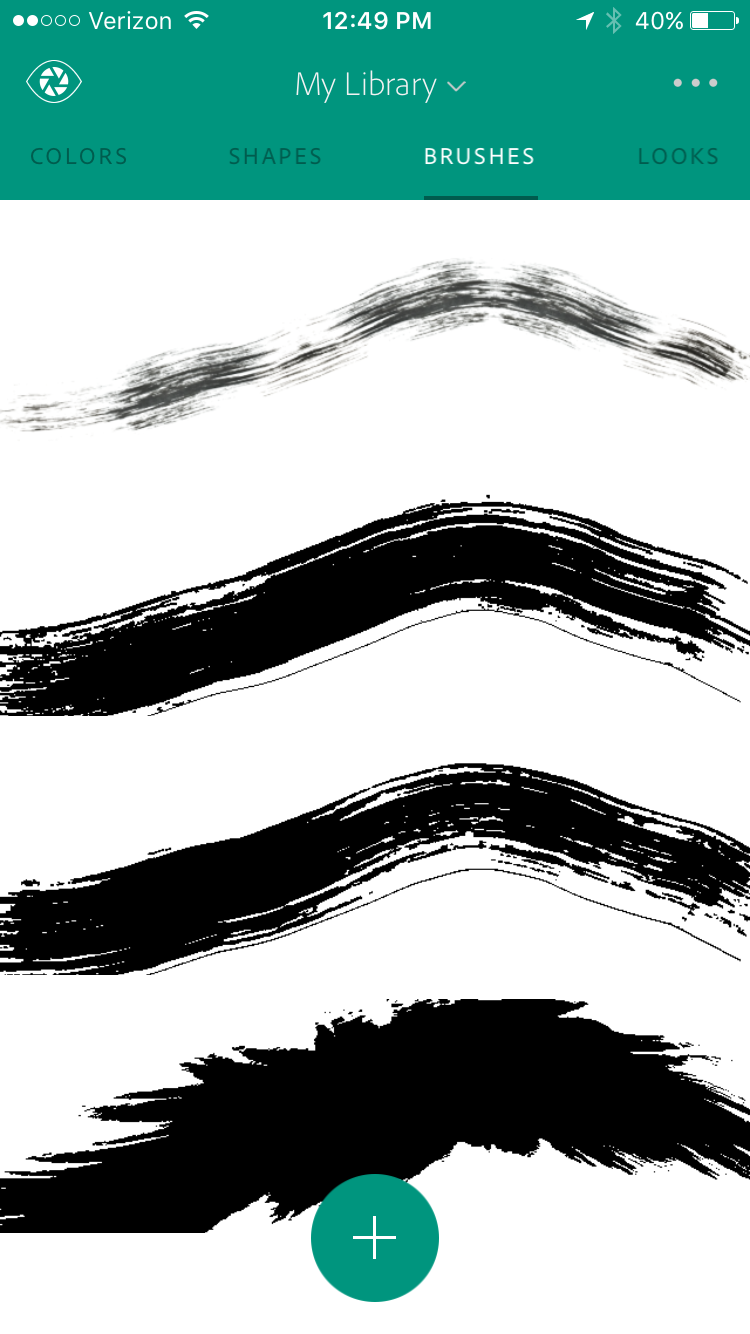
Step 12
Once I saved my brushes to a CC Library, they automatically appeared in my CC Libraries panel in Illustrator CC. I drew a stroke and applied the new brush design to it. The process doesn’t get any easier, and the results look authentic and add a lot of organic flair to the overall aesthetic.
Step 13
I could have used a font, but almost everything in this design was created by hand, so I decided handletter the type as well. I sketched the words on paper, scanned it in and used the Pen tool to complete.
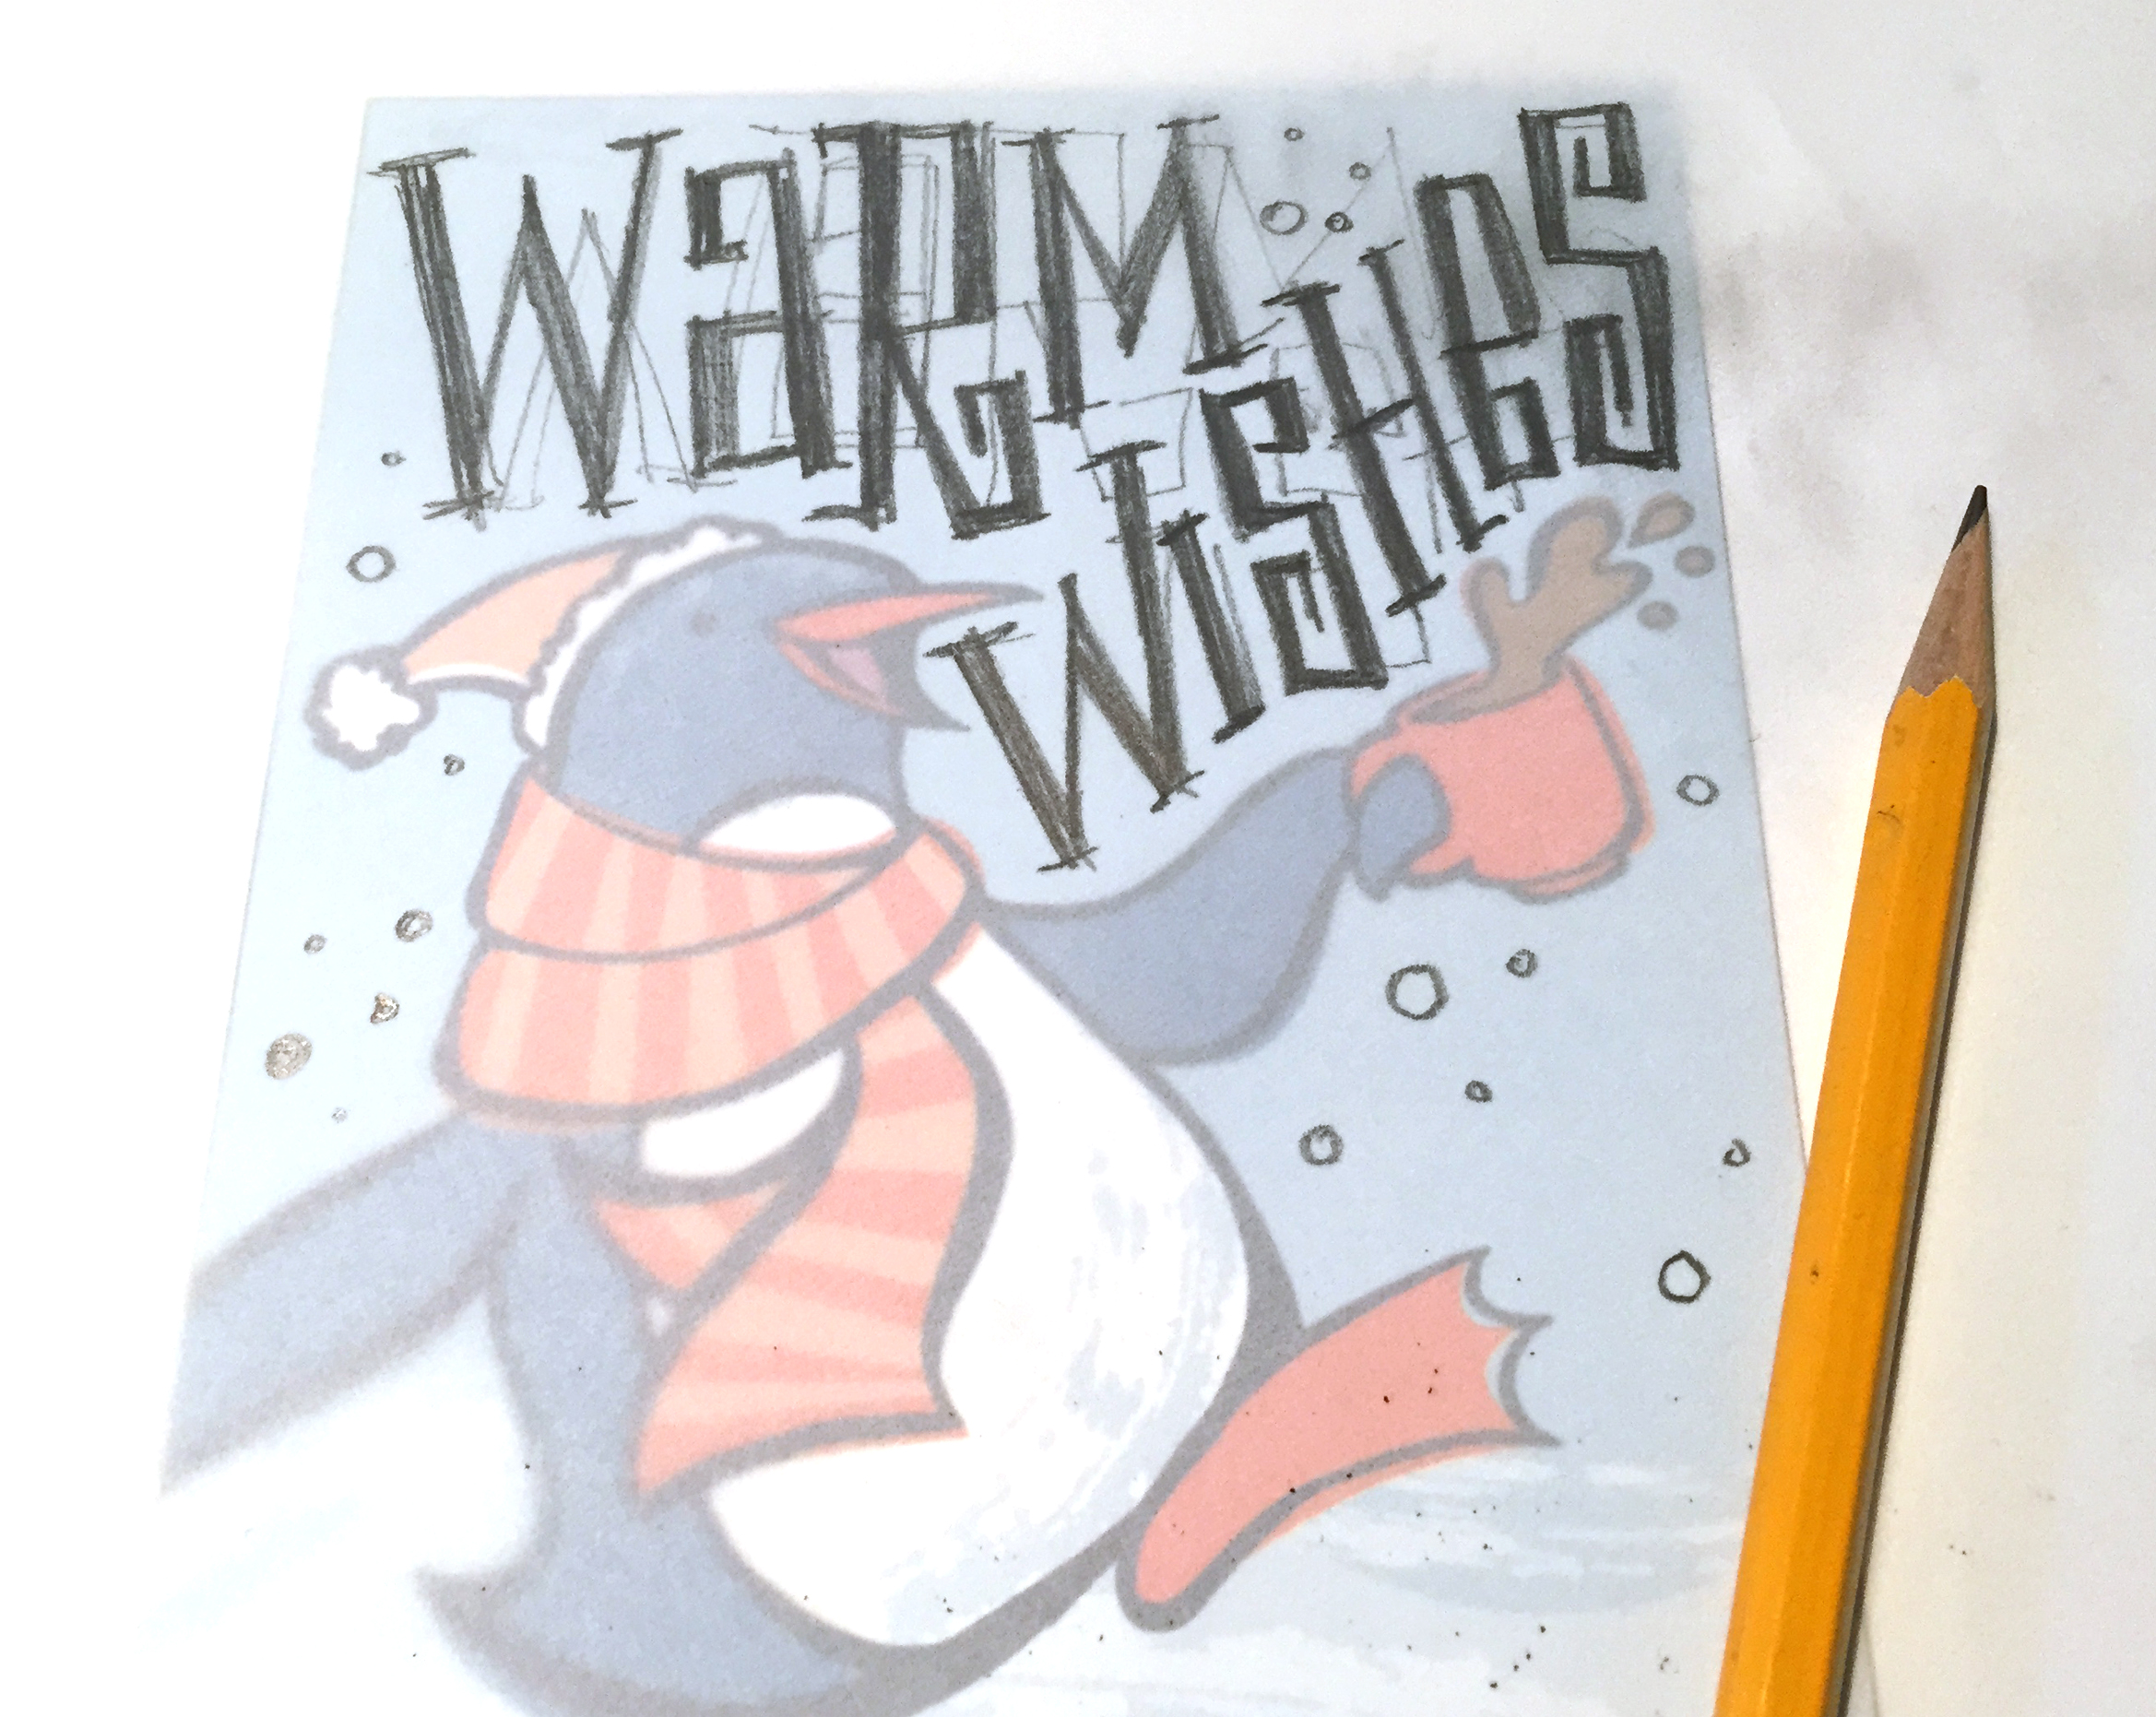
The final type in place really added a nice level of fun to this design. Looking at my design, I realized I was missing an integral piece – SNOWFLAKES!

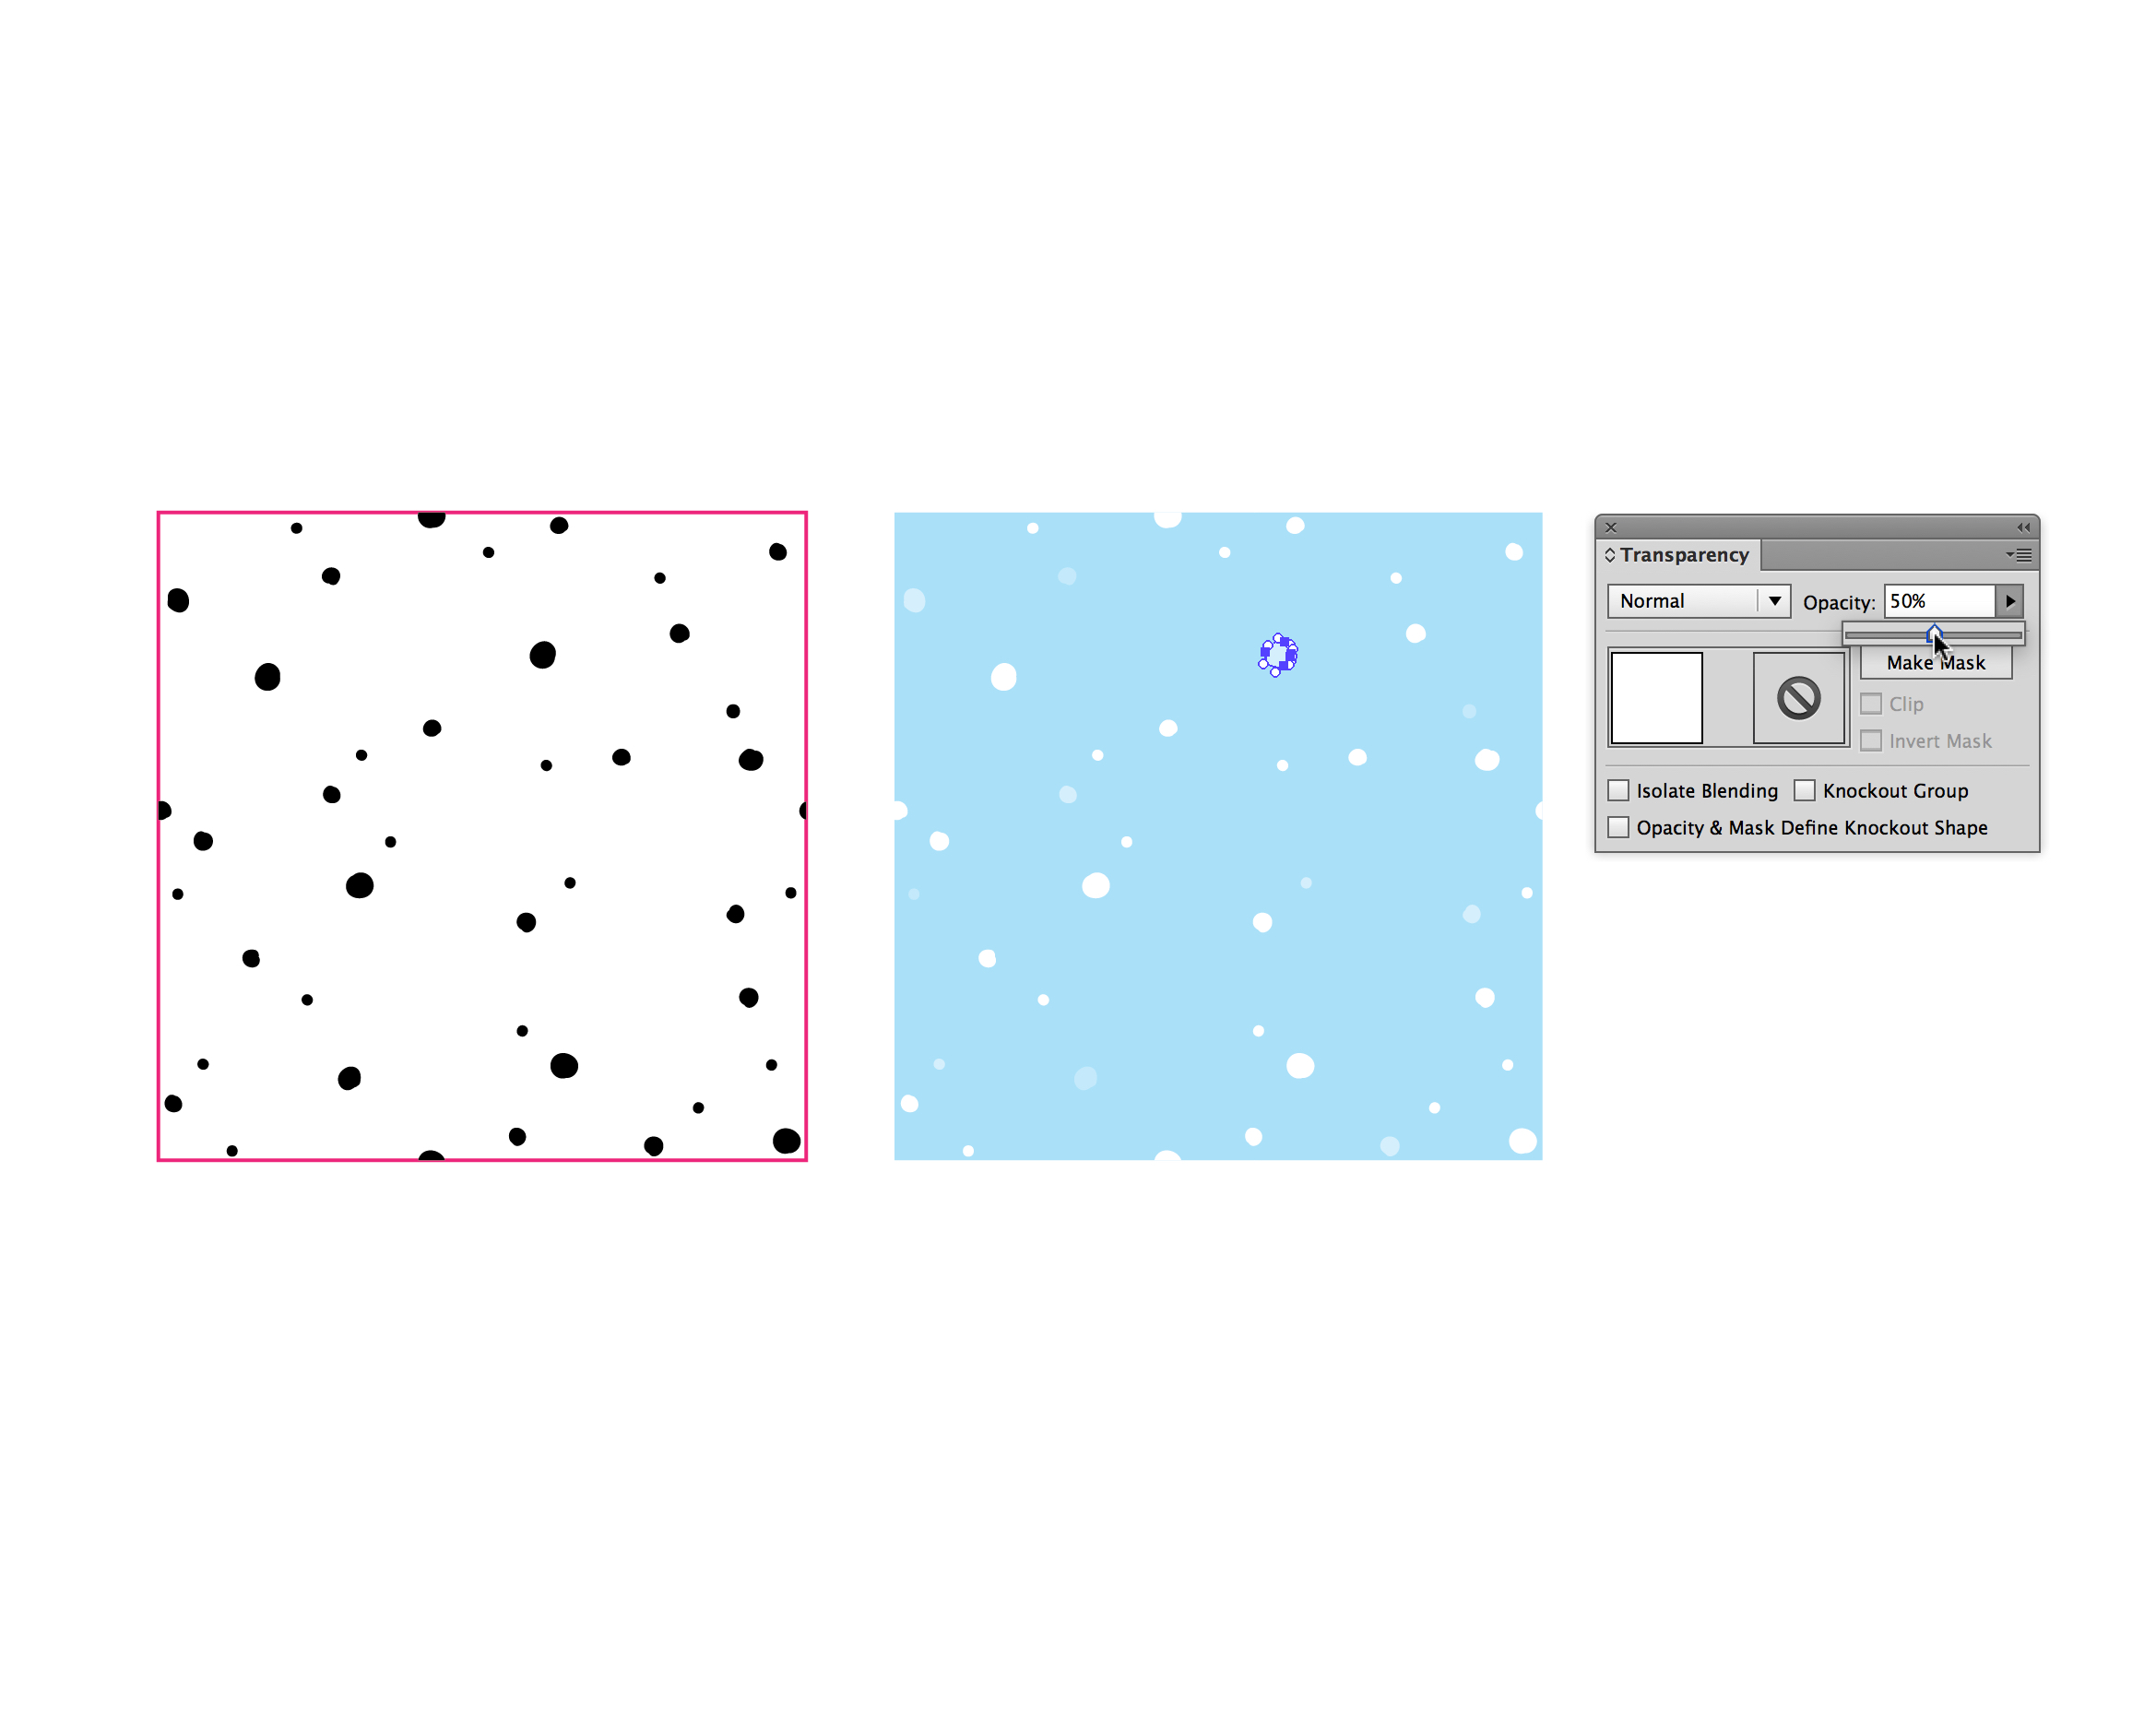
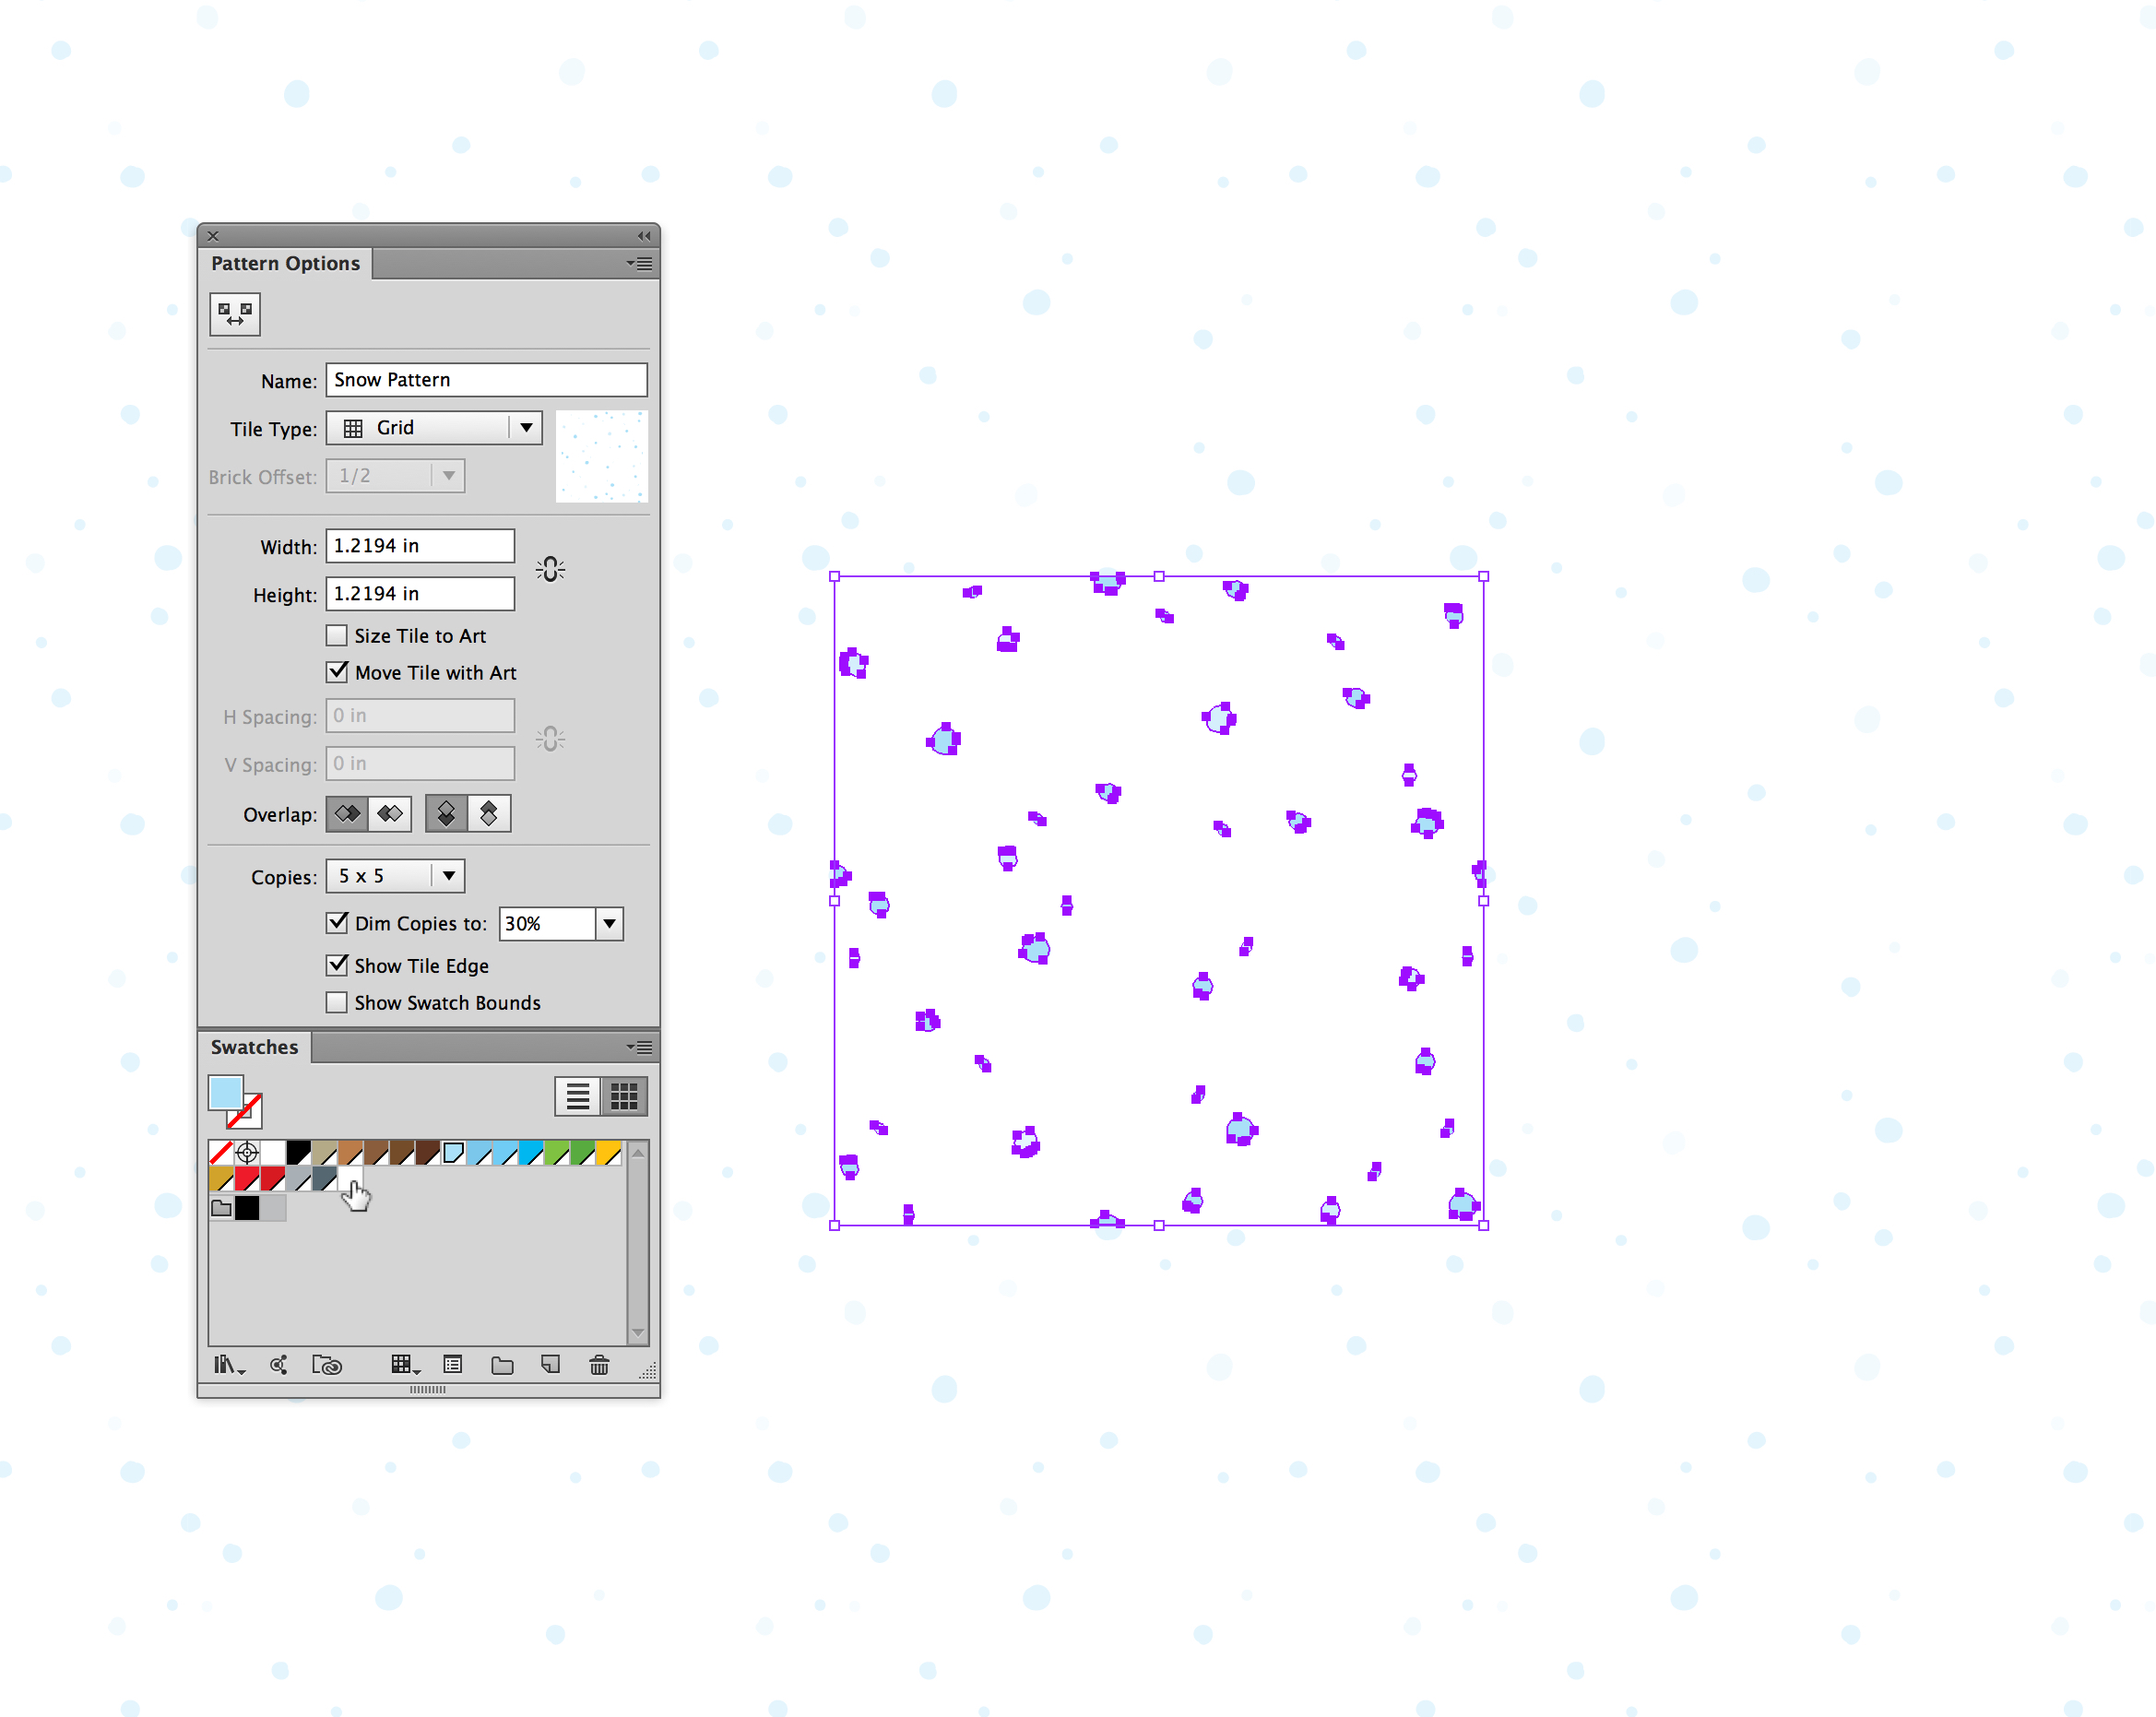
Instead of cluttering the design with ornate graphics of snowflakes, I decided to use a repeat pattern. I first created a Pattern swatch (shown on left) in black and white, then adjusted the opacity of the various white flakes as they’d appear on the background color. Once I was happy with the snow, I dragged the art into the Swatches panel and began using the pattern.
To adjust the pattern tiling, adjust the elements of the pattern, or recolor it, I just double-click on the Pattern swatch to enter Pattern Editing mode in Illustrator CC.
My initial color composition was blue, but creativity is all about exploration. I played around with the color themes to develop three separate color iterations. I settled on the green color scheme for my final holiday card design. The final card design is fun, as was the process to create it using Adobe Capture CC and Illustrator CC. In total, this project took me about 3 hours.