Step 10
Group all city layer by selecting layers and press Cmd/Ctrl + G or use “Create a new group” icon at the bottom of Layer panel. Hold Cmd/Ctrl and click on brush spot thumbnail in Layer panel to create a selection. Add a layer mask to city group to hide all except spot area. Use black hard brush on layer mask to clean up some buildings.
Step 11
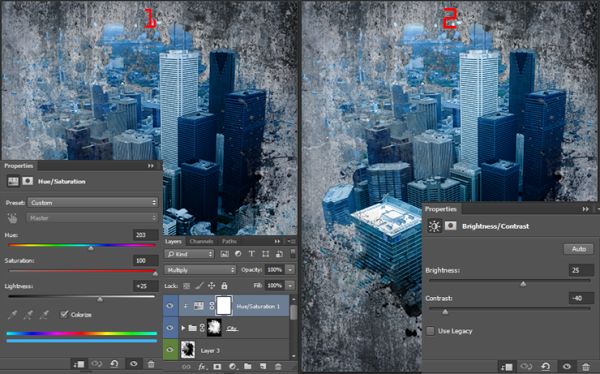
Add a bit of color to the city. Go to Layer > New Adjustment Layer > Hue/Saturation… Check “Colorize” and set Hue: 203, Saturation: 100%, Lightness: +25% and clip this layer to the group. Change layer Blending Mode to “Multiply”. Add another adjustment layer “Brightness/Contrast” with the settings Brightness: +25, Contrast: -40 and clip this layer.
Step 12
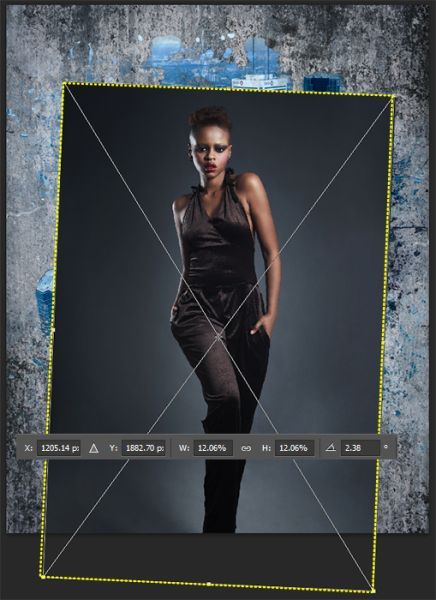
Place model’s image into working document (File > Place…/Place Embedded) above background and city. Move layer a little lower that the legs disappeared beyond the boundaries of the working area. Rotate image on 2.38 degrees. Try to position the model in the center of the picture.
Step 13
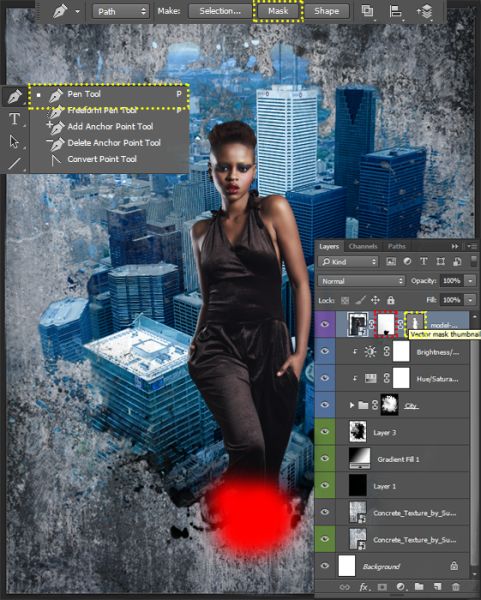
With Pen Tool (P) create a neat path around model and from this selection make a vector mask. This type of mask is needed in order to be able to remove part of the model on a layer mask. Add a layer mask and with soft round, black, 100% Opacity Brush Tool (B) remove legs until city spot.
Step 14
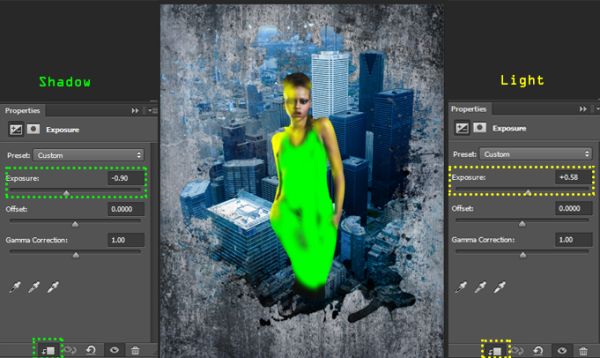
Before proceeding Photo manipulation, I created lighting on a model. To do this, I created two “Exposure” adjustment layers. For first layer I set Exposure to -0.90 and for second Exposure: +0.58 and clip both layer to a model (for a correct lighting, always use the same value for both layers. In my case it was severely hard transitions of light and shadow, so I do not follow this rule). Fill adjustment layer mask with black color (select layer mask and go to Edit > Fill > Color…). Now, everything is simple. Use a Brush Tool (B) on both layers with white color and different values of Opacity to create lighting. For such a technique can also be used “Curves” and “Levels” adjustment layers.
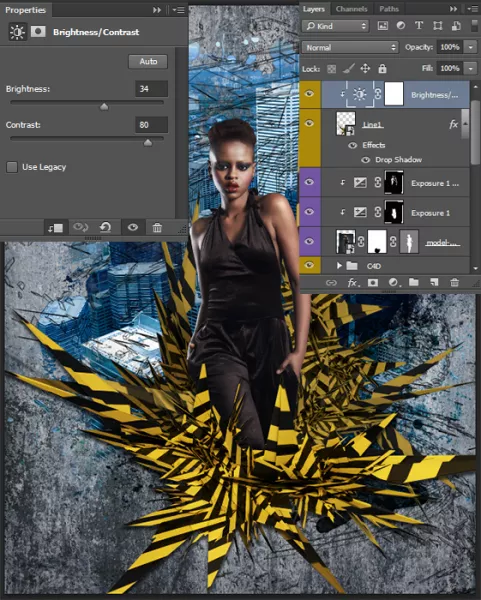
Step 15
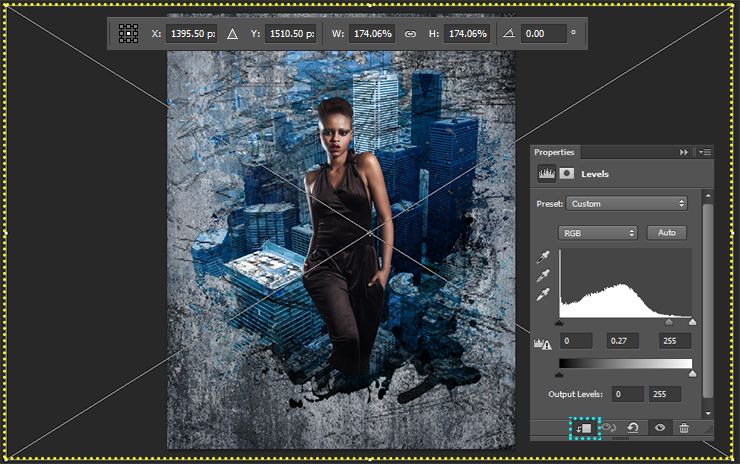
Now time for a render. I created several abstract images in Cinema 4D specifically for this picture. And now I share it with you :). Let’s start with wireframes. Place image “3” from folder “Wireframes” below model layer (File > Place…/Place Embedded). In Free Transform Mode resize it like shown in image below. Change layer Blending Mode to “Multiply” and add as clipping mask (Cmd/Ctrl + Opt/Alt + G) adjustment layer “Levels” (Layer > New Adjustment Layer > Levels…). Set for midtones: 0.27. This will help show the lines of wireframe. Play with rotation to find interesting form.
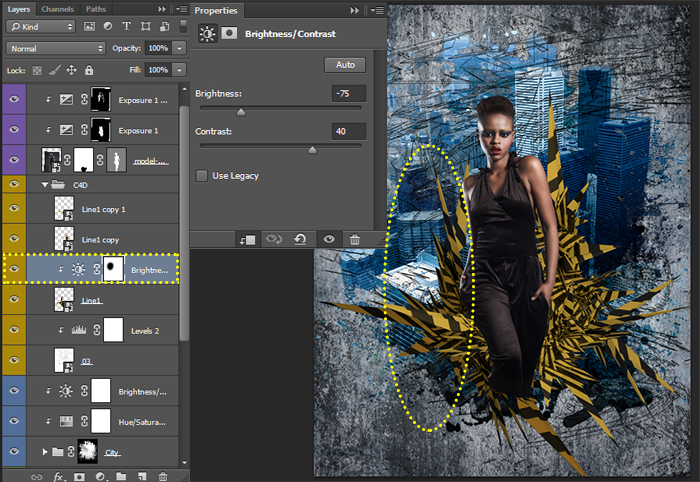
Step 16
Continue adding abstract render. The set includes 7 different images so you can use all of them. Most of all, I used “Line1” and “Line2” images. To create composition in the background I use 3 copy of “Line1” image. Play around Rotation and Scale Tools to create interesting and dynamic composition near the model. To create the depth and volume I have add to the very first image adjustment layer “Brightness/Contrast” with the settings Brightness: -75, Contrast: +40 and clip this layer. I group all images into one group “C4D” (Cmd/Ctrl + G).