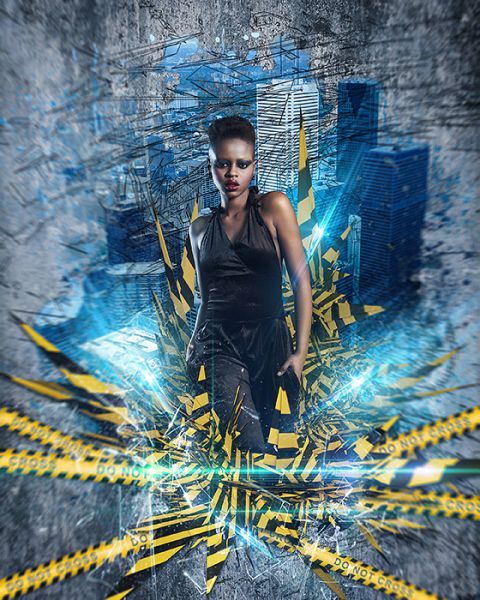
Create a creative poster with beautiful visual effects. In this tutorial I’ll show you how to quickly and easily create a unique poster using abstract rendering and many interesting effects like lightning, glowing lines and police tape. And all of these effects you can create your own in Photoshop. Read this tutorial and see how easy it is!
What you’ll be creating
I love to experiment with abstract rendering. Their abstract forms, can achieve amazing visual effects. I created this picture with ideas broke stereotypes for today’s trends. I’ll start the lesson by creating a background and model. We will work with layer masks, and adjustment layers. Then proceed to the effects. In this part I will tell you about the creation of luminous lines in the background will create a cluster of lightning and police tape. At the end I added the details, effects, and a bit of work with color. In this tutorial we will use the filter “Tilt Shift” which is the only in Photoshop CC. You need to download all attachment links, a little logic, a good mood and be sure to have Photoshop beginning with CS version.
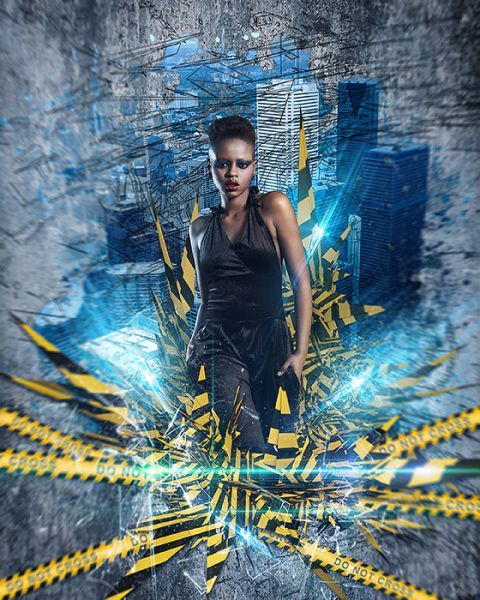
Tutorial Resources
Step 1
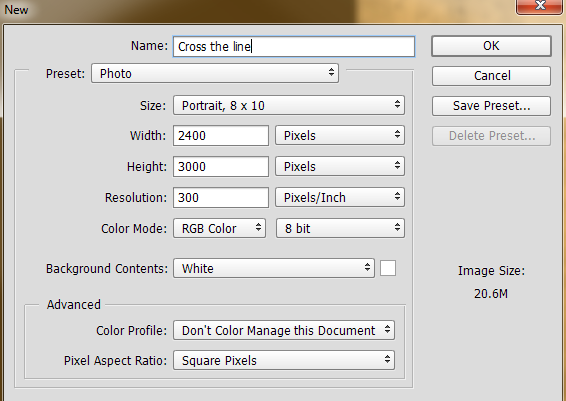
Create a new document via Cmd/Ctrl + N or File > New at 2400 pixels wide and 3000 pixels height, resolution 300 Pixels/Inch.
Step 2
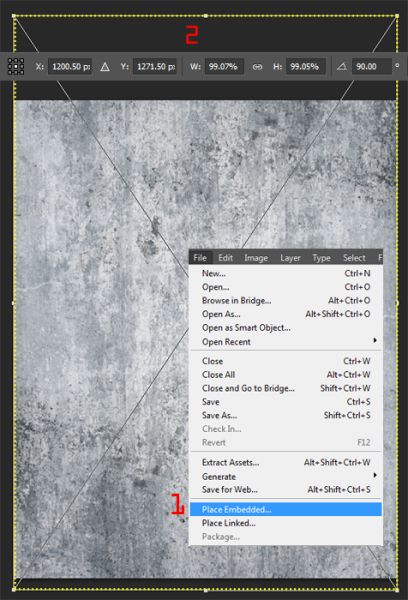
Place concrete texture into working document via File > Place…/Place Embedded. In Free Transform mode (Cmd/Ctrl +T or Edit > Free Transform) rotate it on 90 degrees and slightly reduce it’s size. Hit Enter/Return to apply changes.
Step 3
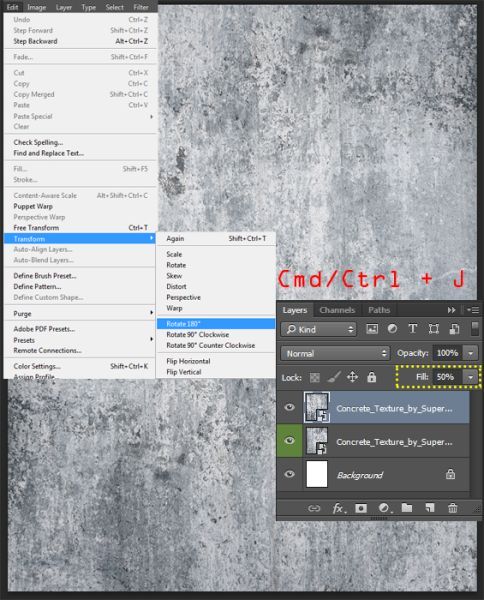
Duplicate this layer (Cmd/Ctrl + J or Layer > Duplicate layer…) and go to Edit > Transform > Rotate on 180 degrees. Reduce layer Fill to 50%. It’s a little to soften the texture and will not distract the viewer from the details.
Step 4
Go to Layer > New Fill Layer > Solid color… or use “Create new fill or adjustment layer” at the bottom of Layer Panel. Set Mode to “Overlay” and color to black (#000000). Reduce Fill to 40%.

Step 5
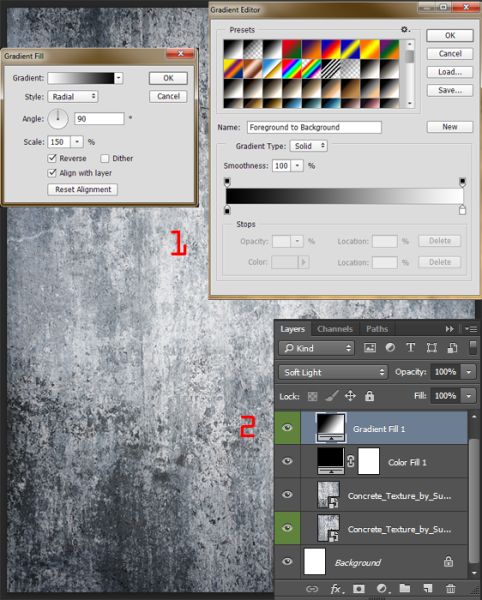
Create another one gradient fill layer (Layer > New Fill Layer > Gradient…). Set default Black & White gradient, Style: Radial, Scale: 150%, check “Reverse”. Change layer blending mode to “Soft Light”. It will be our focus point. We will direct the viewer’s attention on the center of the image.
Step 6
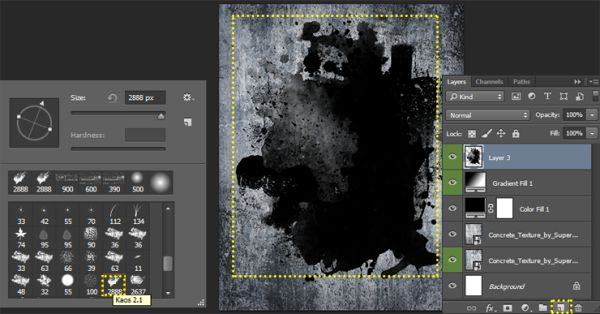
Load “Kaos Brush Set 2.0” by Outof4mmo in Photoshop. Create a new layer (Cmd/Ctrl + Shift + N or use “Create a new layer” icon on Layer panel). Set default background/Foreground colors (D). Take a Brush Tool (B) and with black color and Opacity: 100% draw a big abstract spot. The most important thing is not to go beyond the boundaries of the working field and leave some space around the image. You can use any brush which you will like. I used the brushes “Kaos 2.1” and “Kaos 2.2”.
Step 7
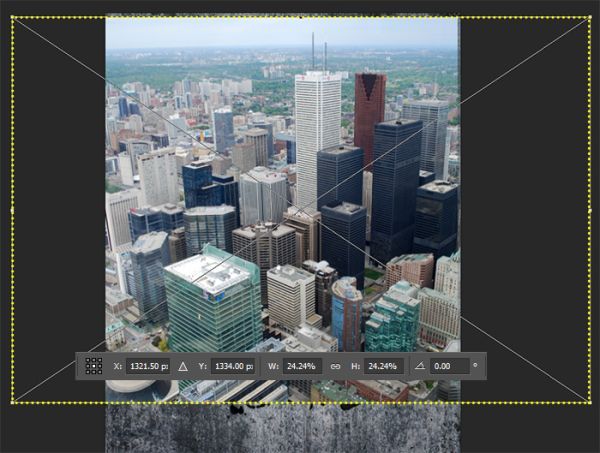
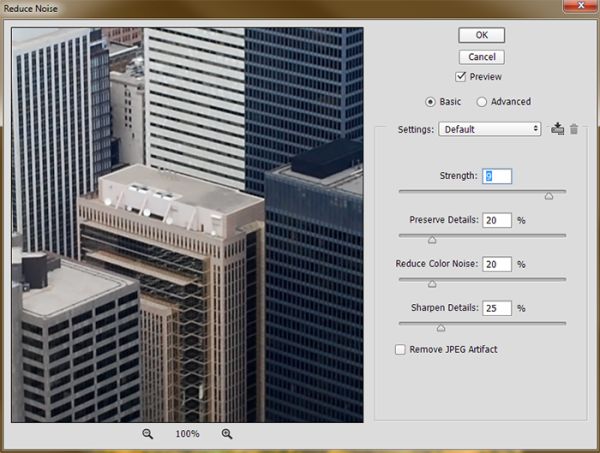
Place City image into working document and resize it around size of brush spot. Unfortunately a lot of noise in the image. To remove it go to Filter > Noise > Reduce Noise. Set Strength: 9, Preserve Details: 20%, Reduce Color Noise: 20%, Sharpen Details: 25% and click OK.
Step 8
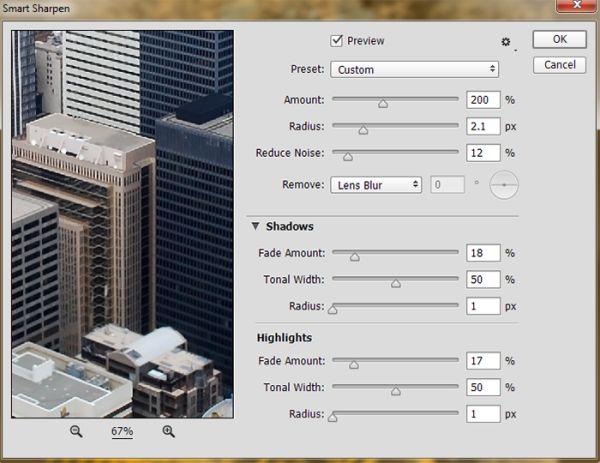
Now sharpen details. Convert city layer to Smart Object (right – click on layer > Convert to Smart Object or go to Layer > Smart Objects > Convert to Smart Object). Go to Filter > Sharpen > Smart Sharpen… Set the settings like shown in image below.
Step 9
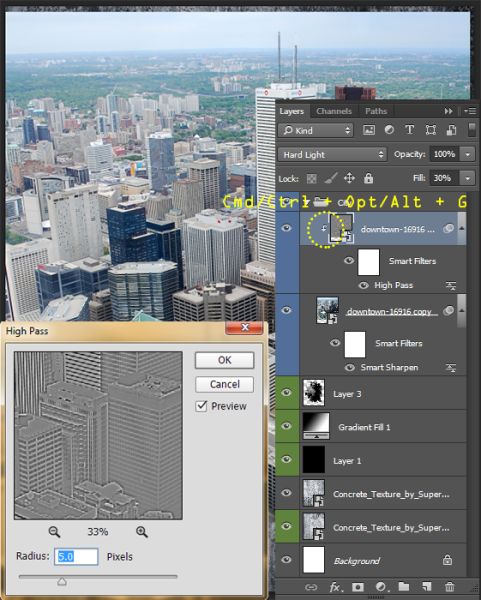
Duplicate this layer (Cmd/Ctrl + J or go to Layer > Duplicate Layer…), convert it to Smart Object. Go to Filter > Other > High Pass… Set Radius to 5.0 pixels and click OK. Change layer Blending Mode to “Hard Light” and reduce Fill to 30%. Make from this layer a Clipping Mask to City layer (Cmd/Ctrl + Opt/Alt + G or right – click > Create Clipping Mask).
