The WordPress platform is a magnet for those who want to take matters into their own hands, who want complete control over their websites and want to be independent in running them. WordPress does make it really easily to completely customize a website. If you have a bit of knowledge of HTMl, CSS and/or PHP, there is nothing you can’t change.
I mean, just compare the default themes, Twenty Fifteen81 and Twenty Fourteen2. Hard to believe they are running on the same platform, isn’t it? Therefore, it is only natural for you to want to adapt the look of your website to fit your vision. I doubt there are many WordPress users out there who don’t constantly think about what to implement next. However, a problem arises.
Customizing WordPress: You Might Be Doing It Wrong Link
When trying to make changes to a website, a staggering number of people opt to edit their theme directly. This means they are changing or adding files in their current theme’s folder. This creates a number of problems.
The biggest disadvantage is that any modifications made to the theme in this way will be lost once the theme is updated by the developer. As a consequence, users either won’t be able to keep their theme up to date (which is bad for security) or will find all of their customizations gone when they do.
Either way, the situation is far from an ideal.
A much better idea is to use a child theme. This allows you to make any number of changes to a website without touching any of the original theme files.
Sound good? Great, because in this article we will take a detailed look at what WordPress child themes are, how to create them and how to use them to customize your website — the right way.
I know! I’m as excited as you are!
What Are Child Themes And Why Use Them? Link
When talking about child themes, we first have to talk about parent themes. A theme only becomes a parent theme when someone builds a child theme for it. Until then, it is just a theme, such as the ones you find in the WordPress directory3. Every theme that includes all of the files required in order to be considered complete can be a parent theme.
Yet, while any such theme can be a parent theme, some are better suited to this purpose than others. For example, frameworks such as Genesis by StudioPress4 are specifically made to be customized by child themes.
What is a child theme, then? Well, from the WordPress back end, a child theme doesn’t behave any differently. You can find and activate it under “Appearance” → “Themes,” just like you would with any other theme.
The big difference is that a child theme depends completely on its parent in order to work. Without its parent theme present, it will not do a thing and cannot even be activated.
That’s because a child theme isn’t a standalone entity, but instead modifies or adds to the files of an existing theme. It uses everything present in the parent theme and changes only those parts that you want to be different.
This allows you to alter styles, functions, layout, templates and more. In fact, you can customize the parent theme beyond recognition. However, without it being present, none of it will work.
Advantages Of Child Themes Link
There are numerous advantages to going the child theme route:
- Instead of having to create a complete theme from scratch, you can build on something that already exists, thus speeding up development time.
- You can take advantage of the functionality of sophisticated frameworks and parent themes, while customizing the design to your needs.
- You can upgrade the parent theme without losing your customizations.
- If you aren’t satisfied with your customizations, just disable the child theme and everything will be as it was before.
- It’s a great way to start learning about how themes work.
A child theme can contain image folders, JavaScript, CSS, template files and many other things. The beautiful thing, though, is that they don’t have to. You can include as much or as little customization as you want.
In fact, a child theme really only needs three things: a folder, a style sheet and a functions.php file. That’s it. And the two files can even pretty much be empty.
When to Use a Child Theme Link
So, should you always build a child theme whenever you want to make any changes to a WordPress website? No, it really depends.
If you plan to make only minor modifications, such as color changes or a different font, then a custom CSS plugin5 might be all you need (other options are Jetpack6 and SiteOrigin CSS7). Many themes nowadays also offer the option to add custom code natively.
However, if you plan to introduce larger changes, such as a complete design overhaul, multiple template changes or anything else of that magnitude, then a child theme is definitely the way to go.
Set Up A Basic Child Theme Link
All right, now that we know how awesome child themes are and what they can do for us, let’s go over how to create one step by step. For our example, we will use Twenty Fifteen81, the latest default theme for WordPress. Don’t worry, it’s really easy and you will get it in no time.
Side note: The steps below can be performed directly on your server via an FTP client. However, I recommend that you first set up everything locally, then zip your child theme folder and install it like a normal theme via the “Theme” menu. This will make the whole thing much easier.
Create a Folder in wp-content/themes Link
As mentioned, a child theme needs three things: its own folder, a style sheet and a functions.php file. We will start with the folder.
Like any theme, child themes are located in wp-content/themes in your WordPress installation. So, navigate there now and create a new folder for your child theme.
A best practice is to give your theme’s folder the same name as the parent theme and append it with -child. Because we are using the Twenty Fifteen theme, we will call our folder twentyfifteen-child.
 9
9You are free to use any name you want to; just make sure not to include any spaces because that might cause errors.
Create a Style Sheet Link
Now that we have our folder, we will need a style sheet. In case you are not aware, a style sheet contains the code that determines the design of a website. Themes can have multiple style sheets, but we will be content with one for the moment.
Making a style sheet is easy: Simply create a new text file and call it style.css. Done! However, in order for it to actually work, we will have to paste the following code, the so-called “style sheet header,” right at the beginning of the file (code courtesy of the WordPress Codex11):
/*
Theme Name: Twenty Fifteen Child
Theme URI: http://example.com/twenty-fifteen-child/
Description: Twenty Fifteen Child Theme
Author: John Doe
Author URI: http://example.com
Template: twentyfifteen
Version: 1.0.0
License: GNU General Public License v2 or later
License URI: http://www.gnu.org/licenses/gpl-2.0.html
Tags: light, dark, two-columns, right-sidebar, responsive-layout, accessibility-ready
Text Domain: twenty-fifteen-child
*/
Here is what each line means:
- Theme name
This is the name that will show up for your theme in the WordPress back end. - Theme URI
This points to the website or demonstration page of the theme at hand. This or the author’s URI must be present in order for the theme to be accepted into the WordPress directory. - Description
This description of your theme will show up in the theme menu when you click on “Theme Details.” - Author
This is the author’s name — that’s you, in this case. - Author URI
You can put your website’s address here if you want. - Template
This part is crucial. Here goes the name of the parent theme, meaning its folder name. Be aware that it is case-sensitive, and if you don’t put in the right information, you will receive an error message, so double-check! - Version
This displays the version of your child theme. Usually, you would start with 1.0. - License
This is the license of your child theme. WordPress themes in the directory are usually released under a GPL license; you should stick with the same license as your parent theme. - License URI
This is the address where your theme’s license is explained. Again, stick with what your parent theme says. - Tags
The tags help others find your theme in the WordPress directory. Thus, if you include some, make sure they are relevant. - Text domain
This part is used for internationalization and to make themes translatable. This should fit the “slug” of your theme.
If you feel a bit overwhelmed (already?), you might be happy to know that not all of this information is actually required. In fact, all you really need is the theme name and template.
The rest is important only if you plan to publish your theme, which I am not. For this reason, my child theme’s header looks like what’s shown below. Feel free to copy it and make your own adjustments.
/*
 Theme Name:   Twenty Fifteen Child Theme
 Description:  A child theme of the Twenty Fifteen default WordPress theme
 Author:       Nick Schäferhoff
 Template:     twentyfifteen
 Version:      1.0.0
*/
Activate Child Theme Link
Once your folder and style sheet are present, go to “Appearance” → “Themes” in the WordPress back end and find your child theme there. When you click on “Theme Details” now, you will see the contents of the style sheet header. That’s what that info is for.
 12
12All right, now click on the button that says “Activate.” Good job! Your theme is now activated. However, if you look at your website, it should look something like this:
 14
14Don’t worry, everything is fine. You haven’t screwed up. Get your face out of the paper bag. The reason why your website is empty is because it doesn’t have any styles yet. No styles means you get treated to an all-text experience.
I just wanted to show you that, in theory, having a style sheet and a folder is enough to create a child theme. And if it worked for you, then you’ve already done it! I’ll be the first to admit, though, that it could look a little better. Let’s get to that now.
Create functions.php Link
Next up is the functions.php file. You have probably heard of this file before, but let’s quickly go over what it is for.
The functions.php file allows you to change and add functionality and features to a WordPress website. It may contain both PHP and native WordPress functions. Plus, you are free to create your own functions.
In short, functions.php contains code that fundamentally changes how a website looks and behaves. Got it? Nice, I knew I could count on you.
Creating the file is as easy as creating a style sheet, if not more so. All you need is a text file named functions.php, and then paste in the following code:
<?php
//* Code goes here
Seriously, that’s it. Just add that opening php tag and you are good to go. Of course, you could get all fancy and write some information in the header (don’t forget to comment it out so that WordPress doesn’t try to execute it), but this will do for our purpose. Add it to your theme’s folder as well.
Now, let me say this: You don’t need functions.php. If you don’t plan to use PHP to modify your theme, then you can completely do without it. A style sheet and other files might be enough for you.
However, I wanted to include this part, first, so that you would know about this important file and, secondly, because of the next step.
Inherit Parent Styles Link
So, you are probably aware that your website is still mostly text. It’s time to change that. How? I’ll show you.
Because you are using a parent theme, you probably have a good idea of how your website is supposed to look. For our example, Twenty Fifteen, we want to get to this point:
 16
16To get here, you will need to inherit the information in your parent theme’s style sheet. There are two ways to do this.
One is via CSS and the @import rule. By copying the code below into your style.css file, you are telling your child theme to use the info contained in your parent theme’s style sheet to present your content.
@import url("../twentyfifteen/style.css");
Be aware, however, that this is the old way of inheriting parent styles and is no longer recommended. The reason for that is performance.
If you need to import several style sheets (which is not unheard of), then using @import will cause them to download consecutively. This can slow down the page’s loading time by several seconds (which, I probably don’t have to tell you, isn’t a good thing).
The second, recommended way to load the parent’s style sheet — and the reason why we created functions.php earlier — is to use wp_enqueue_style(). This WordPress function18 safely adds style sheet files to a WordPress theme.
In our case, the corresponding code looks a little something like this:
add_action( 'wp_enqueue_scripts', 'enqueue_parent_styles' );

function enqueue_parent_styles()
   wp_enqueue_style( 'parent-style', get_template_directory_uri().'/style.css' );
Be sure to paste this at the beginning of your functions.php file, and save it (remember to upload the file if you are using an FTP connection). Now check your front end; it should look like this:
 19
19Pretty, right? Congratulations, you did it! You created your very first WordPress child theme. If I were there, I’d pat you on the shoulder.
However, you might object, rightly, that it looks exactly like the parent theme. So, what’s the point of going with a child theme?
Don’t worry. Next you will learn how to customize the child theme to look exactly the way you want.
If you want to get all fancy, you could add a theme image. This image will show up in the theme menu in WordPress.
All you need to do is create a PNG file, named screenshot.png, and place it in your theme’s folder (in our case, twentyfifteen-child). Make sure to put it in the top-level directory and not in a subdirectory such as images.
The recommended size is 880 × 660 pixels, although it will be shown as 387 × 290. The larger dimensions ensure that the image will show up well on high-resolution screens.
Other image formats such as JPEG and GIF would also work, but PNG is recommended. You can do this now for extra props or wait until you are done customizing the theme, because the image is usually a screenshot of the theme’s design.
Customizing Your WordPress Child Theme Link
If you have done everything correctly, then your child theme should now be activated and look exactly like its parent. This is where the fun begins.
Now we can start customizing our theme and change things around to get the result we are looking for. Customizations can be done in many different ways, and we will go over a whole lot of them.
Implementing Custom Styles Link
One of the easiest ways to make changes to your theme is via CSS. This allows you to customize colors, dimensions, fonts and other fundamental design elements.
If you are proficient in CSS, you could actually change the entire layout of your website. However, introducing such drastic changes is usually done differently. We will get to that.
For now, all you need to know is that, with style.css in place, you can override any styles in the parent theme by adding code to the child theme’s style sheet.
Important: If you’ve called the parent theme’s styles in your style.css file, then be sure to add any custom styles below the @import statement, as in the following snippet. (Although you do know you’re supposed to use functions.php, right?)
/*
 Theme Name:   Twenty Fifteen Child Theme
 Description:  A child theme of the Twenty Fifteen default WordPress theme
 Author:       Nick Schäferhoff
 Template:     twentyfifteen
 Version:      1.0.0
*/

// Custom styles go here
Twenty Fifteen is a beautifully designed theme. I really like the generous white space, which lets the content breathe and is soothing to the eye.
 21
21However, let’s say you are not a fan and want to cram a few more words into each line. No harm in that. In that case, you would use a tool like Firebug23 to figure out which styles need to be modified. Your search would turn up the following:
.entry-header
   padding: 0 10%;
.entry-title, .widecolumn h2
   font-size: 3.9rem;
   line-height: 1.2308;
   margin-bottom: 1.2308em;
.entry-content, .entry-summary
   padding: 0 10% 10%;
We would make a few adjustments that achieve what we have in mind and copy them to the style.css file of our child theme.
.entry-header
   padding: 0 5%;

.entry-title, .widecolumn h2
   margin-bottom: 0.5em;

.entry-content, .entry-summary
   padding: 0 5% 10%;
Voilá! Here is the result:
 24
24Whether that is better than before is another question, but you get the idea: Adding custom styles to a child theme will override styles in the parent theme.
Overriding Parent Theme Files Link
You can not only target individual style declarations via the style sheet, but also override entire components of the parent theme.
For every theme file present in the parent directory, WordPress will check whether a corresponding file is present in the child theme and, if so, use that one instead. This means that a header.php file in the child theme will override its equivalent in the parent folder.
So, if you don’t like something about a page’s layout, just copy the respective file, implement your changes, and upload it to the child theme’s folder. The modifications will then appear in the child theme, while the original file will remain untouched.
For example, if we take content.php from the Twenty Fifteen theme’s folder and open it with an editor, among others things, we will find the following code:
<?php
   // Post thumbnail.
   twentyfifteen_post_thumbnail();
?>

<header class="entry-header">
   <?php
   if ( is_single() ) :
      the_title( '<h1 class="entry-title">', '</h1>' );
   else :
      the_title( sprintf( '<h2 class="entry-title"><a href="%s" rel="bookmark">', esc_url( get_permalink() ) ), '</a></h2>' );
   endif;
   ?>
</header><!-- .entry-header -->
Let’s see what happens when we reverse the order of these two, like this:
<header class="entry-header">
   <?php
      if ( is_single() ) :
         the_title( '<h1 class="entry-title">', '</h1>' );
      else :
         the_title( sprintf( '<h2 class="entry-title"><a href="%s" rel="bookmark">', esc_url( get_permalink() ) ), '</a></h2>' );
      endif;
   ?>
</header><!-- .entry-header -->

<?php
   // Post thumbnail.
   twentyfifteen_post_thumbnail();
?>
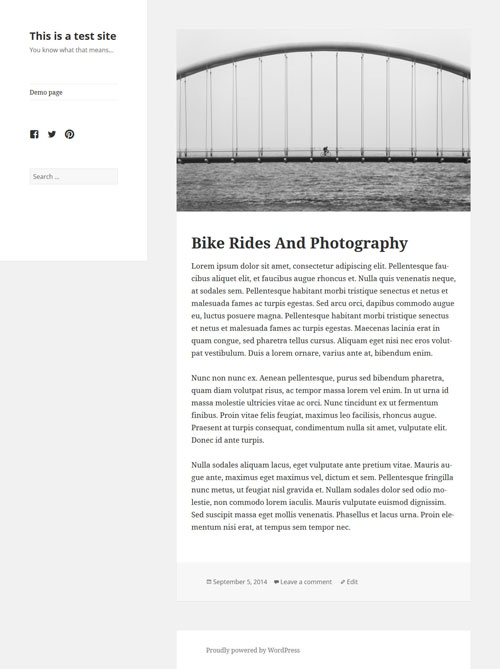
As you can see below, after saving and uploading the file to the child theme’s folder, the featured image of each blog post will now appear underneath the post’s title.
 26
26Granted, it could use some styling, but you get the idea. You can use this method to make all kinds of changes to your website. Just remember to give the child theme the same folder tree structure as the parent. For example, if a file you want to modify is found in a folder named page-templates in the parent theme, then you would create a folder of the same name in your child theme’s directory and place the file there.
Working With Template Files Link
We’ve learned that we can overwrite any file in the parent theme by placing a copy in the child theme’s folder and customizing it. However, using files that exist only in the child theme is also possible. Template files are a good example of this.
Let’s say we want to build a full-width page template for our child theme. I’ll be the first to admit that the Twenty Fifteen theme does not lend itself to full-screen presentation, but let’s do it anyway for demonstration purposes, shall we?
To create a full-width page in Twenty Fifteen, we need to do four things: create a custom page template, a custom header and a footer file, and then add some customized CSS. Let’s start with the page template.
For our custom page template, we simply copy page.php from the parent theme, rename it to custom-full-width.php and place it in a folder named page-templates in our child theme.
Now, let’s introduce a couple of changes to the code so that it looks like this:
<?php
/*
 * Template Name: Custom Full Width
 * Description: Page template without sidebar
 */

get_header('custom'); ?>

   <div id="primary" class="content-area">
   <main id="main" class="site-main" role="main">

   <?php
   // Start the loop.
   while ( have_posts() ) : the_post();

   // Include the page content template.
   get_template_part( 'content', 'page' );

   // If comments are open or we have at least one comment, load up the comment template.
   if ( comments_open() || get_comments_number() ) :
      comments_template();
   endif;

   // End the loop.
   endwhile;
   ?>

   </main><!-- .site-main -->
   </div><!-- .content-area -->

<?php get_footer('custom'); ?>
The only thing we’ve done here is introduce a header that tells WordPress that this is a page template, and we’ve changed the get_header and get_footer calls so that they will include two files named header-custom.php and footer-custom.php.
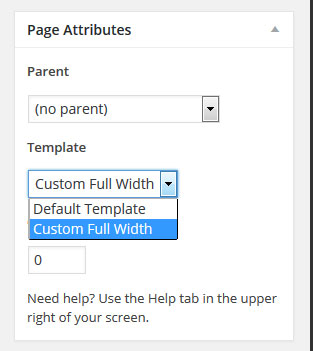
Let’s go to the page that we want to see in full width and, under “Page Attributes,” change the page template to our newly created “Custom Full Width” template.
Now it’s time to create our custom header and footer theme files. First, go to the parent theme, copy both header.php and footer.php to our child theme’s folder, and rename them to header-custom.php and footer-custom.php, respectively.
So far, our page looks the same as before. It’s time for some customization. Let’s start with our custom header.
<?php
/**
 * The template for displaying the header
 *
 * Displays all of the head element and everything up until the "site-content" div.
 *
 * @package WordPress
 * @subpackage Twenty_Fifteen
 * @since Twenty Fifteen 1.0
 */
?><!DOCTYPE html>
<html <?php language_attributes(); ?> class="no-js">
<head>
   <meta charset="<?php bloginfo( 'charset' ); ?>">
   <meta name="viewport" content="width=device-width">
   <link rel="profile" href="http://gmpg.org/xfn/11">
   <link rel="pingback" href="<?php bloginfo( 'pingback_url' ); ?>">
   <!--[if lt IE 9]>
   <script src="http://www.smashingmagazine.com/<?php echo esc_url( get_template_directory_uri() ); ?>/js/html5.js"></script>
   <![endif]-->
   <?php wp_head(); ?>
</head>

<body class="full-width-body" <?php body_class(); ?>>
<div id="page" class="hfeed site">
   <a class="skip-link screen-reader-text" href="#content"><?php _e( 'Skip to content', 'twentyfifteen' ); ?></a>

   <header id="masthead" class="site-header full-width" role="banner">
   <div class="site-branding full-width">
   <?php
      if ( is_front_page() && is_home() ) : ?>
         <h1 class="site-title"><a href="<?php echo esc_url( home_url( '/' ) ); ?>" rel="home"><?php bloginfo( 'name' ); ?></a></h1>
         <?php else : ?>
         <p class="site-title"><a href="<?php echo esc_url( home_url( '/' ) ); ?>" rel="home"><?php bloginfo( 'name' ); ?></a></p>
         <?php endif;

      $description = get_bloginfo( 'description', 'display' );
      if ( $description || is_customize_preview() ) : ?>
         <p class="site-description"><?php echo $description; ?></p>
      <?php endif;
   ?>
   <button class="secondary-toggle"><?php _e( 'Menu and widgets', 'twentyfifteen' ); ?></button>
   </div><!-- .site-branding -->
   </header><!-- .site-header -->

   <div id="content" class="site-content full-width">
We’ve done a number of things here. We have given the <body> element a custom class, named full-width-body. We have also added a full-width class to site-header, site-branding and site-content, so that we can assign them custom CSS.
As a last step, we have gotten rid of all sidebar elements (both the sidebar div and the call to get_sidebar), because we don’t want them on our full-width page.
The only change we’ve made in footer-custom.php is to add the full-width class to the footer element, like so:
<footer id="colophon" class="site-footer full-width" role="contentinfo">All that’s left to do is input some code in our style sheet:
.full-width-body::before
   display: none;


.site-content.full-width
   float: none;
   margin: 0 auto;


.site-header.full-width
   background-color: #fff;
   box-shadow: 0 1px 0 rgba(0, 0, 0, 0.15);
   margin: 0;
   padding: 2% 0;


.site-branding.full-width
   margin: 0 auto;
   width: 58.8235%;


.site-footer.full-width
   float: none;
   margin: 0 auto;
Ta-da! And here is our full-width page:
 28
28It could use some polishing, but let’s be satisfied for the moment. For more shenanigans with page templates, check out my previous article30 on Smashing Magazine.
Using functions.php Link
We’ve touched on functions.php. Use this file to include PHP and native WordPress functions in your theme. This will give you a lot of options for customization.
Note: The child theme’s functions.php file is loaded in addition to the file of the same name in the parent theme. In fact, it is executed right before the parent theme’s function.php — unlike style.css, which replaces the original file. Consequently, do not copy the full contents of your parent theme’s functions.php file to the file in your child theme. Rather, use the latter to modify functions in the parent theme.
Back to customizing our child theme. In this example, I want to add a widget area to the footer of the website. To do that, we first need to register a widget in our functions.php file.
<?php

register_sidebar( array(
   'name'          => 'Footer Widget',
   'id'            => 'footer-widget',
   'before_widget' => '<div class="footer-widget">',
   'after_widget'  => '</div>'
) );
Note: The opening <?php tag is the beginning of the functions.php file. Don’t include it if one is already there!
This will make the newly created widget area show up in our back end. However, for it to be usable on the website, we need to add the following code to footer.php:
<?php if ( is_active_sidebar( 'footer-widget' ) ) :
      dynamic_sidebar( 'footer-widget' );
   endif;
?>
Once more, we will copy footer.php from the Twenty Fifteen parent theme and paste it in our child theme. This time, however, we will leave its name as is.
After that, we need to add the call to our new footer widget so that it looks like this:
<?php
/**
 * The template for displaying the footer
 *
 * Contains the closing of the "site-content" div and all content after.
 *
 * @package WordPress
 * @subpackage Twenty_Fifteen
 * @since Twenty Fifteen 1.0
 */
?>

   </div><!-- .site-content -->

   <footer id="colophon" class="site-footer" role="contentinfo">
      <div class="site-info">
      <?php if ( is_active_sidebar( 'footer-widget' ) ) :
            dynamic_sidebar( 'footer-widget' );
         endif;
      ?>
         <?php
            /**
             * Fires before the Twenty Fifteen footer text for footer customization.
             *
             * @since Twenty Fifteen 1.0
             */
            do_action( 'twentyfifteen_credits' );
         ?>
         <a href="<?php echo esc_url( __( 'https://wordpress.org/', 'twentyfifteen' ) ); ?>"><?php printf( __( 'Proudly powered by %s', 'twentyfifteen' ), 'WordPress' ); ?></a>
      </div><!-- .site-info -->
   </footer><!-- .site-footer -->

</div><!-- .site -->

<?php wp_footer(); ?>

</body>
</html>
Minimal styling is needed in style.css:
.footer-widget
   margin: 2% 0;
Now, when we add a search widget to our new widget area, the front page will look like this:
 31
31Not so hard, was it?
Using Theme Hooks Link
A better way to modify a child theme via functions.php is to use hooks. If you have never heard of theme hooks before, think of them as little anchors in a theme’s files that allow you to add content, functions and other stuff right there, without having to edit the core files themselves.
There are two types of hooks: action hooks and filter hooks. Action hooks allow you to add custom functionality to existing functions. Filter hooks are a way to modify the functions present in the hook’s location.
Let’s go over an example to make it clearer. We will be using an action hook. Let’s go back to our last example, where we added a widget area to our theme’s footer. Instead of modifying the footer.php file in our child theme, we can achieve the same by using an action hook.
Let’s write a little function:
function custom_footer_widget()
   if ( is_active_sidebar( 'footer-widget' ) ) :
      dynamic_sidebar( 'footer-widget' );
   endif;
You will notice that this is essentially the same code that we pasted in footer.php earlier, only this time wrapped in a function (and without the opening and closing php tags around it, since we are pasting this in functions.php).
The advantage of this is that we can now add the entire function to a hook in our parent theme’s core files, without having to edit the file itself. In this case, we are targeting twentyfifteen_credits in the parent theme’s file. It is responsible for the footer credits (“Proudly powered by WordPress”) in the Twenty Fifteen theme, and it appears in footer.php like this:
do_action( 'twentyfifteen_credits' );
All it takes to add our new function for the widget area to this hook is one more line in the functions.php of our child theme:
add_action( 'twentyfifteen_credits', 'custom_footer_widget' );
Boom! Now, the widget area will show up in the exact same spot where we had it before, without our having to copy or add any code to the theme’s footer file. Neat, huh?
Note: If you are following along and are going the functions.php route, don’t forget to delete the modified footer.php file from your child theme; otherwise, the widget area will show up twice.
A lot more can be done with hooks in child themes. Some theme frameworks provide loads of hooks so that you can modify anything directly from functions.php.
However, that topic is beyond the scope of this article. If you are interested in learning more, some excellent resources can be found online. A good starting point is Daniel Pataki’s “A Quick and In-Depth Guide to WordPress Hooks33.”
Summing Up Link
As you have hopefully seen, building a child theme in WordPress is not very complicated. All it takes is a folder plus two files.
Yet, despite its simplicity, a child theme is quite powerful. It allows us to completely and safely customize a website without editing any core files.
The benefits of this are numerous: You can build on top of an existing theme or framework without having to write a theme from scratch; your changes are safe from theme updates; and, if things go awry, you will always have a functioning theme to fall back on.
Plus, you are getting a top-notch education in building WordPress themes on the side. Not too bad, right?
For this reason, learning about child themes is an important step in the career of any WordPress designer or developer and for those who want more control over their WordPress websites. I hope this article helps you get started.
What is your experience with building child themes for WordPress? Do you have anything to add? Anything you’d do differently? Please share it in the comments.
(ml, dp, al,jb)
- 1 https://wordpress.org/themes/twentyfifteen/
- 2 https://wordpress.org/themes/twentyfourteen/
- 3 https://wordpress.org/themes
- 4 http://my.studiopress.com/themes/genesis/
- 5 https://wordpress.org/plugins/wp-add-custom-css/
- 6 http://jetpack.me/support/custom-css/
- 7 https://wordpress.org/plugins/so-css/
- 8 https://wordpress.org/themes/twentyfifteen/
- 9 https://www.smashingmagazine.com/wp-content/uploads/2015/09/01-create-theme-folder-opt.jpg
- 10 https://www.smashingmagazine.com/wp-content/uploads/2015/09/01-create-theme-folder-opt.jpg
- 11 https://codex.wordpress.org/Child_Themes
- 12 https://www.smashingmagazine.com/wp-content/uploads/2015/09/02-WordPress-child-theme-header-opt.jpg
- 13 https://www.smashingmagazine.com/wp-content/uploads/2015/09/02-WordPress-child-theme-header-opt.jpg
- 14 https://www.smashingmagazine.com/wp-content/uploads/2015/09/03-WordPress-child-theme-without-stylesheet-opt.jpg
- 15 https://www.smashingmagazine.com/wp-content/uploads/2015/09/03-WordPress-child-theme-without-stylesheet-opt.jpg
- 16 https://www.smashingmagazine.com/wp-content/uploads/2015/09/04-Twenty-Fifteen-WordPress-default-theme-opt.jpg
- 17 https://www.smashingmagazine.com/wp-content/uploads/2015/09/04-Twenty-Fifteen-WordPress-default-theme-opt.jpg
- 18 https://codex.wordpress.org/Function_Reference/wp_enqueue_style
- 19 https://www.smashingmagazine.com/wp-content/uploads/2015/09/05-WordPress-child-theme-successfully-activated-opt.jpg
- 20 https://www.smashingmagazine.com/wp-content/uploads/2015/09/05-WordPress-child-theme-successfully-activated-opt.jpg
- 21 https://www.smashingmagazine.com/wp-content/uploads/2015/09/06-Twenty-Fifteen-Content-Layout-opt.jpg
- 22 https://www.smashingmagazine.com/wp-content/uploads/2015/09/06-Twenty-Fifteen-Content-Layout-opt.jpg
- 23 https://addons.mozilla.org/en-US/firefox/addon/firebug/
- 24 https://www.smashingmagazine.com/wp-content/uploads/2015/09/07-Child-Theme-Custom-Styles-opt.jpg
- 25 https://www.smashingmagazine.com/wp-content/uploads/2015/09/07-Child-Theme-Custom-Styles-opt.jpg
- 26 https://www.smashingmagazine.com/wp-content/uploads/2015/09/08-WordPress-child-theme-override-parent-theme-files-opt.jpg
- 27 https://www.smashingmagazine.com/wp-content/uploads/2015/09/08-WordPress-child-theme-override-parent-theme-files-opt.jpg
- 28 https://www.smashingmagazine.com/wp-content/uploads/2015/09/10-Twenty-Fifteen-Custom-Full-Width-Template-opt.jpg
- 29 https://www.smashingmagazine.com/wp-content/uploads/2015/09/10-Twenty-Fifteen-Custom-Full-Width-Template-opt.jpg
- 30 https://www.smashingmagazine.com/2015/06/19/wordpress-custom-page-templates/
- 31 https://www.smashingmagazine.com/wp-content/uploads/2015/09/11-WordPress-child-theme-custom-footer-widget-opt.jpg
- 32 https://www.smashingmagazine.com/wp-content/uploads/2015/09/11-WordPress-child-theme-custom-footer-widget-opt.jpg
- 33 http://premium.wpmudev.org/blog/wordpress-hooks/