Audacity, a free and open-source audio editing software, is rich in sound effects that can transform your audio projects from ordinary to extraordinary. It allows you to amplify, add reverb, distort, and more, providing a platform for creative freedom.
Two standout effects are the distortion effect, which alters the shape of sound waves, and the reverb effect, which adds depth to echo. Mastering these effects can make your audio projects more dynamic and engaging.
The article “10 Top Sound Effects in Audacity (& How to Use Them)” provides a comprehensive guide on using these sound effects effectively. For high-quality digital content to complement your audio projects, check out Envato Elements.
This guide will dive deeper into the top 10 sound effects in Audacity and offer tips on using them to their full potential. Stay tuned!
Top 10 Sound Effects List for Audacity
Jump to content in this section
1. Compressor – A Key Tool in Audio Mixing
The Compressor, one of the most fundamental tools in audio mixing, plays a crucial role in enhancing the quality of your soundtracks in Audacity. This feature works by evening out the volume levels in your audio, ensuring a balanced and harmonious output.
Imagine you’re recording a podcast or a piece of music; there are bound to be parts where the audio spikes louder than others. These sudden peaks, often referred to as ‘clipping’, can disrupt the listener’s experience. But worry not, the Compressor is here to save the day! It senses these peaks and reduces them, thus ensuring a consistent audio volume that is pleasing to the ears.
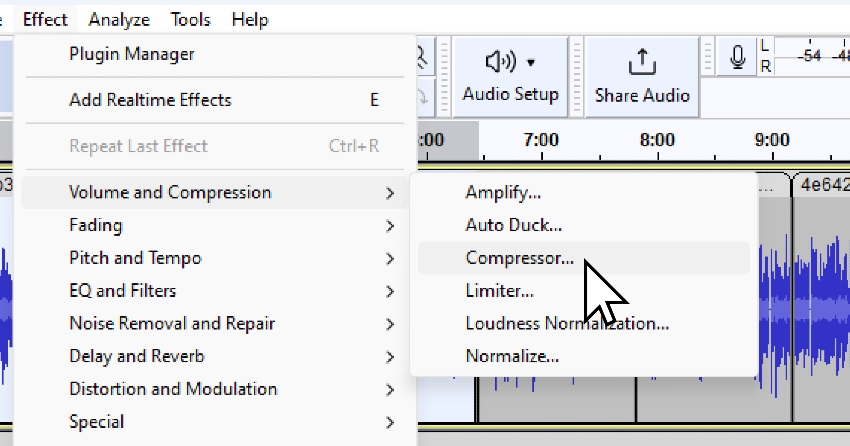

How to use it:
Using the Compressor in Audacity is fairly straightforward. The steps are as follows:
- Begin by selecting the entire audio clip that you want to compress.
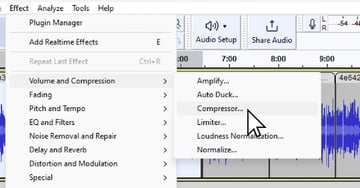
- Navigate to the effects tab and select ‘Volume and Compression’ > ‘Compressor’.
- Now comes an important part – adjusting the threshold settings. For music, a good starting point can be minus 20 decibels. However, ensure that it’s over minus 12 decibels for optimal results. This setting is crucial as it determines the level above which compression begins.
- Activate the ‘compress based on peaks’ option. This allows the compressor to work effectively in reducing the abrupt peaks in your audio.
- Click ‘okay’ to apply the changes.
2. Filter Curve (EQ) – The Sound Sculptor
Meet the Filter Curve, more widely known as EQ in other software, your audio’s sculptor. This feature is the go-to tool when it comes to adjusting the frequency of your audio in Audacity. Think of it as a chisel, carving and refining your sound to perfection.
The lower numbers on the EQ represent the bass, the deep, low-frequency sounds, while the higher numbers denote the treble, the high-frequency sounds. The beauty of the Filter Curve lies in its ability to enhance or reduce specific frequencies, allowing you to customize your sound exactly how you want it.
How to use it:
Manipulating the Filter Curve in Audacity is quite simple and intuitive. Here are the steps:
- First, select the entire audio clip that you wish to modify.
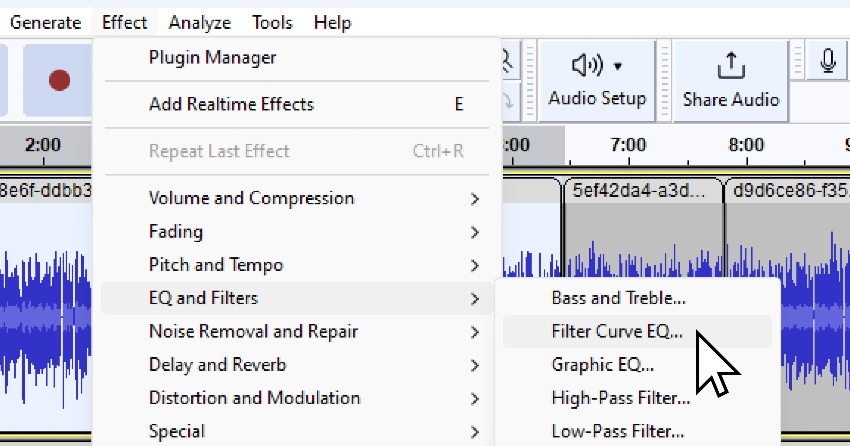
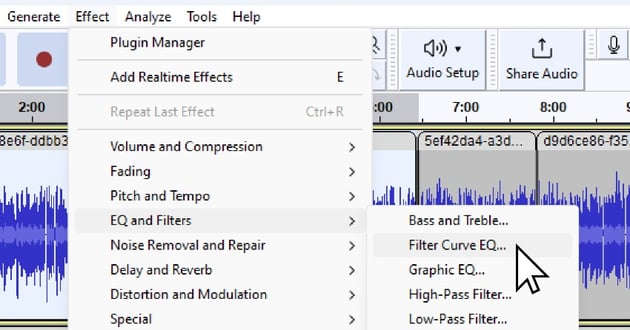
- Head over to the effects tab and choose ‘EQ and Filters > Filter Curve EQ‘.
- Now, you’ll see a line across a grid – this is where the magic happens. You can adjust this curve to emphasize (boost) or de-emphasize (cut) certain frequencies. Dragging the line upwards boosts the frequency, making it more prominent, while dragging it downwards cuts the frequency, making it less noticeable.
- If you’re looking to boost the bass in your audio, there’s a handy preset called ‘Bass Boost’. Selecting this will automatically configure the curve for a bass enhancement.
3. Reverb – The Sound Expounder
Next on our list is the Reverb, a powerful tool in Audacity that can add a whole new dimension to your audio. The Reverb effect is akin to an echo, creating the illusion that your sound is being played in a large space. It’s like transporting your listener from a small room into a concert hall, providing a sense of ambiance and depth.
Whether you’re working on a musical piece, a podcast, or a speech, the Reverb can add that extra layer of richness that makes your audio stand out.
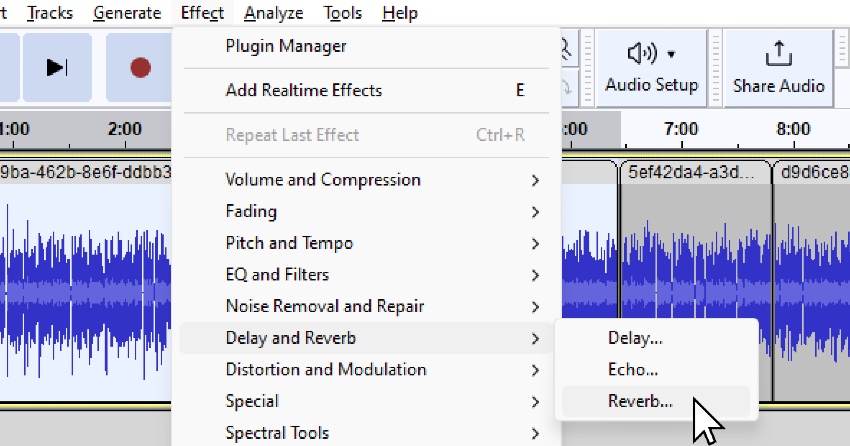


How to use it:
Applying the Reverb effect in Audacity is quite simple. Here are the steps:
- Start by selecting the entire audio clip that you aim to enhance.
- Navigate to the effects tab and choose ‘Delay and Reverb > Reverb‘.
- Now, you’ll see a range of presets and settings. Feel free to experiment with these. For example, if you’re looking for a live sound, try the ‘Vocal‘ preset.
- To increase the echo effect or the ‘reverberance’, simply adjust the corresponding slider. The higher the value, the more pronounced the echo will be.
4. AM Radio EQ Setting -The Vintage Audio Effect
Have you ever wondered if you could make your audio sound like it’s broadcasting over an old radio? If you’re looking for that vintage, nostalgic touch to your audio, Audacity’s AM Radio EQ setting is the perfect tool for you.
The AM Radio EQ setting is a unique feature of Audacity, which can transform your modern, high-definition audio into a piece that sounds like it’s being broadcasted over an old AM radio. This effect can be especially effective for podcasts or audio dramas that want to create a retro or historical vibe.
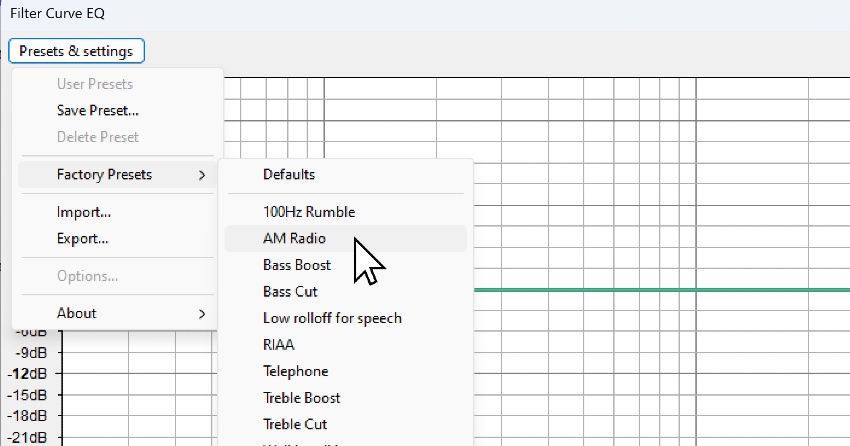
User clicking AM Radio Preset in Audacity for effects for vocals.
How to use it:
Applying the AM Radio EQ setting in Audacity is a breeze. Here are the steps:
- Start by selecting the audio clip that you wish to transform.
- Navigate to the effects tab and choose ‘EQ and Filters > Filter Curve EQ’.
- From the range of presets available, select ‘AM Radio‘.
5. Phaser – The Sound Transformer
The Phaser is another fascinating tool in Audacity’s arsenal, capable of adding a unique twist to your audio. If you’re looking to remix or drastically modify the original sound, the Phaser is your best bet. It can create an effect similar to a sweeping filter that gives your audio a futuristic or psychedelic vibe.
This effect is frequently used in music production, especially in genres like electronic music and rock, but it can also be a fun tool to experiment with in any audio project.
How to use it:
Using the Phaser in Audacity is straightforward. Here are the steps:
- Begin by selecting the audio clip that you want to transform.
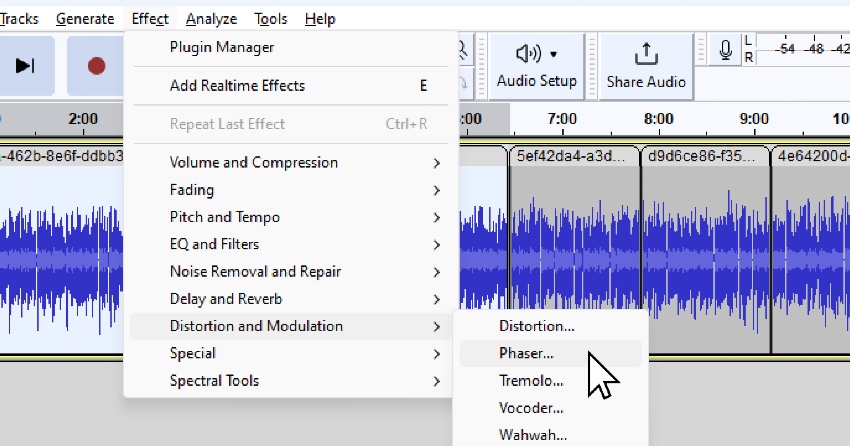
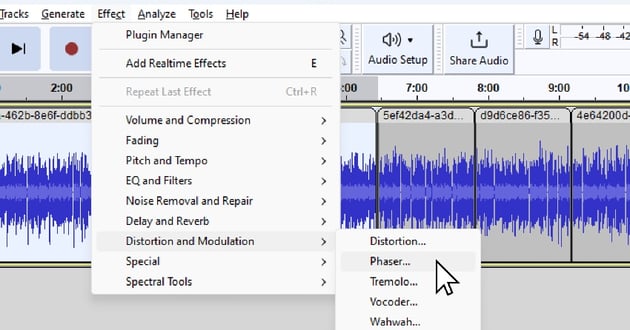
- Navigate to the effects tab and choose ‘Distortion and Modulation > Phaser’.
- Now you’ll see a range of settings. Feel free to tweak these as per your liking. Remember, the Phaser can drastically transform your audio, so it’s always a good idea to listen carefully and adjust the settings until you achieve the desired sound.
6. Echo – The Sound Multiplier
The next tool in our Audacity guide is the Echo effect, a classic audio effect that can add depth and dimension to your vocals. It’s especially useful for creating ad-libs or specific sound effects. By repeating a sound after a certain period, the Echo effect can make your audio more dynamic and interesting.
Whether you’re working on a podcast, music track, or a voiceover, the Echo effect can be a powerful ally in enhancing your audio’s character and feel.
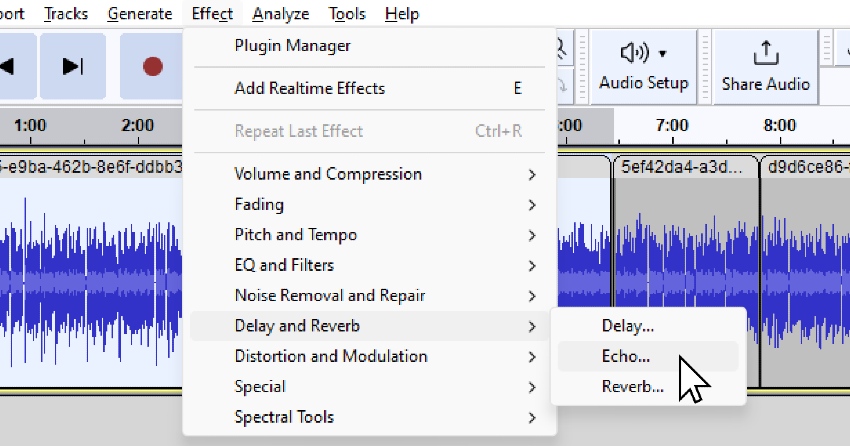
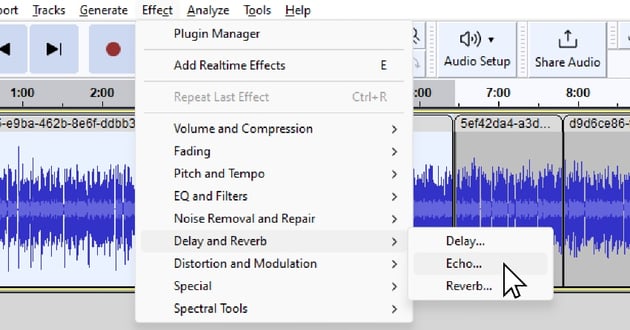
User clicking Echo for Audacity reverb effect.
How to use it:
Applying the Echo effect in Audacity is quite simple. Here are the steps:
- Start by highlighting the audio portion where you want to add the echo.
- Navigate to the effects tab and choose ‘Delay and Reverb’ > ‘Echo’.
- You’ll now see a range of settings that control the delay time and decay factor. Feel free to play with these settings until you achieve your desired echo effect.
7. Noise Reduction – Your Audio Cleanup Tool
One common problem that plagues recorded audio is the presence of unwanted background noise. It could be a subtle hum, a loud fan, or even the rustling of papers. These noises, while often overlooked during recording, can detract from the overall quality of your audio. Thankfully, Audacity’s Noise Reduction feature is a powerful tool that can help clean up your tracks.
Whether you’re recording a podcast, a voiceover, music, or any other type of audio, the Noise Reduction effect can be a lifesaver. It effectively reduces the background noise, allowing your main audio to shine through clearly.

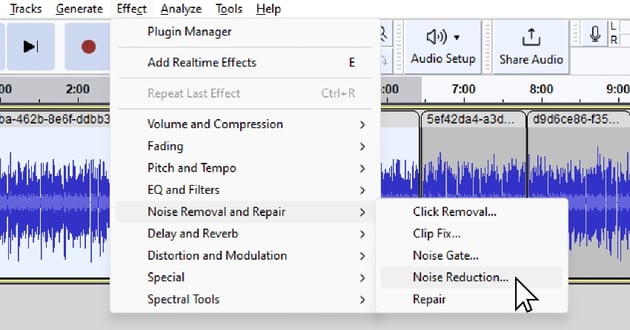
How to use it:
Using the Noise Reduction feature in Audacity involves a few more steps than some of the other effects, but it’s still quite straightforward. Here’s how you can do it:
- Begin by selecting a segment of your audio that contains just the unwanted noise. This will help Audacity understand what it needs to remove.
- Navigate to the effects tab and choose ‘Noise Removal and Repair’ > ‘Noise Reduction’.
- Click on ‘Get Noise Profile’. This allows Audacity to analyze the noise and prepare to remove it.
- Now, select the portion of the audio you want to clean. You can also select the entire track if the noise is consistent throughout.
- Go back to ‘Noise Reduction’ and you’ll see a range of settings. Adjust these as needed, then click ‘OK’ to apply the noise reduction.
8. Pitch Change – The Voice and Note Modifier
The ability to change the pitch of your audio without altering its speed is a fantastic tool in Audacity. This is particularly useful for creating unique voice effects or tuning musical notes in your tracks. Whether you want to sound like an alien, or a giant, or just need to adjust the pitch of a musical instrument, the Pitch Change feature has got you covered.
In audio production, pitch manipulation is a common technique used for various purposes, from creating special effects to correcting off-tune notes in a music recording. With Audacity’s Pitch Change effect, you have this powerful capability right at your fingertips.

How to use it:
Using the Pitch Change effect in Audacity is pretty straightforward. Here are the steps:
- Start by highlighting the audio segment where you want to apply the pitch change.
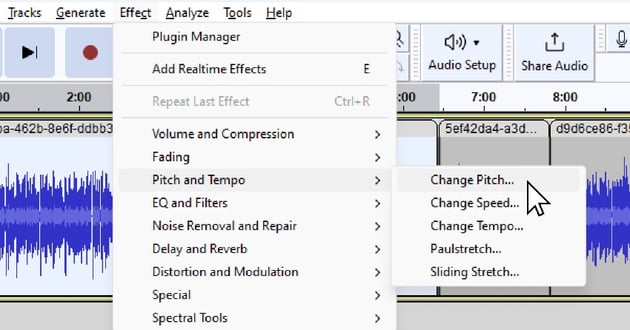
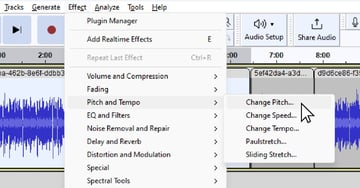
- Navigate to the effects tab and select ‘Pitch and Tempo’ > ‘Change Pitch’.
- You’ll now see a couple of sliders that control the pitch. Use these to adjust the pitch to your liking, either higher or lower.
9. Tempo Change – The Speed Controller
The ability to adjust the speed of your audio without influencing the pitch is another powerful tool in Audacity’s arsenal. This is particularly useful for speeding up long podcasts without making the speakers sound like chipmunks, or for slowing down a segment to emphasize a particular point or moment in your audio.
In audio production, tempo manipulation is a common technique used to control the pace and rhythm of an audio track. It allows you to create dramatic effects or simply make a track more suitable for your intended audience. With Audacity’s Tempo Change feature, you have this dynamic capability at your disposal.


How to use it:
Applying the Tempo Change effect in Audacity is simple. Here are the steps:
- Begin by selecting the portion of the audio where you want to apply the tempo change.
- Navigate to the effects tab and choose ‘Pitch and Tempo’ > Change Tempo’.
- You’ll now see a slider that controls the tempo. Use this to either speed up or slow down the tempo to your preferred rate.
10. Chorus – The Layering Master
The chorus effect is an audio phenomenon that can add a rich, layered texture to your audio. It creates the impression of multiple similar sounds occurring at the same time but slightly out of sync with each other. This can make it sound as if multiple sources are playing the same thing, adding depth and complexity to vocals or instruments.
In music production, the chorus effect is often used to ‘fatten’ up the sound of bass, rhythm guitar, or solo guitar. It’s also commonly used in recordings by various artists, such as the Police, U2, The Pretenders, Nirvana, and Rush, to add depth and texture to their music.
Unfortunately, there is not a single effect to use for this so we have to bootstrap this particular effect. We’ll show you how.
How to use it:
Applying the Chorus effect in Audacity is a straightforward process. Here’s how you can do it:
- Start by selecting the audio segment where you want to apply the chorus effect.
- Normalize the track by lowering the volume a bit first by clicking on ‘Effect’ > ‘Volume and Compression’ > ‘Normalize’.
- Set the peak amplitude to “-8.0” db, and click ‘OK’.
- Then duplicate your track twice by highlighting your track and pressing ‘Ctrl+D’ on PC, or ‘CMD+D’ on MAC.
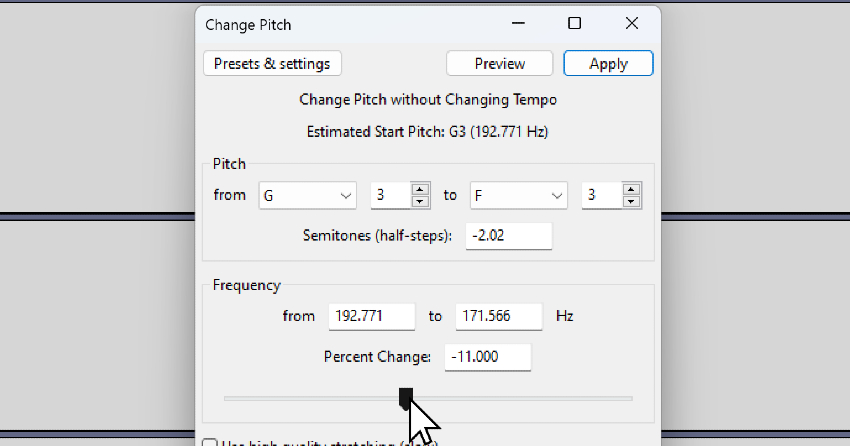
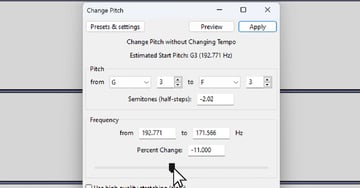
- Keep the first track as it is, then change the second track by clicking on it, then choosing ‘Pitch and Tempo’ > ‘Change Pitch’.
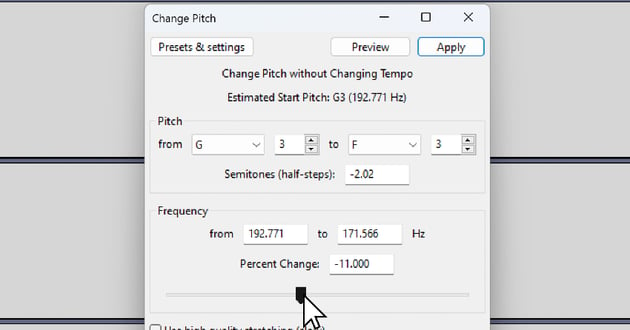
- Move the ‘Change Pitch’ ‘Frequency Slider’ to a negative percent change, like around -10% to -12%.
- Repeat step 6 with the third track by giving it a slightly different percent change. Changing the pitch will make the track a bit different and make it seem like another person is singing or talking.
Conclusion
Audacity provides a plethora of sound effects, each with its unique capability to enhance and modify your audio. Whether you’re going for a professional sound or experimenting creatively, the tools are at your fingertips. Remember, the key is to experiment and find what works best for your project. And if you’re looking for professional-grade digital content, don’t forget to check out Envato Elements. It’s a treasure trove of resources waiting to be explored!