Professional retouchers use a lot of techniques to retouch skin. In this tutorial, you’ll learn one of the most basic retouching techniques called frequency separation. It’s used as a quick way to airbrush skin without removing too many fine details.
What is Frequency Separation?
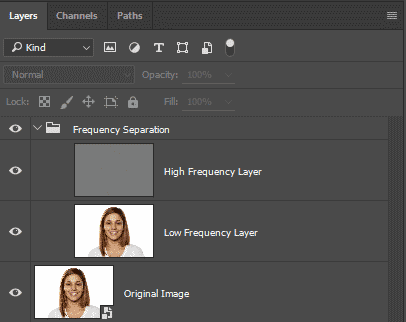
Frequency Separation is a jargon used in the retouching world to describe a skin airbrushing technique. The technique involves splitting an image into two “frequencies”:
- Low Frequency Layer: smoothed layer where only the colors and tones can be seen
- High Frequency Layer: sharpened layer holding the finer skin details
Once the skin is separated into these two layers, you can adjust the layers to create airbrushed skin.

How to Airbrush Skin With Frequency Separation
1Prepare Your Layers for Nondestructive Editing
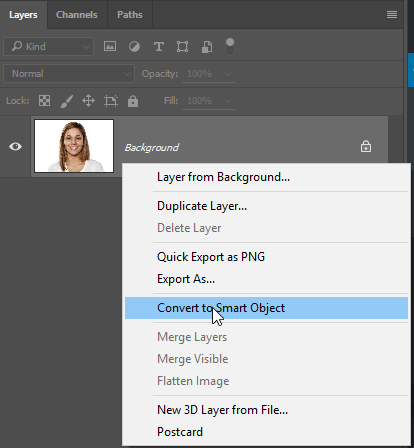
Start by converting your layer into a Smart Object. This will let you change the filter settings later on without undoing a bunch of steps. Open an image then right-click on the layer and select “Convert to Smart Object”.
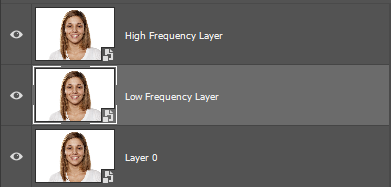
Next, duplicate the layer twice. Name the top layer “High Frequency Layer” and the second layer “Low Frequency Layer”.
2Create the High Frequency Layer
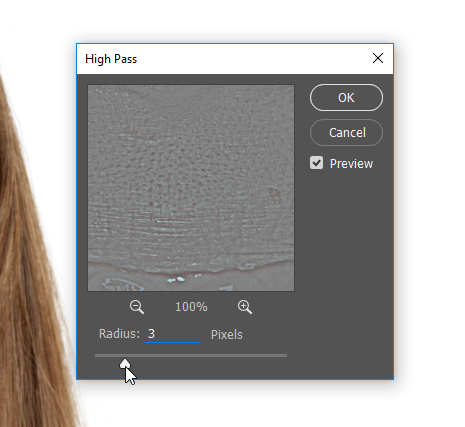
Select the High Frequency layer then go to Filter > Other > High Pass. This filter is used to create a gray layer with an embossed effect of the fine details. Set the Radius to 3 then click OK.
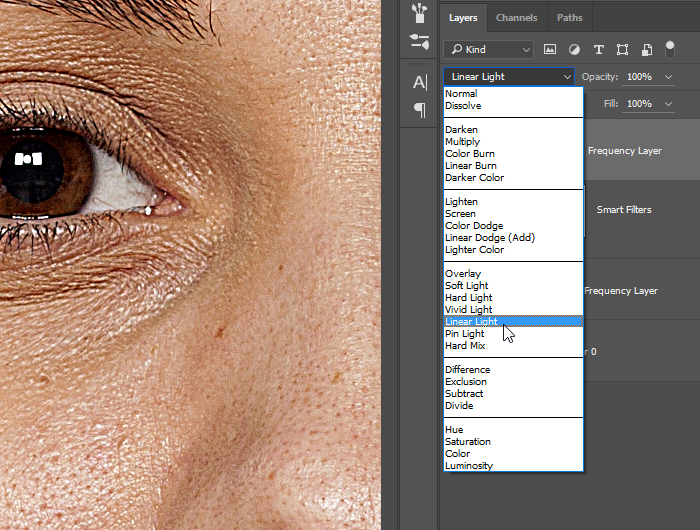
Change the blending mode to Linear Light. Once it’s changed, your image will look incredibly sharp. This layer helps restore the fine/high-frequency details in your photo.
3Traditional vs Modern Frequency Separation

Traditionally, the frequency separation technique applies a low-pass filter to the Low Frequency layer. In Photoshop, the low pass filter is called the Gaussian Blur filter and it is the opposite of the High Pass filter. Instead of revealing the fine details, it’s used to blur the image so that only the tone and color are visible.
However, the traditional frequency separation technique doesn’t produce the best results. It creates a diffused-glow effect on the skin which looks artificial. Instead, we’ll be using a newer variant of the frequency separation technique which uses Photoshop’s Surface Blur filter instead of the Gaussian Blur filter. This produces much better results and it helps preserve the edges in your image. Below is a comparison between the two techniques.
 Frequency separation with Photoshop’s surface blur filter
4Create the Low Frequency Layer

Select the Low Frequency Layer then go to Filter > Blur > Surface Blur. Adjust the settings but don’t spend too much time on it because we’ll be fine-tuning this later.
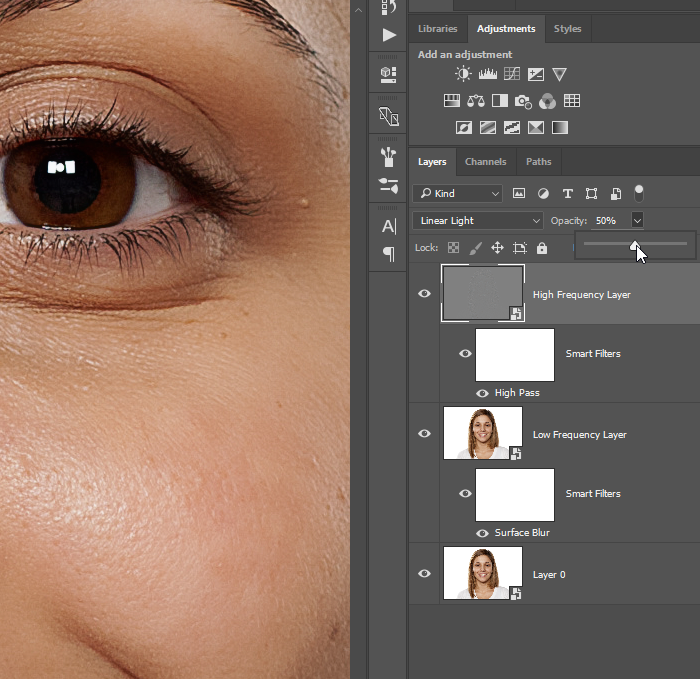
5Adjust the High Frequency Layer
Right now we have an overly-sharp image. Reduce the opacity of the High Frequency layer until you get something that looks more natural. Generally setting this to around 50% is a good start.
6
 Adjust the Low Frequency Layer
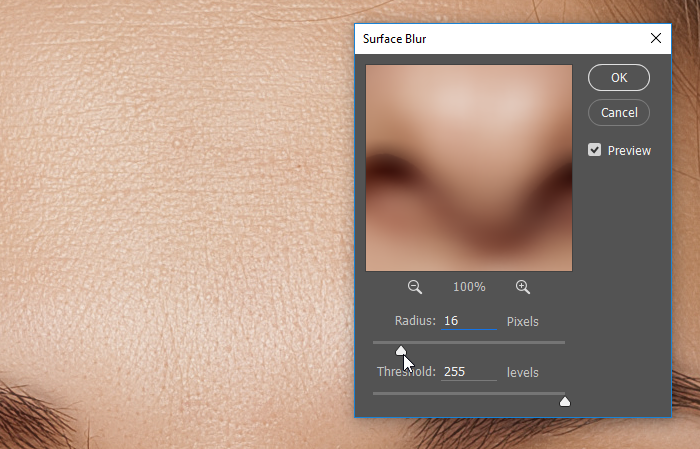
Now that we’re done with the High Frequency layer, we can go back into the Surface Blur filter and fine-tune the effect. In your Layers panel, doubleclick on the Surface Blur filter to edit it.
Start off by setting the Threshold setting to 255 levels. Adjust the Radius setting so that the skin tones look smooth but set it so high that your entire image becomes blurry.
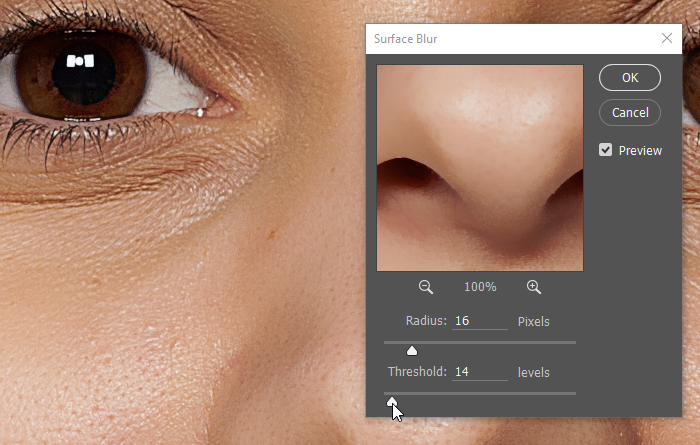
Reduce the Threshold setting until the details start to reappear. You might need to go back and forth between the two settings to fine tune it.
7Group the Layers
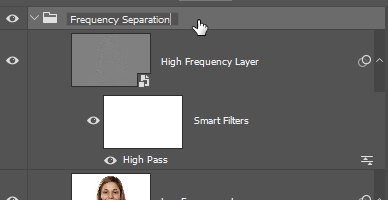
Select the two frequency layers then press Ctrl+G (Cmd+G on Macs) to group the layers. Rename the layer to “Frequency Separation”.
8Add a Layer Group Mask
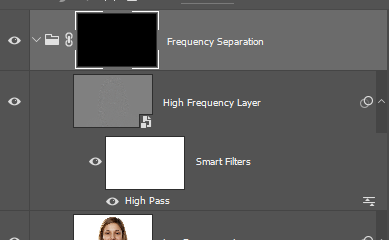
On the bottom of the layers panel, hold the Alt/Option key then click on the Add Layer Mask button. Holding the Alt/Option key will create an inverted layer mask.
Select the brush tool and paint over the skin to reveal the airbrushed look. Make sure that your foreground color is white and that your brush opacity is not 0%. You can check the brush opacity in the option bar located below the menus.
Need to Use the Healing Brush?
Good thing we used nondestructive editing techniques! Because if you didn’t, you would have had to start again from scratch.
To make direct edits to the image, doubleclick on the Smart Object layer. Photoshop will open the layer in a new document. You can make the adjustments here. When you’re done, just save and close the document and your main document will be updated with the adjustments you just made. Also, your frequency layers will be updated too so you don’t need to redo everything.
Tip: If you need to use the Healing Brush tool, do it on a separate layer. Create the layer then select the Healing Brush tool. In the option bar located below the menus, enable the “Sample All Layers” option. Now you can use the Healing Brush on a separate layer.
Final Results
Here’s a before and after comparison of the skin airbrushed with this tutorial. This was a simple tutorial on how to airbrush skin. If you’d like to learn more about skin retouching, check out our Skin Retouching Video Tutorial
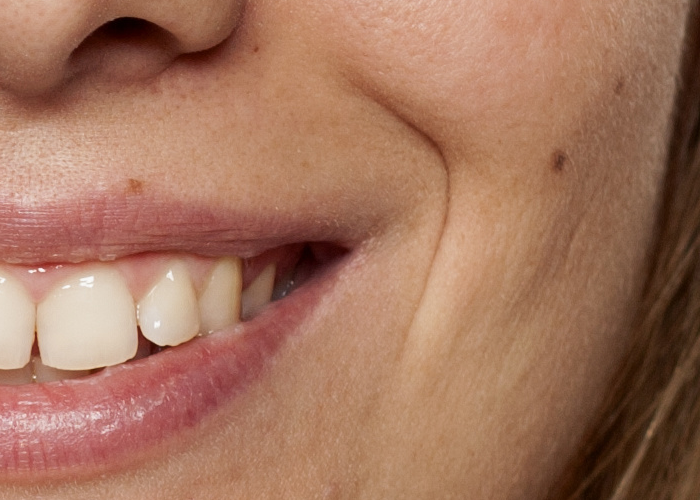 Original Image
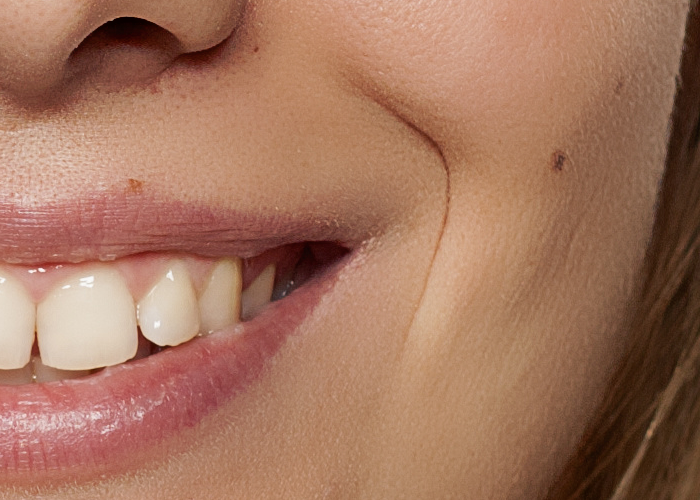 Airbrushed with frequency separation