This Photoshop tutorial, you will learn how to use a variety of color, lighting, and cut and paste techniques to create a surreal photo manipulation. Combine your creativity with these Photoshop techniques to create your own photo manipulation artworks.
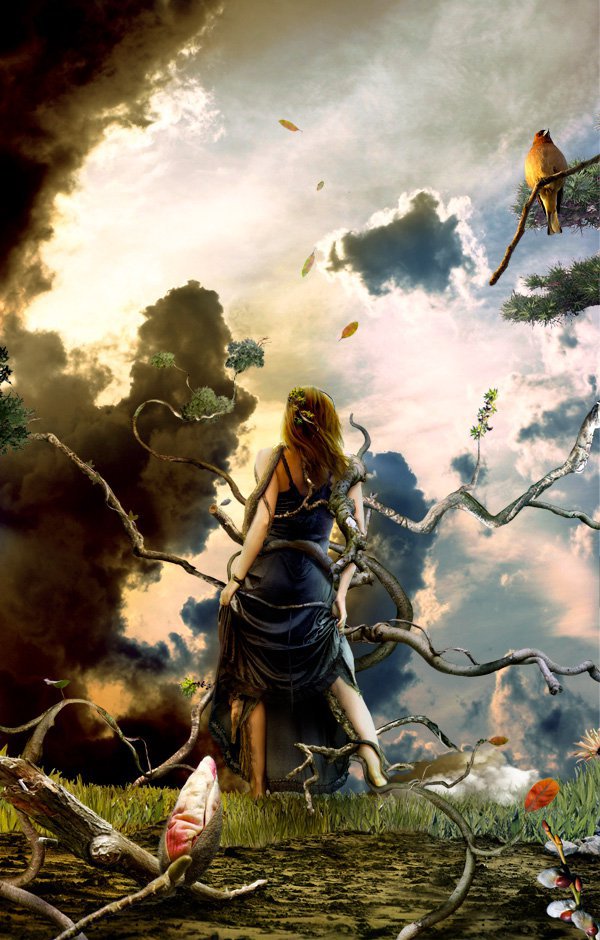
Final Results

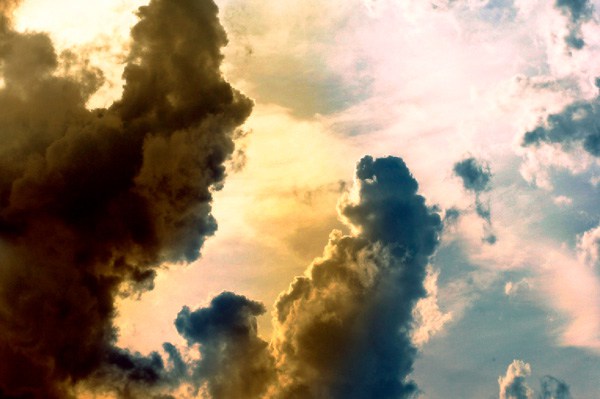
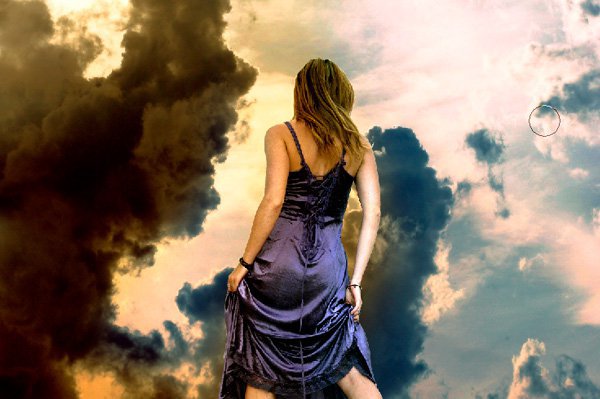
Step 1 – Place the background
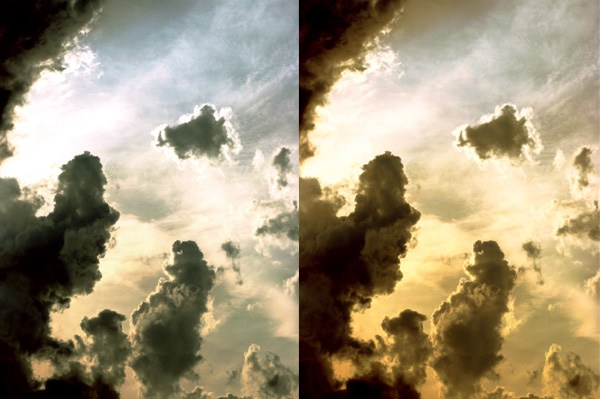
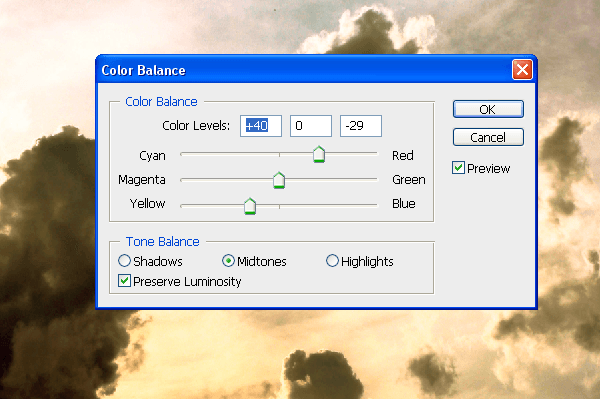
The first step it’s to place the sky, our background, into the image. As you can see, we have changed the color of it. We’re going to create a half of the image with a warm tone and another with a cool tone using the color balance tool. To do this, select the sky and then choose Image > Adjustments > Color Balance. Adjust the input sliders to add red and yellow. Select “highlights” and “shadows” then try adding more of these colors until you like the tones in your image.
Step 2 – Coloring the sky
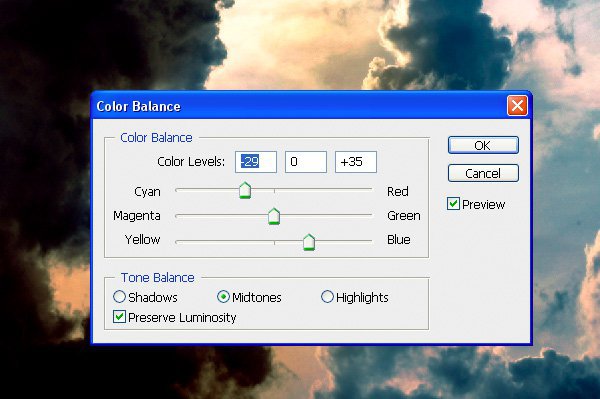
Duplicate the layer with the sky. Now we are going to repeat the previous step with the color balance tool (Image > Adjustments > Color Balance) but this time adding blue and cyan tones. Remember to add some color to highlights and shadows as well.
Select the eraser tool then, in the option bar, select a blurred brush like shown below:

Now use the eraser tool to erase the left side of the sky in the top layer. This will make the warm tones from the layer below appear wherever you paint. When using the eraser, create curved strokes rather than a straight cut. When you have finished this step, you can reduce the opacity of the current layer to make the color more subtle.
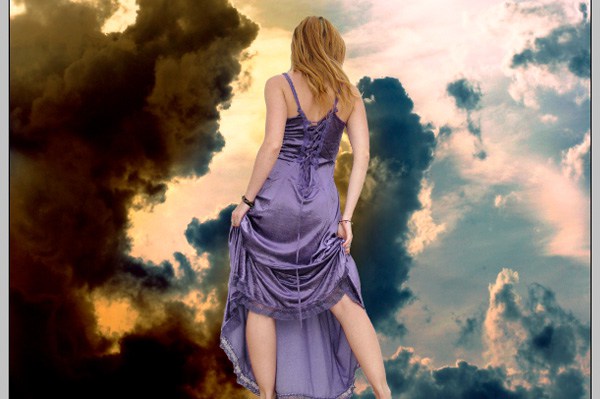
Step 3 – Add the model
Now let’s open picture of the model. Use the magic wand tool to create a selection of the model then click on the add layer mask button in the layers palette to create a mask of the model. Refine the mask by painting in the layer mask using a brush with a harder edge. When you’re done, position the woman in the centre of the image.
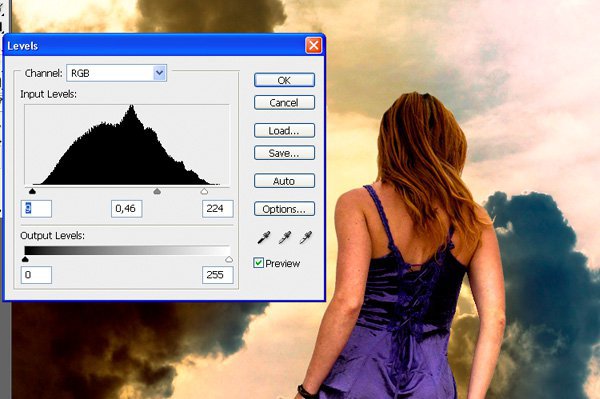
Step 4 – Coloring the model
As you can see the lighting of the model isn’t blending in well with the background. We’re going to fix this with the levels tool. Choose Image > Adjustments > levels and move the input sliders to add contrast that matches the contrast of the background
Now choose Image > Adjustments > Hue/Saturation and reduce the saturation to reduce the saturation created when we used the levels tool. For the image used in this tutorial, the saturation was reduced by –24.
The next step will be exactly the same that in step 2 (when we used the color balance tool) except we’re going to use it on the model. First, duplicate the layer with the model so that you have two layers. Select one of the layers with the model then, like step two, use the color balance tool (Image > Adjustments > Color Balance) to add some red/yellow tones.
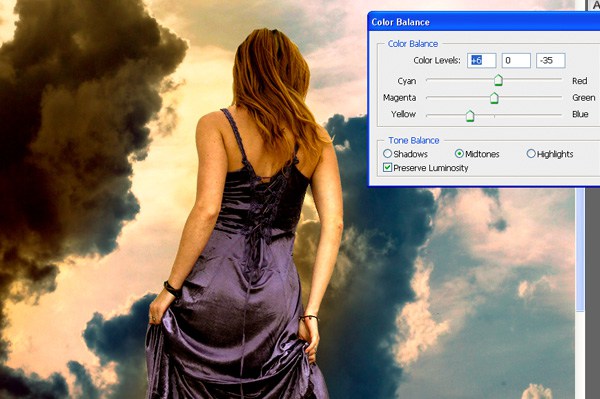
As you can see, it looks blended better with the left half of the background. Now, select the other layer of the model then choose Image > Adjustments > Color Balance and add some blue and cyan tones.
Now, as you did before with the sky, use the eraser tool with a soft edge to remove the left side of the layer with the girl in blue tones. Reduce the opacity on the current layer to reduce the strength of the color effect.
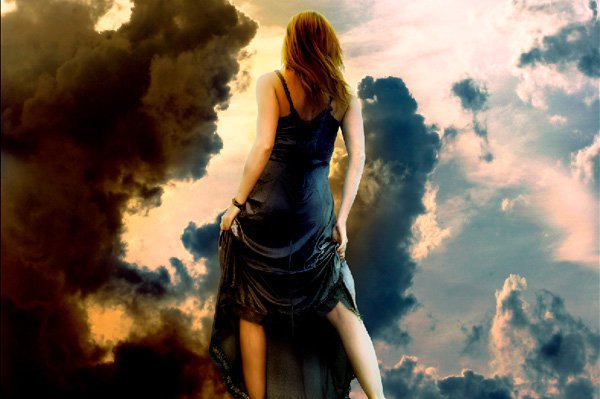
We’ve done the hardest part matching the lighting of the model with the background. Merge the layers of the model into one layer. Now you can play again with the levels, color balance, and saturation (found in the Image > Adjustments menu) to make further adjustments.
Step 5 – Lightning the model
For the image used in this tutorial, the light comes from the background left. And to make the lighting match, we’ll have to darken the back of the model. To begin, select the burn tool.

Use a soft brush, edit the midtones, and set the exposure to around 30%.

Now use the brush over the models back. Try not make it too dark, just a little. Use this tool in the skirt too.
After that, select the dodge tool and paint the outline of the model (especially in her hair and her left arm).
Step 5 – Roots
Now we are going to add some roots and branches to the body of the model. It’s not difficult and you just need some images of trees and roots. We will be cutting parts of the root and tree and giving them some color like we did earlier with the color balance tool.
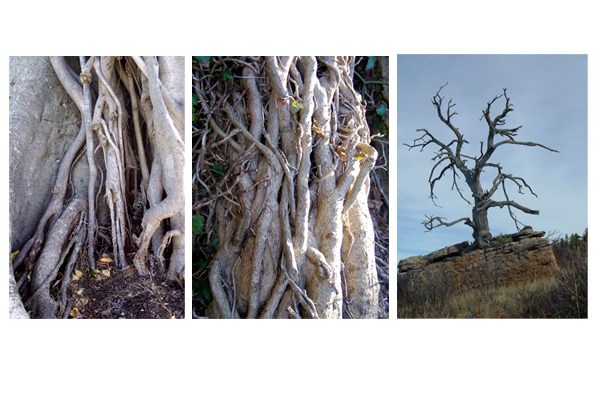
First step will be to look for a beautiful root and select it with your favorite tool (Magnetic lasso or quick mask mode for example). Don’t worry if it’s not a perfect selection, we will modify it later. Copy it and paste in our image.

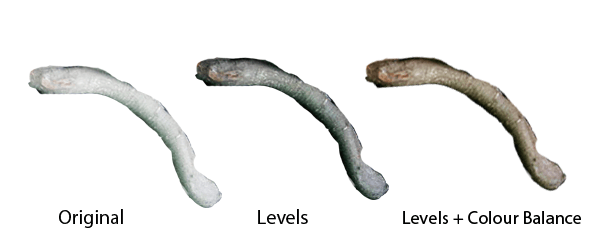
As you can see the new image has not the same light and colors that the others, it looks out of place. What we have to do it’s the same that we did with the sky and the girl. Choose Image > Adjustments > Levels and adjust the input sliders. If you move the one in the center to the left the image will be brighter. If you move it to the right the image will be darker. In our case we are going to move to the right.
Now choose Image > Adjustments > Color Balance and add color depending of the place where you are going to put the root. If the root it’s on the left arm of the girl, for example, it will need red and yellow. But if it is on the right arm you have to add blue and cyan. This time we are going to add yellow and red. This is how it looks with the modifications:
When you have the root ready, just place it where you think that it will look good and select the eraser tool with a focus brush. Erase all the part that you don’t need and give the correct form to the root, now it’s when you have to improve the selection root.
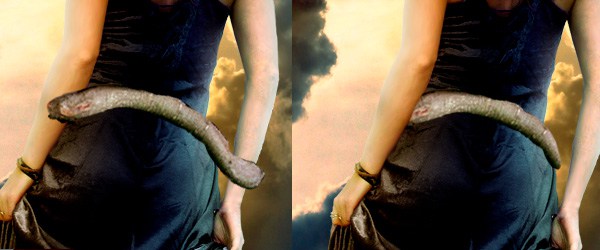
The final step will be to use the burn tool in the areas where we should see shadows. For example, in the image below, it was used over the arm or in the bottom. I have added a little of blue using Image > Adjustments > Color Balance too. The last step is to erase the upper part of the root to create the look of a crease.