Configuration Management
Configuration management tools such as Puppet, Chef and Ansible, which provide the ability to quickly automate config and deployment processes, have become a critical part of many engineering teams’ plans when building new systems. Implementing an additional cloud service should fit alongside the configuration management methods you already use. Luckily, the MongoDB Atlas API provides you with the ability to programmatically launch MongoDB clusters with your pre-existing toolset, ensuring a repeatable and reliable method that can be customized to your needs.
MongoDB Atlas API
The Atlas API follows the principles of the REST architectural style and exposes a number of internal resources which enable programmatic access to Atlas features. Instead of writing additional code for the aforementioned tools, you can call upon this HTTPS API with instructions for the MongoDB cluster you would like to use and a secure key for authentication. If you follow the documentation of your configuration management tool, you should be able to leverage a similar method to submit an HTTPS POST to launch a MongoDB Atlas Cluster.

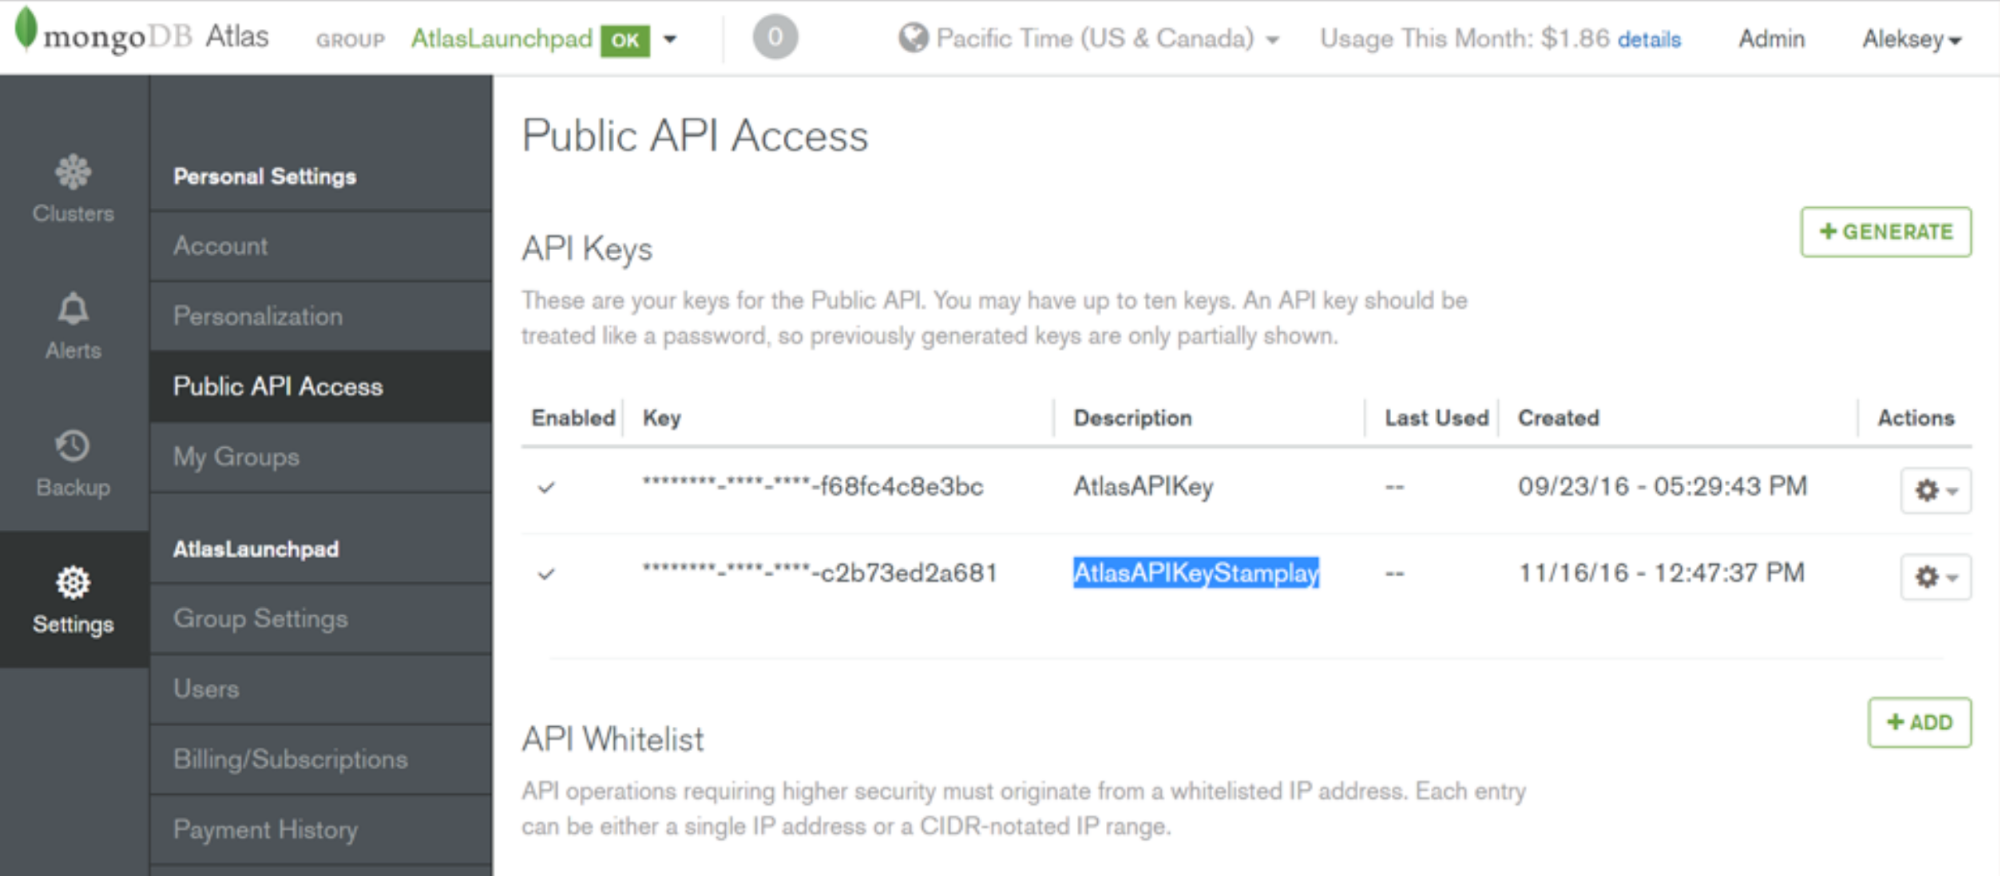
To use the MongoDB Atlas API from your configuration management tool, you’ll first need to configure API access. This ensures a secure connection is always available between your configuration management server and the MongoDB API. Our documentation also shows you how to generate your API key and specify a whitelist of IP addresses that are permitted to modify your MongoDB Atlas clusters via your API key.
As shown in the screenshot above, MongoDB Atlas grants you to the ability to disable or delete API keys as needed; you can also easily see when your API keys were last used.
Cluster Attributes
Let’s build our MongoDB Atlas M30 cluster named DataStore with 40 GB of disk, backups enabled, IOPS of 120, and 3 replica set members in total.
Items required for launching:
-
JSON file
atlas.json{ "name" : "DataStore", "numShards" : 1, "replicationFactor" : 3, "providerSettings" : { "providerName" : "AWS", "regionName" : "US_EAST_1", "instanceSizeName" : "M30", "diskIOPS" : 120, "encryptEBSVolume" : false }, "diskSizeGB" : 40, "backupEnabled" : true } - My API Key
- My Atlas account username (jay.gordon)
- My Group ID (Found by going to Settings -> Group Settings at the top of the screen)
- My AWS server with SSH key to permit ansible to log in
- An ansible “hosts” file with our inventory
In this example I’ll use a simple curl from my local computer. I provided the API with some basic info:
bash-3.2$ curl -i -u "jay.gordon:$APIKEY" --digest -H "Content-Type: application/json" -X POST
 "https://cloud.mongodb.com/api/atlas/v1.0/groups/575ece95e4b0ec4f28db42ca/clusters" --data @atlas.json
In this situation, I’ve used a standard HTTPS curl POST with my JSON payload containing the settings I want for my cluster.
Launch a MongoDB Atlas Cluster with Ansible

Ansible allows you to execute complex playbooks from your local desktop computer; we’ll use it in this example to launch our MongoDB Atlas cluster.
The Ansible uri module can be used to interact with the MongoDB HTTPS API along with the created secure key.
The Ansible documentation for uri provides an example on how to generate a new JIRA ticket via HTTPS post:
- name: Create a JIRA issue
  uri:
    url: https://your.jira.example.com/rest/api/2/issue/
    method: POST
    user: your_username
    password: your_pass
    body: "{{ lookup('file','issue.json') }}"
    force_basic_auth: yes
    status_code: 201
    body_format: json
This is exactly the same kind of method we can with the MongoDB Atlas API to easily build a small playbook for any new Atlas Clusters we need.
- hosts: webapp
  vars:
    user: ENTER-MONGODB-ATLAS-USERNAME-HERE
    apikey: ENTER-SECRET-API-KEY-HERE
    groupid: ENTER-GROUPID-HERE
  remote_user: ec2-user
  become: true
  tasks:
    - name: pip httplib2
    # ansible uri module requires httplib2
      pip: name=httplib2 extra_args="--user"
    - name: setup atlas
      uri:
        url: https://cloud.mongodb.com/api/atlas/v1.0/groups/{{ groupid }}/clusters/
        method: POST
        user: "{{ user }}"
        password: "{{ apikey }}"
        body: "{{ lookup('file','atlas.json') }}"
        body_format: json
        HEADER_Content-Type: "application/json"
        status_code: 201
I’ve created a basic playbook which will do the following:
- Permit you to log into your AWS instance and install httpdlib2, a required library on our Amazon Linux server to use the uri feature in Ansible.
- It will gather the attributes for our requested cluster from the atlas.json file and send the payload in JSON format to the API
- It will begin building the cluster within your account
To execute the command and begin launching your cluster, you can do the following from your command line terminal window:
ansible-playbook -v create-atlas.yml
This will begin the process of installing the required software and making the API call to launch your Atlas cluster. Ansible will notify you that the process is completed by giving you a green “201” status code.
In the example I provided below, we can see the output from the API confirming our requirements:
TASK [setup atlas]
*************************************************************
ok: [34.206.142.222] => {"changed": false, "content_length": "510", "content_type": "application/json", "date": "Wed, 19 Apr 2017 13:15:03 GMT", "json": {"backupEnabled": true, "diskSizeGB": 40.0, "groupId": "588b776f96e82110b163ed93", "links": [{"href": "https://cloud.mongodb.com/api/atlas/v1.0/groups/588b776f96e82110b163ed93/clusters/DataStore1", "rel": "self"}], "mongoDBMajorVersion": "3.2", "mongoDBVersion": "3.2.12", "mongoURIUpdated": "2017-04-19T13:15:03Z", "name": "DataStore1", "numShards": 1, "providerSettings": {"diskIOPS": 120, "encryptEBSVolume": false, "instanceSizeName": "M30", "providerName": "AWS", "regionName": "US_EAST_1"}, "replicationFactor": 3, "stateName": "CREATING"}, "redirected": false, "status": 201, "strict_transport_security": "max-age=300"}
PLAY RECAP
*********************************************************************
34.206.142.222 : ok=3 changed=0 unreachable=0 failed=0Once the process of creating your cluster is completed, you can add the connection string to your application and begin working with your database.
Get Started Today
Thanks to the MongoDB Atlas API and Ansible, we’ve avoided having to write additional code to build our three node replica set. You can start working today by going to this github and cloning the basic playbook I used in this example— simply insert these details into your existing Ansible playbook or build a brand new one.
This content is sponsored via Syndicate Ads