A pingback in WordPress refers to an automated system where you get notified if someone links to one of your blog posts from their website. The notification is in the form of a comment on your website under the same blog post which was linked.
Basically, pingbacks are a way by which WordPress tells website owners “Hey, someone has linked to your blog post over there”. One nice things about pingbacks is that they are fully automated. Keep in mind that while pingbacks do send back an excerpt along with the article links, the excerpt is usually not shown in the comments by most themes.
How to Enable and Disable WordPress Pingbacks
Pingbacks are not for everyone. Some people like them while others don’t. Luckily, WordPress allows you to easily enable or disable pingbacks.
Once you are logged into the WordPress admin dashboard, head over to Settings > Discussion from the navigation menu. You should see something like the image below.
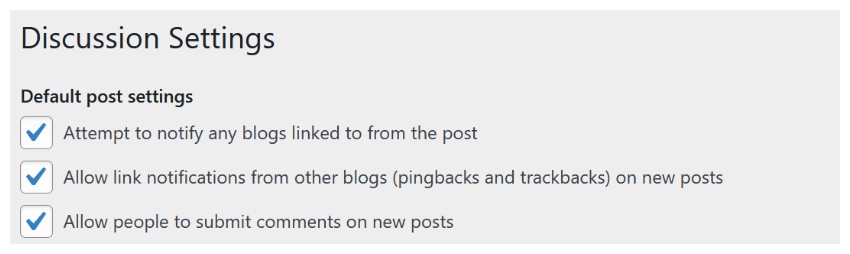

The first two options are used for sending and receiving pingbacks. Your own blog will try to send pingbacks if the first option is checked. Other blogs will be pinging you back if the second option is checked.
Uncheck the first box if you don’t want to send pingbacks. Uncheck the second box if you don’t want to receive pingbacks. Uncheck them both to completely disable pingbacks.
Keep in mind that any changes that you make to these options will only apply to new posts. The settings for old posts will remain unchanged.
Enable or Disable Pingbacks for Individual Posts
The admin dashboard allows you to set sitewide rules for enabling or disabling pingbacks. However, you might sometimes want to disable or enable pingbacks only for a specific post. Is that possible? Certainly.
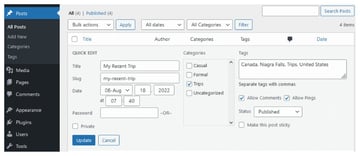
The quickest way to do that would be to navigate to Posts > All Posts form the WordPress Admin Dashboard and then hovering over any post title from the whole post list. This will show you a submenu below the hovered post.

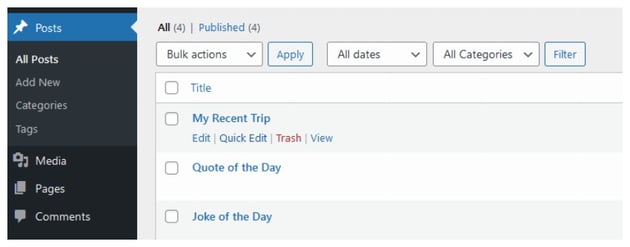

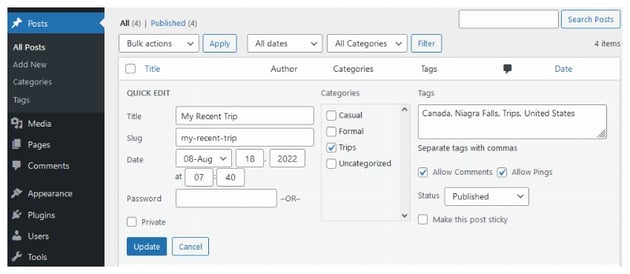
Click on the button titled Quick Edit and you will see a bunch of options there. The option to allow pingbacks is on the right side as shown in the image below. Uncheck the option to disable pingbacks for this particular post.

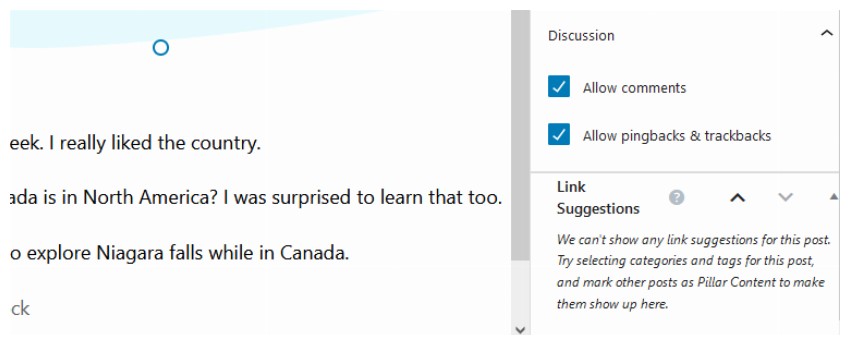
You can also find the option to allow pingbacks and trackbacks on the main Edit Screen of a particular post in the right side. It will be able in the sidebar menu on the right of the edit screen. You will probably need to scroll down a bit to see it. Here is a screenshot of the option for one of my posts.
How to Disable Self Pings
One unexpected behavior that you might notice when pings are enabled is that you will occasionally get pingbacks form the posts on your own blog. While this is a good way to achieve better cross-linking between your posts, some users will also find in annoying.
The secret to disable these self pings while keeping pings from others active is to use the shortened URL form when linking to posts on your own website. The pingback functionality gets triggered when the URL includes https:// at the beginning. However, that can be easily avoided when linking to your own posts. As an example, the URL https://my-website.com/my-recent-trip/ will become /my-recent-trip/.
Final Thoughts
This tutorial covered all the basics of WordPress pingbacks that you need to know. You should now be able to enable or disable WordPress pingbacks on website level as well as individual post level.