Components are the building blocks of a React app. They are somewhat similar a JavaScript function that you might define in a program. They are independent entities that make up the UI of your app and you can reuse them again and again.
In fact, you can define a component using classes or functions. Functional components are the most up-to-date technique, so that’s what I’ll show you in this lesson.
Creating a React Component
Lets begin by updating our “Hello World” app from the first tutorial so that it uses a React component. We will modify it in a manner that allows us to say hello to someone specific instead of the whole world.
When React components are defined as functions, you can pass them a single object argument called props with all the required data. These function will return a React element. Our helloElement from the previous tutorial looked like this:
let helloElement = React.createElement('h1', {id: 'greeting', className: 'hello'}, 'Hello, World!');
We can convert it to a function that returns a React element by using the code below:
function Greeting() {
    return React.createElement('h1', {id: 'greeting', className: 'hello'}, 'Hello, World!');
}

let helloElement = React.createElement(Greeting);
Opening the webpage in the browser will still show us the same old Hello World! message because the message is hard-coded into the function.
Lets modify it so that is accepts a prop object as an argument with all the information that it needs.
function Greeting(props) {
    return React.createElement('h1', {id: 'greeting', className: 'hello'}, `Hello, ${props.name}!`);
}

let helloElement = React.createElement(Greeting, {name: 'Nitish'});
There is another way of creating our component as shown below. However, keep in mind that a simple function call like this will only work if the Greeting component does not have any hooks (it doesn’t in this case). I would suggest that you stick with the above method of creating components.
function Greeting(props) {
    return React.createElement('h1', {id: 'greeting', className: 'hello'}, `Hello, ${props.name}!`);
}

let helloElement = Greeting({name: 'Nitish'});
Open the webpage in a browser and you will see “Hello, Nitish!” instead of “Hello, World!”. We can say hello to anyone now.


Creating More Complicated Components
The code we have written so far to create components is manageable. However, we have only defined a very basic component consisting of a single heading element. In real life, you will have to create much more complicated layouts and using the above method for creating components will no longer be feasible.
The following example creates another component that will demonstrate how cumbersome it can get to create complicated components with multiple children.
function Country(props) {
    return React.createElement('div', {
        className: "container"
    }, React.createElement('h2', {
        className: "country-name"
    }, `Country Name: ${props.name}`), React.createElement('p', {
        className: "capital"
    }, `Capital: ${props.capital}`), React.createElement('p', {
        className: "population"
    }, `Population: ${props.population}`));
}

let countryElement = React.createElement(Country, {name: 'United States', capital: 'Washington, D.C.', population: '332 million'});

let rootElement = document.getElementById('root');
ReactDOM.createRoot(rootElement).render(countryElement);
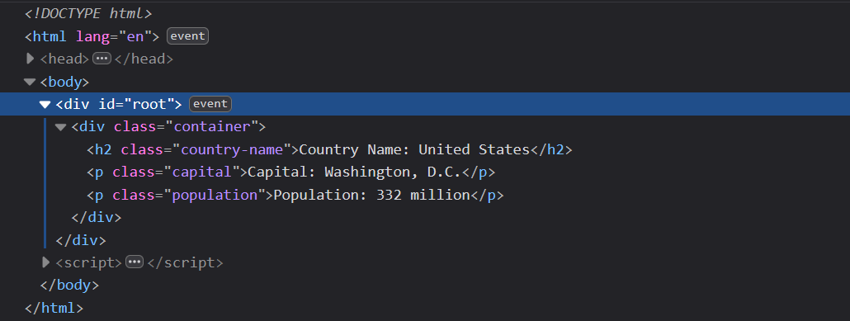
Once you refresh the webpage, the markup in the inspector tab will look like the image below:
I used a little CSS to make the component more presentable.



You can see the final result of executing the above code in a browser in the CodePen below. Try modifying the code to add one more element to the component which shows the area of the United States.
Final Thoughts
We were able to output our component the way we wanted. However, you can see that it required us to write a lot of code. Writing so much code for creating simple components is error-prone and will bring down productivity.
There are a bunch of tools and libraries out there that can help you create a React app by writing much less code. The code for our component could also be shortened significantly by using JSX. We will learn about that in the next tutorial.