You’re a Photoshop master. You have your preferences perfected, the menus memorized. You’re a Wacom wielding wizard. Or are you? If you use Photoshop and you don’t code, you’re wasting time and effort with every project you touch. That’s time you could use to do more creative, enriching work or to get away from your desk entirely.
Adobe provides us the ability to automate tedious tasks and perform otherwise cumbersome chores by writing simple scripts. We can use AppleScript, JavaScript, or VBScript. In this tutorial, I’ll show you a few basic lines of JavaScript that will result in a useful Photoshop helper. By the end, you’ll have enough knowledge to investigate further and apply some basic scripting to your own projects. When you think of a repetitive task that takes the joy out of your design process, I hope you’ll stop dreading it and start automating it.
Why JavaScript?
I’m going to use JavaScript for a few reasons. First, JavaScript is cross-platform, so we can use it on both Mac and Windows. Second, JavaScript is everywhere. If you decide to take programming further (e.g. building your own website), you will be well-positioned by having JavaScript knowledge. Third, because JavaScript is so widely used on the Web, there are a lot of wonderful introductions to the language, including those here on Treehouse.
What about automating with Photoshop actions?
I know what you’re thinking—I can automate tasks using Photoshop’s actions, and I don’t have to write any code. You’re right . . . and you’re wrong. Actions are wonderful, and they are pretty powerful too. Scripting isn’t meant to take the place of actions, rather scripting is meant to enhance actions and provide functionality that actions cannot.
How do I add JavaScript to Photoshop?
To write scripts for Photoshop, Illustrator, or the other Adobe desktop applications, you can use the ExtendScript Toolkit that comes with Adobe CC. However, you are not required to use ExtendScript. You can write your code in whichever text editor you choose. The important part is that you save a file with the .js or .jsx file extension. There isn’t anything special about a script for Photoshop – it’s just a text file like any other JavaScript file. Once you write your code and save the file, you can browse to that file and load it into Photoshop, which I’ll show you in a little bit.
Let’s get started.
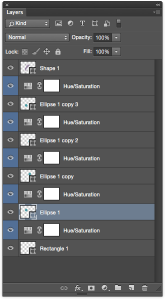
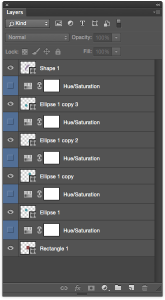
I have an action setup for when I’m illustrating. I pulled this handy action from “The DC Comics Guide to Digitally Drawing Comics”, by Freddie Williams II. It’s a helpful little book if you haven’t jumped into digital drawing yet. The action creates a new adjustment layer that colors all my line work below that adjustment layer a light blue. The action also creates a new layer above the blue adjustment layer. This allows me to quickly sketch and refine, because I can easily see the difference between my current layer and the previous work below that layer.
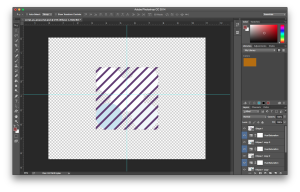
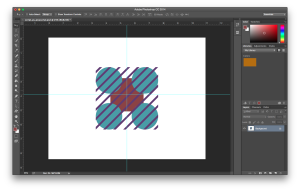
During the course of a single illustration, I can quickly build up a lot of these blue layers. You know what isn’t fun—hiding each blue layer so I can see my final illustration. That’s where a script can be really useful. Let’s hide all those blue adjustment layers. I’ve created a little example Photoshop file with some layers containing simple shapes for demonstration.
When scripting for Photoshop there is a general hierarchy to follow—like an organizational chart or inheritance tree. For a full look at the tree, you can check out Adobe’s own scripting overview.
At the top of the tree is the application (Photoshop). With JavaScript you don’t need to specify the application, so I will ignore setting that explicitly. Below the application you have the document. Like in the Adobe documentation, I’m going to set a variable named docRef equal to my active document.
var docRef = app.activeDocument;
Below the active document, you can target a lot of different things. For my simple script, I want to target those adjustment layers. According to the Adobe docs, “Photoshop has two types of layers: an Art Layer that can contain image contents and a Layer Set that can contain zero or more art layers.” I actually don’t need to work with a layer set in this example, so I can focus on the art layers.
Layers are numbered using a zero indexed array with the top most layer being zero. Be careful here. The names of layers in your layer stack do not correspond to the layer numbers in your script. For example, your top-most layer might be called “Layer 3” or “Background copy,” but it will still be layer zero when you reference it in your script. That means my first adjustment layer to hide will be at index one (the layer right below my top layer). I know that the adjustment layers will be every other layer, so I can increment by two, starting with layer one. This seems like a good candidate for a for loop.
Building a Function
Let’s create a function that will hold the for loop and hide the layers over which the loop iterates. I’ll call the function hideBlueLayers. Again, I’m going to write all of this in my text editor, and I’ll load the script to Photoshop when I’m happy with the final code. Also, don’t worry if you get errors or unexpected behaviors. You can undo and step backward from running a script just like you can undo any other Photoshop operation.
function hideBlueLayers(){ }
Looping over The Layers
Inside my function I’ll build my for loop. Remember, because of the order in which my action creates layers, I know that my top-most adjustment layer is the second layer from the top of my layer stack, so it’s layer index one. My adjustment layers then follow every other layer after that, so I can increment by two. I’ve set the active document to my docRef variable, and Photoshop provides “layers” to iterate over like any JavaScript array. That means I can use layers.length to set the end of my loop. My for loop looks like this:
for (var i = 1; i < docRef.layers.length; i+=2){ }
Hiding the Layers
Now I tell Photoshop that those layers should be hidden. I do this by setting the visible property to false on each of the layers iterated over by my loop.
docRef.layers[i].visible = false;
That’s it. The complete function looks like this:
function hideBlueLayers(){ for (var i = 1; i < docRef.layers.length; i+=2){ docRef.layers[i].visible = false; }; }
Now I can call that function at the bottom of the script.
hideBlueLayers();
Loading the JavaScript into Photoshop
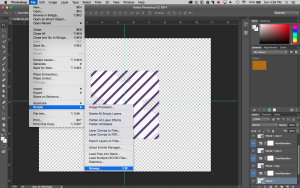
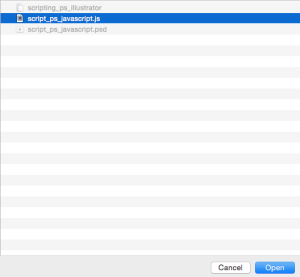
Let’s load this into Photoshop and see how it does. In Photoshop, I will go to File>Scripts>Browse and browse to my script. I select it and hit open. The script should now run.
Hey! Success. About 10 lines of code, and we have something useful—albeit simple.
Save a flattened version of the file as a PNG.
Building The Second Function
OK, but now I have a bunch of hidden blue layers that I don’t need. What if I want to take this a little further? At this point in an illustration, I have usually refined the art to the point that I’m ready to prep it for vectorizing or final inks. Let’s say I want a tidy PNG to bring into Illustrator for vectors. Wouldn’t it be nice if my script also flattened my layers and saved a PNG? Lets try it out. I’ll create a function called flattenSavePNG.
function flattenSavePNG(){ }
First, I want to save a version of the file as it is. If I want to make some changes later, I don’t want to lose all my layers, so I’ll save the file before flattening.
docRef.save();
This line will throw an error if you have not saved the file you’re working on at some point in the past. However, if you get this far on a project without ever saving I would be surprised.
Flattening the Layers
Now I want to flatten the image. Conveniently, Photoshop gives us a flatten method for just this. I’ll add it after my save.
docRef.flatten();
Saving the PNG
So far, so good. Now let’s save the PNG. For this I need to create a few variables, and I’ll put them at the top of my function for organization. I need a variable to set the file name of the PNG (I want it to be the same name as my PSD), a variable to hold the path of my file (I also want this to be the same as my PSD), and a variable to combine those for the output of my final PNG file. I’ll do that like this:
var pngName = docRef.name; var savePath = docRef.path; var fileLocation = File(savePath + "/" + pngName);
Now I need to call the saveAs method to save my PNG. SaveAs takes a few parameters. The first is where we want to save the “File,” which we set in our fileLocation variable, so we can pass it that.
docRef.saveAs(fileLocation);
Adobe also provides save options for different file types. For PNG I can set compression, interlacing and the typename. You can see all the different options in the Adobe docs. I’m not worried about changing the defaults for my PNG, so I’ll just pass it PNGSaveOptions. I can also set whether or not I want to save the file as a copy, which I’ll set to true. Lastly, I have three options for how to include the file extension: LOWERCASE, NONE, UPPERCASE. I like my file extensions lowercased, so I’ll set that. The final saveAs line looks like this:
docRef.saveAs(fileLocation, PNGSaveOptions, true, Extension.LOWERCASE);
The whole function looks like this:
function flattenSavePNG(){ var pngName = docRef.name; var savePath = docRef.path; var fileLocation = File(savePath + "/" + pngName); docRef.save(); docRef.flatten(); docRef.saveAs(fileLocation, PNGSaveOptions, true, Extension.LOWERCASE); }
Almost there. Let’s call this function and load the script into Photoshop just like last time (File>Scripts>Browse).
flattenSavePNG();
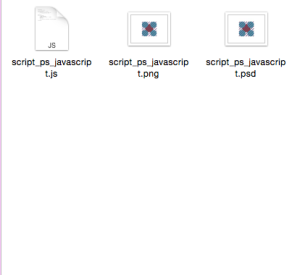
Hey, what do you know? The script flattened my file and saved a PNG.
I can include both these functions in one script and run all those steps each time I need the functionality – hide the blue layers, flatten the image, save my PSD, and save a PNG copy.
What else can you do?
Now, I could do a lot more than this. I should check to make sure that the PNG file doesn’t already exist before overwriting it. I could save a PNG, TIFF, and BMP all at once. I could even save each layer as a separate file rather than flattening the image.
You can also simplify some of the artistic processes in Photoshop such as adding borders, rotating objects precisely, and more. The example here isn’t meant to be exhaustive, and it probably differs from your Photoshop workflow (I don’t imagine you’re actually flattening things and saving PNGs for Illustrator). But I hope you see some possibility in what scripting offers.
Maybe you’re intrigued, but you don’t know any JavaScript. To be honest, the amount of JavaScript you need to get going is minimal. A quick trip through JavaScript Basics and JavaScript Loops Arrays and Objects here on Treehouse is more than enough knowledge to up your Photoshop game.
You may have no desire to program for the Web or to create applications. Coding will still help you excel at the things that do get your gears turning. Adobe is hardly the only company to offer the ability to script its programs. Many 3D applications allow you to write scripts with the Python programming language. There are so many ways to let a little code do the boring stuff, so you can stay focused on what makes your design and art creative.

