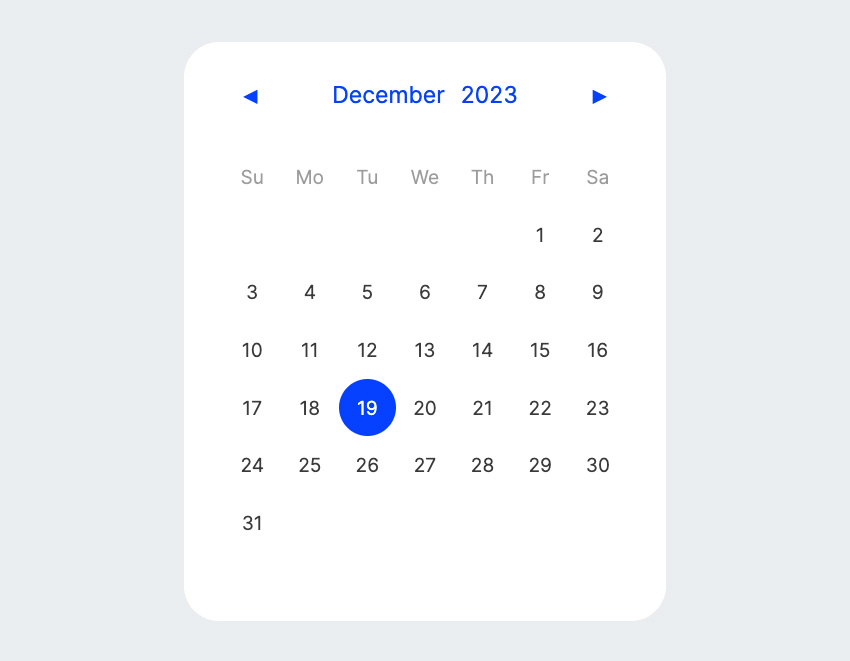
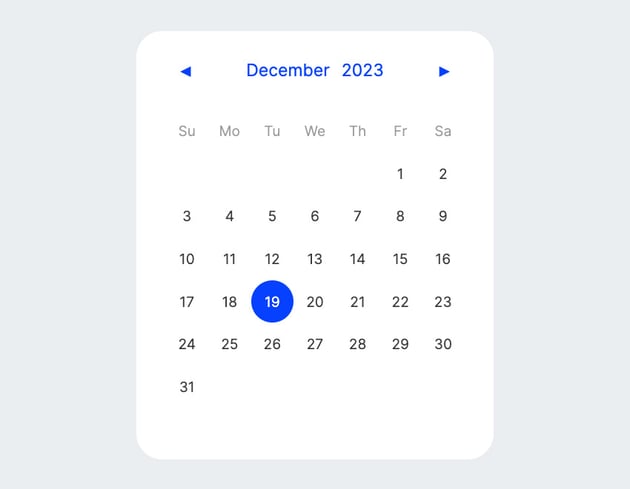
Building a JavaScript calendar is the best way to understand date functionalities in JavaScript. This tutorial will create a real-time calendar similar to the one in your digital devices. By the end, you’ll have something like this:
HTML Structure
We will start our JavaScript calendar by building the structure with HTML and CSS. Once the interface is done, we will replace the functionality with JavaScript.
The HTML structure will contain a header showing the current month and year. Then, we will have arrows to navigate to the next or previous month, and lastly, we will have a grid showing the names of the days in a week and each day of the month.
1 |
<div class="container"> |
2 |
<div class="calendar"> |
3 |
<header>
|
4 |
<pre class="left">◀</pre> |
5 |
<div class="header-display"> |
6 |
<p class="display">""</p> |
7 |
</div>
|
8 |
<pre class="right">▶</pre> |
9 |
</header>
|
10 |
|
11 |
<div class="week"> |
12 |
<div>Su</div> |
13 |
<div>Mo</div> |
14 |
<div>Tu</div> |
15 |
<div>We</div> |
16 |
<div>Th</div> |
17 |
<div>Fr</div> |
18 |
<div>Sa</div> |
19 |
</div>
|
20 |
<div class="days"> |
21 |
<!--days will be filled here-->
|
22 |
</div>
|
23 |
</div>
|
24 |
<div class="display-selected"> |
25 |
<p class="selected"></p> |
26 |
</div>
|
27 |
</div>
|
Inside the div with the class days, we will fill our days dynamically with JavaScript.
Styling Calendar With CSS
Lets start by applying some styles to the body and the container element.
We’ll begin by settings some variables for our colors. Then the calendar will be centered in the container element and have a border radius to make it rounded.
1 |
/*variables*/
|
2 |
:root { |
3 |
--white: #fff; |
4 |
--main: #eaedf0; |
5 |
--accent: #0041ff; |
6 |
--accent-2: #ebedf0; |
7 |
}
|
8 |
|
9 |
/*styles*/
|
10 |
body { |
11 |
background-color: var(--main); |
12 |
display: flex; |
13 |
align-items: center; |
14 |
justify-content: center; |
15 |
}
|
16 |
.container { |
17 |
display: inline-block; |
18 |
background-color: var(--white); |
19 |
border-radius: 35px; |
20 |
padding: 0 1em; |
21 |
margin-top: 2em; |
22 |
}
|
The header elements, including a p tag and two arrows, will use Flexbox with the items spread across the x-axis and spaced evenly.
1 |
header { |
2 |
margin: 20px; |
3 |
display: flex; |
4 |
justify-content: space-between; |
5 |
align-items: center; |
6 |
padding: 10px; |
7 |
}
|
8 |
.header-display { |
9 |
display: flex; |
10 |
align-items: center; |
11 |
}
|
12 |
|
13 |
.header-display p { |
14 |
color: var(--accent); |
15 |
margin: 5px; |
16 |
font-size: 1.2rem; |
17 |
word-spacing: 0.5rem; |
18 |
}
|
19 |
|
20 |
pre { |
21 |
padding: 10px; |
22 |
margin: 0; |
23 |
cursor: pointer; |
24 |
font-size: 1.2rem; |
25 |
color: var(--accent); |
26 |
}
|
Calendar Grid Layout
The divs containing the names of days in a week and the days in a month will use a grid layout of 7 equal columns and will be centered horizontally.
1 |
.days, |
2 |
.week { |
3 |
display: grid; |
4 |
grid-template-columns: repeat(7, 1fr); |
5 |
margin: auto; |
6 |
padding: 0 20px; |
7 |
justify-content: space-between; |
8 |
}
|
9 |
.week div, |
10 |
.days div { |
11 |
display: flex; |
12 |
justify-content: center; |
13 |
align-items: center; |
14 |
height: 3rem; |
15 |
width: 3em; |
16 |
border-radius: 100%; |
17 |
}
|
We will also add a hover effect on each day of the week and an opacity to the names of the days of the week.
1 |
.days div:hover { |
2 |
background: var(--accent-2); |
3 |
color: rgb(25, 25, 201); |
4 |
cursor: pointer; |
5 |
}
|
6 |
.week div { |
7 |
opacity: 0.5; |
8 |
}
|
We will also display the date when a day in the calendar is clicked and apply a background color to today’s date.
1 |
.current-date { |
2 |
background-color: var(--accent); |
3 |
color: var(--white); |
4 |
}
|
5 |
.display-selected { |
6 |
margin-bottom: 10px; |
7 |
padding: 20px 20px; |
8 |
text-align: center; |
9 |
}
|
JavaScript Calendar Functionality
Okay, that’s given us our structure, now let’s focus on the behavior. We’ll start by selecting all the elements that will need to be updated.
1 |
let display = document.querySelector(".display"); |
2 |
let previous = document.querySelector(".left"); |
3 |
let next = document.querySelector(".right"); |
4 |
let days = document.querySelector(".days"); |
5 |
let selected = document.querySelector(".selected"); |
Date() Object
JavaScript comes with an inbuilt Date() object that makes it easy to work with dates. To get the current date, you can use the new Date() object like this:
1 |
let dateToday = new Date(); |
2 |
let dateToday = new Date() |
3 |
console.log(dateToday); |
You can also use the date object methods to get various parts of the date, such as the year, month, day of the week, etc.
1 |
console.log(dateToday.getFullYear()); //2023 |
2 |
console.log(dateToday.getMonth()); //11 |
3 |
console.log(dateToday.getDate()); //12 |
4 |
console.log(dateToday.getHours()); //13 |
5 |
console.log(dateToday.getMinutes()); //9 |
6 |
console.log(dateToday.getSeconds());//35 |
One important thing to note when working with the Date() object is, months are zero-based, meaning January is represented by 0, February by 1, and so on. Thus, our output for get.Month(), which equals 11, means we are in December.
Start by defining a variable date using the Date object and get the month’s and year’s values.
1 |
let year = date.getFullYear(); |
2 |
let month = date.getMonth(); |
Create a function called displayCalendar and update the header to show the current month and year.
1 |
let formattedDate = date.toLocaleString("en-US", { |
2 |
month: "long", |
3 |
year: "numeric", |
4 |
});
|
5 |
display.innerHTML = `${formattedDate}`; |
Invoke the displayCalendar() function to display the header functionality. Now, the header displays the current month and year.


Displaying the Calendar
Next, update the displayCalendar() function as follows:
1 |
function displayCalendar() { |
2 |
|
3 |
const firstDay = new Date(year, month, 1); |
4 |
const firstDayIndex = firstDay.getDay(); |
5 |
|
6 |
const lastDay = new Date(year, month + 1, 0); |
7 |
const numberOfDays = lastDay.getDate(); |
8 |
|
9 |
}
|
-
const firstDay = new Date(year, month, 1);: Creates a new Date object representing the first day of the current month. -
const firstDayIndex = firstDay.getDay();: Here, we use the value offirstDayto get the index of the first day of the week. For example, 0 represents Sunday, 1 represents Monday, and so on. -
const lastDay = new Date(year, month + 1, 0);: Creates a new Date object representing the last day of the current month. -
const numberOfDays = lastDay.getDate();: Here, we use the value oflastDayto get the index of the last day of the month. This value will allow us to get the exact days in a month. For example, if a month has 31 days,numberOfDayswill be 31
From the value of firstDayIndex, we know when the first day of the month will start. For example, for December 2023, the first day of the month will start at index 5, on a Friday. The calendar should be blank from index 0 (Sunday) to index 4 (Thursday). Let’s use firstDayIndex to create a for loop that will add empty divs to the start of the calendar.
1 |
for (let x = 1; x <= firstDayIndex; x++) { |
2 |
let div = document.createElement("div"); |
3 |
div.innerHTML += ""; |
4 |
|
5 |
days.appendChild(div); |
6 |
}
|
To display the days in a month, we will create another for loop that will add divs equal to the value of numberOfDays. Each div will also contain the day of the month matched correctly to the day of the week.
1 |
for (let i = 1; i <= numberOfDays; i++) { |
2 |
let div = document.createElement("div"); |
3 |
let currentDate = new Date(year, month, i); |
4 |
|
5 |
div.dataset.date = currentDate.toDateString(); |
6 |
|
7 |
div.innerHTML += i; |
8 |
days.appendChild(div); |
9 |
if ( |
10 |
currentDate.getFullYear() === new Date().getFullYear() && |
11 |
currentDate.getMonth() === new Date().getMonth() && |
12 |
currentDate.getDate() === new Date().getDate() |
13 |
) { |
14 |
div.classList.add("current-date"); |
15 |
}
|
16 |
}
|
The for loop does the following:
- Creates div elements representing each day in a month
- Adds a dataset attribute called date to each div containing a date matching the current day, month, and year. The data attribute will be helpful when we want to determine which date has been clicked.
- Appends each div to our days element.
- We are also adding a different CSS class to the div, which matches the current date.
Now, our JavaScript calendar is displaying the correct date.


Selecting a Date
We also want to listen for a click event when a day is clicked and do the following:
- retrieve the
currentDatevalue from the data attribute of the clicked element - display the selected date on the screen.
1 |
function displaySelected() { |
2 |
const dayElements = document.querySelectorAll(".days div"); |
3 |
dayElements.forEach((day) => { |
4 |
day.addEventListener("click", (e) => { |
5 |
const selectedDate = e.target.dataset.date; |
6 |
selected.innerHTML = `Selected Date : ${selectedDate}`; |
7 |
});
|
8 |
});
|
9 |
}
|
10 |
displaySelected(); |
In the code above, we iterate through the day elements, assigning a click event listener to each div element. When clicked, we retrieve the current date from the data-date attribute and update the display element with the formatted current date.
The displaySelected() function is then invoked.
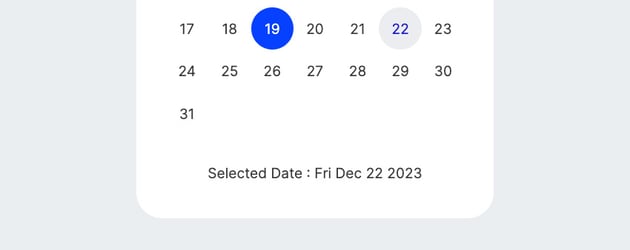
You should see the following label displayed at the bottom of the UI when you click any date.


Final JavaScript Calendar Functionality
The final functionality is to ensure the correct month and year are displayed when the prev and next elements are clicked.
1 |
previous.addEventListener("click", () => { |
2 |
days.innerHTML = ""; |
3 |
selected.innerHTML = ""; |
4 |
|
5 |
if (month < 0) { |
6 |
month = 11; |
7 |
year = year - 1; |
8 |
}
|
9 |
|
10 |
month = month - 1; |
11 |
console.log(month); |
12 |
date.setMonth(month); |
13 |
|
14 |
|
15 |
displayCalendar(); |
16 |
displaySelected(); |
17 |
});
|
In the code above:
-
days.innerHTML = "";: Clears the content of HTML div elements for the current month. -
selected.innerHTML="";: Clears the contents of thecurrentDate. - In the for loop, we first check if the current month is less than 0 (January ). If true, we set the month to December (December has index 11) and also decrease the year by 1. If false, we decrement the month only.
-
dateToday.setMonth(month);: sets the month to the newly updated month. Finally, we invoke thedisplayCalendar()anddisplaySelected()functions.
For the next element, we check if the month is greater than 11 (December) and if true, we set the month to 0 and increment the year to the next year. Otherwise, we increment the month by 1.
1 |
next.addEventListener("click", () => { |
2 |
days.innerHTML = ""; |
3 |
selected.innerHTML = ""; |
4 |
|
5 |
if (month > 11) { |
6 |
month = 0; |
7 |
year = year + 1; |
8 |
}
|
9 |
|
10 |
month = month + 1; |
11 |
date.setMonth(month); |
12 |
|
13 |
displayCalendar(); |
14 |
displaySelected(); |
15 |
});
|
Conclusion
This tutorial has covered how to use JavaScript to create a fully functional calendar dynamically. Hopefully, you’ve learned a lot, and you are now in a position to create dynamic JavaScript calendars for different purposes!