This tutorial will give an introduction to sockets in Python and how to use the socket module to build HTTP servers and clients in Python. It will also cover Tornado, a Python networking library which is ideal for long polling, WebSockets, and other applications that require a long-lived connection to each user.
What Are Sockets?
A socket is a link between two applications that can communicate with one another (either locally on a single machine or remotely between two machines in separate locations).
Basically, sockets act as a communication link between two entities, i.e. a server and a client. A server will give out information being requested by a client. For example, when you visited this page, the browser created a socket and connected to the server.
The socket Module
In order to create a socket, you use the socket.socket() function, and the syntax is as simple as:
import socket
s= socket.socket (socket_family, socket_type, protocol=0)
Here is the description of the arguments:
- socket_family: Represents the address (and protocol) family. It can be either AF_UNIX or AF_INET.
- socket_type: Represents the socket type, and can be either SOCK_STREAM or SOCK_DGRAM.
- protocol: This is an optional argument, and it usually defaults to 0.
After obtaining your socket object, you can then create a server or client as desired using the methods available in the socket module.
Create a Simple Client
Before we get started, let’s look at the client socket methods available in Python.
s = socket.socket(socket.AF_INET, socket.SOCK_STREAM)-
s.connect(): Initiates a TCP server connection.
To create a new socket, you first import the socket method of the socket class.
import socket
Next, we’ll create a stream (TCP) socket as follows:
stream_socket = socket.socket( socket.AF_INET, socket.SOCK_STREAM )
The AF_INET argument indicates that you’re requesting an Internet Protocol (IP) socket, specifically IPv4. The second argument is the transport protocol type SOCK_STREAM for TCP sockets. Additionally, you can also create an IPv6 socket by specifying the socket AF_INET6 argument.
Specify the server.
server = "localhost"
Specify the port we want to communicate with.
port =80
Connect the socket to the port where the server is listening.
server_address = ((host, port))
stream_socket.connect(server_address)
It’s important to note that the host and port must be a tuple.
Send a data request to the server:
message = 'message'
stream_socket.sendall(message)
Get the response from the server:
data = sock.recv(10)
print(data)
To close a connected socket, you use the close method:
stream_socket.close()
Below is the full code for the Client/Server.
import socket

# Create a TCP/IP socket
stream_socket = socket.socket(socket.AF_INET, socket.SOCK_STREAM)

# Define host
host = 'localhost'

# define the communication port
port = 8080

# Connect the socket to the port where the server is listening
server_address = ((host, port))

print("connecting")

stream_socket.connect(server_address)


# Send data
message = 'message'
stream_socket.sendall(message.encode())

# response
data = stream_socket.recv(10)
print(data)


print('socket closed')
Build a Simple Server
Now let’s take a look at a simple Python server. The following are the socket server methods available in Python.
s = socket.socket(socket.AF_INET, socket.SOCK_STREAM)-
s.bind(): Binds address (hostname, port number) to socket. -
s.listen(): Sets up and starts TCP listener. -
s.accept(): Accepts TCP client connection.
We will follow the following steps:
- Create a socket.
- Bind the socket to a port.
- Start accepting connections on the socket.
Here is the server program.
import socket

# Create a TCP/IP socket
sock = socket.socket(socket.AF_INET, socket.SOCK_STREAM)

# Define host
host = 'localhost'

# define the communication port
port = 8080

# Bind the socket to the port
sock.bind((host, port))
# Listen for incoming connections
sock.listen(1)

# Wait for a connection
print('waiting for a connection')
connection, client = sock.accept()

print(client, 'connected')

# Receive the data in small chunks and retransmit it

data = connection.recv(16)
print('received "%s"' % data)
if data:

    connection.sendall(data)
else:
    print('no data from', client)


# Close the connection
connection.close()
The server is now ready for incoming connections.
Now run the client and server programs in separate terminal windows, so they can communicate with each other.
Server Output
$ python server.py
waiting for a connection
('127.0.0.1', 45504) connected
received "b'message'
Client Output
$ python client.py
connecting
b'message'
socket closed
To view which ports are currently being used, you can use the nestat -ntlp command as shown below
The Tornado Framework
The Tornado framework is one of the libraries available for network programming in Python. In this section, we will discuss this library and show how to use it to build WebSockets.
Tornado is a Python web framework and asynchronous networking library. Tornado uses the non-blocking network I/O, and hence is capable of scaling to tens of thousands of open connections. This trait makes it ideal for long polling, WebSockets, and other applications that require a long-lived connection to each user.
Let’s create a simple Tornado WebSocket:
import tornado.ioloop
import tornado.web


class ApplicationHandler(tornado.web.RequestHandler):

    def get(self):
        self.message = message = """<html>
<head>
    <title>Tornado Framework</title>

</head>
<body
    <h2>Welcome to the Tornado framework</h2>
</body>
</html>"""
        self.write(message)


if __name__ == "__main__":
    application = tornado.web.Application([
        (r"/", ApplicationHandler),
    ])
    application.listen(5001)
    tornado.ioloop.IOLoop.instance().start()
In the code above:
- We define the class
ApplicationHandlerwhich serves as the handler for a request and returns a response using thewrite()method. - The
mainmethod is the entry for the program. -
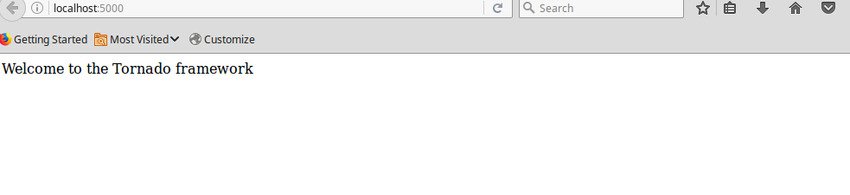
tornado.web.Applicationcreates a base for the web application and takes a collection of handlers, i.e. ApplicationHandler. - The Application listens on port 5000, and a client can communicate to this application using the same port.
-
tornado.ioloop.IOLoop.instance().start()creates a nonblocking thread for an application.
If we run the application, we will get the result as shown in the screenshot below.


Tornado also integrates with the asyncio module allowing you to use the two libraries in the same event loop. Asyncio is a python library that will enable you to write coroutines with async/await syntax.
Synchronous Vs Asynchronous Programming
Synchronous programming is where tasks are in sequence. All tasks follow a particular order; this means that each task is done from start to finish before the next task starts.
A disadvantage of synchronous programming is that if a specific task takes considerably longer to execute, the preceding tasks must wait for the task to complete; this causes delays.
Asynchronous programming, however, means that tasks can coincide without waiting for other jobs to finish execution.
Asynchronous communication is primarily used in chat applications as well as applications that show real-time data.
Asynchronous programming saves the day when fetching data from an API. Fetching data from an API or making an HTTP request can take longer than expected; rather than waiting for the http request to complete, you can apply an async function on the HTTP call.
Async calls free up programs to continue executing in other areas.
Another advantage of Asynchronous programming is that if you are making multiple requests, and one of the requests suddenly stops, this doesn’t affect others since the program is allowed to move to the next task.
Suppose you have an application that requests several times to an external API server. With synchronous programming, the application will have to wait until the proceeding API completes the HTTP request and returns the response, making your application slow.
For example, suppose we want to request an external API such as the weather API. Let’s perform both synchronous and asynchronous calls with Tornado to fetch the weather information for the city of London.
# synchronous function

from tornado.httpclient import HTTPClient
key = 'my_secret_key'

def get_weather():
    city = 'london'
    url = 'https://api.weatherapi.com/v1/current.json?key='+key+'&q='+city+'&aqi=no'
    print(url)
    http_client = HTTPClient()
    response = http_client.fetch(url)
    return (response.body)

# Asynchronous function
from tornado.httpclient import AsyncHTTPClient
secret_key = 'my_secret_key'

async def get_weather():
    city = 'london'
    url = 'http://api.weatherapi.com/v1/current.json?key='+key+'&q='+city+'&aqi=no'
    print(url)
    http_client = AsyncHTTPClient()
    response = await http_client.fetch(url)
    return (response.body)
Conclusion
By now you must have grasped the basics of socket programming in Python and how you can build a simple server and client. Feel free to experiment by building your own chat client. For more information, visit the official Python docs.
Thumbnail image generated with Open AI’s DALL-E.