In this free course, you’ll learn how to code with modern HTML and CSS, the main building blocks of any website. If you want to become a successful web developer, this is where you need to start!
At the end of 32 lessons (more than eight hours of learning) where we cover everything from basic HTML elements to working with Flexbox and CSS Grid, you’ll test your new skills by building a complete web page.
Who is This FREE Course For?
- Designers who want to branch out
- Programmers who want to expand their expertise
- Anyone who wants to learn something new and exciting
Watch Full HTML & CSS Course
Introduction
1. Welcome to the Course!
This is a huge course. It starts with HTML; the markup language which defines the structure of web pages. Then we move onto CSS which is a “declarative” styling language. It’s what we use to make our websites look pretty. In the final lessons we’ll use our newly acquired knowledge to build a simple web page.
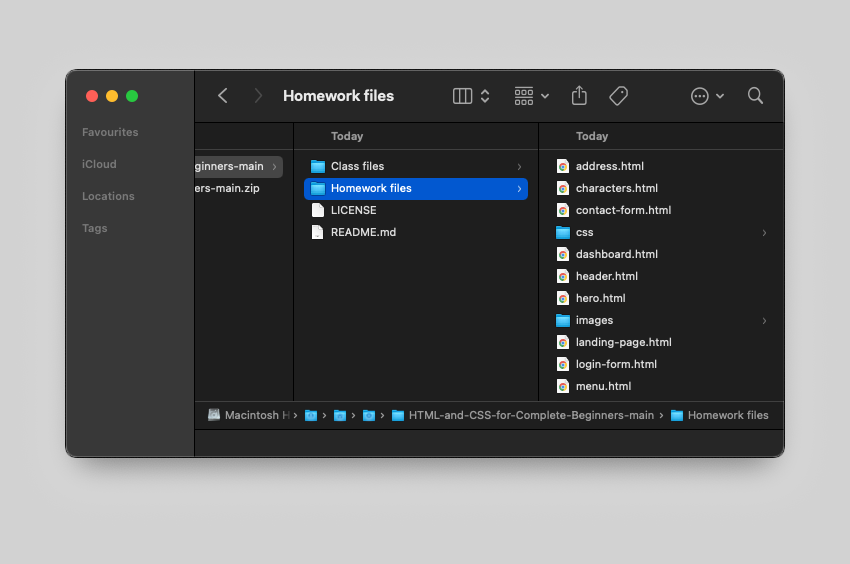
At the end of the course you’ll also receive some exercises as “homework” which are based off a Figma design I created. I highly recommend you do those because they’ll help you assimilate all the information I give you a lot more effectively. Download the course files below:
2. Prerequisites
Depending on the kind of coding we’re doing, we might need different tools. In this course we’re learning about HTML and CSS—languages used in front-end development (the presentation layer visitors see). The tools we need are therefore quite straightforward:
Let’s look at some options.
HTML: The Basics
3. How Websites Are Loaded
Have you ever asked yourself what happens when you type an address into a web browser and press Enter? You type in the URL, you hit enter, and the website is loaded. But what happens behind the scenes? Most people wouldn’t give it a second thought, but I think it’s important to understand this process as a web developer. It all boils down to Client > Server Communication. Let’s take a look.
4. What is HTML?
Before we can start writing HTML code, we need to know what HTML is. HTML stands for HyperText Markup Language and it’s the code that defines the structure and content of a web page.
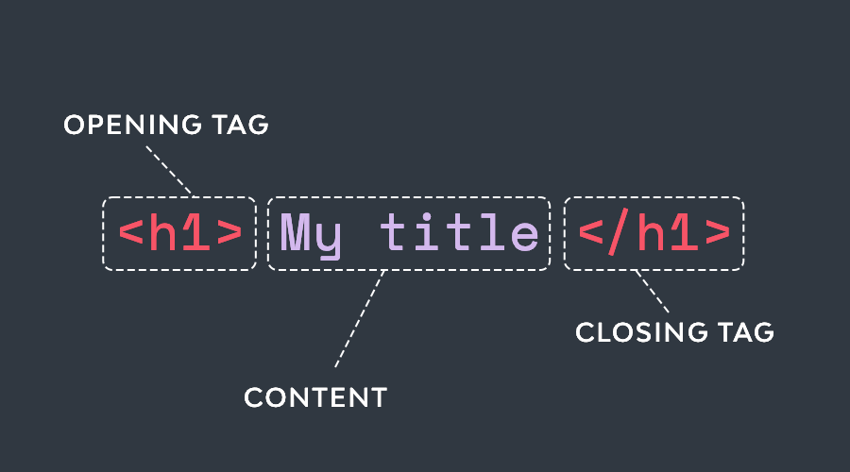
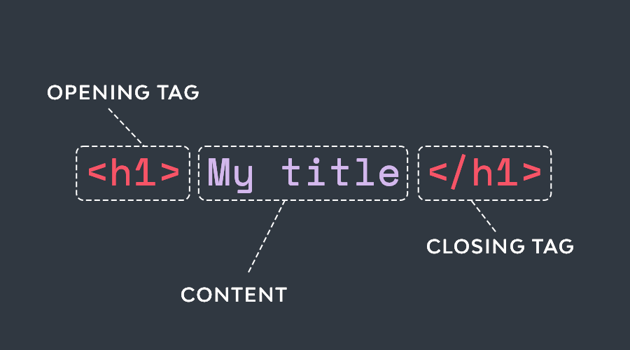
It’s actually quite easy to work with. We have entities called tags which you use to wrap various parts of your content with. Let’s look at some examples.

5. Let’s Create an HTML File
You can create an HTML file in pretty much any text editor, but I recommend you use one of the dedicated code editors I mentioned earlier. I’m going to be using Visual Studio Code, but you can use whatever you’re most comfortable with.
Let’s create our first HTML file and learn about its structure.
6. HTML Elements and Tags
I’ve briefly talked about HTML elements in a previous lesson, and before we move on I’d like to clarify something that could (potentially) be confusing: the difference between an HTML element and an HTML tag.
7. Inline vs. Block-Level Elements
To understand how inline is different to block, you must first understand how content flows in an HTML document. This lesson will make the difference clear.
HTML Elements You’ll Need
9. Text-Related Elements
Watch video lesson [1:08:00] ↗
If you think about it, most of the content within a given web page is text, which is why HTML gives us a lot of text-related elements. Headings, paragraphs, and links are just a few examples. In this lesson I won’t go over every single one of them (we’d be here forever) so, instead, I’ll cover the most commonly used ones.
10. Separating Content With Breaks
Watch video lesson [1:30:23] ↗
Who’s ready for a break? Well in this lesson we’ll talk about separators (which we use to separate content), the technical term for which is break. There are two such elements in HTML:
Let’s look at which is which, and what we can use them for.
11. Using Lists
Watch video lesson [1:36:24] ↗
HTML has three list elements:
In this lesson we’ll discuss the first two because they’re used the most.
12. Working With Images
Watch video lesson [1:47:15] ↗
There are several ways to add images to a web page, but the easiest one is using the <img> tag (or as specialists refer to it: the image embed element). Let me show you the syntax and how to use it.
13. Using Forms and Buttons
Watch video lesson [2:04:31] ↗
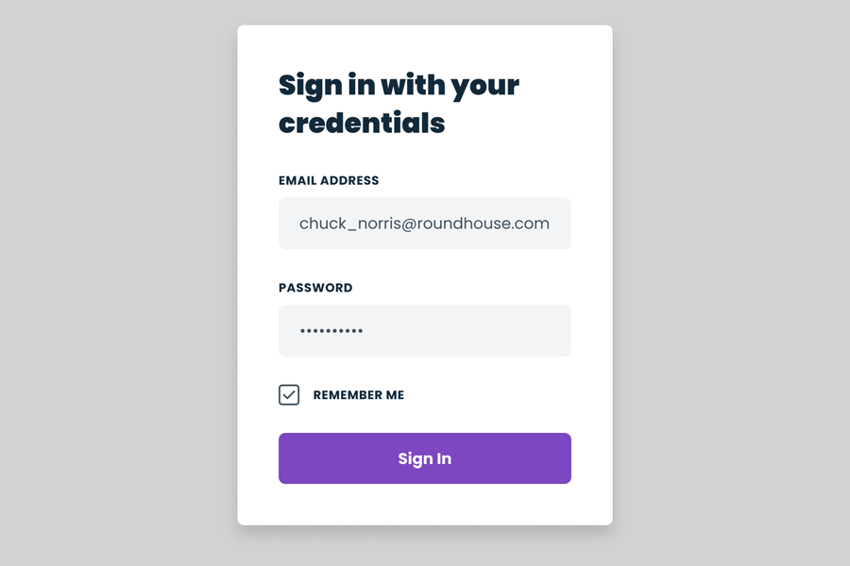
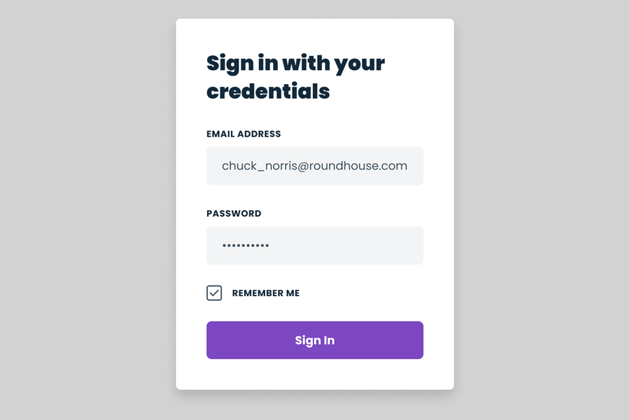
Forms are essential components in HTML because they allow for user input. Think about how you use a login, or contact form; you enter your information, press a button, then that information gets submitted to be processed in various ways.
HTML has a <form> element, but that’s just the tip of the iceberg.. The form element on its own is useless. We need to populate that form with other form-related elements like inputs, buttons, and text. For this reason forms are arguably the most complex components in HTML, so let’s see if we can explain them simply!
14. Displaying Tabular Data With Tables
Watch video lesson [2:45:22] ↗
In the early days of the web, tables were used extensively—they were all we had to make layouts. Cells and rows, nested tables within other nested tables. It was a mess, because that’s not what HTML tables are for.
Thankfully, nowadays we have much better options for creating layouts, and we’ll discuss those in the CSS chapters of this course. This also means we can stick to using HTML tables for what they were always intended: displaying tabular data. In this lesson I’ll explain the syntax and how we use tables.
15. HTML5 Semantic Elements
Watch video lesson [2:54:12] ↗
Let me quickly introduce you to “HTML5”. HTML5 refers to the latest version of HTML which was released back in 2014. But it also represents a wider array of technologies like enhanced JavaScript APIs, multimedia support, new video formats, and a lot more.
Among the changes that came with HTML5 we find a couple of new HTML elements, known officially as semantic elements. Predictably this list is quite large, and there’s no point in learning all of them now. Instead, I recommend you focus on a handful of the most commonly used, like these:
<header><footer><nav><aside><main><article><section>
In this lesson I’ll explain what each one does and how you use it, but first of all, you’re probably wondering “what the heck is a semantic element?!” Let me leave you with this before you check out the video lesson:
“A semantic element clearly describes its meaning to both the browser and developer.”
CSS: The Basics
16. What is CSS?
Watch video lesson [3:01:59] ↗
We’re three hours into this MEGA free course, well done! Let’s now take things to the next level and learn about CSS. But what is CSS?
CSS stands for Cascading Style Sheets and it’s a styling language. It tells the browser how to present an HTML document to the user. You may also have heard of CSS preprocessors like Sass and LESS, but I’ll explain all about those in this lesson.
Neither HTML nor CSS is a programming language. HTML is a markup language (for structure) and CSS is a styling language (for visual presentation).
17. Adding CSS to an HTML Page
Watch video lesson [3:04:39] ↗
There are three ways we can add CSS to an HTML page:
Let’s have a look at each, and see which one we should use for different situations.
18. Using CSS Selectors
Watch video lesson [3:11:59] ↗
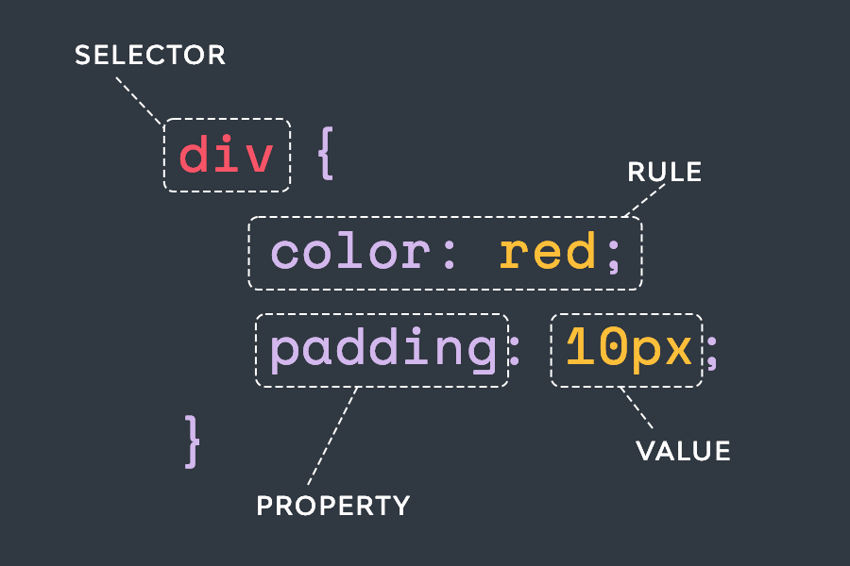
The way CSS works is pretty simple: you tell the browser which elements you want to style, and then how you want to style them. The first part of this process is done with CSS Selectors, the second part is handled by CSS Rules comprising properties and values (something we’ll talk about in the next lesson).
Let me explain the anatomy of a CSS selector, and what kinds of selectors you can use.

19. Working With Color in CSS
Watch video lesson [3:29:37]] ↗
The first styles you’ll be applying in CSS will likely be color-related. Color is everywhere—from text, button backgrounds, section backgrounds, to border colors, and everything between. There are all kinds of ways to apply color in CSS, but in this lesson I’ll show you two properties you’ll be using 90% of the time.
20. Let’s Discover the CSS Units
Watch video lesson [3:40:49] ↗
As you learn more about CSS properties you’ll realize that most of them have numeric values attached to them. Most of these numeric values also have units, in the same we we use units of measurement in every day life (buying 1L of soda, or 2 kg of potatoes, for example).
The units we use in CSS pertain to the screen environment, such as px, em, rem, % and so on. Let me give you a quick guide to the units we might use in CSS, plus where and how to use them.
Getting Practical With CSS
21. Styling Text With CSS
Watch video lesson [3:54:36] ↗
Styling text in CSS is something you’ll be doing quite often, because (as we’ve discussed already) the majority of a given web page is usually textual content. CSS gives us some great tools to style text in pretty much any way we want, and in this lesson I’ll show you some of the more commonly used properties for doing so.
22. Setting Dimensions in CSS
Watch video lesson [4:10:08] ↗
At some point in a CSS project you’ll have to write some styles to make an element bigger or smaller. Thankfully that’s super simple to do, and in CSS we can even define minimum and maximum dimensions.


23. The CSS Box Model
Watch video lesson [4:20:46] ↗
The first thing you need to understand about the Box Model is that everything has a box around it. From images, to paragraphs, headings, and spans.
Open file 2-5.html for a reminder of how boxes work.
These boxes aren’t visible (unless you deliberately style them to be) but they exist, and they affect the flow of all elements around them.
The second thing you need to understand is that each box is actually built from several other boxes:

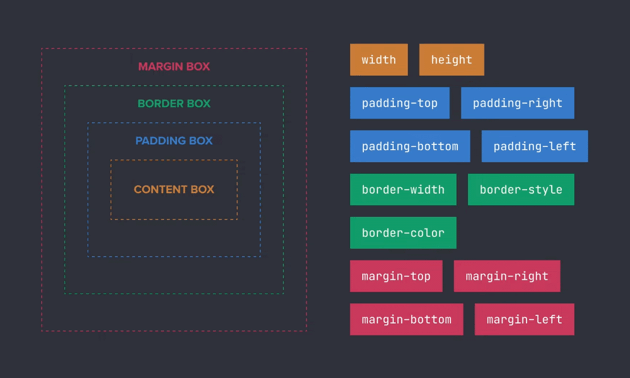

We’ll go over the box model in detail during this lesson, but to summarize:
- The content box is the area where content is displayed. Its size can be controlled with the
widthandheightproperties. - The padding box is found outside the content and adds whitespace. We can control the size of this using the
paddingproperties. - The border box wraps the content and any padding we add. Its size can be controlled through the
borderproperties. - The margin box wraps everything: the content, the padding, and the borders. It adds whitespace around the whole element and its size can be controlled with
marginproperties.
24. Working With Borders in CSS
Watch video lesson [4:45:44] ↗
The third box in the box model is the border box, and you can control its size and styles using border properties. Let’s take a closer look.
25. Using the Display Property in CSS
Watch video lesson [4:55:25] ↗
Before we start coding we need to understand the two display types: inner and outer.
“In CSS, boxes have an outer display type which specifies whether the box is block or inline. They also have an inner display type which dictates how the elements inside the box are laid out.”
26. Styling Lists in CSS
Watch video lesson [5:05:04] ↗
Lists are very common in web design. You can use them to structure an ingredient list in a recipe, a table of contents, navigation, and so on—they’re very versatile. But what kind of styling can you apply to them? Can you get rid of, or replace the bullets? Can you display lists horizontally? Let’s find out.
27. Positioning Elements in CSS
Watch video lesson [5:15:56] ↗
This is probably one of the most burning questions when it comes to CSS: “how do I precisely position an element?” The answer to this, and many other layout questions, lies in the position property. I’ve prepared a few examples in the demo files, so let’s look at them and explore different types of positioning.
28. Styling Backgrounds in CSS
Watch video lesson [5:30:22] ↗
HTML elements can have two kinds of backgrounds: color and image. We’ve already covered color backgrounds in a previous lesson, so in this one we’ll focus on images. Images in this context can actually mean one of two things: a normal image, or a CSS gradient. So with all that laid out, let’s dive in and have a look!


29. Building Layouts With Flexbox and CSS Grid
Watch video lesson [5:52:10] ↗
Flexbox and CSS Grid are two of the most powerful tools you can use in CSS to create layouts, so it’s really important you learn how to use them. With that said, they can both be very complex—I could record multiple courses just on Flexbox alone. I don’t think either of these topics is suitable for a beginners course, however, given their importance, I will give you a short introduction to give you a feel for what they can do.
warning
Flexbox and CSS Grid are complex subjects! This lesson is merely a beginner’s introduction.
You’ll notice I’m bundling these two complex things into the same lesson. This is so you can see the differences and gain an understanding of which is better suited to different situations.
30. Working with Media Queries for Creating Responsive Websites
Watch video lesson [6:19:43] ↗
A responsive website will change its layout and behavior based on the medium it’s being displayed on. A responsive website will therefore appear different on a big screen, to how it appears on a mobile screen. This was once a novel concept, but is nowadays accepted as being the logical, normal behavior of a website.
CSS gives us all kinds of tools for responsive web design, arguably most powerful of which being media queries, which we’ll discover in this lesson.
“A media query modifies how certain elements are rendered based on the device type (for example: print or screen) or based on specific characteristics (like screen resultion or browser width).”
Test Your HTML and CSS Skills
31. Let’s Code a Simple Design with HTML and CSS
Watch video lesson [6:32:37] ↗
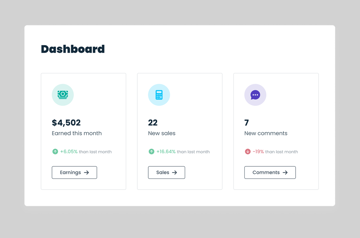
Now it’s time to implement all the knowledge we’ve gained on this course, by doing a simple exercise. We’re going to code a basic web page using HTML and CSS.
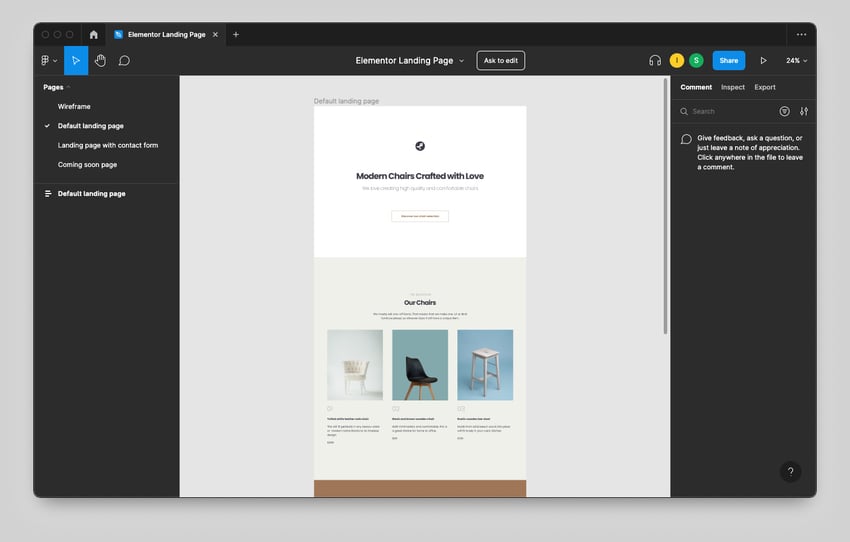
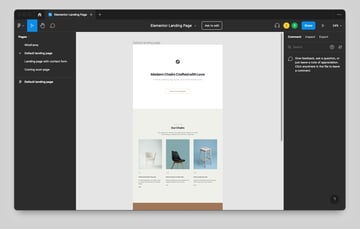
I’ll be working from a Figma design, which you can access as well, and I’ll essentially be showing you my process of coding a web page. I’ll be going quite quickly because I won’t be explaining each element or style that I’m using, but you always have the pause button!
Here’s what we’re going to work from:

32. Conclusion and Homework
Watch video lesson [7:46:03] ↗
First of all: big congrats for making it to the end of this massive free course! I hope you found it useful and that you learned something valuable.
I realize I’ve given you a ton of information in a relatively short amount of time, so if you find you haven’t been able to absorb everything at this point, don’t worry! I honestly don’t expect you to. It took me years to learn all the information I’ve shared here, so the best thing to do is just keep practicing, keep learning, and keep building those skills!
Homework
To help you improve I’ve prepared some homework for you, which is basically a series of smaller exercises.


HTML & CSS Tutorials on Tuts+
To continue your learning, take a look at these HTML & CSS resources on Tuts+.