Introduction
UIKit is a very powerful framework and provides various ways to transition between view controllers. Some of the animations provided by UIKit include horizontal sliding (via a push segue), vertical sliding, cross fade, and page curl. Sometimes, however, you need to have a custom transition between view controllers to create a compelling design or deliver a unique user experience. A good example of custom transitions is Apple’s Photos for iOS when selecting a photo.
In this tutorial, I show you how to create your own custom transitions through the use of multiple UIKit APIs.
Requirements
While the APIs used to create custom transitions were introduced in iOS 7, this tutorial uses Auto Layout and Swift 2, which means that you need to be running Xcode 7+ on OS X Yosemite or later. You also need to download the starter project from GitHub.
1. Components of a Custom Transition
When implementing a custom view controller transition, there are two main components you need to be aware of:
- animation controller, also referred to as the animator
- transitioning delegate, a view controller that you assign
The animator object is responsible for the transition in terms of both the duration and the actual logic of animating the views. The animation controller in your app can be any type of object as long as it conforms to the UIViewControllerAnimatedTransitioning protocol.
The transitioning delegate is responsible for providing the animation controller to be used for the custom transition. The delegate object you designate must conform to the UIViewControllerTransitioningDelegate protocol.
2. Creating a Custom Transition
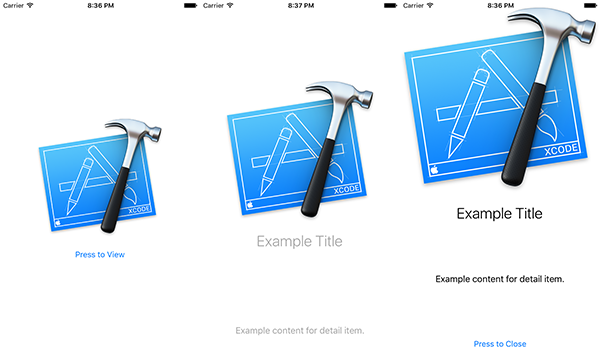
Open the starter project and run your app. When you tap the Press to View button, the standard vertical modal transition is currently being used.
Create a new file by selecting New > File… from the File menu. From the options that are shown, select iOS > Source > Swift File and name the file CustomTransition. This file is going to hold the logic needed for the custom transition.
Firstly, we are going to define the animation controller class that will be used for the custom transition. Add the following code to CustomTransition.swift:
import UIKit

enum TransitionType {
    case Presenting, Dismissing
}

class AnimationController: NSObject, UIViewControllerAnimatedTransitioning {
    var duration: NSTimeInterval
    var isPresenting: Bool
    var originFrame: CGRect

    init(withDuration duration: NSTimeInterval, forTransitionType type: TransitionType, originFrame: CGRect) {
        self.duration = duration
        self.isPresenting = type == .Presenting
        self.originFrame = originFrame

        super.init()
    }

    func transitionDuration(transitionContext: UIViewControllerContextTransitioning?) -> NSTimeInterval {
        return self.duration
    }
}
We define a TransitionType enumeration, which is used when creating an AnimationController object.
Next, we define the AnimationController class with a few properties. The duration property is going to be used to determine the animation duration and is the value returned in the UIViewControllerAnimatedTransitioning protocol method transitionDuration(_:). This duration does not have to be a variable, but it is easier to change when only set once when creating the animation controller. Both the isPresenting and originFrame properties will be used to create the animation of the transition.
At this point, Xcode should be presenting you with an error. This is because we have not implemented the a required method of the UIViewControllerAnimatedTransitioning protocol. Before we implement this method, there is one important thing you need to know.
When your custom transition begins, UIKit provides you with a container view in which you must perform the animations for the transition. In this container view, you must manually add the view of the view controller you are transitioning to. This container view only lives for the duration of the transition and is removed from the view hierarchy as soon as your animation has finished.
Now we are going to implement the custom animation. Add the following method to the AnimationController class:
func animateTransition(transitionContext: UIViewControllerContextTransitioning) {
    let containerView = transitionContext.containerView()!

    let fromView = transitionContext.viewControllerForKey(UITransitionContextFromViewControllerKey)!.view
    let toView = transitionContext.viewControllerForKey(UITransitionContextToViewControllerKey)!.view

    let detailView = self.isPresenting ? toView : fromView

    if self.isPresenting {
        containerView.addSubview(toView)
    } else {
        containerView.insertSubview(toView, belowSubview: fromView)
    }

    detailView.frame.origin = self.isPresenting ? self.originFrame.origin : CGPoint(x: 0, y: 0)
    detailView.frame.size.width = self.isPresenting ? self.originFrame.size.width : containerView.bounds.width
    detailView.layoutIfNeeded()

    for view in detailView.subviews {
        if !(view is UIImageView) {
            view.alpha = isPresenting ? 0.0 : 1.0
        }
    }

    UIView.animateWithDuration(self.duration, animations: { () -> Void in
        detailView.frame = self.isPresenting ? containerView.bounds : self.originFrame
        detailView.layoutIfNeeded()

        for view in detailView.subviews {
            if !(view is UIImageView) {
                view.alpha = self.isPresenting ? 1.0 : 0.0
            }
        }
    }) { (completed: Bool) -> Void in
        transitionContext.completeTransition(!transitionContext.transitionWasCancelled())
    }
}
We start off this method by retrieving the container view from the provided transition context using the containerView() method. We access the from and to views by invoking the viewControllerForKey(_:) method, passing in UITransitionContextFromViewControllerKey and UITransitionContextToViewControllerKey respectively.
In iOS 8 and later, you can get direct access to the views using the viewForKey(_:) method and the UITransitionContextFromViewKey and UITransitionContextToViewKey keys.
In the method body, we animate the detail view to either grow or shrink using existing UIView animation APIs.
The last important thing to note is the completeTransition(_:) method called on the transition context object. This method must be called once your animation has completed to let the system know that your view controllers have finished transitioning. This method accepts a boolean as its single parameter, which indicates whether or not the transition was completed or not.
With this implementation, we have created a fully functional animation controller. To actually implement this, we now need to set up a transitioning delegate.
3. Assigning a Transitioning Delegate
As I mentioned earlier, the job of the transitioning delegate is to provide the animation controller object for a transition between two view controllers. The transitioning delegate can be whatever object you want, but the common practice is to make the presenting view controller the delegate.
In CustomTransition.swift, add the following code below the AnimationController class definition:
extension ViewController: UIViewControllerTransitioningDelegate {
    override func prepareForSegue(segue: UIStoryboardSegue, sender: AnyObject?) {
        segue.destinationViewController.transitioningDelegate = self
    }

    func animationControllerForDismissedController(dismissed: UIViewController) -> UIViewControllerAnimatedTransitioning? {
        return AnimationController(withDuration: 3.0, forTransitionType: .Dismissing, originFrame: self.image.frame)
    }

    func animationControllerForPresentedController(presented: UIViewController, presentingController presenting: UIViewController, sourceController source: UIViewController) -> UIViewControllerAnimatedTransitioning? {
        return AnimationController(withDuration: 3.0, forTransitionType: .Presenting, originFrame: self.image.frame)
    }
}
By implementing this extension, we make the ViewController class conform to the UIViewControllerTransitioningDelegate protocol and implement three methods. The first, prepareForSegue(_:sender:), is used to designate the current ViewController instance as the destination DetailViewController object’s transitioningDelegate. The other two methods create an AnimationController object for presenting and dismissing the view controller using the initializer we defined earlier. If you return nil from either of these methods, the default or standard view controller transition will be used instead.
With the transitioning delegate set up, it is time to build and run your app. This time when you tap the Press to View button, you should see the Xcode icon grow in size and the other labels fade in. Likewise, when you tap the Press to Close button, you should see the same animation but in reverse.

Congratulations. You have now successfully created your very first custom view controller transition on iOS.
4. Making a Transition Interactive
To make the custom transition even better, we are going to make it interactive and responsive. A good example of this is the UINavigationController swipe gesture from the left edge to go back.
To make a custom transition interactive, you first need to have an object that conforms to the UIViewControllerInteractiveTransitioning protocol. For this tutorial, we are going to use a class provided by UIKit that already conforms to this protocol, UIPercentDrivenInteractiveTransition.
In order to communicate easily between the view controllers (the transitioning delegate and the view controller determining the percentage complete of the transition), open DetailViewController.swift and add the following property to the DetailViewController class:
var rootViewController: ViewController!
Next, add the following code to the didPanDown(_:) method of the DetailViewController class:
@IBAction func didPanDown(sender: UIPanGestureRecognizer) {
    let progress = sender.translationInView(self.view).y/self.view.frame.size.height

    switch sender.state {
    case .Began:
        self.rootViewController.interactionController = UIPercentDrivenInteractiveTransition()
        self.dismissViewControllerAnimated(true, completion: nil)
    case .Changed:
        self.rootViewController.interactionController?.updateInteractiveTransition(progress)
    case .Ended:
        if progress >= 0.5 {
            self.rootViewController.interactionController?.finishInteractiveTransition()
        } else {
            self.rootViewController.interactionController?.cancelInteractiveTransition()
        }

        self.rootViewController.interactionController = nil
    default:
        self.rootViewController.interactionController?.cancelInteractiveTransition()
        self.rootViewController.interactionController = nil
    }
}
In the didPanDown(_:) method, we calculate the value of the progress variable in terms of how far the user has panned in relation to the detail view. If the pan has just begun, we create the interaction controller object and begin the view controller dismissal. Whenever the pan gesture moves within the view, we update the interaction controller with how far the transition should have progressed.
Lastly, when the pan has ended, we either finish or cancel the transition using the finishInteractiveTransition() and cancelInteractiveTransition() methods respectively.
Next, go back to CustomTransition.swift and replace the prepareForSegue(_:sender:) method in the ViewController class extension with the following:
override func prepareForSegue(segue: UIStoryboardSegue, sender: AnyObject?) {
    segue.destinationViewController.transitioningDelegate = self
    (segue.destinationViewController as? DetailViewController)?.rootViewController = self
}
In prepareForSegue(_:sender:), we give the detail view controller access to the root view controller.
Finally, add the following method to the ViewController extension:
func interactionControllerForDismissal(animator: UIViewControllerAnimatedTransitioning) -> UIViewControllerInteractiveTransitioning? {
    return self.interactionController
}
The interactionControllerForDismissal(_:) method returns the root view controller’s interactionController. If it is nil (for example, if the button is tapped), the custom animation will be used instead.
As you would expect, an interactive controller can also be used when presenting view controllers by implementing the interactionControllerForPresentation(_:) method.
Build and run your app one last time and, after presenting your detail view controller, drag down on the screen and you will see the transition move in sync with the position of your finger.
Conclusion
You should now be comfortable creating fully interactive, custom view controller transitions on iOS. As you can see, these APIs are only held back by the animation capabilities of UIKit and Core Animation. They can be utilized for almost any kind of transition. As always, leave your comments and feedback in the comments below.