1. Placing Content With HTML
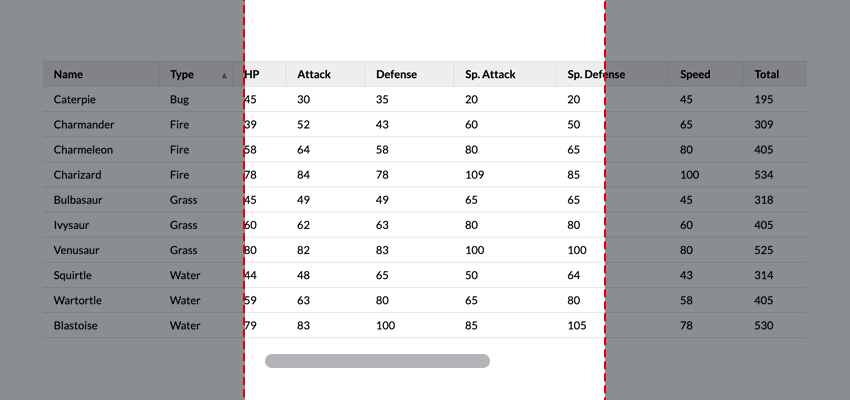
The <table> tag is the semantic HTML tag used for displaying data on a webpage. We’ll be placing our <table> tag within a table-container div which will allow us include some responsive styling in CSS.
<div class="table-container">
  <table class="data-table">
  </table>
</div>
Our table will contain the table header, thead and table content, tbody tags. In our table header, we’ll include buttons in each th cell which will be used to handle the sorting functionality. The cells for table content will added in with JavaScript using the data from our JSON response.
<div class="table-container">
  <table class="data-table">
    <thead>
      <tr>
        <th><button id="name">Name</button></th>
        <th><button id="type">Type</button></th>
        <th><button id="hp">HP</button></th>
        <th><button id="attack">Attack</button></th>
        <th><button id="defense">Defense</button></th>
        <th><button id="spAttack">Sp. Attack</button></th>
        <th><button id="spDefense">Sp. Defense</button></th>
        <th><button id="speed">Speed</button></th>
        <th><button id="total">Total</button></th>
      </tr>
    </thead>
    <tbody id="table-content"></tbody>
  </table>
</div>
2. Making a Responsive Table with CSS
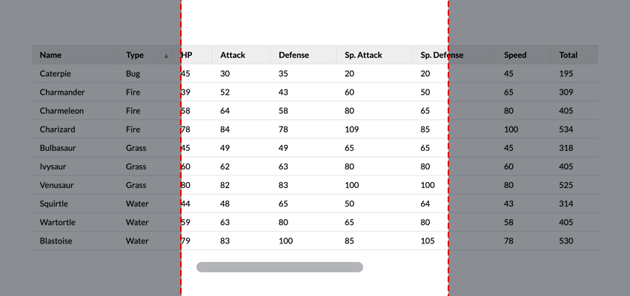
One of the more common problems of working with HTML tables is a lack of responsiveness. The table might have a cell overlap problem or go beyond the boundaries of the full page.
We can get rid of these issues by placing the table in a table-container that’s the width of the full page with an overflow scroll property. That way, the table is always only as wide as the full page and there’s no need to shrink the cells thanks to the scrollable overflow. We’ll also include min-width properties on our table cells to avoid text wrapping.
This is the CSS needed to make our table scrollable:
.table-container {
  width: 100%;
  overflow: scroll;
}

table {
  width: 100%;
}
We can then add the rest of our styling:
.table-container {
  margin: auto;
  max-width: 1200px;
  min-height: 100vh;
  overflow: scroll;
  width: 100%;
}

table {
  border-collapse: collapse;
  width: 100%;
}

thead tr {
  border-bottom: 1px solid #ddd;
  border-top: 1px solid #ddd;
  height: 1px;
}

th {
  font-weight: bold;
  height: inherit;
  padding: 0;
}

th:not(:first-of-type) {
  border-left: 1px solid #ddd;
}

th button {
  background-color: #eee;
  border: none;
  cursor: pointer;
  display: block;
  font: inherit;
  height: 100%;
  margin: 0;
  min-width: max-content;
  padding: 0.5rem 1rem;
  position: relative;
  text-align: left;
  width: 100%;
}

tbody tr {
  border-bottom: 1px solid #ddd;
}

td {
  padding: 0.5rem 1rem;
  text-align: left;
}
3. Placing JSON Data in an HTML Table
For this example, we’ll be working with a mock parsed JSON response. This is what our data looks like:
const response = {
   "pokedata": [
      {
         "name": "Bulbasaur",
         "type": "Grass",
         "hp": 45,
         "attack": 49,
         "defense": 49,
         "spAttack": 65,
         "spDefense": 65,
         "speed": 45,
         "total": 318
      },
      ...
   ]
}
We’ll be placing the data within our <tbody id="table-content"> tag so we’ll target that element in JavaScript;
const tableContent = document.getElementById("table-content")
The row content will be based on each object within our response.pokedata. Let’s define a function for creating a new row based on the object data:
const createRow = (obj) => {
  const row = document.createElement("tr");
  const objKeys = Object.keys(obj);
  objKeys.map((key) => {
    const cell = document.createElement("td");
    cell.setAttribute("data-attr", key);
    cell.innerHTML = obj[key];
    row.appendChild(cell);
  });
  return row;
};
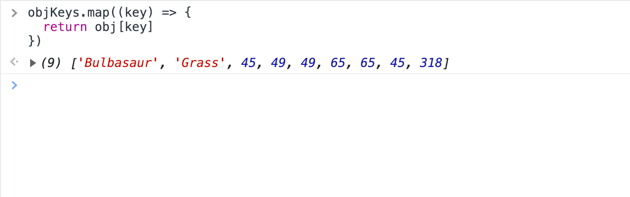
In this function, we use the Object.keys() method to get the object keys as an array. This is what the returned value looks like:
![Object.keys(obj) (9) ['name', 'type', 'hp', 'attack', 'defense', 'spAttack', 'spDefense', 'speed', 'total']](https://cdn.idevie.com/wp-content/uploads/2022/08/object_keys.png)
![Object.keys(obj) (9) ['name', 'type', 'hp', 'attack', 'defense', 'spAttack', 'spDefense', 'speed', 'total']](https://cdn.idevie.com/wp-content/uploads/2022/08/1660438442_137_object_keys.png)
![Object.keys(obj) (9) ['name', 'type', 'hp', 'attack', 'defense', 'spAttack', 'spDefense', 'speed', 'total']](https://cdn.idevie.com/wp-content/uploads/2022/08/1660438442_434_object_keys.png)
Once we’ve gotten the array of the object keys, we loop through each key using the .map() method. The map method carries out the function we’ve passed into it on each item in the array.
In this map function, we’re creating a new cell for each item in the array and setting the cell innerHTML as the corresponding object key value.


Finally, we append the cell we’ve created to the row defined at the beginning of the function using the .appendChild() method.
Now that we have our row creating function, we’ll define a function to loop through the response.pokedata array and append each new row to our tableContent element.
const getTableContent = (data) => {
  data.map((obj) => {
    const row = createRow(obj);
    tableContent.appendChild(row);
  });
};
We’ll pass our getTableContent function into an event listener so the content is added to the table once the page loads.
window.addEventListener("load", () => {
  getTableContent(response.pokedata);
});
4. Sorting Data With JavaScript
Now that we have created our table, let’s add the sorting functionality. In our HTML, we included buttons in the header cells which had the object keys as their id. Let’s target those buttons now:
const tableButtons = document.querySelectorAll("th button");
We want to handle sorting the data according to which button is clicked and also include a feature that toggles the sorting direction (ascending or descending) when the button is clicked.
We can use the .sort() method to handle sorting the data in our response.pokedata array. The sort method takes in a function comparing two different params and sorts them according to the function response:
compareFunction(a, b) return value
|
sort order |
|---|---|
| > 0 |
sort a after b
|
| < 0 | sort a before b |
| === 0 | keep original order of a and b
|
Source: MDN
Another thing to note about the sort method is that it mutates the original array that it operates on. This means it changes the value of our original array.


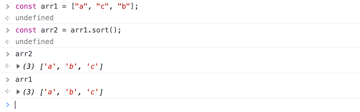
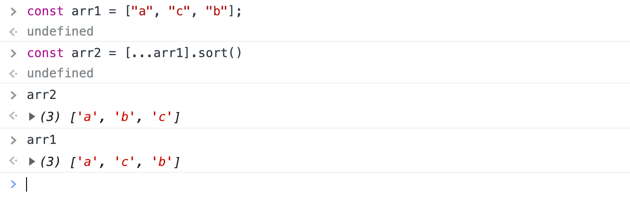
We can avoid mutating our original array by using the spread syntax […]

Now we can create our sorting function. This is what the logic for our sorting function will look like:
- Clear the content in the tableContent element
- Sort the data according to the selected param and direction
- Append the sorted data to our tableContent using the
getTableContentfunction
const sortData = (data, param, direction = "asc") => {
  tableContent.innerHTML = '';
  const sortedData =
    direction == "asc"
      ? [...data].sort(function (a, b) {
          if (a[param] < b[param]) {
            return -1;
          }
          if (a[param] > b[param]) {
            return 1;
          }
          return 0;
        })
      : [...data].sort(function (a, b) {
          if (b[param] < a[param]) {
            return -1;
          }
          if (b[param] > a[param]) {
            return 1;
          }
          return 0;
        });

  getTableContent(sortedData);
};
Our sort function takes three parameters:
-
data: the array to be sorted -
param: the value being used to sort the array -
direction: sort the array in either ascending or descending order. The default paramater value is set to “asc”.
We clear the content in our tableContent element by setting the innerHTML to a blank string. We then use the .sort() method and direction parameter to determine how the data should be sorted. We reverse the compare function in order to sort in descending order. Using the compare function this way lets us sort the data regardless of the type value (string, integer, float etc)
Finally, we pass the sortedData as the new value in our table content.
Now we’ll pass our sort function into a click event listener for our table buttons and also handle toggling the sort direction.
window.addEventListener("load", () => {
  getTableContent(response.pokedata);

  [...tableButtons].map((button) => {
    button.addEventListener("click", (e) => {

      if (e.target.getAttribute("data-dir") == "desc") {
        sortData(response.pokedata, e.target.id, "desc");
        e.target.setAttribute("data-dir", "asc");
      } else {
        sortData(response.pokedata, e.target.id, "asc");
        e.target.setAttribute("data-dir", "desc");
      }

    });
  });
});
In this function, we handle the toggling by setting a data-dir attribute on our buttons to determine the sorting direction. We’ll also update our CSS to display an icon next to the button depending on the sorting direction:
th button::after {
  position: absolute;
  right: 0.5rem;
}

th button[data-dir="asc"]::after {
  content: url("data:image/svg+xml,%3Csvg xmlns='https://www.w3.org/2000/svg' width='8' height='8'%3E%3Cpolygon points='0, 0 8,0 4,8 8' fill='%23818688'/%3E%3C/svg%3E");
}

th button[data-dir="desc"]::after {
  content: url("data:image/svg+xml,%3Csvg xmlns='http://www.w3.org/2000/svg' width='8' height='8'%3E%3Cpolygon points='4 0,8 8,0 8' fill='%23818688'/%3E%3C/svg%3E");
}
We don’t want to have the icons show up on all previously clicked buttons so we’ll define a resetButtons function that removes the data-dir attribute on any button that’s not the button clicked.
const resetButtons = (event) => {
  [...tableButtons].map((button) => {
    if (button !== event.target) {
      button.removeAttribute("data-dir");
    }
  });
};
We’ll pass that function into our button event listener to reset the previous buttons whenever a new button is clicked
window.addEventListener("load", () => {
  getTableContent(response.pokedata);

  [...tableButtons].map((button) => {
    button.addEventListener("click", (e) => {

      resetButtons(e);

      if (e.target.getAttribute("data-dir") == "desc") {
        sortData(response.pokedata, e.target.id, "desc");
        e.target.setAttribute("data-dir", "asc");
      } else {
        sortData(response.pokedata, e.target.id, "asc");
        e.target.setAttribute("data-dir", "desc");
      }

    });
  });
});
Conclusion
And with that, we’re done! We’ve created a sortable table using only vanilla JavaScript!