In this tutorial, we’re going to build a PHP/MySQL-powered forum from scratch in Laravel.
What Is Laravel?
From the official documentation:
Laravel is a web application framework with expressive, elegant syntax. We’ve already laid the foundation—freeing you to create without sweating the small things.
It’s an open-source PHP web application framework designed for the development of web applications following the model-view-controller (MVC) architectural pattern. It aims to make the development process easier by providing a set of ready-made tools that help you speed up development and write reusable and maintainable code.
By default, Laravel provides features such as routing, middleware, authentication, templating, database migration, and many more. So you don’t have to reinvent the wheel to implement common features and can instead focus on the business logic of your application. It also comes with a powerful ORM system called Eloquent, which simplifies database operations and makes it easy to work with databases.
Indeed, Laravel is a powerful and flexible framework which can be used to build a wide range of web applications, from simple blogs to complex e-commerce systems.
Today, we’re going to use it to build a simple forum with Laravel. Before we go ahead, you’ll need to install Laravel in your system. It’s fairly easy to install Laravel—just follow the official documentation.
How to Set Up a Database Configuration in Laravel
In Laravel, you need to follow these steps to set up a MySQL database configuration.
Open the .env file in the root directory of your Laravel application. Find the following lines in that file.
1 |
DB_CONNECTION= |
2 |
DB_HOST= |
3 |
DB_PORT= |
4 |
DB_DATABASE= |
5 |
DB_USERNAME= |
6 |
DB_PASSWORD= |
Set the value for each of the configuration settings, and you’re good to go. Your .env file might look like this:
1 |
DB_CONNECTION=mysql |
2 |
DB_HOST=localhost |
3 |
DB_PORT=3306 |
4 |
DB_DATABASE=forum |
5 |
DB_USERNAME=your_mysql_yourname |
6 |
DB_PASSWORD=your_mysql_password |
Once you have set up your MySQL database configuration, Laravel will automatically use it to connect to your MySQL database when you run your application.
Creating Database Tables
To create a MySQL table in Laravel, you can use Laravel’s built-in database migration feature. Laravel migrations provide a convenient way to manage database schema changes and version control.
Firstly, we’ll see how you can create the categories table with the help of the migration feature. You can repeat the same process to create other tables as well.
Open your terminal and navigate to the root directory of your Laravel application, and run the following command.
1 |
$php artisan make:migration categories
|
It should create a new migration file in the database/migrations directory. The filename should be named something like 2023_02_25_000000_create_categories_table.php. Open it and replace the contents with the following contents.
1 |
<?php
|
2 |
use IlluminateDatabaseMigrationsMigration; |
3 |
use IlluminateDatabaseSchemaBlueprint; |
4 |
use IlluminateSupportFacadesSchema; |
5 |
|
6 |
class CreateCategoriesTable extends Migration |
7 |
{
|
8 |
public function up() |
9 |
{
|
10 |
Schema::create('categories', function (Blueprint $table) { |
11 |
$table->increments('cat_id'); |
12 |
$table->string('cat_name', 255); |
13 |
$table->string('cat_description', 255); |
14 |
$table->timestamps(); |
15 |
});
|
16 |
}
|
17 |
|
18 |
public function down() |
19 |
{
|
20 |
Schema::dropIfExists('categories'); |
21 |
}
|
22 |
}
|
Go ahead and run the following command to create the categories table in your MySQL database.
In the same way, let’s create the rest of the tables.
1 |
$php artisan make:migration topics
|
2 |
$php artisan make:migration posts
|
Add the following contents in the topics migration file.
1 |
<?php
|
2 |
use IlluminateDatabaseMigrationsMigration; |
3 |
use IlluminateDatabaseSchemaBlueprint; |
4 |
use IlluminateSupportFacadesSchema; |
5 |
|
6 |
class CreateTopicsTable extends Migration |
7 |
{
|
8 |
public function up() |
9 |
{
|
10 |
Schema::create('topics', function (Blueprint $table) { |
11 |
$table->increments('topic_id'); |
12 |
$table->string('topic_subject', 255); |
13 |
$table->dateTime('topic_date'); |
14 |
$table->integer('topic_cat')->unsigned(); |
15 |
$table->integer('topic_by')->unsigned(); |
16 |
$table->timestamps(); |
17 |
});
|
18 |
}
|
19 |
|
20 |
public function down() |
21 |
{
|
22 |
Schema::dropIfExists('topics'); |
23 |
}
|
24 |
}
|
Finally, add the following contents in the posts migration file.
1 |
<?php
|
2 |
use IlluminateDatabaseMigrationsMigration; |
3 |
use IlluminateDatabaseSchemaBlueprint; |
4 |
use IlluminateSupportFacadesSchema; |
5 |
|
6 |
class CreatePostsTable extends Migration |
7 |
{
|
8 |
public function up() |
9 |
{
|
10 |
Schema::create('posts', function (Blueprint $table) { |
11 |
$table->increments('post_id'); |
12 |
$table->text('post_content'); |
13 |
$table->dateTime('post_date'); |
14 |
$table->integer('post_topic')->unsigned(); |
15 |
$table->integer('post_by')->unsigned(); |
16 |
$table->timestamps(); |
17 |
});
|
18 |
}
|
19 |
|
20 |
public function down() |
21 |
{
|
22 |
Schema::dropIfExists('posts'); |
23 |
}
|
24 |
}
|
Go ahead and run the following command to create tables in the database.
It’s important to note that when we run the above command, Laravel creates the users table as well, since it supports a built-in authentication feature. So we’ll use it for login and authentication purposes.
With that in place, we’ve created the necessary database tables for our application.
Set Up User Registration and Login
In this section, we’ll see how you can set up user registration and login in Laravel.
Create Routes
To start with, let’s set up the necessary routes for the user registration and login features.
Go ahead and add the following in the routes/web.php file.
1 |
<?php
|
2 |
|
3 |
use IlluminateSupportFacadesRoute; |
4 |
|
5 |
Route::get('/register/index', 'RegistrationController@index'); |
6 |
Route::post('register/save', 'RegistrationController@save'); |
7 |
|
8 |
Route::get('/login/index', 'LoginController@index'); |
9 |
Route::post('/login/checkErrors', 'LoginController@checkErrors'); |
10 |
Route::get('/logout', 'LoginController@logout'); |
The Route::get('/register/index', 'RegistrationController@index') route is used to map a GET request to the URL path /register/index to the index method of the RegistrationController class. The index method is responsible for displaying the registration form to the user. The Route::post('register/save', 'RegistrationController@save') route is a POST request responsible for validating and processing the user’s registration data and saving it to the database.
The Route::get('/login/index', 'LoginController@index') route is responsible for displaying the login form to the user. The Route::post('/login/checkErrors', 'LoginController@checkErrors') route is responsible for validating the user’s login credentials and authenticating the user.
Finally, the Route::get('/logout', 'LoginController@logout') route is responsible for logging users out of the application by destroying their session.
Build Controller Classes
In this section, we’ll build the necessary controller classes.
Let’s first create the app/Http/Controllers/RegistrationController.php file with the following contents.
1 |
<?php
|
2 |
|
3 |
namespace AppHttpControllers; |
4 |
|
5 |
use IlluminateHttpRequest; |
6 |
use AppUser; |
7 |
|
8 |
class RegistrationController extends Controller |
9 |
{
|
10 |
public function index() |
11 |
{
|
12 |
return view('registration.index'); |
13 |
}
|
14 |
|
15 |
public function save() |
16 |
{
|
17 |
$this->validate(request(), [ |
18 |
'name' => 'required', |
19 |
'email' => 'required|email', |
20 |
'password' => 'required' |
21 |
]);
|
22 |
|
23 |
$user = User::create(request(['name', 'email', 'password'])); |
24 |
|
25 |
return redirect()->to('/login/index'); |
26 |
}
|
27 |
}
|
Next, let’s create the app/Http/Controllers/LoginController.php controller.
1 |
<?php
|
2 |
|
3 |
namespace AppHttpControllers; |
4 |
|
5 |
use IlluminateHttpRequest; |
6 |
|
7 |
class LoginController extends Controller |
8 |
{
|
9 |
public function index() |
10 |
{
|
11 |
return view('login.index'); |
12 |
}
|
13 |
|
14 |
public function checkErrors() |
15 |
{
|
16 |
if (auth()->attempt(request(['email', 'password'])) == false) { |
17 |
return back()->withErrors([ |
18 |
'message' => 'The email or password is incorrect, please try again' |
19 |
]);
|
20 |
}
|
21 |
|
22 |
return redirect()->to('/topic/index'); |
23 |
}
|
24 |
|
25 |
public function logout() |
26 |
{
|
27 |
auth()->logout(); |
28 |
|
29 |
return redirect()->to('/topic/index'); |
30 |
}
|
31 |
}
|
Build Views
In this section, we’ll create the necessary view files.
Firstly, let’s create the resources/views/registration/index.blade.php file with the following contents. It’s used to build the registration form.
1 |
@include('common.header') |
2 |
|
3 |
<h2>User Registration</h2> |
4 |
<form method="POST" action="/register/save"> |
5 |
{{ csrf_field() }} |
6 |
<div class="form-group"> |
7 |
<label for="name">Name:</label> |
8 |
<input type="text" class="form-control" id="name" name="name"> |
9 |
</div> |
10 |
|
11 |
<div class="form-group"> |
12 |
<label for="email">Email:</label> |
13 |
<input type="email" class="form-control" id="email" name="email"> |
14 |
</div> |
15 |
|
16 |
<div class="form-group"> |
17 |
<label for="password">Password:</label> |
18 |
<input type="password" class="form-control" id="password" name="password"> |
19 |
</div> |
20 |
|
21 |
<div class="form-group"> |
22 |
<button style="cursor:pointer" type="submit" class="btn btn-primary">Submit</button> |
23 |
</div> |
24 |
|
25 |
@if ($errors->any()) |
26 |
<div class="alert alert-danger"> |
27 |
<ul> |
28 |
@foreach ($errors->all() as $error) |
29 |
<li>{{ $error }}</li> |
30 |
@endforeach
|
31 |
</ul> |
32 |
</div> |
33 |
@endif
|
34 |
</form> |
35 |
|
36 |
@include('common.footer') |
Finally, let’s create the resources/views/login/index.blade.php file. It’s used to build the login form.
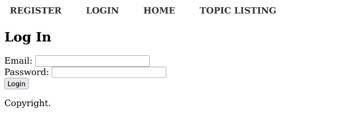
1 |
@include('common.header') |
2 |
|
3 |
<h2>Log In</h2> |
4 |
|
5 |
<form method="POST" action="/login/checkErrors"> |
6 |
{{ csrf_field() }} |
7 |
<div class="form-group"> |
8 |
<label for="email">Email:</label> |
9 |
<input type="email" class="form-control" id="email" name="email"> |
10 |
</div> |
11 |
|
12 |
<div class="form-group"> |
13 |
<label for="password">Password:</label> |
14 |
<input type="password" class="form-control" id="password" name="password"> |
15 |
</div> |
16 |
|
17 |
<div class="form-group"> |
18 |
<button style="cursor:pointer" type="submit" class="btn btn-primary">Login</button> |
19 |
</div> |
20 |
|
21 |
@if ($errors->any()) |
22 |
<div class="alert alert-danger"> |
23 |
<ul> |
24 |
@foreach ($errors->all() as $error) |
25 |
<li>{{ $error }}</li> |
26 |
@endforeach
|
27 |
</ul> |
28 |
</div> |
29 |
@endif
|
30 |
</form> |
31 |
|
32 |
@include('common.footer') |
Set Up Password Encryption
You may have noticed that we’re storing the user password as plain text in the save method of the Registration controller. It’s never a good idea to save plain-text passwords, so let’s change the User model so that it can encrypt the password before it’s stored in the database.
Go ahead and add the setPasswordAttribute method in the app/User.php model file, as shown in the following snippet. The User model should be already available in Laravel.
1 |
<?php
|
2 |
|
3 |
namespace App; |
4 |
|
5 |
use IlluminateNotificationsNotifiable; |
6 |
use IlluminateFoundationAuthUser as Authenticatable; |
7 |
|
8 |
class User extends Authenticatable |
9 |
{
|
10 |
use Notifiable; |
11 |
|
12 |
/**
|
13 |
* The attributes that are mass assignable.
|
14 |
*
|
15 |
* @var array
|
16 |
*/
|
17 |
protected $fillable = [ |
18 |
'name', 'email', 'password', |
19 |
];
|
20 |
|
21 |
/**
|
22 |
* The attributes that should be hidden for arrays.
|
23 |
*
|
24 |
* @var array
|
25 |
*/
|
26 |
protected $hidden = [ |
27 |
'password', 'remember_token', |
28 |
];
|
29 |
|
30 |
/**
|
31 |
* Add a mutator to ensure hashed passwords
|
32 |
*/
|
33 |
public function setPasswordAttribute($password) |
34 |
{
|
35 |
$this->attributes['password'] = bcrypt($password); |
36 |
}
|
37 |
}
|
With that in place, we’ve created the login and registration features in our application.
Import Sample Categories
To keep things simple, we’ll use a predefined set of categories. However, if you wish, you can also build a CRUD interface for the category entity by following the topic CRUD implementation, which we’ll discuss in the very next section.
For now, go ahead and run the following query, which inserts a dummy set of categories that we can use while creating a topic.
1 |
INSERT INTO categories (`cat_name`, `cat_description`) |
2 |
VALUES ('Sports', 'Sports category related discussion'), |
3 |
('Tech', 'Sports category related discussion'), |
4 |
('Culture', 'Sports category related discussion'), |
5 |
('History', 'Sports category related discussion'), |
6 |
('Misc', 'Sports category related discussion'); |
It should populate the categories table with a few dummy categories.
How to Create Topics and Post Replies
In this section, we’ll build the topic creation UI, which allows users to create category-wise topics. Once a topic is created, users can start topic-wise discussion by replying to it.
Create Routes
To start with, let’s set up the necessary routes.
Go ahead and add the following in the routes/web.php file.
1 |
<?php
|
2 |
|
3 |
....
|
4 |
....
|
5 |
|
6 |
Route::get('/topic/create', 'TopicController@create'); |
7 |
Route::post('/topic/save', 'TopicController@save'); |
8 |
Route::get('/', 'TopicController@index'); |
9 |
Route::get('/topic/index', 'TopicController@index'); |
10 |
Route::get('/topic/detail/{id}', 'TopicController@detail'); |
11 |
|
12 |
Route::post('/reply/save', 'TopicController@replySave'); |
The Route::get('/topic/create', 'TopicController@create') route is used to map a GET request to the URL path /topic/create to the create method of the TopicController class. The create method is responsible for displaying the topic form to the user. The Route::post('topic/save', 'TopicController@save') route is a POST request responsible for collecting topic data and saving it to the database.
Next, the index method is used to build the topic listing interface. Finally, the detail method is used to build the topic detail interface.
Build a Controller Class
In this section, we’ll build the necessary controller classes.
Let’s create the app/Http/Controllers/TopicController.php file with the following contents.
1 |
<?php
|
2 |
|
3 |
namespace AppHttpControllers; |
4 |
|
5 |
use IlluminateHttpRequest; |
6 |
use AppUser; |
7 |
use AppTopic; |
8 |
use AppCategory; |
9 |
use AppPost; |
10 |
|
11 |
class TopicController extends Controller |
12 |
{
|
13 |
public function create() |
14 |
{
|
15 |
$categories = Category::all(); |
16 |
|
17 |
return view('topic.create', ['categories' => $categories]); |
18 |
}
|
19 |
|
20 |
public function save() |
21 |
{
|
22 |
$user = auth()->user(); |
23 |
|
24 |
$this->validate(request(), [ |
25 |
'topic_cat' => 'required', |
26 |
'topic_subject' => 'required', |
27 |
'topic_message' => 'required' |
28 |
]);
|
29 |
|
30 |
$topic = Topic::create([ |
31 |
'topic_cat' => request()->input('topic_cat'), |
32 |
'topic_subject' => request()->input('topic_subject'), |
33 |
'topic_by' => $user->id, |
34 |
]);
|
35 |
|
36 |
$post = Post::create([ |
37 |
'post_content' => request()->input('topic_message'), |
38 |
'post_topic' => $topic->id, |
39 |
'post_by' => $user->id, |
40 |
]);
|
41 |
|
42 |
return redirect()->to('topic/index') |
43 |
->with('success','Topic is created successfully.'); |
44 |
}
|
45 |
|
46 |
public function index() |
47 |
{
|
48 |
$topics = Topic::all(); |
49 |
|
50 |
$arrTopics = array(); |
51 |
foreach ($topics as $topic) { |
52 |
$category = Category::where('cat_id', $topic->topic_cat)->first(); |
53 |
|
54 |
$arrTopics[] = array( |
55 |
'topic_id' => $topic->topic_id, |
56 |
'topic_subject' => $topic->topic_subject, |
57 |
'topic_category_name' => $category->cat_name |
58 |
);
|
59 |
}
|
60 |
|
61 |
return view('topic.index', ['topics' => $arrTopics]); |
62 |
}
|
63 |
|
64 |
public function detail($id) |
65 |
{
|
66 |
$topic = Topic::where('topic_id', $id)->first(); |
67 |
$posts = Post::where('post_topic', $id)->get(); |
68 |
|
69 |
$arrPosts = array(); |
70 |
foreach ($posts as $post) { |
71 |
$user = User::where('id', $post->post_by)->first(); |
72 |
|
73 |
$arrPosts[] = array( |
74 |
'post_by' => $user->name, |
75 |
'post_content' => $post->post_content |
76 |
);
|
77 |
}
|
78 |
|
79 |
return view('topic.detail', ['topic' => $topic, 'posts' => $arrPosts]); |
80 |
}
|
81 |
|
82 |
public function replySave() |
83 |
{
|
84 |
$user = auth()->user(); |
85 |
|
86 |
$this->validate(request(), [ |
87 |
'post_message' => 'required' |
88 |
]);
|
89 |
|
90 |
$post = Post::create([ |
91 |
'post_content' => request()->input('post_message'), |
92 |
'post_topic' => request()->input('topic_id'), |
93 |
'post_by' => $user->id |
94 |
]);
|
95 |
|
96 |
return redirect()->to('topic/detail/'.request()->input('topic_id')) |
97 |
->with('success','Reply is added successfully.'); |
98 |
}
|
99 |
}
|
The create method is used to display the topic form. It’s important to note that we’ve passed the $categories array to the topic.create view. It’ll be used to build the categories drop-down box, which allows the user to select the category the topic will be associated with.
Next, the save method is used to save topic details in the database. We’ve used the validate method to validate the details before it’s saved to the database with the help of the create method of the Topic model. We’ve also created an associated post with the help of the Post model.
Next, the index method is used to build the topic listing interface. Moving further, the detail method is used to build the topic detail page. Finally, the replySave method is used to save replies to the topic.
Create Models
As you can see, we’ve already used the Topic and Category models in the TopicController class, but we haven’t created it. Let’s take a moment to create it with the help of the following artisan commands.
1 |
$php artisan make:model Category
|
2 |
$php artisan make:model Topic
|
3 |
$php artisan make:model Post
|
It should generate the Topic, Category, and Post model classes, which will be placed in the app directory. Go ahead and edit the app/Topic.php file so that it looks like the following:
1 |
<?php
|
2 |
|
3 |
namespace App; |
4 |
|
5 |
use IlluminateDatabaseEloquentModel; |
6 |
|
7 |
class Topic extends Model |
8 |
{
|
9 |
/**
|
10 |
* The table associated with the model.
|
11 |
*
|
12 |
* @var string
|
13 |
*/
|
14 |
protected $table = 'topics'; |
15 |
|
16 |
/**
|
17 |
* The attributes that are mass assignable.
|
18 |
*
|
19 |
* @var array
|
20 |
*/
|
21 |
protected $fillable = [ |
22 |
'topic_cat', 'topic_subject', 'topic_message', 'topic_by' |
23 |
];
|
24 |
}
|
And the app/Category.php file should look like this.
1 |
<?php
|
2 |
|
3 |
namespace App; |
4 |
|
5 |
use IlluminateDatabaseEloquentModel; |
6 |
|
7 |
class Category extends Model |
8 |
{
|
9 |
/**
|
10 |
* The table associated with the model.
|
11 |
*
|
12 |
* @var string
|
13 |
*/
|
14 |
protected $table = 'categories'; |
15 |
}
|
Finally, the app/Post.php file should look like this.
1 |
<?php
|
2 |
namespace App; |
3 |
|
4 |
use IlluminateDatabaseEloquentModel; |
5 |
use IlluminateDatabaseEloquentCastsAttribute; |
6 |
|
7 |
class Post extends Model |
8 |
{
|
9 |
/**
|
10 |
* The table associated with the model.
|
11 |
*
|
12 |
* @var string
|
13 |
*/
|
14 |
protected $table = 'posts'; |
15 |
|
16 |
/**
|
17 |
* The attributes that are mass assignable.
|
18 |
*
|
19 |
* @var array
|
20 |
*/
|
21 |
protected $fillable = [ |
22 |
'post_content', 'post_topic', 'post_by' |
23 |
];
|
24 |
}
|
So that’s it for setting up our model classes.
Build Views
In this section, we’ll create view files for the topic UI.
Firstly, let’s create the resources/views/topic/create.blade.php file with the following contents. It’s used to build the topic creation form.
1 |
@include('common.header') |
2 |
|
3 |
<h2>Create a New Topic</h2> |
4 |
<form method="POST" action="/topic/save"> |
5 |
{{ csrf_field() }} |
6 |
<div class="form-group"> |
7 |
<label for="topic_cat">Topic Category:</label> |
8 |
<select name="topic_cat"> |
9 |
<option value="">--Select Category--</option> |
10 |
@foreach($categories as $category) |
11 |
<option value="{{ $category->cat_id }}">{{ $category->cat_name }}</option> |
12 |
@endforeach
|
13 |
</select> |
14 |
</div> |
15 |
|
16 |
<div class="form-group"> |
17 |
<label for="topic_subject">Topic Subject:</label> |
18 |
<input type="text" class="form-control" id="topic_subject" name="topic_subject"> |
19 |
</div> |
20 |
|
21 |
<div class="form-group"> |
22 |
<label for="topic_message">Topic Message:</label> |
23 |
<input type="text" class="form-control" id="topic_message" name="topic_message"> |
24 |
</div> |
25 |
|
26 |
<div class="form-group"> |
27 |
<button style="cursor:pointer" type="submit" class="btn btn-primary">Submit</button> |
28 |
</div> |
29 |
|
30 |
@if ($errors->any()) |
31 |
<div class="alert alert-danger"> |
32 |
<ul> |
33 |
@foreach ($errors->all() as $error) |
34 |
<li>{{ $error }}</li> |
35 |
@endforeach
|
36 |
</ul> |
37 |
</div> |
38 |
@endif
|
39 |
</form> |
40 |
|
41 |
@include('common.footer') |
Next, let’s create the resources/views/topic/index.blade.php file. It’ll be used to display the topic listing.
1 |
@include('common.header') |
2 |
|
3 |
<h2>Topic Listing</h2> |
4 |
|
5 |
<table border="1"> |
6 |
<tr> |
7 |
<th>Topic Title</th> |
8 |
<th>Topic Category</th> |
9 |
</tr> |
10 |
|
11 |
@foreach($topics as $topic) |
12 |
<tr> |
13 |
<td> |
14 |
<a href="{!! url('/topic/detail', [$topic['topic_id']]) !!}"> |
15 |
{{ $topic['topic_subject'] }} |
16 |
</a> |
17 |
</td> |
18 |
<td> |
19 |
{{ $topic['topic_category_name'] }} |
20 |
</td> |
21 |
</tr> |
22 |
@endforeach |
23 |
</table> |
24 |
|
25 |
@include('common.footer') |
Finally, let’s create the resources/views/topic/detail.blade.php file. It’ll be used to display the topic detail page.
1 |
@include('common.header') |
2 |
|
3 |
<h2>{{ $topic->topic_subject }}</h2> |
4 |
|
5 |
<table border="1"> |
6 |
<tr> |
7 |
<th width="20%">Post Author</th> |
8 |
<th width="80%">Post Message</th> |
9 |
</tr> |
10 |
|
11 |
@foreach($posts as $post) |
12 |
<tr> |
13 |
<td width="20%" height="100" valign="top">{{ $post['post_by'] }}</td> |
14 |
<td width="80%" height="100" valign="top">{{ $post['post_content'] }}</td> |
15 |
</tr> |
16 |
@endforeach |
17 |
</table> |
18 |
|
19 |
@if (auth()->check()) |
20 |
<form method="POST" action="/reply/save"> |
21 |
{{ csrf_field() }} |
22 |
<input type="hidden" class="form-control" id="topic_id" name="topic_id" value="{{ $topic->topic_id }}"> |
23 |
<label for="post_message">Post Message:</label> |
24 |
<div class="form-group"> |
25 |
<textarea rows="5" cols="60" class="form-control" id="post_message" name="post_message"></textarea> |
26 |
</div> |
27 |
|
28 |
<div class="form-group"> |
29 |
<button style="cursor:pointer" type="submit" class="btn btn-primary">Submit Reply</button> |
30 |
</div> |
31 |
</form> |
32 |
@endif |
33 |
|
34 |
@include('common.footer') |
Build Common View Files
Let’s quickly see how to create header and footer files for our application.
Let’s create the resources/views/common/header.blade.php file.
1 |
<style> |
2 |
nav ul { |
3 |
list-style: none; |
4 |
margin: 0; |
5 |
padding: 0; |
6 |
}
|
7 |
|
8 |
nav li { |
9 |
display: inline-block; |
10 |
margin-right: 20px; |
11 |
}
|
12 |
|
13 |
nav li:last-child { |
14 |
margin-right: 0; |
15 |
}
|
16 |
|
17 |
nav a { |
18 |
display: block; |
19 |
padding: 5px 10px; |
20 |
text-decoration: none; |
21 |
color: #333; |
22 |
font-weight: bold; |
23 |
}
|
24 |
|
25 |
nav a:hover { |
26 |
background-color: #333; |
27 |
color: #fff; |
28 |
}
|
29 |
|
30 |
</style> |
31 |
<nav> |
32 |
<ul> |
33 |
@if (!auth()->check()) |
34 |
<li> |
35 |
<a href="{!! url('/register/index') !!}"> |
36 |
REGISTER
|
37 |
</a> |
38 |
</li> |
39 |
<li> |
40 |
<a href="{!! url('/login/index') !!}"> |
41 |
LOGIN
|
42 |
</a> |
43 |
</li> |
44 |
@endif
|
45 |
<li> |
46 |
<a href="{!! url('/topic/index') !!}"> |
47 |
HOME
|
48 |
</a> |
49 |
</li> |
50 |
<li> |
51 |
<a href="{!! url('/topic/index') !!}"> |
52 |
TOPIC LISTING |
53 |
</a> |
54 |
</li> |
55 |
@if (auth()->check()) |
56 |
<li> |
57 |
<a href="{!! url('/topic/create') !!}"> |
58 |
CREATE TOPIC |
59 |
</a> |
60 |
</li> |
61 |
@endif
|
62 |
</ul> |
63 |
</nav> |
64 |
@if (auth()->check()) |
65 |
<div style="text-align: right;"> |
66 |
Welcome, {{ auth()->user()->name }} (<a href="{!! url('/logout') !!}">Logout</a>) |
67 |
</div> |
68 |
@endif
|
69 |
|
Next, let’s create the resources/views/common/footer.blade.php file.
1 |
Copyright and other contents. |
So that’s it for setting up the common header and footer files.
How It Works Altogether
In this section, we’ll go through how you can test your application.
I assume that our Laravel application is available at the https://localhost/ URL. As we’ve already defined the home page to be the topic listing page, you should see the following page when you access the http://localhost/ URL.
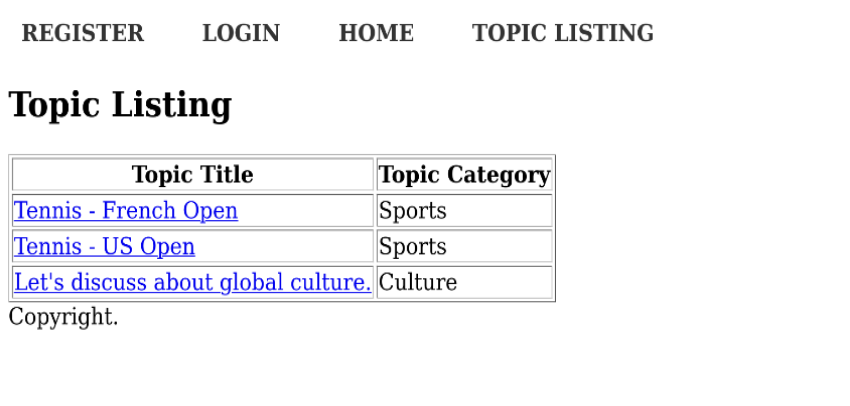
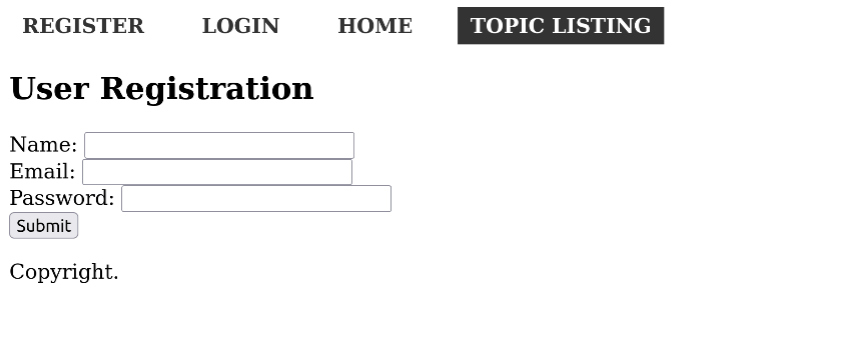
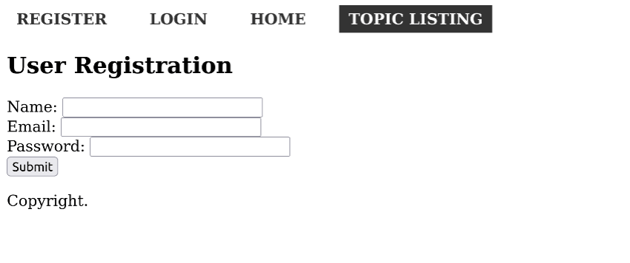
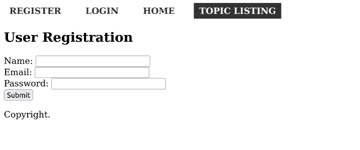
Next, let’s click on the REGISTER link to open the registration form, as shown in the following image. Go ahead and create a new account.
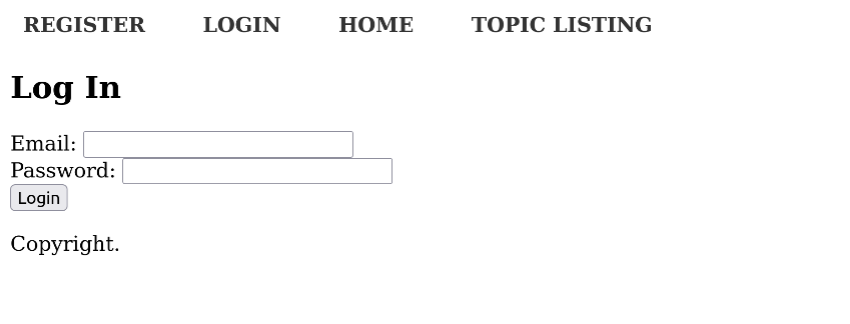
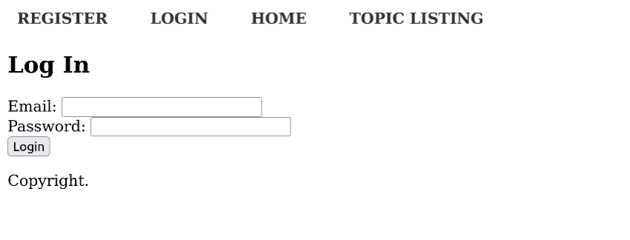
After you create a new user, you can log in by clicking on the LOGIN link shown below.
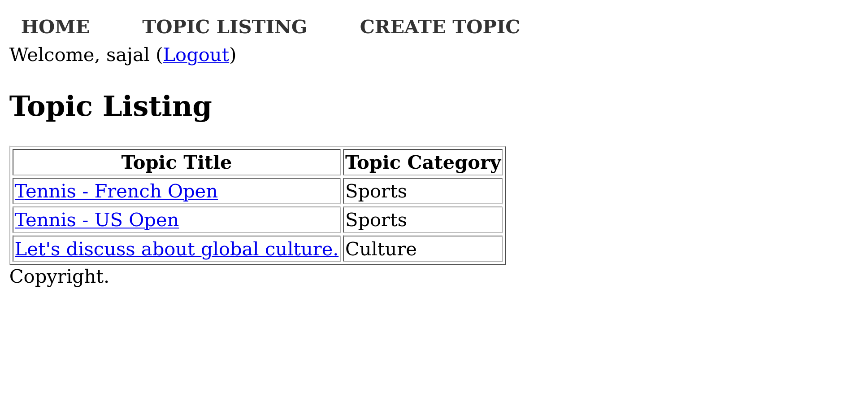
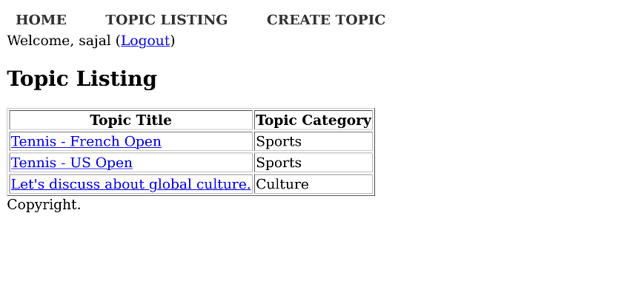
After you’re logged in, you can see the logged-in username. You can also see a new link in the header navigation to create a new topic.
To create a new topic, click on the CREATE TOPIC link, which should open the following form. Fill it in and create a new topic.
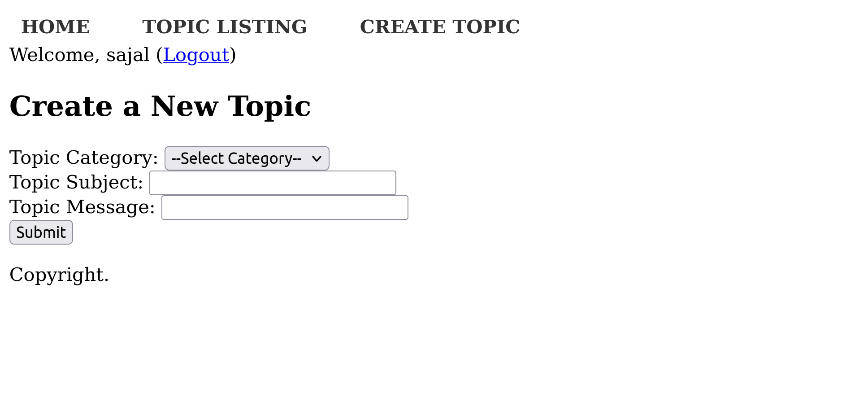
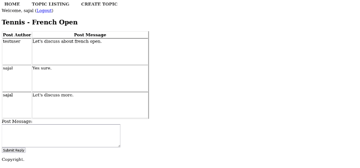
When you visit the topic detail page by clicking on any topic from the topic listing page, it should open the following interface.
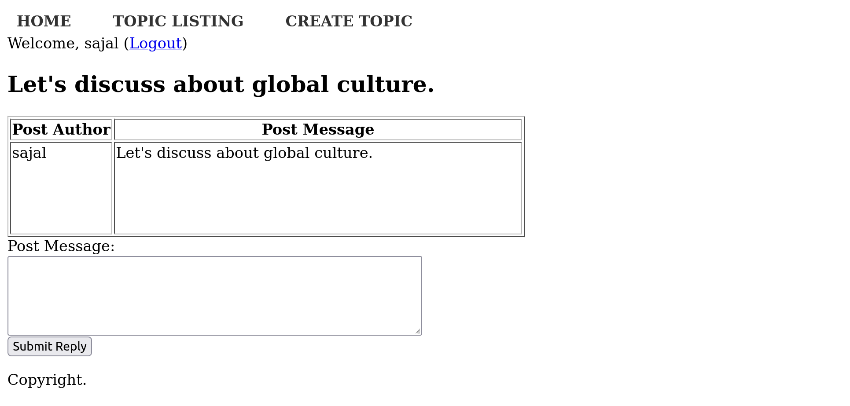
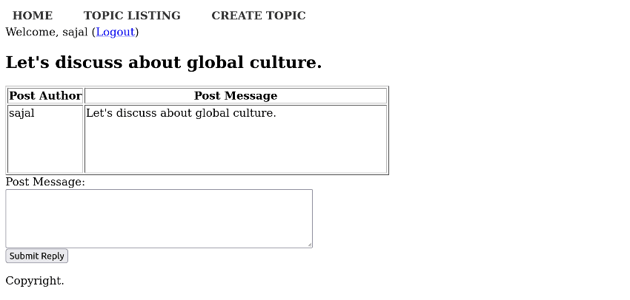
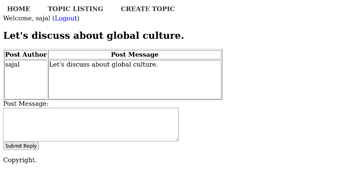
As you can see, you can reply to any topic by posting a new message, and it should start a conversation which allows users to discuss a specific topic.
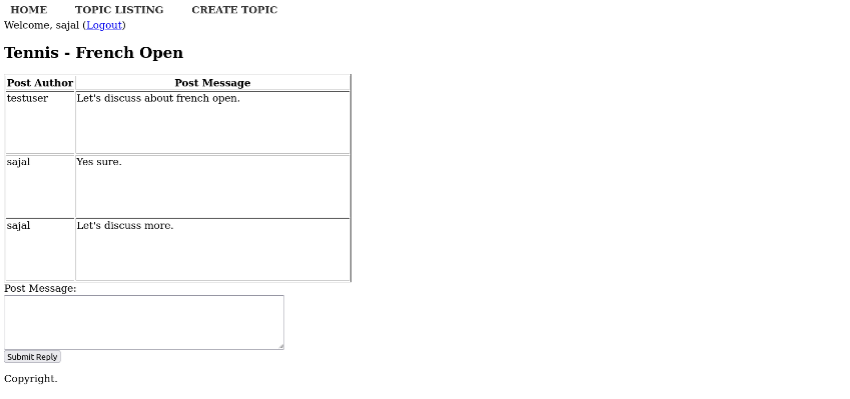
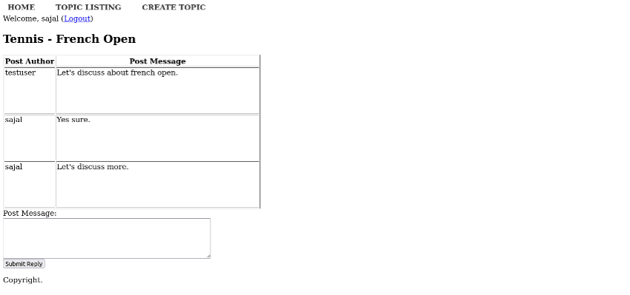
Overall, the conversation UI should look like this.
So in this way, we’ve created a mini-forum application, which allows users to create new topics and discuss them. It’s just a starting point, and I would encourage you to add more features to it and style it according to your requirements.