In this new tutorial, we’ll learn how to create an infinite blinking/flashing text effect with CSS animations and a bit of JavaScript. Specifically, selected text parts will switch colors after a certain period. After that, the animation will reinitialize.
Our Text Effect
Here’s what we’re going to create. It’s a great addition to a portfolio or company landing page, to highlight brands, or names, places, and so on.
1. Begin With the HTML Markup
Inside a container, we’ll define a wrapper element that will hold some text with well-known brands, like this:
1 |
<div class="container"> |
2 |
<div class="blinking-wrapper"> |
3 |
Accenture, |
4 |
Amazon |
5 |
Apple, |
6 |
Astrazeneca, |
7 |
Citigroup, |
8 |
Coca-Cola Co, |
9 |
China Merchants Bank, |
10 |
Disney |
11 |
Google, |
12 |
... |
13 |
</div>
|
14 |
</div>
|
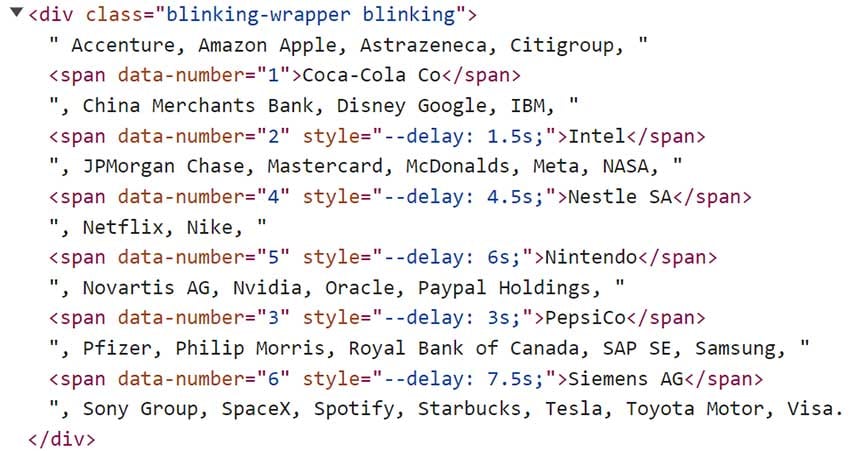
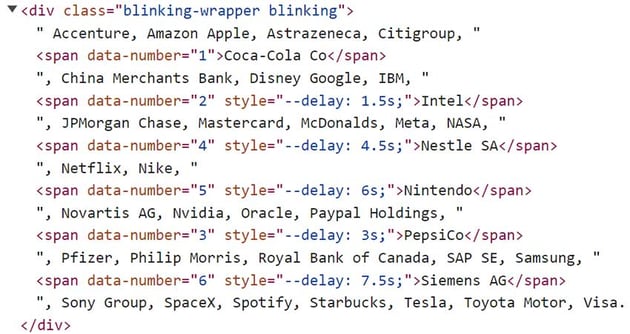
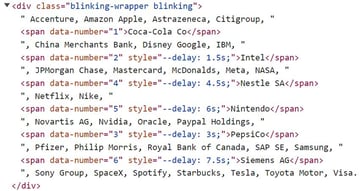
For each brand (piece of text) we want to animate, we’ll wrap it inside a span element and give it the data-number attribute. The value of the custom attribute will determine the animation order. The smaller the number, the sooner the animation will run. That said, the element with the data-number="1" attribute value will be animated first, then this with the data-number="2" attribute value, etc.
Here’s the required markup skeleton:
1 |
<div class="container"> |
2 |
<div class="blinking-wrapper"> |
3 |
Accenture, |
4 |
Amazon |
5 |
Apple, |
6 |
Astrazeneca, |
7 |
Citigroup, |
8 |
<span data-number="1">Coca-Cola Co</span>, |
9 |
China Merchants Bank, |
10 |
Disney |
11 |
Google, |
12 |
IBM, |
13 |
<span data-number="2">Intel</span>, |
14 |
JPMorgan Chase, |
15 |
Mastercard, |
16 |
McDonalds, |
17 |
Meta, |
18 |
NASA, |
19 |
<span data-number="4">Nestle SA</span>, |
20 |
Netflix, |
21 |
Nike, |
22 |
... |
23 |
</div>
|
24 |
</div>
|
2. Add the CSS
The CSS will be pretty basic. All we need is to apply a CSS animation to the spans that will change their color from white to a shade of our choice. But note one thing here: the animations will run sequentially when the page loads. At that point, we’ll add the blinking class to the wrapper and give spans appropriate delays.
In your case, depending on the page layout, you might want to start the blinking effect when the .blinking-wrapper element comes into view.
Here are all the styles:
1 |
/*CUSTOM VARIABLES HERE*/
|
2 |
|
3 |
.container { |
4 |
max-width: 1600px; |
5 |
padding: 0 15px; |
6 |
margin: 0 auto; |
7 |
}
|
8 |
|
9 |
.blinking-wrapper { |
10 |
font-size: 50px; |
11 |
}
|
12 |
|
13 |
.blinking-wrapper.blinking [data-number] { |
14 |
animation: changeColor 1.5s var(--delay, 0s); |
15 |
}
|
16 |
|
17 |
@keyframes changeColor { |
18 |
to { |
19 |
color: var(--green); |
20 |
}
|
21 |
}
|
22 |
|
23 |
@media (max-width: 600px) { |
24 |
.blinking-wrapper { |
25 |
font-size: 25px; |
26 |
}
|
27 |
}
|
3. Apply the JavaScript
As mentioned above, apart from adding the blinking class to the wrapper element when the page loads, we’ll assign appropriate delays for each span to determine when their blinking animation will start. The first element won’t have any delay. All the others will fire as soon as the animation of the previous animated element finishes.
Of course, you can set the delays manually or adjust the timings as you wish.
Here’s the required JavaScript code:
1 |
const blinkingWrapper = document.querySelector(".blinking-wrapper"); |
2 |
const animatedEls = blinkingWrapper.querySelectorAll("[data-number]"); |
3 |
const TOGGLE_CLASS = "blinking"; |
4 |
const BASE_DELAY = 1.5; |
5 |
|
6 |
window.addEventListener("load", function () { |
7 |
blinkingWrapper.classList.add(TOGGLE_CLASS); |
8 |
animatedEls.forEach(function (el, index) { |
9 |
if (index != 0) { |
10 |
const delay = BASE_DELAY * el.dataset.number - BASE_DELAY; |
11 |
el.style.setProperty("--delay", `${delay}s`); |
12 |
}
|
13 |
});
|
14 |
});
|
Replay Animations
With this code in place, our animations will play as expected for once. But what if we want to replay them in sequence (keeping the desired delays) infinitely? Just using the infinite keyword for the animation iteration count won’t work.
In such a case, we’ll wait for all animations to finish before reinitializing them using the animationend event of the last animated element—the one with the largest data-number. A quick way to find which element this should be is to manually give it a unique ID/class. Alternatively, we can write some code for retrieving the largest number from all the data-number attribute values like below:
1 |
...
|
2 |
|
3 |
function getMaxNumber() { |
4 |
const numbers = Array.from(animatedEls).map(function (el) { |
5 |
return el.dataset.number; |
6 |
});
|
7 |
return Math.max(...numbers); |
8 |
}
|
Next, we’ll target the desired element and listen for its animationend event.
1 |
...
|
2 |
|
3 |
blinkingWrapper
|
4 |
.querySelector(`[data-number="${getMaxNumber()}"]`) |
5 |
.addEventListener("animationend", function () { |
6 |
//stuff here
|
7 |
});
|
Inside it, we’ll do three things:
- Remove the
blinkingclass from the wrapper element. - Force a reflow to that element by calculating its height or anything that makes it reflow without returning anything.
- Add again the
blinkingclass to it.
This way, the CSS animations will resume with the delays in place each time the previous bunch of them finishes. If we don’t cause a reflow, our animation won’t restart. You can test by removing the reflow action.
Here’s the required JavaScript code:
1 |
...
|
2 |
|
3 |
blinkingWrapper
|
4 |
.querySelector(`[data-number="${getMaxNumber()}"]`) |
5 |
.addEventListener("animationend", function () { |
6 |
blinkingWrapper.classList.remove(TOGGLE_CLASS); |
7 |
void blinkingWrapper.offsetHeight; |
8 |
blinkingWrapper.classList.add(TOGGLE_CLASS); |
9 |
});
|
An alternative implementation, instead of forcing a reflow that can be expensive depending on your layouts, is to append the class to the wrapper after the shortest possible delay like this—by giving a zero delay, we’ll let the browser decide the shortest delay time:
1 |
...
|
2 |
|
3 |
blinkingWrapper
|
4 |
.querySelector(`[data-number="${getMaxNumber()}"]`) |
5 |
.addEventListener("animationend", function () { |
6 |
blinkingWrapper.classList.remove(TOGGLE_CLASS); |
7 |
setTimeout(function () { |
8 |
blinkingWrapper.classList.add(TOGGLE_CLASS); |
9 |
}, 0); |
10 |
});
|
Apart from these methods discussed here, there are others as well. Feel free to let us know on X or in the demo comments if you’ve used any other to accomplish something similar!
Conclusion
In this tutorial, we managed to build an infinite blinking CSS effect with staggering animations thanks to the animationend event. This kind of effect is useful if you want to highlight specific portions of the text like your latest projects, top clients, top skills, etc.
Here’s again our effect:
As always, thanks a lot for reading!