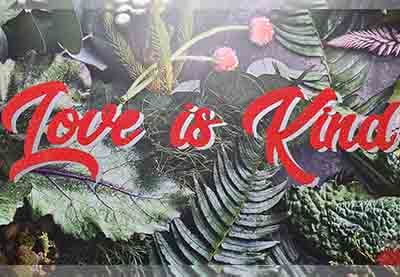
Your Cricut is so much more than a machine that you can make T-shirts with. With an ever-growing list of design features and machine capabilities, your Cricut machine can help you to craft just about any project.
Fan of video tutorials? In this A-Z video from the Envato Tuts+ YouTube channel, I’m going to explain some essential features and give you some of the best Cricut tips and tricks that all the professionals use.
What You’ll Learn in This Cricut Tutorial
- What blades you can use with your Cricut machines
- How many features work in Cricut Design Space
- Some helpful Cricut Design Space tips
- What products you can use with your Cricut machines
- And much more!
A is for Attach
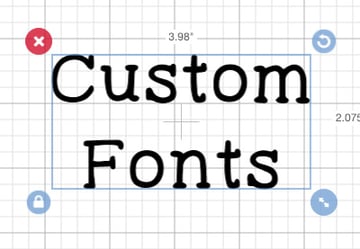
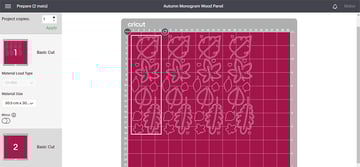
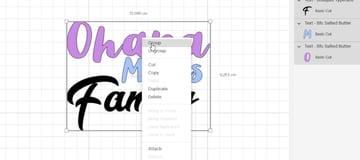
The Attach feature is probably one of the most important ones, so this is one of the most helpful Cricut Design Space tips. This feature is probably the thing most people have problems with at the beginning of their Cricut journey.
It allows you to design whatever you want on your canvas and cut exactly what you’ve designed as you see it on the canvas. As you can see below, the design is complete on the canvas, but it isn’t attached.
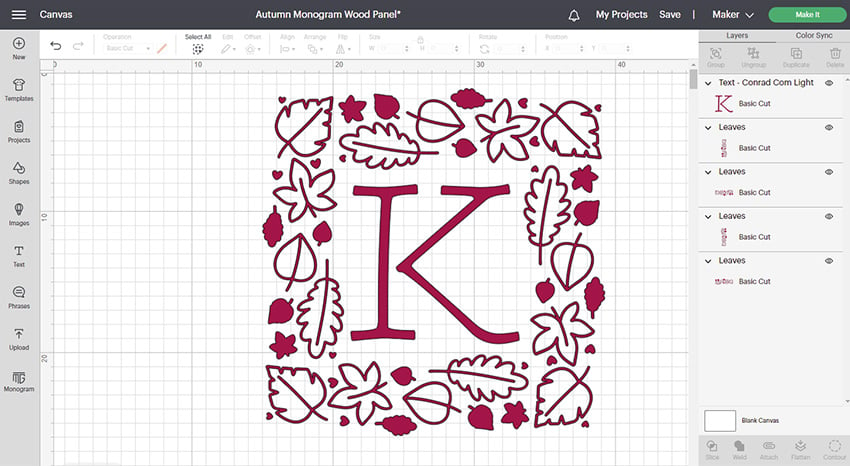
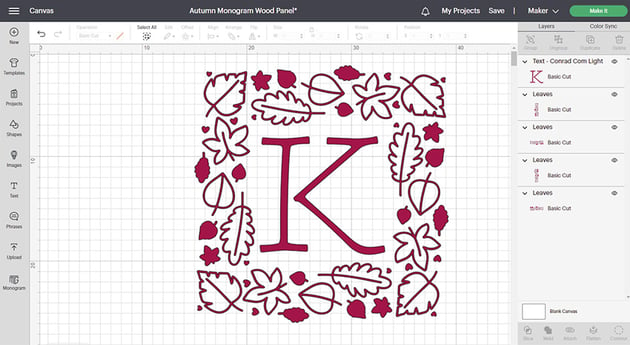
You will need to make sure to Attach the same colours together that you want to cut, in order to keep them in exactly the same position that they are currently in.
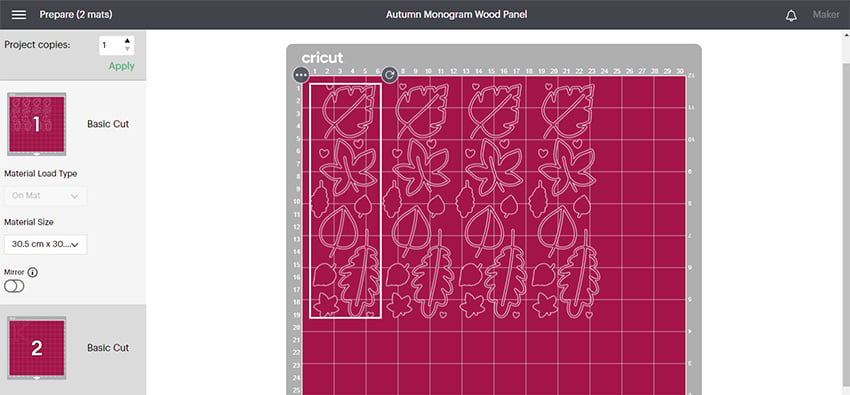
If you don’t attach, then when you go to the Make It panel, you will see something like the below example. All of the items that you have on your canvas will be lined up in separate pieces as the software tries to optimise space usage on your media.

B is for Bookmark Fonts
With so many amazing fonts to choose from on Envato Elements and sifting through all of the fonts that I have on my computer already, finding the exact font that I want to use for my project is sometimes a difficult thing for me to do. So when I’m able to use this feature to Bookmark my favourite fonts, I most definitely do. You can bookmark fonts that you have installed on your computer by simply pressing the little banner button on the right-hand side of the font’s name.

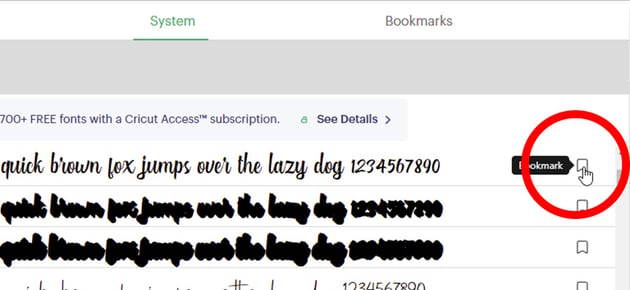

When you want to find those fonts again, just click on the Bookmarked Fonts tab on the right-hand side next to System, and all of your favourite fonts will be right there waiting for you!
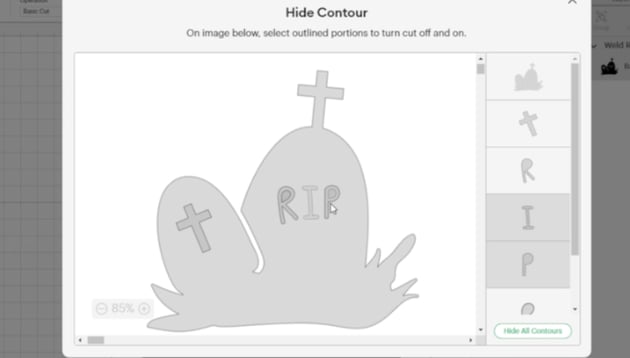
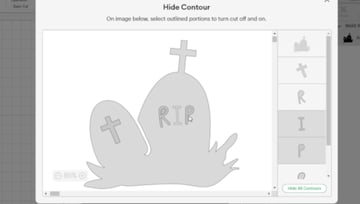
C is for Contour
The Contour feature is the type of feature that you will use to remove certain parts of a single-layer basic cut design. You can also use this feature to separate a design into a multi-layer design so that you can cut each piece with a different colour.

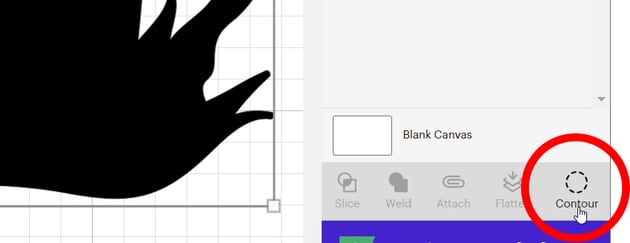

This feature is particularly useful for projects that you want to layer in different coloured vinyls as you don’t need to attach the pieces that you have separated out as they are already in one piece, making it much easier to line up the pieces once everything has been cut.

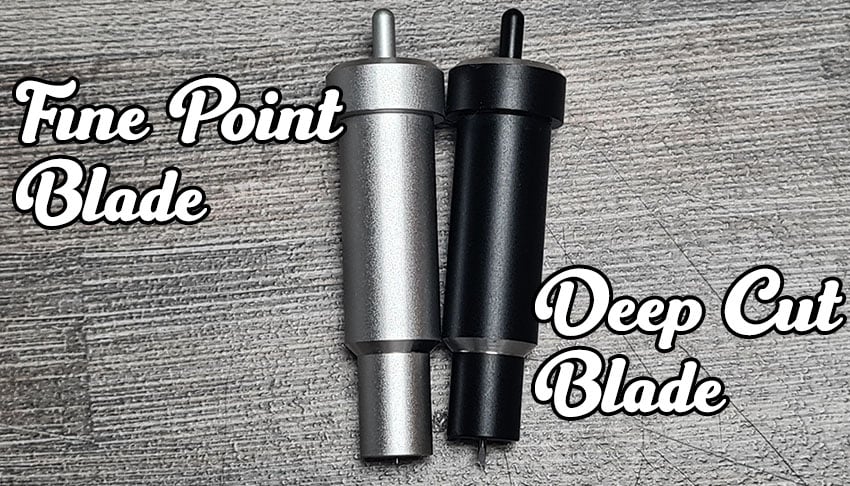
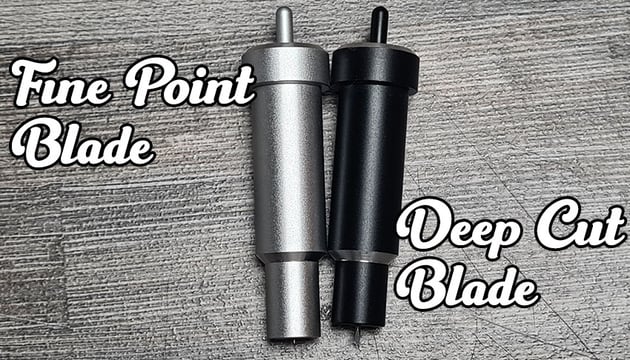
D is for Deep Cut Blade
The deep cut blade is one of the many additional blades that you can buy for the machine that will cut thicker but not necessarily harder materials. It will cut things like craft foam, some leathers, and some types of faux leather.


This blade and housing are not compatible with the fine point blade housing as the actual deep cut blade holder itself is slightly shorter to allow for bigger clearance of the thicker materials.

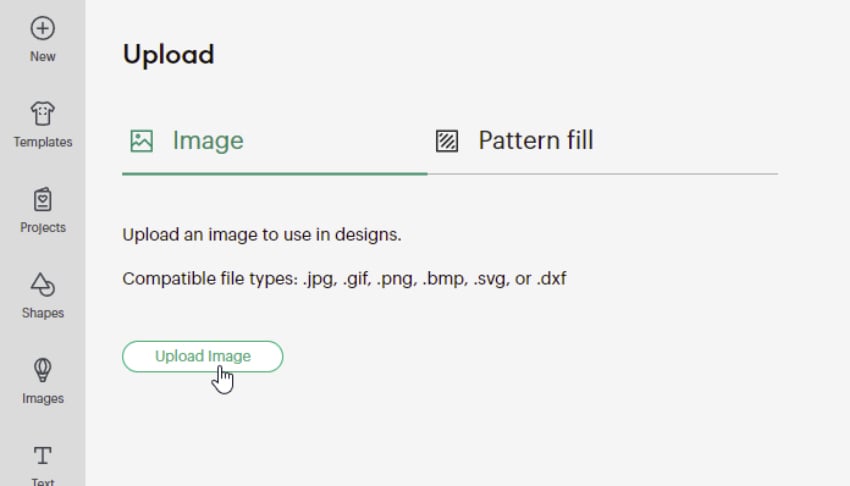
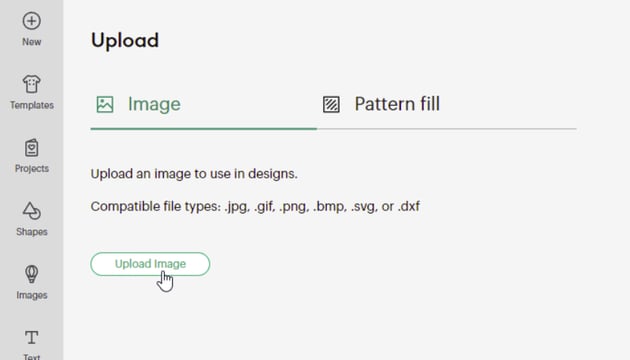
E is for External Designs
You can very easily download hundreds of external designs from Envato Elements and upload them into Cricut Design Space so that you can cut, draw, and even print then cut with your machine. I often run to Envato Elements to find the design I want, as they have so many incredible designs and graphics that you can download under one monthly subscription (which has no lock-in contracts, and you can cancel at any time, by the way!) and upload into Cricut Design Space, using the SVG, JPG, or PNG file.
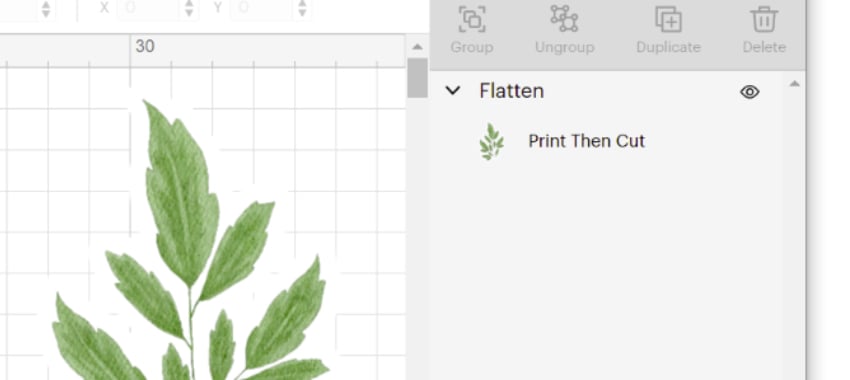
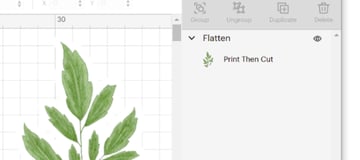
F is for Flatten
The Flatten feature is one that you will use with print then cut if you want to print something on your printer and have your Cricut cut it out. You’ll need to make sure that whatever you have designed on your canvas has been completely flattened into a single layer if you only want to cut the outline. So you need to select all of the layers, right-click, and Flatten the design (or click Flatten at the bottom-right of the screen).
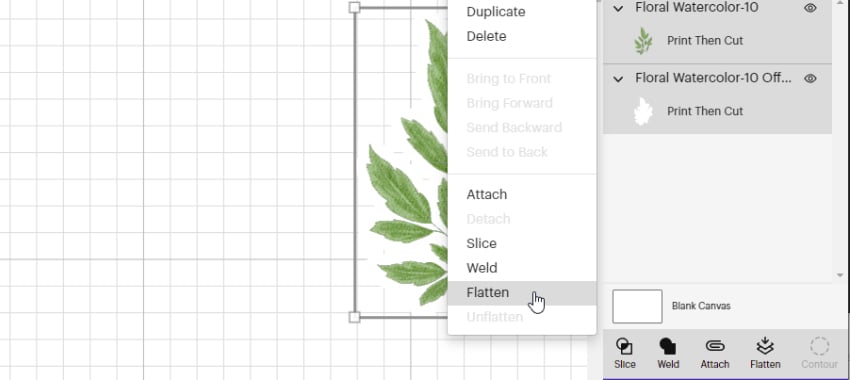

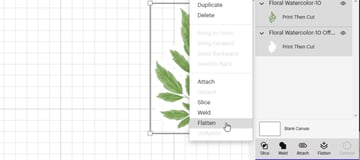
You do need to be sure that you don’t have any other layers like a basic cut layer when you are working with print then cut, as any of your layers that you do have will have cut lines around the edges, which will affect how your end sticker will look.

G is for Group
The Group feature is something that you will use to keep your elements together on your canvas while you are working on your project. With it, you can easily organise or move your project around on the canvas, but not have them stay together on the Make it panel. This is one of the essential Cricut tips for beginners.

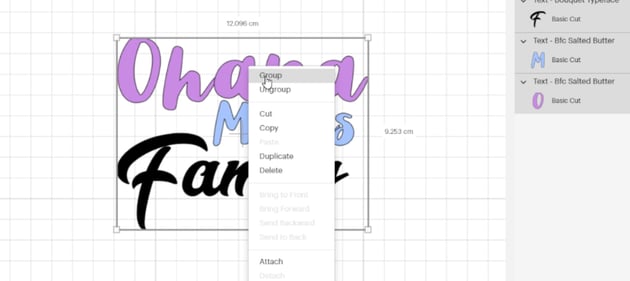
This feature differs from “Attach” as you can group multiple layers together, but they will not cut in the exact place that you have them on the canvas. You would use Group to keep pieces of the same or different colours together to make your design look complete, but if you want to cut them out separately, then you can still move them around more easily and they won’t cut in that exact place as they would with Attach.
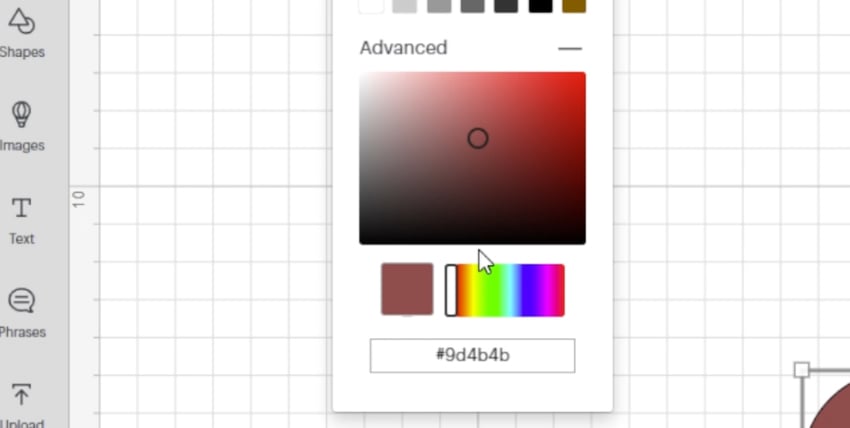
H is for Hex Codes
If you’re designing something in Design Space and you need to use a specific colour, then you can use the hex codes. It’s something like the Cricut color codes.
A hex code is the hexadecimal code of a specific colour, which uses letters and numbers to locate a colour on the spectrum. So if you have to use a business logo with a specific colour, try these Cricut Design Space tips!
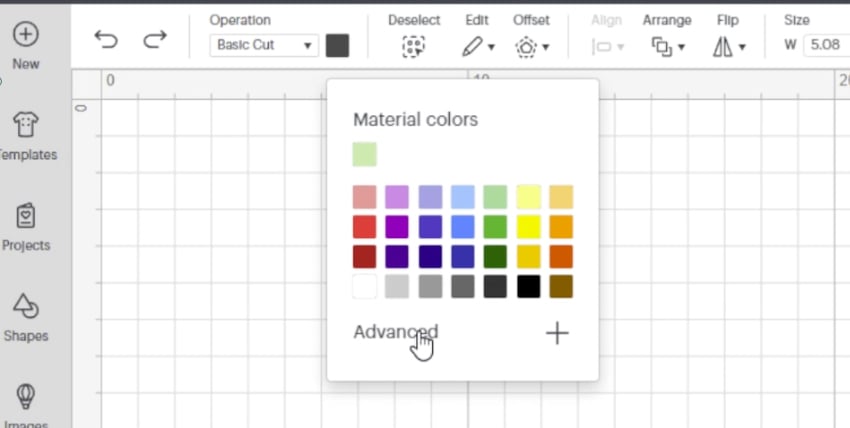
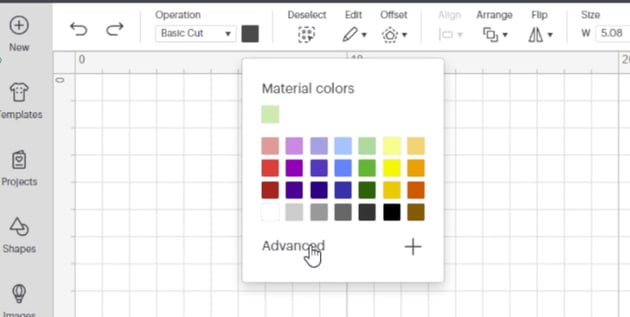
Within the colour feature, you can click on Advanced, and from there you’ll be able to type in the exact hex code of the colour you want to use! That’s how you see and add Cricut color codes.


I is for Infusible Ink
Infusible ink is a product that allows you to transfer ink from the sheet to an item using a heat source. Infusible ink is essentially pre-printed sublimation sheets.

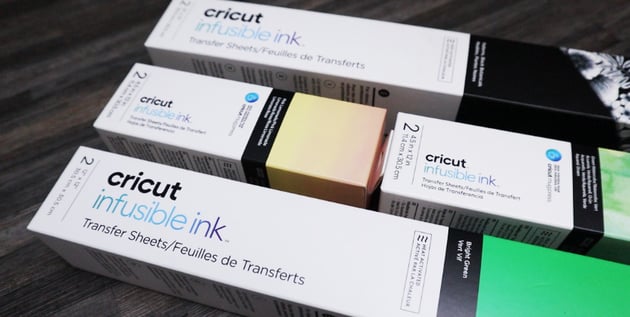

It works with heat at 190° for 60 to 90 seconds on most items and transfers the ink into the item, so instead of having a layer like vinyl on top of your T-shirt, the ink actually stains/bonds to the polyester fibres in your T-shirt. It is important to note that you cannot use cotton—it needs to be a polyester or a sublimation-ready T-shirt, and it should be white or very light in colour. You can also use infusible ink on mugs and other sublimation-ready items like mouse pads, keyrings, coasters, socks—the list goes on!


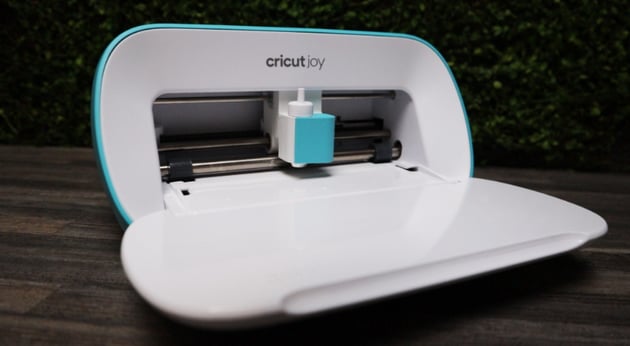
J is for Joy
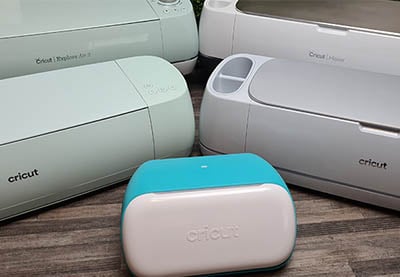
The Cricut Joy is the baby of the family, but despite its size it is still a very powerful machine. Most people want one because it’s so small and portable that you can easily put it in your handbag and take it with you on holiday if you want to make projects on the go, or even at a friend’s house.
It’s far easier to carry around, and it cuts all of the basic materials like your cardstock, vinyl, some faux leather, iron-on materials, and so many more different things. It of course has its limitations, but many use it as an entry into the market or to complement their other needs.


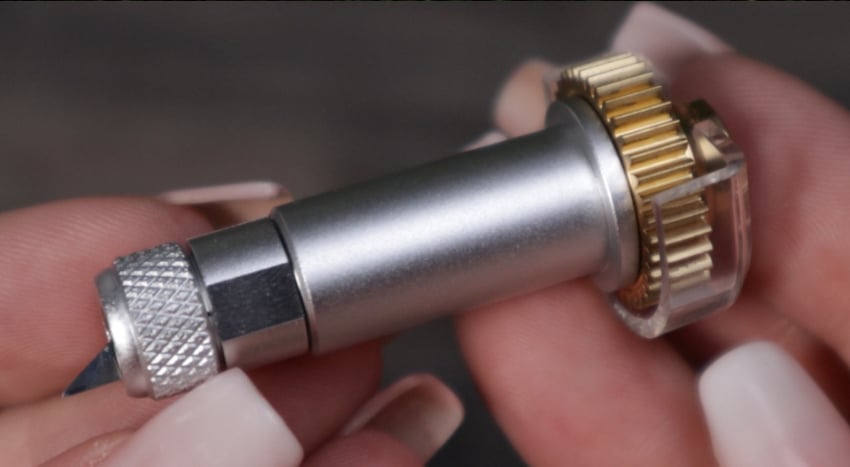
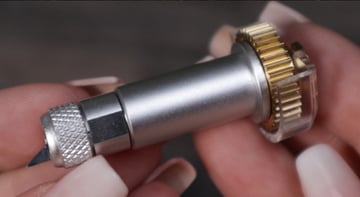
K is for Knife Blade
The knife blade is a blade that is only compatible with the Maker and Maker 3 machines, so this may interest you if you are looking for Cricut Maker tips. It is a very thick, heavy-duty blade that is used to cut heavier substances like balsa wood, heavy chipboard, tooling leather, and so many more things. This blade uses its own housing and is not compatible with anything else, and it requires calibration before being used.

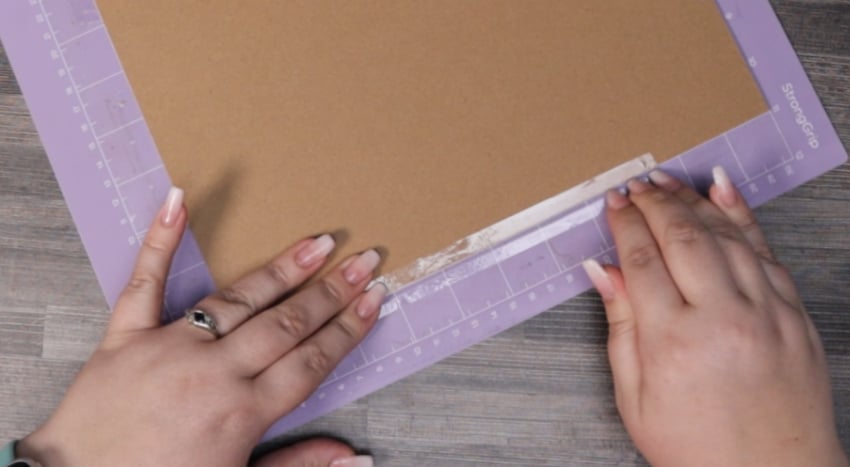
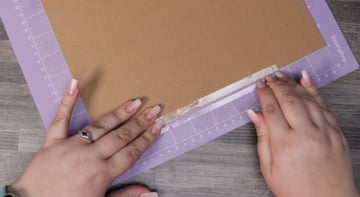
You should also be using the strong grip mat with your knife blade when you’re cutting the heavier materials because it uses a lot of force to cut through, and you need the extra grip to keep your materials in place. You will also need to tape your items down to make sure they don’t move around while cutting. This is one of the most important Cricut cutting tips.

L is for Layers
Here’s another of our basic Cricut Design Space tips. On the right-hand side of the screen, you’ll see the Layers panel.
Each individual item that you add to the canvas will have its own layer, and each layer can have its own operation. So you can add many different types of things and combine them in unique ways to create your projects.


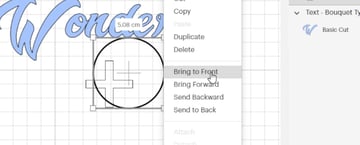
You can also change the order of your layers, so if something is in the front but you don’t want it to be, you can right-click on that layer and send it to the back. You can attach layers to keep them together, merge shapes to form one layer, or slice them—there are so many different things that you can do with your layers!


M is for Mats
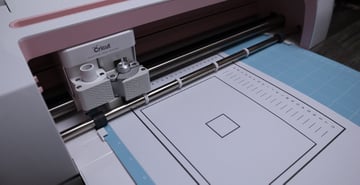
This Cricut hack is one of the essential Cricut cutting tips. In order to cut many different materials on your Cricut, you will likely need to use a cutting mat. This is a durable piece of plastic that fits into the machine under the rollers, with a sticky area on the inside where your paper and other materials will be stuck to ensure they don’t move while in the machine.
There are four different types of mats that you can get for your machines, and they all serve different functions. The blue light grip is for your thinner, softer materials like copy paper, while the green standard grip is for the majority of normal materials like cardstock.
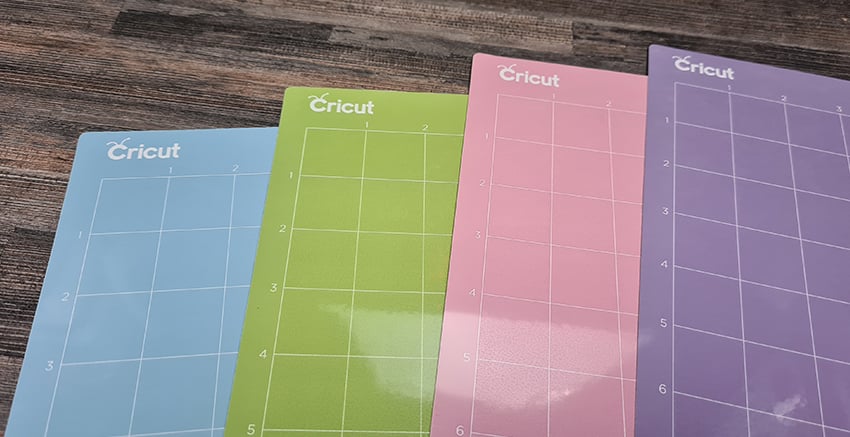

The pink fabric grip is for all fabric materials, and the purple strong grip is for your harder, thicker materials that need some extra strength. You will need a mat for your machine if you want to cut the majority of things as you can only currently cut smart materials without a mat on your machines. Always be sure to keep the protective sheeting on your mat to keep it clean for as long as possible, but if it does lose its stick, you can simply very gently wash it with dishwasher detergent, giving a very light brush to get the fibres off and then hanging it out in the sun to dry.
N is for Never Forget to Calibrate
Calibrating your machine for print then cut and for your knife blade is very important. Calibration allows the machine to have better accuracy and control over where it cuts while using the print then cut feature and knife blade. If you find that your print then cut is not working 100% correctly and you can see that it has a few sections where it cuts just a little bit off to the side, then I would suggest a calibration.
Calibration allows you to test to see how your machine is registering and where it is going to cut, and once you’ve done calibration once (or maybe a few times), you should have a much more accurate end result.


O is for Offset
The Offset feature allows you to add a line on the outside or the inside of your object. It’s one of the most helpful Cricut hacks.
This is particularly useful for things like your print then cut stickers as you’re able to add an offset and cut that offset instead of the inside of your design.

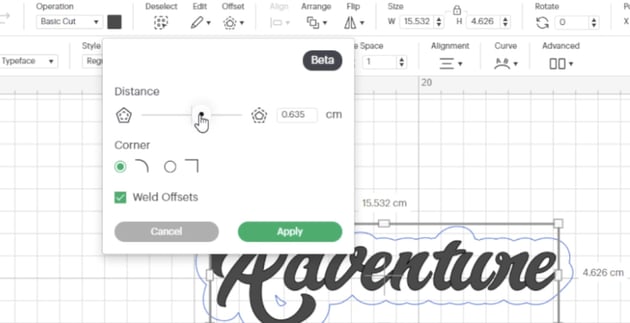

You can also use the offset feature for colouring in your words if you’re using the pen function. For this, you will need to use an internal offset, so with the offset feature open, if you drag the little dot to the left-hand side of the grey line, you will see it has a negative value (-0.03 as an example). If you continue to apply that offset and add more of them, you will fill in the entire letter, and you can then have a coloured-in letter.


P is for Print Then Cut
We’ve spoken about Print then cut a few times already. This is a very useful feature if you want to print out full-colour designs or logos, with gradient colours and things that you wouldn’t be able to get out of vinyl. This is where it’s good to know your Cricut color codes.
One of the key Cricut cutting tips is to make sure you have the same printing medium as what you have in a printer. As an example, if you have an inkjet printer, you will need inkjet printable vinyl.


Cricut Design Space will then place a black border around the edge of your design, and when it is printed and placed on your mat, it will scan in that border and try to locate the design that you’ve printed on your paper, and then cut on the outside of where you have told it to.
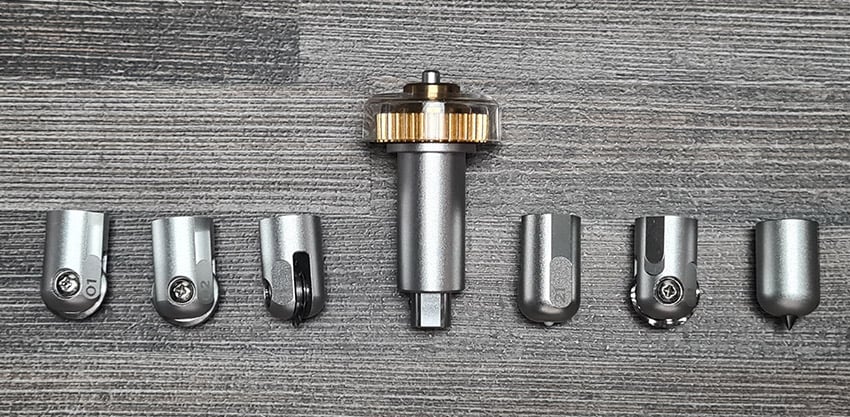
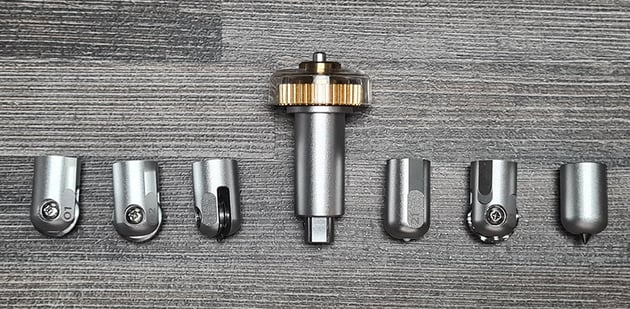
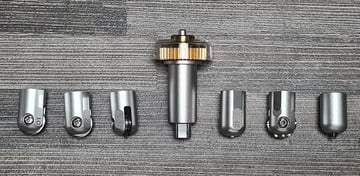
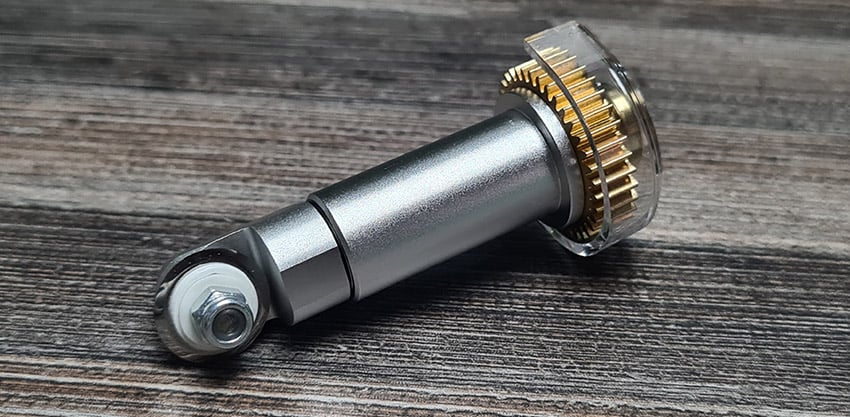
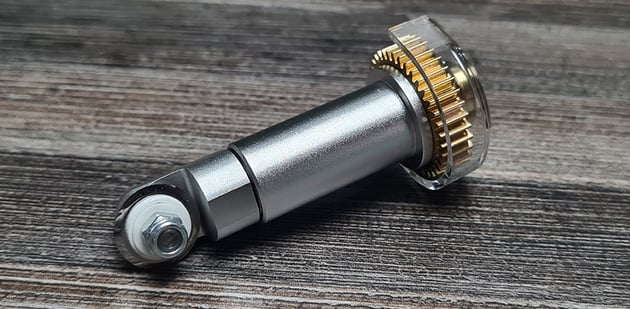
Q is for QuickSwap Housing
The QuickSwap Housing is an adaptive blade tool that allows you to easily swap out tips for various functions. You can simply buy one QuickSwap housing and have several tips to go along with the one housing, so it will save you a lot of money at the end of the day.
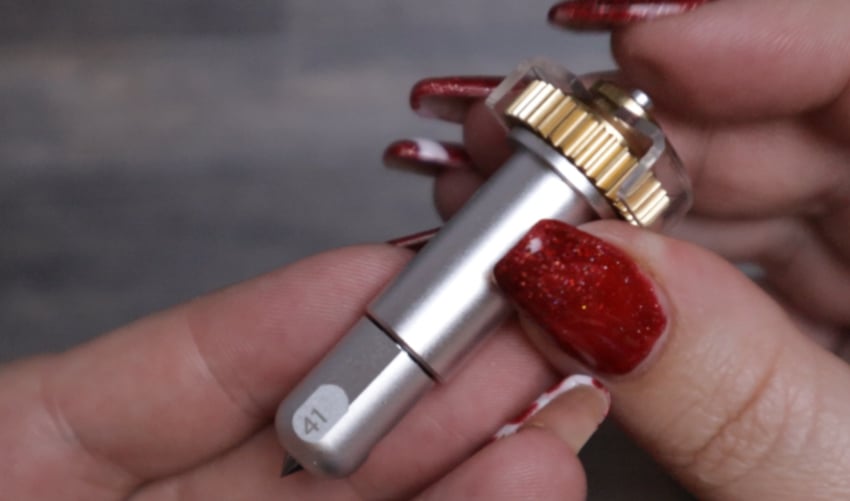

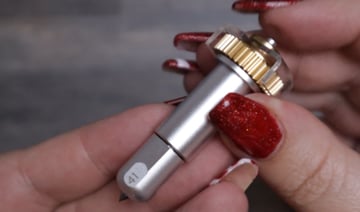
The QuickSwap Housing has a little silver button on the top, and when you press that button it pops the bottom tip off, so you can easily swap it with another tip. The tips that you can get with the QuickSwap housing are the perforation blade, debossing tool, engraving tip, single scoring wheel, double scoring wheel, and wavy blade.
R is for Rotary Blade
The rotary blade is a blade that is compatible with the Maker and Maker 3, and it allows you to cut unbonded fabric. The rotary blade comes as standard with the Maker machine, but you will have to buy it separately if you buy the Maker 3.
This housing is not compatible with anything else, and you will need to use the pink fabric group mat when you’re using this blade. It’s a must when it comes to Cricut Maker tips.
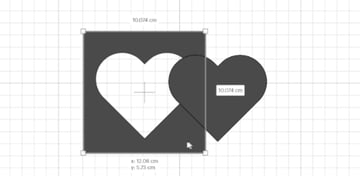
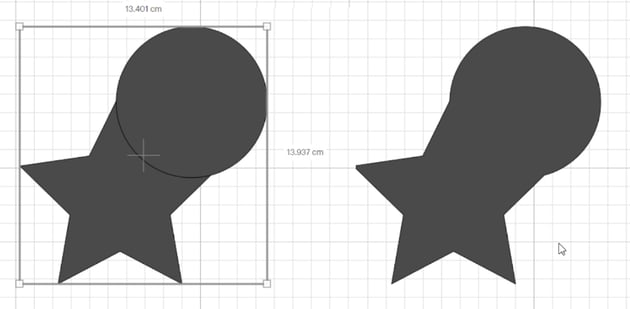
S is for Slice
This feature allows you to cut different objects out of each other. So if you have a square and you want to cut a heart out of the middle of it, you can use the Slice feature.
You can simply select both of the objects, and hit Slice. If you are not able to use the slice feature, it is because you don’t have two layers selected (it could be one or three or more). You can also use this feature to break up designs into different sections if you want to have a paragraph of words written out in different colours or cut in different colours. I can add a square to my canvas over one of the sections of the word that I want to cut out, select both of the layers, and then slice them out. I will then have several different layers that I can change the colours of!


T is for Test Cuts
Here’s a fun Cricut hack. Test cuts are incredibly important whenever you’re cutting a new material on your Cricut. Instead of cutting an entire design and then realising that it hasn’t cut through properly, you should be doing a test cut on a small corner of your material first.
You can cut any shape or letter around 1 cm, just to make sure that the cut settings that you are using are correct. It should only take a minute, and it will save you a lot of time and heartache in the long run. Please do your test cuts!


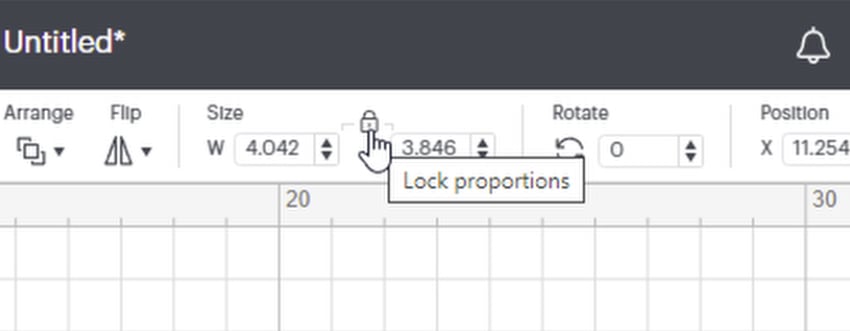
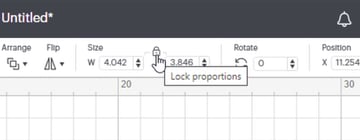
U is for Unlock Proportions
Here’s another one of the best Cricut tips for beginners.
If you want to change the height but not the width of your design, you can unlock the proportions by clicking on the little padlock button at the top of the screen towards the right.
From here, you’ll be able to change the proportions of your item to make it taller and not longer, or you can lock the proportions to keep the same proportions of your design.

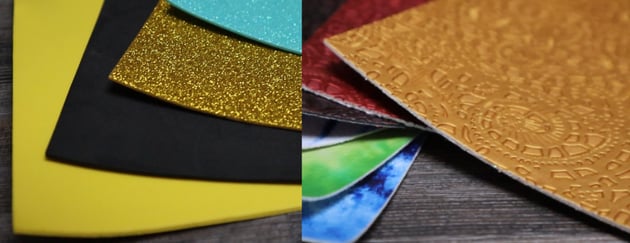
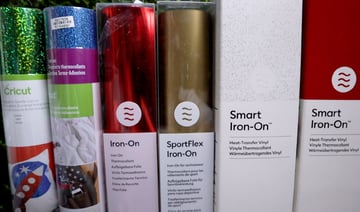
V is for Vinyl
Vinyl is an incredibly popular thing to cut on your Cricut machines. You get two types of vinyl: adhesive vinyl and heat transfer/iron-on vinyl. However, in the Cricut world, just the word vinyl refers to adhesive vinyl or sticker vinyl.
Sticker vinyl can be put on things like mugs, cars, or cell phones. You can even use removable vinyl on walls when you don’t want to mess up the paint.


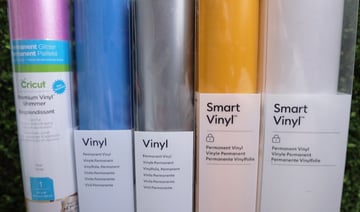
Iron-on/heat transfer vinyl is the type of vinyl that you would apply to T-shirts, socks, wood, and many other different types of substrates. It is applied with heat at around 165° and pressure to make sure that it sticks to your garment in the long term.


W is for Weld
The Weld feature is a basic Cricut hack. You can use it to permanently stick multiple shapes together and make a solid shape or combine multiple shapes into one layer.
Without using the Undo feature, you cannot undo this step at a later stage, so when you weld something, be sure that this is what you want. You may also need to weld text together if you have ungrouped the letters so that they don’t cut out individually.


X is for Control-X (Cut)
There are many shortcuts that you can use in Cricut Design Space, and this one allows you to Cut something out of your canvas and paste it in later. It’s one of the basic Cricut tips for beginners. You can press Control and X on your keyboard to remove whatever item you have selected, and you can paste it in as many times as you want by pressing Control-V.
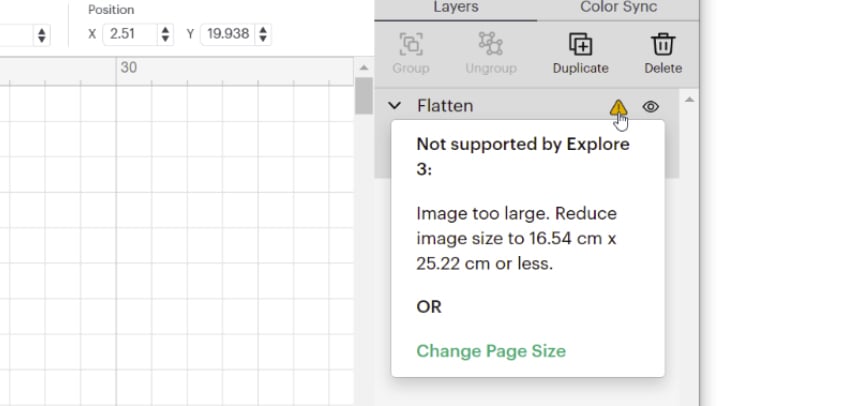
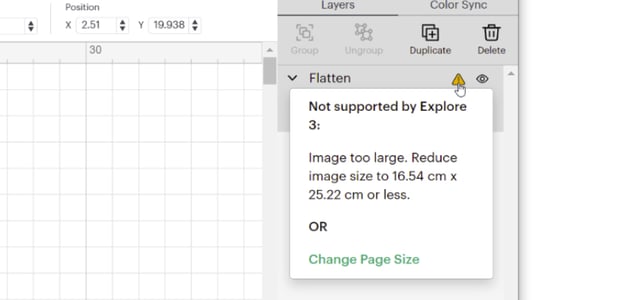
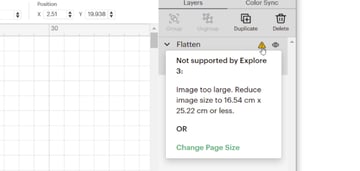
Y is for Yield Sign
The Yield sign is a little yellow triangle that will appear on the Layers panel on the right-hand side of your screen when there is something wrong with that layer. It’s one of the Cricut hacks that could save you the most time.
For example, if you are using a print then cut design and your design is now larger than the maximum size possible, there will be a little yield sign on that layer. When you click on the sign, it will tell you exactly what is wrong and what you need to do to fix it.

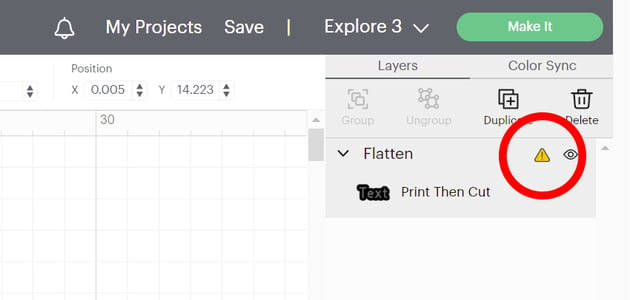

Another thing that it could show you is that the operation you have on your layer is not compatible with your machine. If you want to deboss something but you have a Cricut Joy, it will tell you that the debossing feature is not compatible with the machine type you have selected.
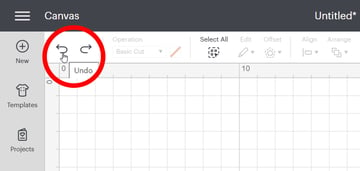
Z is for Control-Z (Undo!)
Here’s the last of our Cricut tips and tricks. Easily the shortcut that I use on my computer the most!
Control-Z allows you to undo your last action. So if you have moved something on your canvas by accident, you can press Control-Z on your keyboard and it will undo that move. You can also use the undo and redo arrows on the top left-hand side of your screen if you are not too comfortable with keyboard shortcuts.


Learn More Cricut Skills With These Tutorials!
We just went through some of the coolest Cricut hacks. Whether you were looking for Cricut Joy or Cricut Maker tips, now you know more about the Cricut basics.
There are so many incredible full tutorials you can use to improve your Cricut skills, so take a look at these tutorials to learn more:
-
 How to Shadow Text in Cricut Design Space
-
What Is Cricut?
-
How to Make a Stencil Font With Cricut
-
How to Upload Fonts to Cricut Design Space
-
How to Add Flourishes to Fonts in Cricut Design Space
-
How to Make a Monogram on Cricut
-
How to Make T-Shirt Designs With a Cricut
-
How to Make a Font Thicker on Cricut