
When it comes to creating mobile apps there are a variety of issues to consider, including the plethora of devices, screen sizes and platforms to cater for, plus the number of skillsets needed to target all the major platforms. For example, Apple iOS uses Objective-C, Android uses Java and a bit of C and C++, while BlackBerry uses Java.
Even if a developer has the skills to target them all, it’s still a costly task to manage and test several variations of the same application. This is where HTML5 can help. Mobile and tablet devices from Apple, Android and BlackBerry all feature web browsers capable of rendering rich interfaces through the use of HTML5. This offers a simplified avenue for app development, enabling the developer to simply create the app once and target all the major platforms.
A few years ago Sencha released the mobile web application framework, Sencha Touch. This enabled me to create cross-platform mobile web applications written in JavaScript. The UI controls, along with all the animations and transitions, make it seem like a native application. More recently Sencha released Sencha Architect, which facilitates designing and developing applications using a graphical drag-and-drop interface.
In the first of this two-part tutorial I will show how you can use these tools, with the minimum amount of coding, to create a simple mobile HTML5 application for managing places you want to visit. This will be expanded upon in the next issue to illustrate how you can link this app to an ASP.NET Web API backend.
START New project
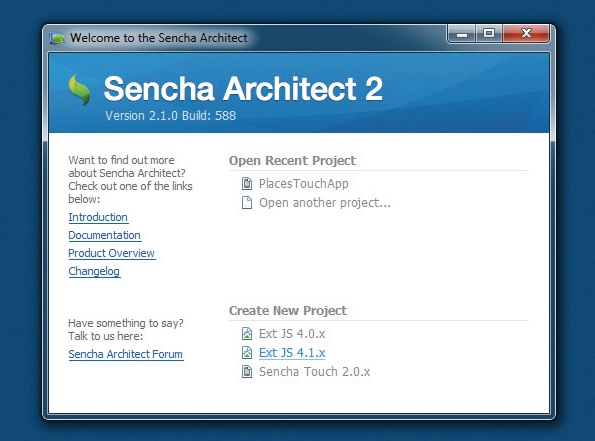
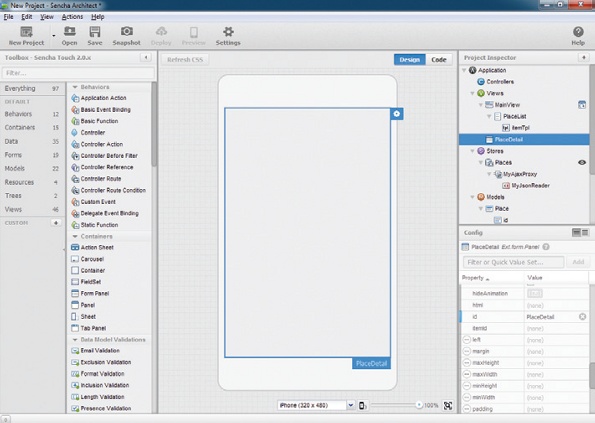
Open Sencha Architect and create a new mobile project by selecting Sencha Touch 2 from the Welcome screen. The main Architect window will open and you will be shown your new project with a blank canvas where the application interface can be built.
Concepts
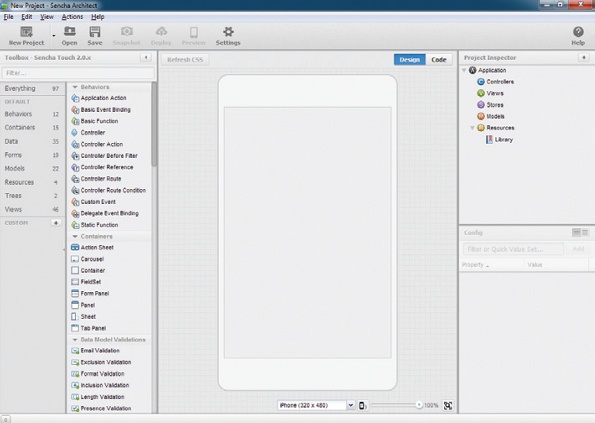
Architect works by enabling controls to be dragged and dropped from the Toolbox to the Canvas or Project Inspector. This generates best-practice JavaScript code for the application. To view the generated code, press the Code button at any stage during development.
Navigation
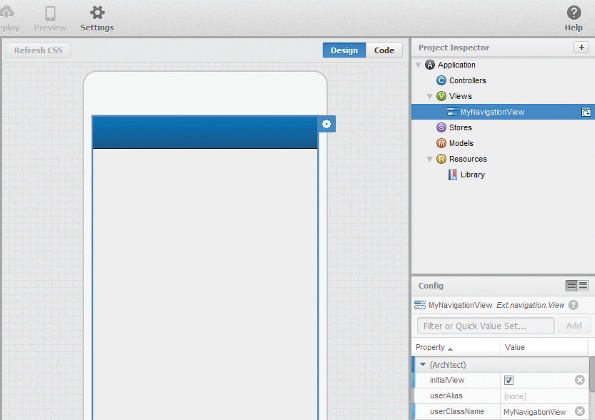
View Start by dragging and dropping a Navigation View from the Toolbox on to the Canvas. The new view will be listed under Views in the Project Inspector. This has been marked as the initial view when the app is launched, because it’s the first one in the project.
Config
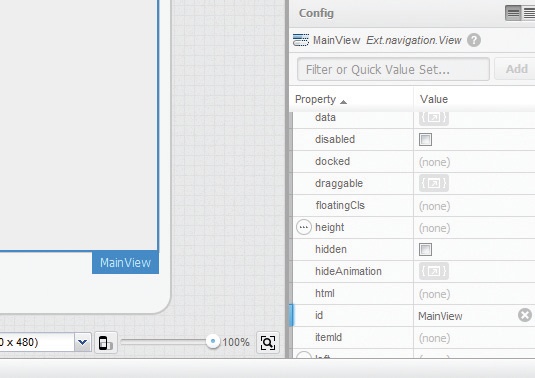
The Navigation View enables multiple components to be added within it, but just shows one at a time, allowing easy switching between them by the developer. In the Config panel, change the userClassName and id properties of the Navigation View to MainView.
Store
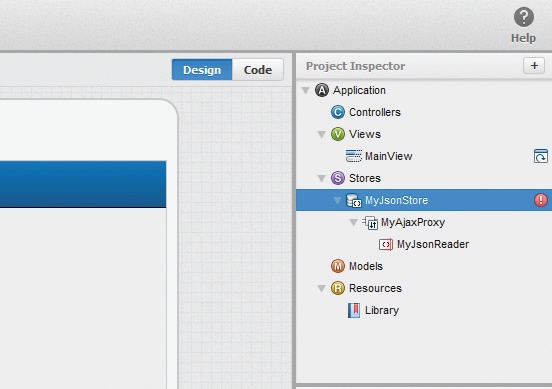
For this part of the tutorial, the data is going to be hard-coded. We need somewhere to keep this data, and for that we need to add a Store (a kind of database of records) to the project. In the Project Inspector click the Add button, then select Json Store from the Store submenu.
Model
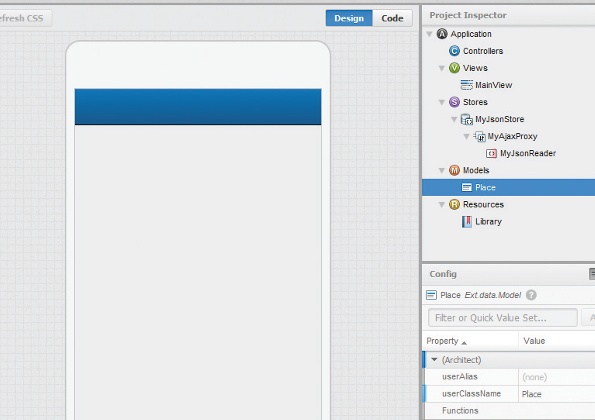
The Store needs to have an associated Model. This is like a database record, and will define the fields for the type of data we’re dealing with. In the Project Inspector click the Add button, then select Model. Set the userClassName of this new Model to Place.
Fields
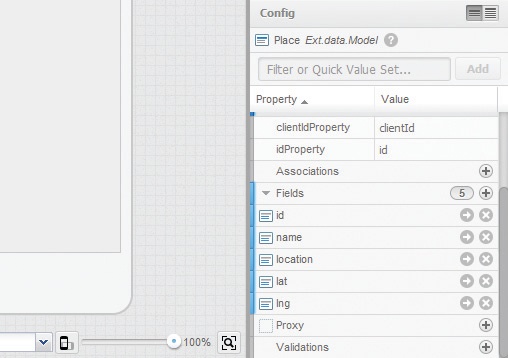
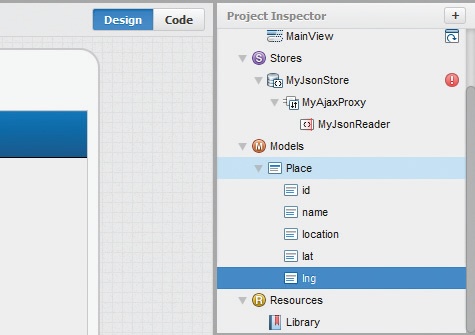
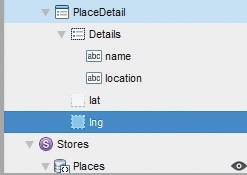
The new Model needs to have some Fields defined. In the Config panel use the Add button next to the Fields property to add five new fields: id, name, location, lat and lng. These will be used for storing the ID of the record, name of the place, location, latitude and longitude.
Field types
By default, newly added fields within a Model default to type string, which isn’t suitable for some of the fields that were just added. From the Project Inspector, select the id field and set its type to int. Then select both the lat and lng fields and set their types to float.
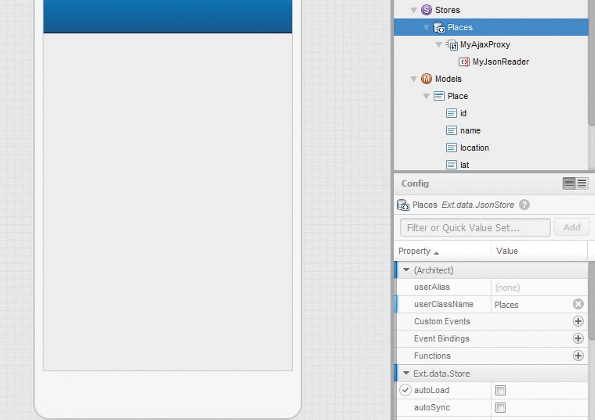
Store config
The Store needs to know what type of data it’s dealing with. Select the Store, and in the Config panel set Model to Place, userClassName to Places, and storeId to Places. When data is loaded in the Store, new instances of the Place Model will be created.
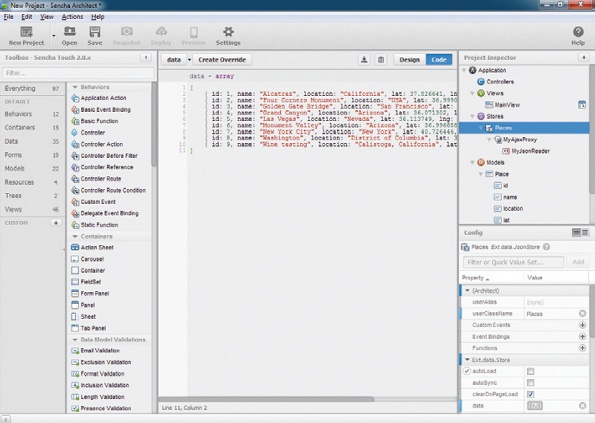
Store data
The data property within the Store needs to be pre-populated with hard-coded JSON data. A sample set of data is included in the download files for this tutorial (Step10.txt). Open up the file in a text editor, and copy the contents into the data property of the Store.
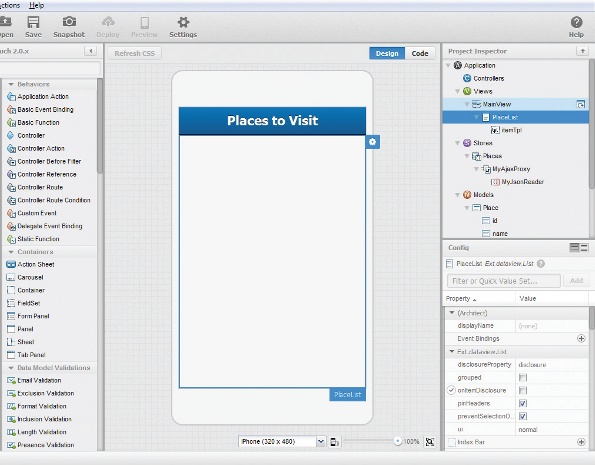
List
Now the Store has been populated with data, we need to show this data on screen. Return to Design view, drag a new List on to the Navigation View and then set the id of the List to PlaceList, the title to Places to Visit, and set the store (its data source) to Places.
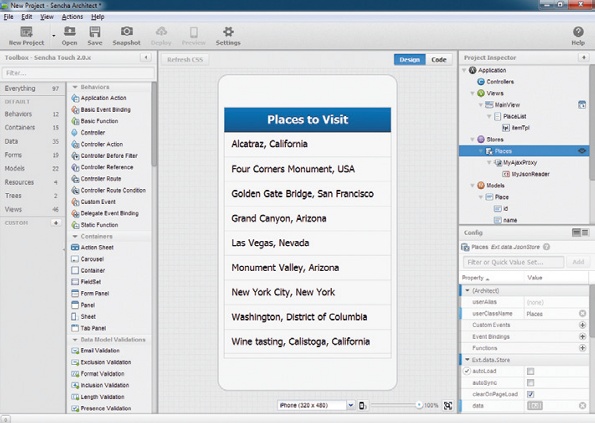
Load data
On the List, change the itemTpl property, which is used to render each row of the list, to <div>{name}, {location}</div>. By referencing the field names within parenthesis, their values will be inserted in their place. Right-click the Store and select Load Data.
Detail
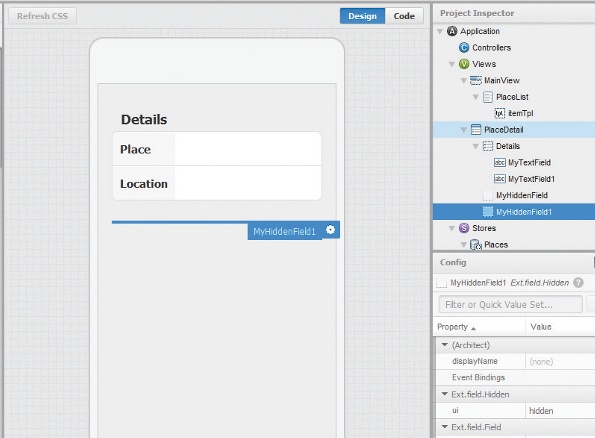
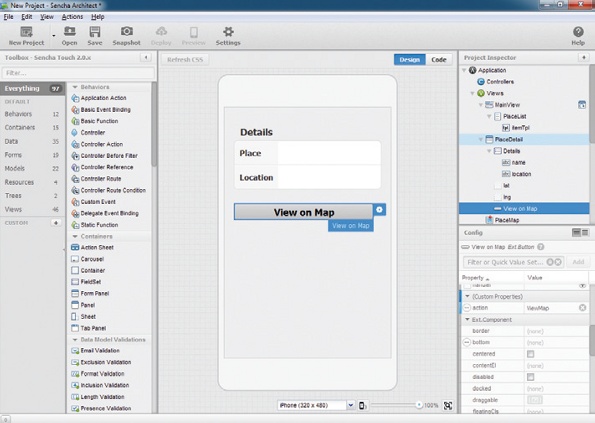
We want to allow the user to show some more information regarding a place when they tap an item in the List; for instance the name of the place along with a map. Drag a new Form Panel to the root of your project and set both the userClassName and id to PlaceDetail.
Fields
Drag a new FieldSet to the Form and set the title to Details. By default, two text fields are included in the FieldSet. Change the label of the first field to Place, and then the second one to Location. Also drag two new Hidden Fields on to the Form.
Field names
Later, we’ll load an instance of a Place record in to the Form. For it to automatically populate the fields with values, you need to set the name property of all four of the fields to match the fields in the Model (name, location, lat, lng).
Map
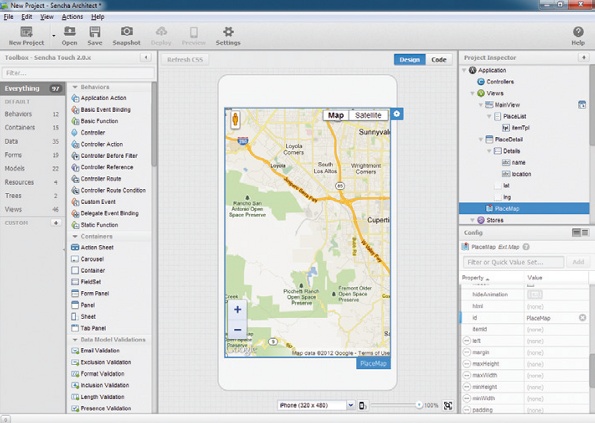
Drag a new Map to the root of your project and set both userClassName and id to PlaceMap. This map will be used for showing the location of the selected place. The Map component encapsulates a Google Maps view, which can be controlled via the Google Maps API.
Map button
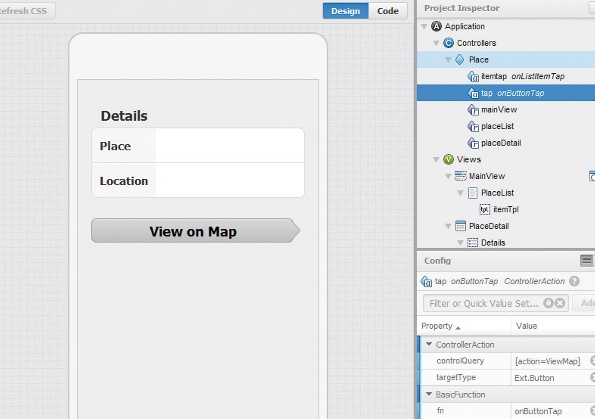
Drag a new Button on to the PlaceDetail form. Double-click the button on the canvas and set the text to View on Map. Set the ui property to forward. Add the following in the Filter or Quick Value Set box: action:”ViewMap”, then click Add.
Controller
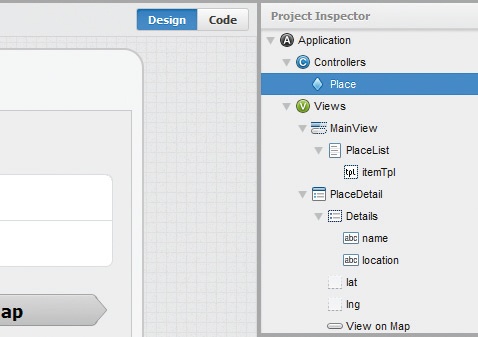
Now that the interfaces and data definitions have been completed, we’ll add a Controller to bring the functionality together. Click the Add button in the Project Inspector and select the Controller option. Set the Controller’s userClassName to Place.
References
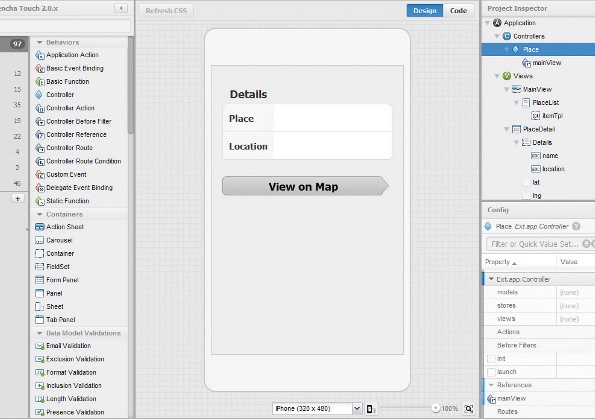
Now we’ll add some Controller References. These will allow the Controller to reference our View components. Select Controller and click Add, next to References in the Config panel. Enter the name mainView, click Next, and enter a selector of #MainView.
References
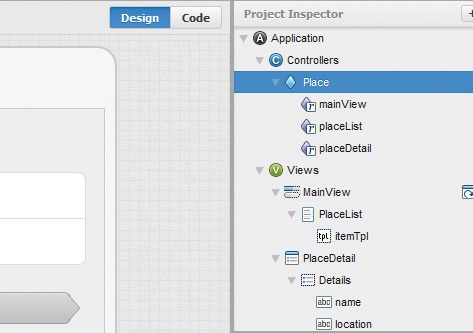
A Controller Reference creates an automatic getter in the Controller, and the selector is a control query. Add two References, one for placeList (with a selector of #PlaceList), and another for placeDetail (with a selector of #PlaceDetail).

Actions
We need to add two Controller Actions – functions called when events are fired within our app. The first Action will be for the List’s itemtap event. Add a new Action by clicking on the Add button beside Actions in the Config panel, and selecting Controller Action.
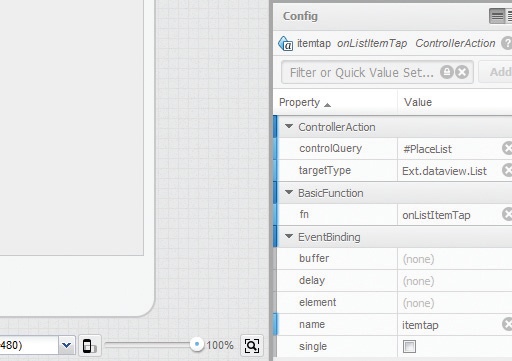
Actions
When you add a new Action, a combo box appears: select Ext.dataview.List, then itemtap. This creates the Action in the project. Select the itemtap Action and set the controlQuery to #PlaceList. This sets which control is associated with the Action.
Actions
Add the final Action for the View on Map button. Select the Controller and add a new Action. Select Ext.Button from the target type combo box, then select tap from the event combo box. Now select it in the Project Inspector and set the controlQuery to [action=ViewMap].
Code
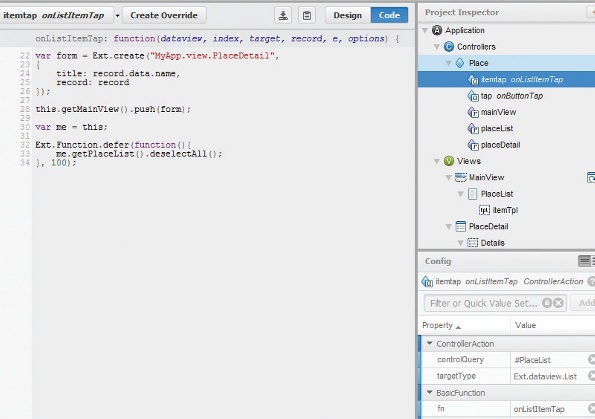
We now need to add code to the two Controller Actions. First, double-click on the itemtap Controller Action in the Project Inspector to show the code view and copy and paste from the Step24.txt file that’s included in the tutorial download.
More code
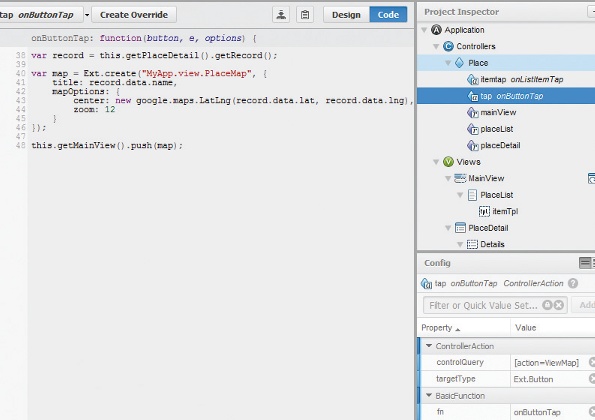
Now add the code for the other Controller Action, by copying and pasting from the Step25.txt file that is included in the tutorial download. This is the code that will show the map when a user clicks the View on Map button.
Save project
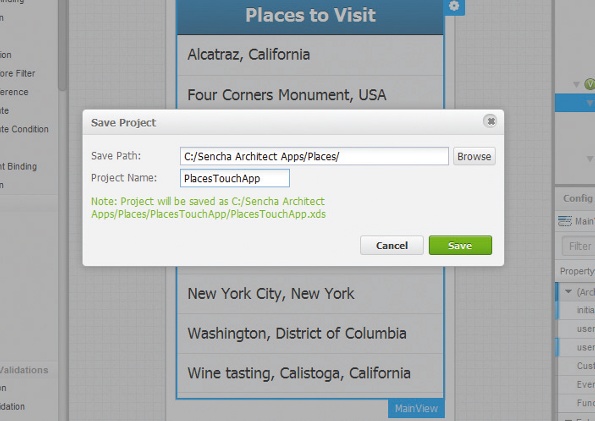
Save the project somewhere on your local file system, by clicking on the Save button. Enter a Save Path such as C:\Sencha Architect Apps\Places\, and enter a Project Name of PlacesTouchApp. In part two we’ll create a .NET Web API application in the root of this folder.
Web server
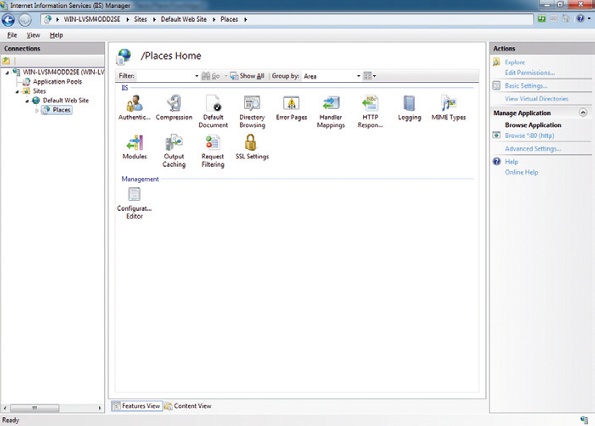
On your local web server (IIS), create a new Application called Places, and point it to the application path (C:\Sencha Architect Apps\Places\ PlacesTouchApp). You will then be able to access your web app by navigating to http://localhost/Places/app.html.
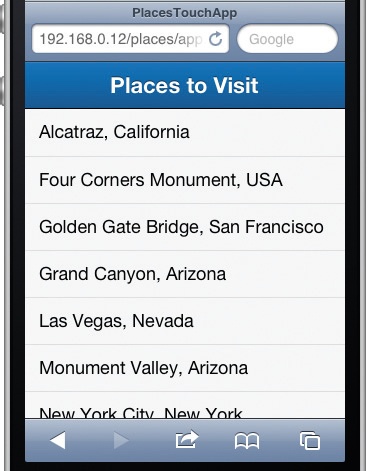
FINISH View in browser
Either use a compatible mobile device on your network to access the demo hosted on your local web server, or launch a WebKit-based browser such as Chrome or Safari and preview your app. You’ll notice when navigating through the app all the animations between Views, along with Back buttons, are handled automatically.
How to build an app: discover 35 great tutorials at Creative Bloq.