
Today we are going to be taking a look at a unique take on providing WordPress themes, named CloudPress, it is an app which lets you design a WordPress theme from scratch ( or choose from a number of existing themes ) and customize it using drag and drop building tools. Once you are done designing your site, you can then export the design to your WordPress site where it will function like any other WordPress theme.
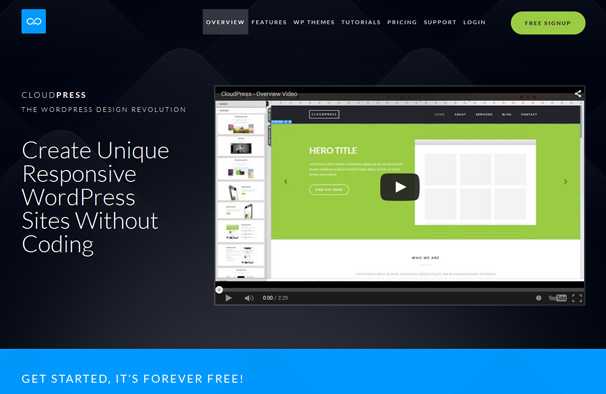
I like the idea of this, it seems to be bridging the gap between site builders like Squarespace with easy to use visual tools to create a website, but you retain all the benefits that comes with using WordPress as your platform for running your site.
CloudPress Features
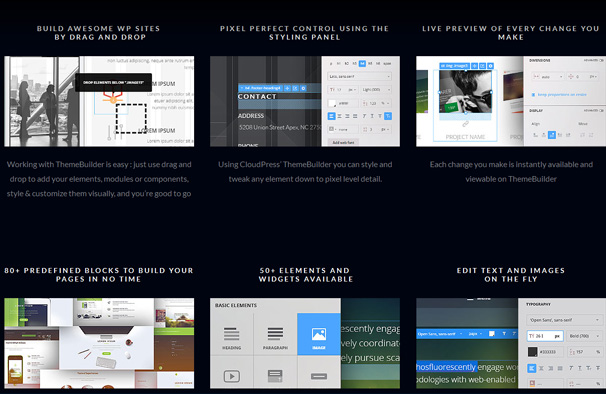
CloudPress includes an impressive number of features for you to make use of, drag and drop controls to build your site in a visual environment, 80+ predefined content blocks, 50+ elements and widgets, responsive grid-based layouts, responsive menus, sliders and carousels.
Here is a run down of all the included features
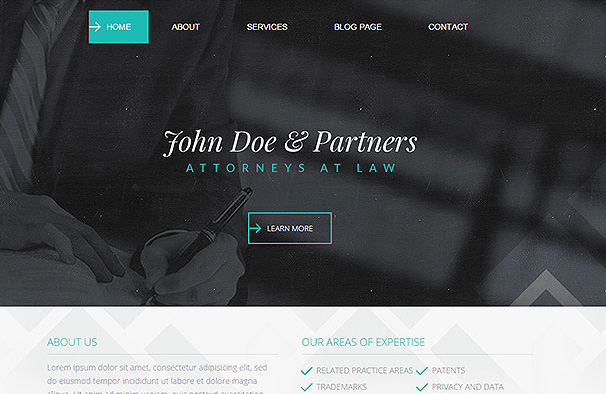
There are also a number of themes that you can use as a base to start customizing, all themes include :
- Unlimited customization with ThemeBuilder
- Create any type of layout with ThemeBuilder
- Live Visual Styling
- 5 types of predefined page layout
- Beautiful effects
- Customizable contact form
- Responsive slider
- Photo gallery with lightbox
- Customizable search results page
- SEO plugins
- Google Analytics plugin
- Social plugins
Creating Your Theme
To get started, create a free account on the site and once you are logged in to the dashboard hit the “Create New Site” button.

On the next screen, you can give your project a name and choose a password for it. You then have the choice of starting a blank project or picking one of the 10 included designs as a base to start customizing.

Once that is done, you are transferred to a WordPress installation which is where you will begin to design your site. There is a main welcome screen with some links for configuring things like SEO, link for sharing your preview, Analytics etc and some tutorial links down the other side.
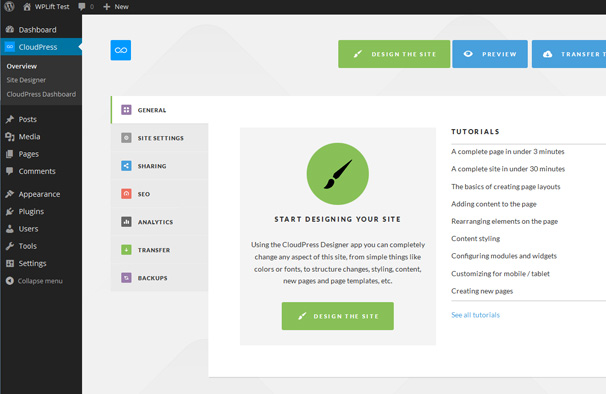
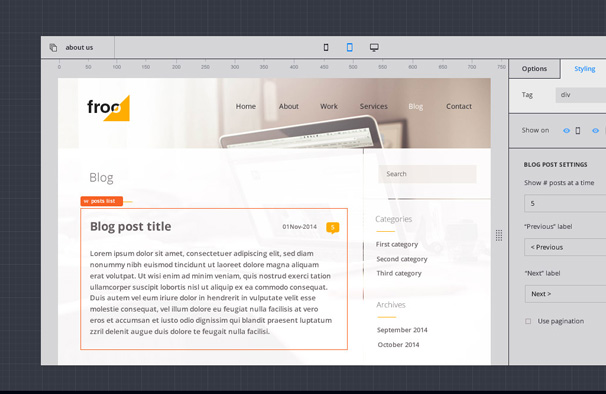
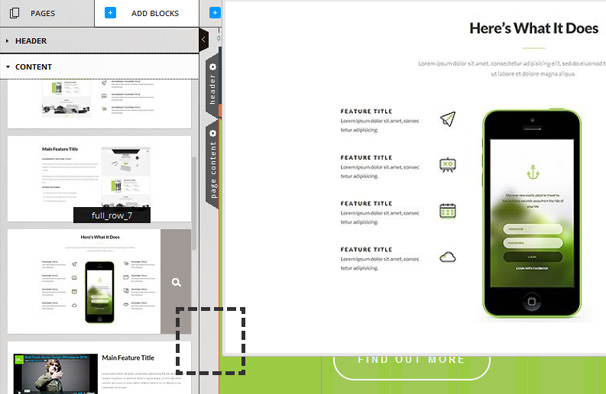
If you click the “Design the Site” button you are transferred to the site designer. Now this next screen is where you will be creating your site and at first glance it looks quite complicated. The main panel contains a preview of your chosen theme, as you hover over different elements they will highlight themselves offering you the opportunity to click on them and edit them in place.
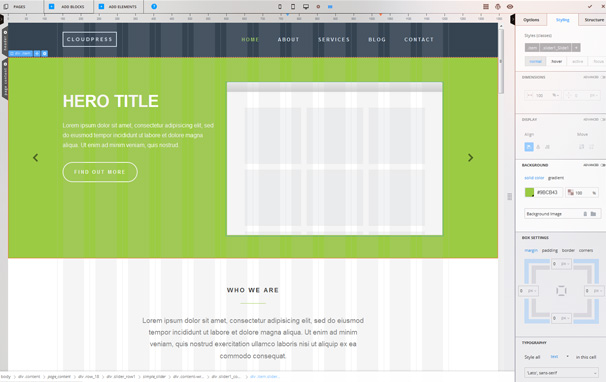
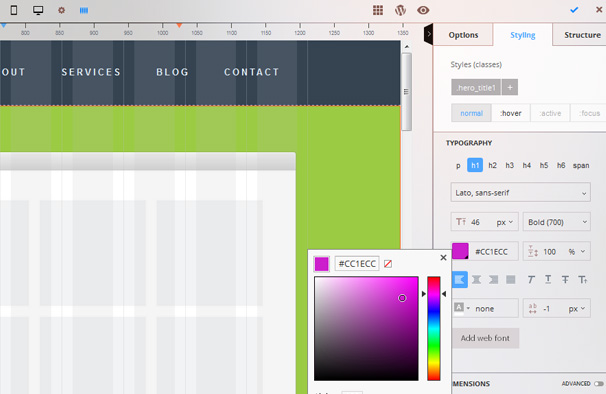
When you click on an element on the preview, it will load the options for it in the right hand panel. For example clicking on the “Hero Title” heading will let you change the font, size, color, dimensions and so on. You can also click on the element and drag it around the page to a different position.
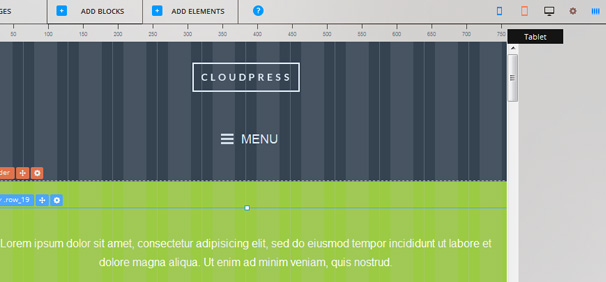
At the top of the screen are icons for mobile, tablet and desktop so you can check how your responsive design looks at differing screen sizes in real time.
In addition to just customizing the content that is provided in the theme by default, you can add different content blocks – clicking the “Add Blocks” button will load a list of different types of content blocks that you can place in the header, content or footer. To use one, simply drag it in to place in your design preview and it will be added – you can then customize it how you like by selecting individual elements within it.
You can also add a range of different elements to the blocks, clicking the “Add Elements” button will load the available elements on the left. Again, these are added by simply dragging them over into the desired position.
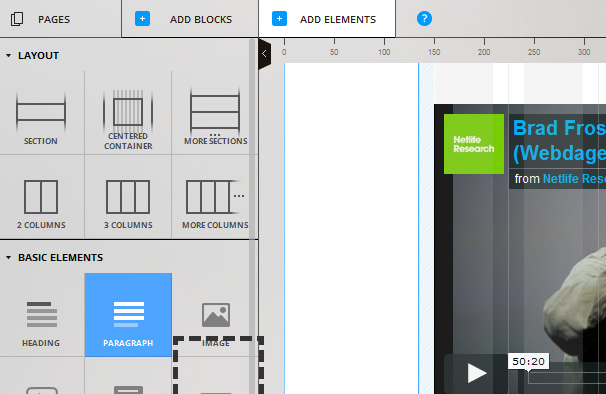
The available elements consist of things like layouts, basic elements such as headings, paragraphs, images, videos and lists, sliders, carousels, Google maps, search boxes and social networking elements. Each item has been designed to work with your chosen theme.
Publishing to Your Site
Once you are happy with the design of your site, you can transfer it to your hosting. To do this, you must have a paid site plan which costs from $ 59.99 per year for one pro site. Click the “Transfer to Hosting” button and you will be provided with a plugin to download and add to your site.
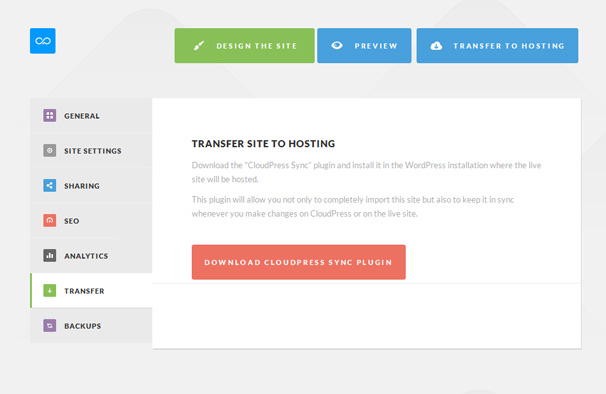
After downloading an activating the plugin, you are taken to a screen which gives you the option to “Get from CloudPress” which will then begin the synching process.
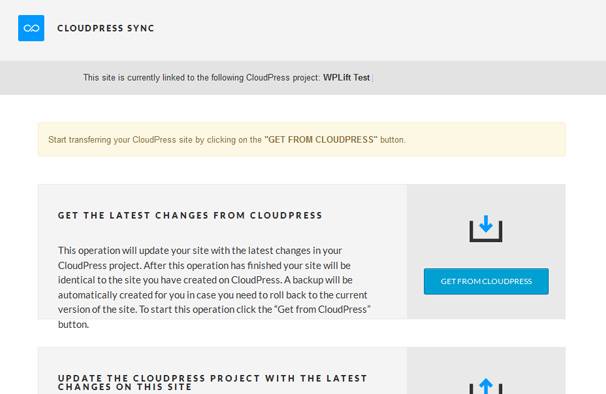
Once the process has completed which took a couple of minutes, you can view your site and it will be setup the same as the site you created before on CloudPress. There is an option on the CloudPress Sync tool to send changes back to the CloudPress app so it will stay synched there if you make changes on your live site. You can carry out any more changes as required on the CloudPress site and simply hit the “Get from CloudPress” button again and it will update your live site.
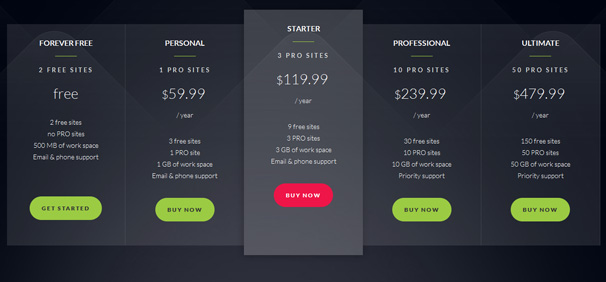
Pricing
CloudPress is free to try for 2 free sites so you can try it out, you get 500MB of workspace included with that so you can fully test the service out. If you get to the point where you want to transfer your design to a live site on your hosting you will need to upgrade to a paid plan which includes at least 1 pro site. The cheapest starts at $ 59 per year for 1 pro site, and there are other plans right up to the “Ultimate” which costs $ 479 and includes 50 pro sites, 50GB of space and 150 free sites. You can view the full pricing details here.
Conclusion
CloudPress is certainly a very impressive achievement – turning WordPress theme creation into an app has worked very well here. The service was easy to use, even if the initial design screen was a little overwhelming – once I spent a few minutes playing about it with it I found it worked like other similar visual theme builders. The themes offered are quite well designed and should provide a solid starting point for building something a little more custom to your needs.
The process of transferring the site over worked like a charm – simply activating a plugin and clicking a button imported my design over and it looked and functioned exactly the same as the one from the app.
Pricing seems reasonable, $ 59 per year for a single site is not too bad, you have to budget in that you will also need to pay for your own hosting as well. If you don’t need all the extra functionality you will get from your own hosted WordPress installation, you could use their free plan which provides your site on their free sub domain but there is no mention on the site of bandwidth that is included etc so I’m not sure if it’s a viable option to keep your site running there permanently.
Maybe in future they could begin offering more options for sites hosted with CloudPress and turn it into a true competitor for sites like Squarespace, I think they are definitely onto something good here so it will be interesting to see how it progresses.