Evernote is a great tool for easy synchronization of notes across multiple devices and various platforms. It’s used extensively to save, edit and share notes among different devices and with multiple users. It works great for group collaborations and is great to jot down ideas on-the-go.
At first, Evernote may look like a disorganized and tough-to-run app, but if you know what you are dealing with and learn how to use it proficiently to organize your ideas and tasks, it could be your very best personal assistant.
In this article, we are going to share with you 10 tips to help you get started on Evernote, beginning with…
Recommended Reading: Evernote 5 For Mac And IOS: 10 New Features You Should Know
Saving with Evernote
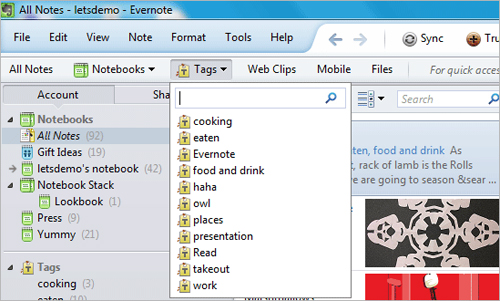
Save Ideas with ‘Tags’
You’ll be working with ideas whether you’re a student, writer, designer or a software engineer. With Evernote, you can easily save and manage your ideas, and never risk losing another great idea again.
Start a note and title the idea. Enter ‘Idea’ as one tag and one other specific tag to describe what your idea is all about. Add a description to explain your idea for future reference, and you’re set.
Shortcut key:
- New Note: Ctrl + N (for Windows) and ⌘ + N (for Mac OS X)
- New Tag: Ctrl + Shift + T (for Windows) and ⌃ + ⌘ + N (for Mac OS X)
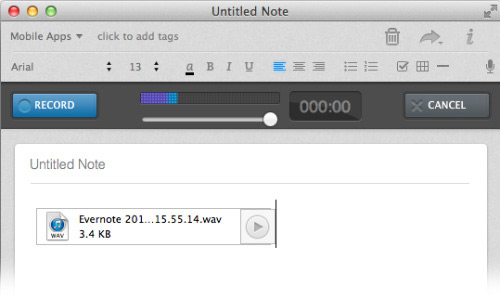
Save your Idea as an Audio Note
What if you get an idea and don’t have time to type it all out. That’s not a problem; you can save your idea as an audio file. Just start a new Audio note, click Record and start speaking through your microphone. Save your note once you are done.
Your note will be shown in the Note List with a Speaker button, which identifies it as an audio note.
Shortcut key: Ctrl + Shift + U (for Windows)
Save Handwritten work as an Ink Note
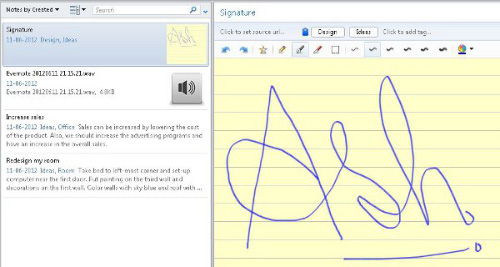
Don’t like to write or leave audionotes? You can leave it as a handwritten note as well. If you’re in the graphic industry, you’d surely prefer this alternative. Have a quick idea that you need to doodle out fast?
Start an Ink Note, use the pencil or pen tool to draw what you need to remember then save it. You can even save your signature with it.
Shortcut key: Ctrl + Shift + I (for Windows)
Save text and Screenshots
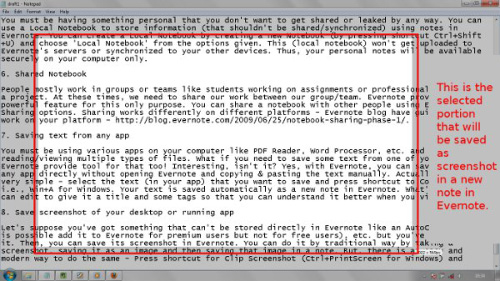
With Evernote, you can save text directly from any app without opening Evernote and doing the usual copy-paste action. Select the text from say, a PDF document or text file, copy the selection, and your text is automatically saved as a new note in Evernote. Later on, you can edit the saved note to give it a title and some tags so that you can store it in an organized fashion.
Evernote also has a handy shortcut to help you save screenshots of running apps or a view of your desktop. Hit the Win + PrtScrn keys to get an option to select part of the screen to be saved as screenshot. Highlight the area you want saved and upon release of the cursor your screenshot will be saved as a note in Evernote.
Shortcut key:
- Clip selected text: Win + A (for Windows)
- Paste clipboard content as new note: Ctrl + Alt + V (for Windows)
- Win + PrintScreen (for Windows)
Managing Notes and Notebooks
Synchronized Notebook
When creating a new Notebook, choose Synchronized Notebook and your notebook and the notes kept within will be synchronized with all your devices that are connected with Evernote.
Save your presentations, documents using notes in this notebook and you’ll never miss your important files when you need them no matter which device you are on. Free users can only attach images and pdf but premium users can attach any file.
Shortcut key: Ctrl + Shift + N (for Windows) and ⌘ + ⇧ + N (for Mac OS X)
Local Notebook
If you have personal notes that you don’t want shared, you can use a Local Notebook to store information. Create a new Notebook and choose Local Notebook from the options given.
Your notes will not be uploaded to Evernote’s servers nor get synchronized to any other device. Thus, your personal notes will be available on a single device.
Shared Notebook
If you work in groups and need to share data among your team members, you can share a notebook with them using the Evernote Sharing options. Free users can only read shared notebooks but premium users can modify it too. Sharing works differently on different platforms.
Evernote blog has a guide that you can check out to learn how to make it work on your platform.
Organize your notes
In Evernote, you have ‘notebooks’ and ‘notes’, which are different things. You can organize your notes in Notebooks, which can then be organized in stacks.
To make your notes work for you, put all your notes together in a notebook, for example, design plans, client feedback, first drafts, final drafts can all be placed together in a notebook which carries the title of the project.
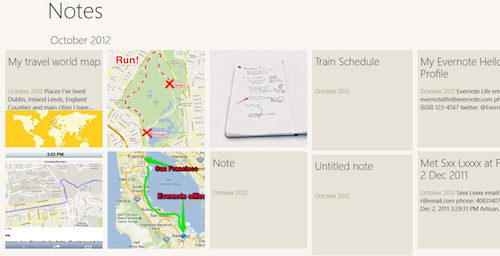
If you can organize all your materials and make it quickly accessible by way of close association, you don’t have to waste your time going through stacks and stacks of materials to get the information you need.
Security
Encrypt your data to maximize security
Evernote doesn’t take security matters lightly, so much so that the app provides an encryption feature to secure its users’ data. You can encrypt part or the whole text of your note using a password and no one will be able to read that text without the password.
Encrypted text is not shown directly in the note and in its place, you will see a passphrase button. When you right-click the passphrase button, you get two options namely ‘Show Encrypted Text’ and ‘Decrypt Text Permanently…’. Using any of the two options and the right password, you can get access to the encrypted text.
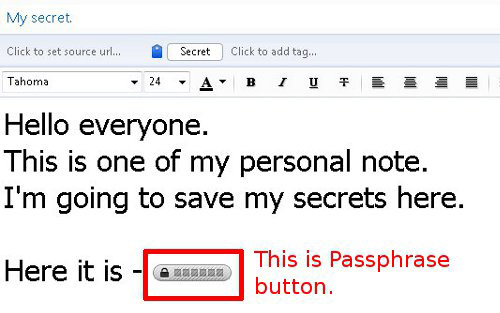
Do take note that Evernote only features encryption – RC2 encryption algorithm which is not supposed very secure these days – for text and not much else.
Shortcut key: Encrypt selected text: Ctrl + Shift + X (for Windows) and ⇧ + ⌘ + X (for Mac OS X)
Productivity
Evernote templates
If you spend a little time to look up Evernote templates for specific needs this will also be able to help increase productivity. These templates can be created very easily. You can create a note that contains all the required fields for your information, then save and export it as an .enex (Evernote exported) file.
Here is a good guide to create and use Evernote templates – neseco.com, as well as a few links to some Evernote templates:
- Bible Study Passage Analysis
- Evernote templates by Thought Asylum
- Expensify with Evernote (it’s not a template but can be used to manage your expenses easily)
- Evernote templates by Christopher Mayo
Conclusion
Hopefully these tips will help encourage you to give Evernote a chance to help manage your assignments for school, projects for freelance and achieve deadlines for your next report. Are you using Evernote now? Do you have any tricks to put Evernote to better use? Share your tips with us in the comments section.
