Requests is a Python module that you can use to send all kinds of HTTP requests. It’s an easy-to-use library with a lot of features, ranging from passing parameters in URLs to sending custom headers and SSL verification. In this tutorial, you will learn how to use this library to send simple HTTP requests in Python.
You can use Requests with Python version 2.6–2.7 and 3.3–3.6. Before proceeding further, you should know that Requests is an external module, so you will have to install it first before trying out the examples in this tutorial. You can install it by running the following command in the terminal:
Once you have installed the module, you can verify if it has been successfully installed by importing it using this command:
If the installation has been successful, you won’t see any error messages.
Making a GET Request
It is very easy to send an HTTP request using Requests. You begin by importing the module and then make the request. Here is an example:
1 |
import requests |
2 |
req = requests.get('https://tutsplus.com/') |
All the information about our request is now stored in a Response object called req. For example, you can get the encoding of the webpage using the req.encoding property. You can also get the status code of the request using the req.status_code property.
1 |
req.encoding # returns 'utf-8' |
2 |
req.status_code # returns 200 |
You can access the cookies that the server sent back using req.cookies. Similarly, you can get the response headers using req.headers. The req.headers property returns a case insensitive dictionary of response headers. This means that req.headers['Content-Length'], req.headers['content-length'] and req.headers['CONTENT-LENGTH'] will all return the value of the 'Content-Length' response header.
You can check if the response is a well-formed HTTP redirect that could have been processed automatically using the req.is_redirect property. It will return True or False based on the response. You can also get the time elapsed between sending the request and getting back a response using the req.elapsed property.
The URL that you initially passed to the get() function can be different than the final URL of the response for a variety of reasons, including redirects. To see the final response URL, you can use the req.url property.
1 |
import requests |
2 |
req = requests.get('https://www.tutsplus.com/') |
3 |
|
4 |
req.encoding # returns 'utf-8' |
5 |
req.status_code # returns 200 |
6 |
req.elapsed # returns datetime.timedelta(0, 1, 666890) |
7 |
req.url # returns 'https://tutsplus.com/' |
8 |
|
9 |
req.history |
10 |
# returns [<Response [301]>, <Response [301]>]
|
11 |
|
12 |
req.headers['Content-Type'] |
13 |
# returns 'text/html; charset=utf-8'
|
Getting all this information about the webpage you are accessing is nice, but you most probably want to access the actual content. If the content you are accessing is text, you can use the req.text property to access it. The content is then parsed as unicode. You can pass the encoding with which to decode the text using the req.encoding property.
In the case of non-text responses, you can access them in binary form using req.content. The module will automatically decode gzip and deflate transfer-encodings. This can be helpful when you are dealing with media files. Similarly, you can access the json-encoded content of the response, if it exists, using req.json().
You can also get the raw response from the server using req.raw. Keep in mind that you will have to pass stream=True in the request to get the raw response.
Some files that you download from the internet using the Requests module may have a huge size. In such cases, it will not be wise to load the whole response or file in the memory at once. You can download a file in pieces or chunks using the iter_content(chunk_size = 1, decode_unicode=False) method.
This method iterates over the response data in chunk_size number of bytes at once. When stream=True has been set on the request, this method will avoid reading the whole file into memory at once for large responses. The chunk_size parameter can be either an integer or None. When set to an integer value, chunk_size determines the number of bytes that should be read into the memory.
When chunk_size is set to None and stream is set to True, the data will be read as it arrives in whatever size of chunks are received. When chunk_size is set to None and stream is set to False, all the data will be returned as a single chunk.
Let’s download this image of some mushrooms using the Requests module. Here is the actual image:


This is the code that you need:
1 |
import requests |
2 |
|
3 |
req = requests.get('path/to/mushrooms.jpg', stream=True) |
4 |
req.raise_for_status() |
5 |
|
6 |
with open('mushrooms.jpg', 'wb') as fd: |
7 |
for chunk in req.iter_content(chunk_size=50000): |
8 |
print('Received a Chunk') |
9 |
fd.write(chunk) |
The 'path/to/mushrooms.jpg' is the actual image URL. You can put the URL of any other image here to download something else. The given image file is 162kb in size, and you have set chunk_size to 50,000 bytes. This means that the “Received a Chunk” message should be printed four times in the terminal. The size of the last chunk will just be 32350 bytes because the part of the file that remains to be received after the first three iterations is 32350 bytes.
You can also download videos in a similar manner. Instead of specifying a fixed chunk_size, we can simply set its value to None, and the video will then be downloaded in whatever chunk sizes are delivered. The following code snippet will download this video of a highway from Mixkit:
1 |
import requests |
2 |
|
3 |
req = requests.get('path/to/highway/video.mp4', stream=True) |
4 |
req.raise_for_status() |
5 |
|
6 |
with open('highway.mp4', 'wb') as fd: |
7 |
|
8 |
for chunk in req.iter_content(chunk_size=None): |
9 |
print('Received a Chunk') |
10 |
fd.write(chunk) |
Try running the code, and you will see that the video is downloaded as a single chunk.
There are a couple of things that you should keep in mind if you decide to use the stream parameter. The downloading of the response body is deferred until you actually access its value using the content attribute. This way, you can avoid downloading a file if something like one of the header values seems off.
Also remember that any connections you initiated while setting the value of the stream to True aren’t closed unless you either consume all the data or use the close() method. A better way of making sure that connections are always closed even if you read the response partially is to make your requests within a with statement, as shown below:
1 |
import requests |
2 |
|
3 |
with requests.get('path/to/highway/video.mp4', stream=True) as rq: |
4 |
with open('highway.mp4', 'wb') as fd: |
5 |
for chunk in rq.iter_content(chunk_size=None): |
6 |
print('Received a Chunk') |
7 |
fd.write(chunk) |
Since the image file we downloaded earlier had a comparatively small size, you could also download it all at once by using the following code:
1 |
import requests |
2 |
|
3 |
req = requests.get('path/to/mushrooms.jpg') |
4 |
req.raise_for_status() |
5 |
|
6 |
with open('mushrooms.jpg', 'wb') as fd: |
7 |
fd.write(req.content) |
We skipped setting the value of the stream parameter, so it has been set to False by default. This means that all the response content will be downloaded immediately. The content of the response is captured as binary data with the help of the content property.
Requests also allows you to pass parameters in a URL. This can be helpful when you are searching a webpage for some results like a specific image or tutorial. You can provide these query strings as a dictionary of strings using the params keyword in the GET request. Here is an example:
1 |
import requests |
2 |
|
3 |
query = {'q': 'Forest', 'order': 'popular', 'min_width': '800', 'min_height': '600'} |
4 |
req = requests.get('https://pixabay.com/en/photos/', params=query) |
5 |
|
6 |
req.url |
7 |
# returns 'https://pixabay.com/en/photos/?order=popular&min_height=600&q=Forest&min_width=800'
|
Making a POST Request
Making a POST request is just as easy as making GET requests. You just use the post() method instead of get(). This can be useful when you are automatically submitting forms. For example, the following code will send a post request to the httpbin.org domain and output the response JSON as text.
1 |
import requests |
2 |
|
3 |
req = requests.post('https://httpbin.org/post', data = {'username': 'monty', 'password': 'something_complicated'}) |
4 |
req.raise_for_status() |
5 |
|
6 |
print(req.text) |
7 |
'''
|
8 |
{
|
9 |
"args": {},
|
10 |
"data": "",
|
11 |
"files": {},
|
12 |
"form": {
|
13 |
"password": "something_complicated",
|
14 |
"username": "monty"
|
15 |
},
|
16 |
"headers": {
|
17 |
"Accept": "*/*",
|
18 |
"Accept-Encoding": "gzip, deflate",
|
19 |
"Content-Length": "45",
|
20 |
"Content-Type": "application/x-www-form-urlencoded",
|
21 |
"Host": "httpbin.org",
|
22 |
"User-Agent": "python-requests/2.28.1",
|
23 |
"X-Amzn-Trace-Id": "Root=1-63ad437e-67f5db6a161314861484f2eb"
|
24 |
},
|
25 |
"json": null,
|
26 |
"origin": "YOUR.IP.ADDRESS",
|
27 |
"url": "https://httpbin.org/post"
|
28 |
}
|
29 |
'''
|
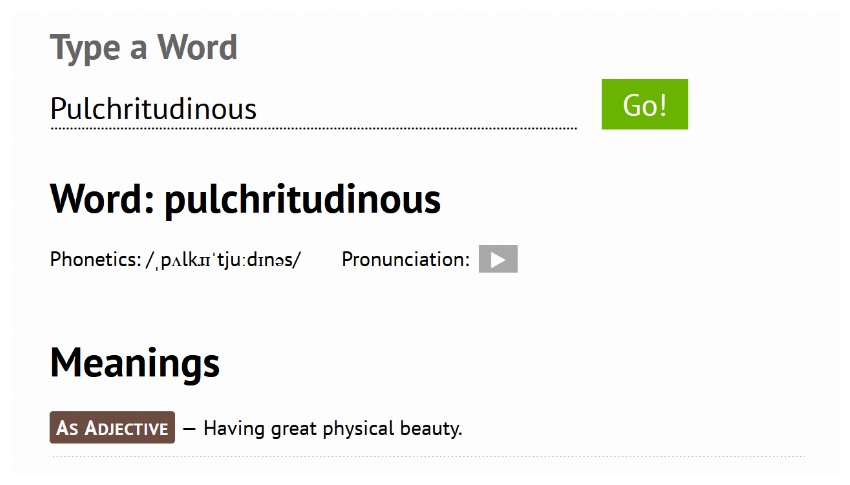
You can send these POST requests to any URLs that can process them. As an example, one of my friends created a webpage where users can input a word and get back its meaning along with pronunciation and other information using an API. We can make a POST request to the URL with our queried word and then save the result as an HTML page, as shown below:
1 |
import requests |
2 |
|
3 |
word = 'Pulchritudinous' |
4 |
filename = word.lower() + '.html' |
5 |
|
6 |
req = requests.post('https://tutorialio.com/tools/dictionary.php', data = {'query': word}) |
7 |
req.raise_for_status() |
8 |
|
9 |
with open(filename, 'wb') as fd: |
10 |
fd.write(req.content) |
Execute the above code, and it will give you back a page that contains information about the word, as shown in the image below.

Sending Cookies and Headers
As previously mentioned, you can access the cookies and headers that the server sends back to you using req.cookies and req.headers. Requests also allows you to send your own custom cookies and headers with a request. This can be helpful when you want to, let’s say, set a custom user agent for your request.
To add HTTP headers to a request, you can simply pass them in a dict to the headers parameter. Similarly, you can also send your own cookies to a server using a dict passed to the cookies parameter.
1 |
import requests |
2 |
|
3 |
url = 'http://some-domain.com/set/cookies/headers' |
4 |
|
5 |
headers = {'user-agent': 'your-own-user-agent/0.0.1'} |
6 |
cookies = {'visit-month': 'February'} |
7 |
|
8 |
req = requests.get(url, headers=headers, cookies=cookies) |
Cookies can also be passed in a Cookie Jar. They provide a more complete interface to allow you to use those cookies over multiple paths. Here is an example:
1 |
import requests |
2 |
|
3 |
jar = requests.cookies.RequestsCookieJar() |
4 |
jar.set('first_cookie', 'first', domain='httpbin.org', path='/cookies') |
5 |
jar.set('second_cookie', 'second', domain='httpbin.org', path='/extra') |
6 |
jar.set('third_cookie', 'third', domain='httpbin.org', path='/cookies') |
7 |
|
8 |
url = 'http://httpbin.org/cookies' |
9 |
req = requests.get(url, cookies=jar) |
10 |
|
11 |
req.text |
12 |
|
13 |
# returns '{ "cookies": { "first_cookie": "first", "third_cookie": "third" }}'
|
Session Objects
Sometimes it is useful to preserve certain parameters across multiple requests. The Session object does exactly that. For example, it will persist cookie data across all requests made using the same session. The Session object uses urllib3’s connection pooling. This means that the underlying TCP connection will be reused for all the requests made to the same host. This can significantly boost the performance. You can also use methods of the Requests object with the Session object.
Here is an example of multiple requests sent with and without using sessions:
1 |
import requests |
2 |
|
3 |
reqOne = requests.get('https://tutsplus.com/') |
4 |
reqOne.cookies['_tuts_session'] |
5 |
#returns 'cc118d94a84f0ea37c64f14dd868a175'
|
6 |
|
7 |
reqTwo = requests.get('https://code.tutsplus.com/tutorials') |
8 |
reqTwo.cookies['_tuts_session'] |
9 |
#returns '3775e1f1d7f3448e25881dfc35b8a69a'
|
10 |
|
11 |
ssnOne = requests.Session() |
12 |
ssnOne.get('https://tutsplus.com/') |
13 |
ssnOne.cookies['_tuts_session'] |
14 |
#returns '4c3dd2f41d2362108fbb191448eab3b4'
|
15 |
|
16 |
reqThree = ssnOne.get('https://code.tutsplus.com/tutorials') |
17 |
reqThree.cookies['_tuts_session'] |
18 |
#returns '4c3dd2f41d2362108fbb191448eab3b4'
|
As you can see, the session cookie has a different value in the first and second request, but it has the same value when we used the Session object. You will be getting a different value when you try out this code, but in your case too, the cookie for the requests made using the session object will have the same value.
Sessions are also helpful when you want to send the same data across all requests. For example, if you decide to send a cookie or a user-agent header with all the requests to a given domain, you can use Session objects. Here is an example:
1 |
import requests |
2 |
|
3 |
ssn = requests.Session() |
4 |
ssn.cookies.update({'visit-month': 'February'}) |
5 |
|
6 |
reqOne = ssn.get('http://httpbin.org/cookies') |
7 |
print(reqOne.text) |
8 |
# prints information about "visit-month" cookie
|
9 |
|
10 |
reqTwo = ssn.get('http://httpbin.org/cookies', cookies={'visit-year': '2017'}) |
11 |
print(reqTwo.text) |
12 |
# prints information about "visit-month" and "visit-year" cookie
|
13 |
|
14 |
reqThree = ssn.get('http://httpbin.org/cookies') |
15 |
print(reqThree.text) |
16 |
# prints information about "visit-month" cookie
|
As you can see, the "visit-month" session cookie is sent with all three requests. However, the "visit-year" cookie is sent only during the second request. There is no mention of the "vist-year" cookie in the third request too. This confirms the fact that cookies or other data set on individual requests won’t be sent with other session requests.
Conclusion
The concepts discussed in this tutorial should help you make basic requests to a server by passing specific headers, cookies, or query strings. This will be very handy when you are trying to scrape webpages for information. Now, you should also be able to automatically download music files and wallpapers from different websites once you have figured out a pattern in the URLs.
Learn Python
Learn Python with our complete Python tutorial guide, whether you’re just getting started or you’re a seasoned coder looking to learn new skills.
