PHPMyAdmin (PMA) is an excellent free, open-source, web-based database client which can be used to interact more easily with MySQL and WordPress databases. I’ll describe how to install PMA in Linux and with the WAMP and XAMPP server distributions. I’ll also describe ways to secure it and some common scenarios in which it can assist you in WordPress administration. Here’s an online demo of PMA for you to explore.
In addition to offering a visual GUI for database operations, I also appreciate being able to run command-line SQL operations via my browser without having to log in to the server via SSH. For example, some WiFi and mobile connections regularly terminate persistent SSH sessions, making database tasks problematic.
Before we start, there are a few precautions I recommend when configuring PMA.
1. Use very strong passwords for all of your MySQL accounts, especially the root account, e.g. 25 characters for the root password.
2. Use different MySQL accounts and privileges for each WordPress site running on a single server. This way, if one WordPress password is compromised, only one site’s database is compromised.
3. Change the default URL used by PMA. This way, people can’t visit http://yourblog.com/phpmyadmin. While this security by obscurity isn’t a very effective technique, it does add some protection.
On a typical WordPress installation, there aren’t any direct ports to MySQL for a hacker to try to access. They might try to break in via SSH or try SQL injection attacks against WordPress, but they can’t directly attack the database. Once you install PMA, anyone can run web-based attacks against it in order to gain control of your database, so care is warranted.
Installing PHPMyAdmin on Ubuntu
Getting started with PMA is fairly straightforward on Linux. I’ll describe how to do so with Ubuntu 14.x at Digital Ocean. Log in to your server via SSH:
apt-get install phpmyadmin
You can use the default settings during installation or customize them to your liking.
Add an alias to the apache.conf file:
nano /etc/phpmyadmin/apache.conf
Alias /myobscuredpma /usr/share/phpmyadmin
Reload Apache:
service apache2 reload
Then, to access PMA, visit http://yourblog.com/myobscuredpma.
If you need to modify your PHPMyAdmin password, you can edit the config-db.php here:
nano /etc/phpmyadmin/config-db.php
4. Configure Web Authentication for the PMA Site. This will require that you enter an additional password to gain access to PMA, in addition to your database password, like this:

To configure Apache user restrictions, follow these steps:
Install htpasswd as part of apache2-utils:
apt-get install apache2-utils
Make a directory to store your passwords:
mkdir /etc/htpasswd
Add htaccess support for PMA:
nano /etc/phpmyadmin/apache.conf
Add AllowOverride All below:
<Directory /usr/share/phpmyadmin>
        Options FollowSymLinks
        DirectoryIndex index.php
        AllowOverride All
Configure your user authentication for PMA:
nano /usr/share/phpmyadmin/.htaccess
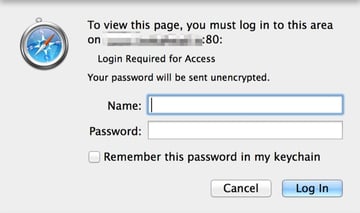
AuthType Basic
AuthName "Login Required for Access"
AuthUserFile /etc/htpasswd/.htpasswd
Require valid-user
Set your password:
htpasswd -c /etc/htpasswd/.htpasswd username
And restart Apache:
service apache2 restart
Browse to your PMA site, and you’ll be prompted for your username and password, as shown above.
Installing phpMyAdmin With WAMP and XAMPP
Today, there are several open-source PHP servers, also known as server solution stacks, which come with the components needed to create a local Apache web server, saving us the hassle of installing and configuring everything by ourselves. Two popular solution stacks in this category are WAMP and XAMPP.
The WAMPServer software installs and configures the WAMP stack, which entails all three of Apache, MySQL (plus MariaDB), and PHP running on a Windows operating system. XAMPP stands for cross-platform (i.e. X means any operating system), Apache, MySQL, PHP, and Perl. Both are simple, lightweight Apache distributions that make it very easy for developers to create a local web server for testing purposes.
During the setup process for both WAMP and XAMPP, when selecting the server components to install, you’ll be given the option to include phpMyAdmin. In fact, it’s included in the default installation for WAMP:
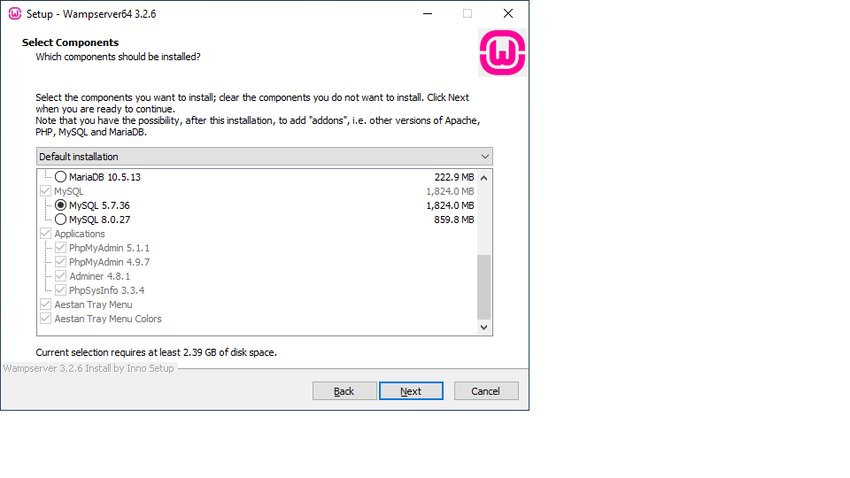
If phpMyAdmin is selected and subsequently installed, you can access it by starting up Apache and MySQL on whichever of the two stacks you’re using and navigating to http://localhost/phpmyadmin in your web browser. There, you’ll be prompted to log in with your database username and password, which by default are root and blank respectively.


Installing WordPress on WAMP and XAMPP servers
Both WAMP and XAMPP make it easy to run WordPress sites on your local server. The installation process is also pretty straightforward in both server environments.
For WAMP, after downloading the zip folder containing the WordPress software and configuration files, you’ll need to extract the WordPress files in your server’s root folder, named www. Its full path on your filesystem could be something like C://wamp64/www or C://wamp32/www, depending on which version you installed and where it was installed.
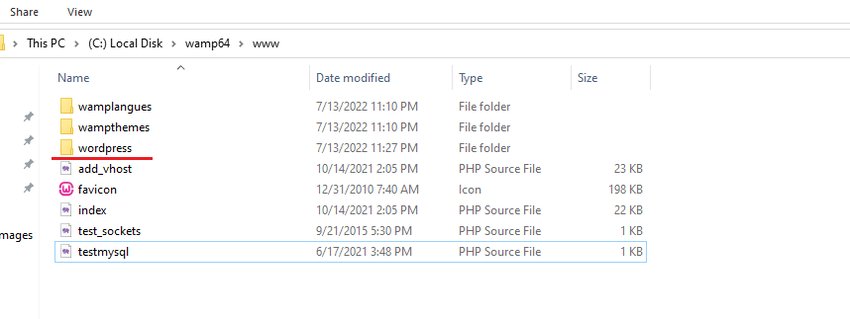
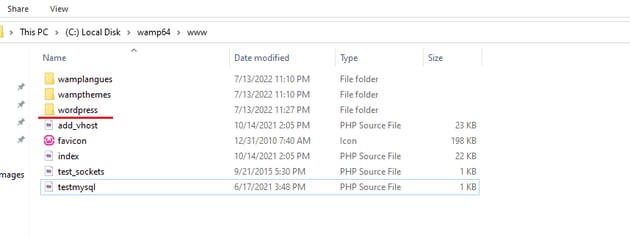
After exporting the WordPress files to your server’s root, you can now run WordPress locally on WAMP. To do this, fire up Apache, MySQL, and PHP on your WAMP tray, and then navigate to http://localhost/wordpress to view the website’s homepage. If you’re launching it for the first time, you’ll be guided through the WordPress setup process to customize your website and configure your WordPress database settings.
The process is quite similar for XAMPP. In this case, you’ll need to navigate to the folder where you installed XAMPP. This is typically in C://xampp. Inside there, you’ll need to find the htdocs folder and paste your WordPress files there. After copying the files, fire up your services from the XAMPP admin panel and navigate to http://localhost/wordpress in your web browser.
Using PHPMyAdmin With WordPress
It’s very important to remember that PMA allows you to directly manipulate the WordPress database; that means it’s quite easy to break your WordPress site if you don’t know what you’re doing. It’s especially unwise to apply database scripts from the web unless you understand them completely. Use PMA with great care.
Here are a few scenarios that may be helpful to you in ongoing WordPress administration:
1. Creating a New Database for WordPress Installation
Without PMA, I would sign in to my server via SSH. Log in to MySQL, and then run:
create database wordpress;
grant all privileges on wordpress.* TO "your-mysql-username"@"localhost" identified by "your-mysql-password";
flush privileges;
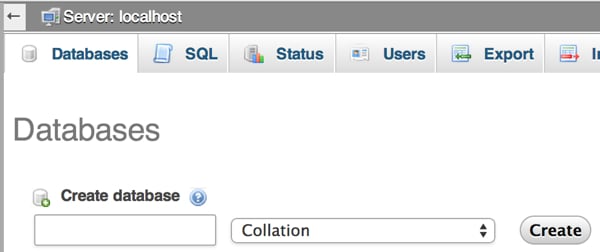
With PMA, you can run any command-line query with the visual interface. Click the SQL tab and paste the MySQL database instructions above. Replace your-mysql-username and your-mysql-password with your MySQL username and password respectively. By default, your username should be root and password should be blank. Then click Go to create the database.

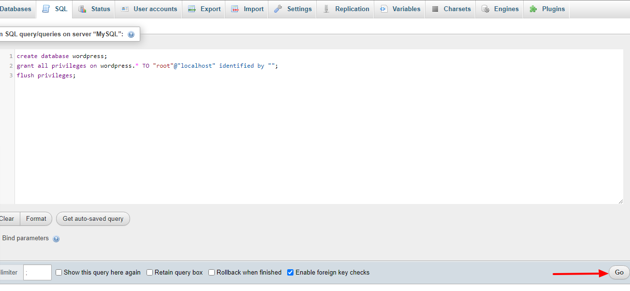

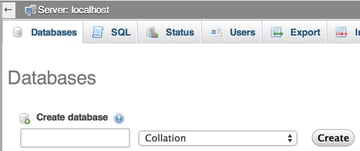
I use this a lot when creating new WordPress sites, just before running the WordPress web installer. Or you can use the visual interface to create your database directly:
You can also add users and define privileges from the UI. To do this, click on your database, and then click on the Privileges tab:
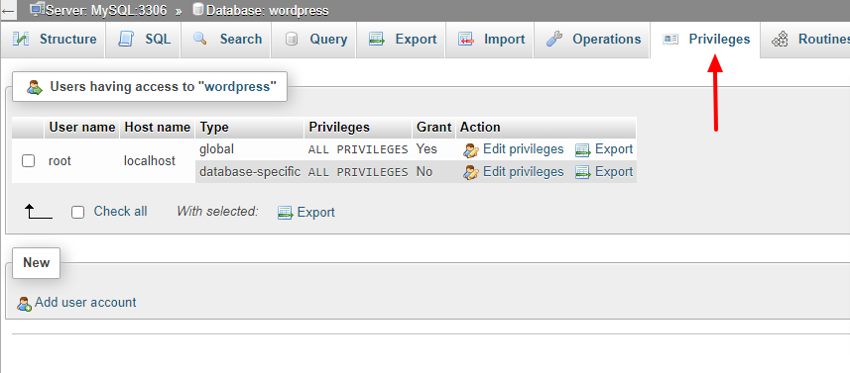


Click Add User, and define the privileges for the database that you wish:
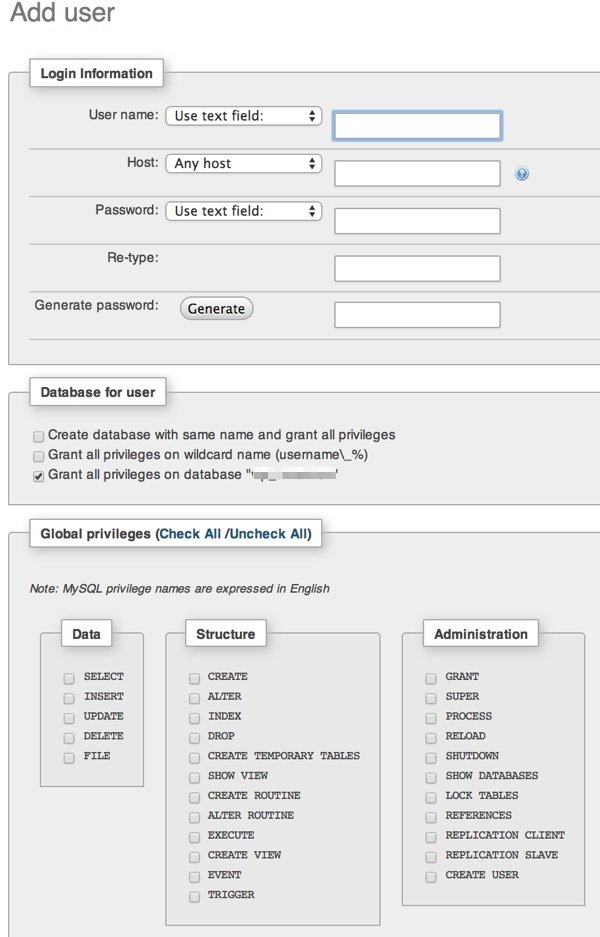
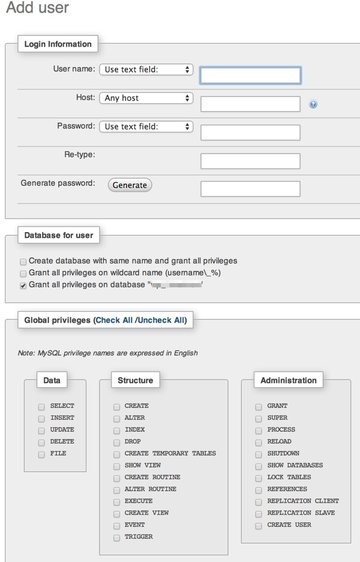
For your typical WordPress database account, you’ll want to check the boxes in the Data and Structure squares.
2. Backing Up Your Database
It’s a very good idea to back up your database before performing any of the tasks below. If something goes wrong, you’ll be able to restore your WordPress site from the backup.
Using the PMA web interface, click on your WordPress database, click the Export tab, and select Custom.
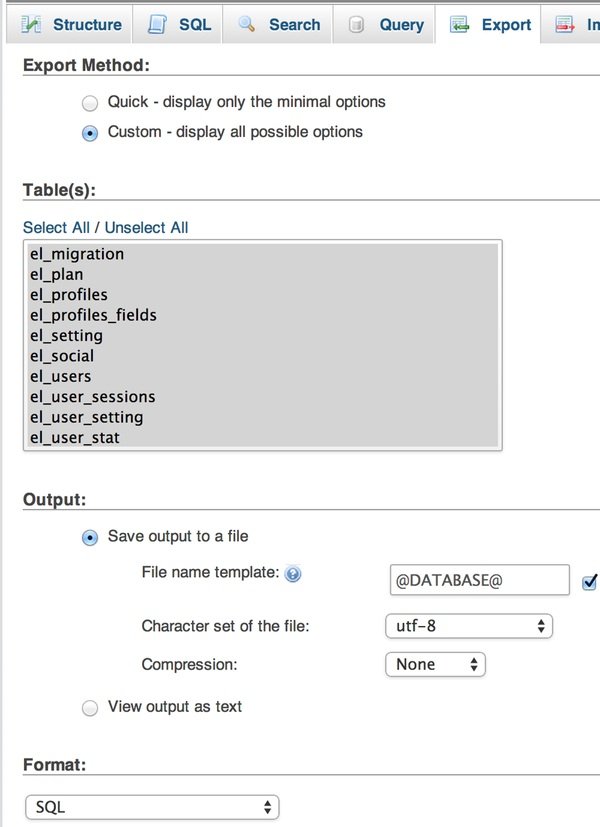
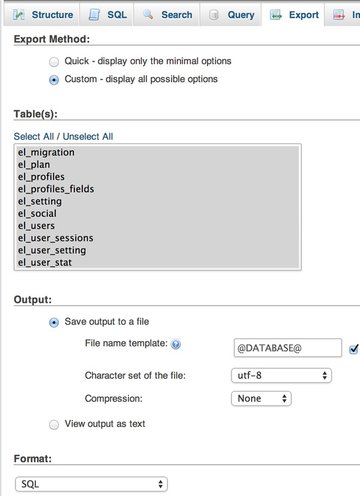
Enable Add Drop Table / View / Procedure / Function / Event statement:
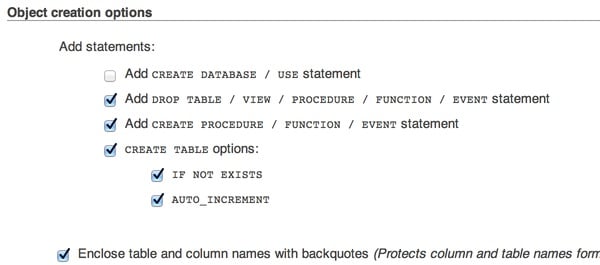

When you click Go, PMA will download a backup of your entire database. If your Apache PHP timeout settings aren’t properly configured, some long file downloads may time out and fail. You can adjust this in PHP.ini.
3. Search and Replace
WordPress doesn’t have built-in features to help with search and replace when websites change or you need to adjust content across many posts.
With PMA, you can run a manual query to search and replace the text that you want to change (again, be very careful with write-based SQL commands on your WordPress database):
UPDATE wp_posts SET post_content = REPLACE (post_content, 'source text', 'replace with this text');
An alternative to using PMA and MySQL is this handy Search and Replace plugin.
4. Site Migration
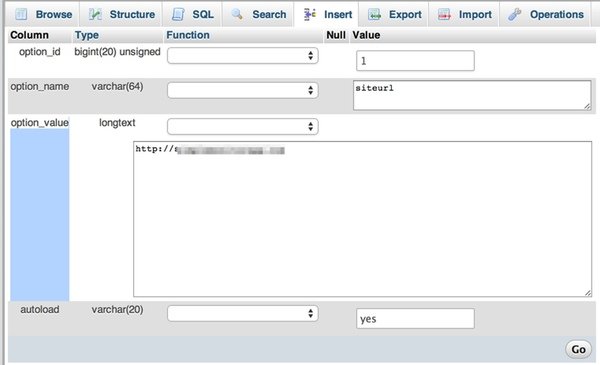
Often, when you move a WordPress site to a new domain name or URL, it won’t reflect the changes to your domain name throughout the site, even after changing the domains in the site settings. You can fix this in the database with PMA:
Again, you can use the SQL query box to update your site’s database directly:
update wp_options set option_value = replace(option_value,'http://old_domain.com','http://new_domain.com');
update wp_postmeta set meta_value = replace(meta_value,'http://old_domain.com','http://new_domain.com');
update wp_posts set post_content = replace(post_content,'http://old_domain.com','http://new_domain.com');
update wp_posts set guid = replace(guid,'http://old_domain.com','http://new_domain.com');
update wp_posts set pinged = replace(pinged,'http://old_domain.com','http://new_domain.com');
update wp_comments set comment_content = replace(comment_content,'http://old_domain.com','http://new_domain.com');
Or you can use the web interface. Browse to the database name, select each table, run a query, and manually change the settings for each:

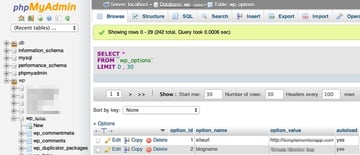
Click Edit and make your changes:

5. Reset Your WordPress Administrator Password
There are rare cases where WordPress administrator passwords get changed, lost, or corrupted. If you can access your database, you can use PMA to update your password right directly (do browse and verify which numeric id represents the current administrative user):
Update 'your_database'.'your_user' SET 'user_pass'=MD5('new-password') WHERE 'wp_users'.'ID'=1;
Once that’s done, you can log in to the WordPress dashboard with your new password.
This post has been updated with contributions from Kingsley Ubah. Kingsley is passionate about creating content that educates and inspires readers. Hobbies include reading, football and cycling.