Midjourney is an AI art generator tool that can help us generate images from the depths of our imagination. While it’s not a challenging program to learn, it certainly has its own learning curve. In this tutorial, I’d like to share a tip on how to use reference photos in Midjourney to help you achieve results that align with your vision.
Using Midjourney is all about experimentation and trying different things to discover what works best for you. However, if we can make your life easier, that’s already a plus.
Let’s start with our tutorial on how to use reference photos in Midjourney!
How to Use Reference Photos in Midjourney
Step 1
First, we need to create an account. Check out Abbey Esparza’s article to learn how to get started with Midjourney, from creating your Discord account and gaining access to the Midjourney server to understanding pricing and getting started with the program:
Step 2
Once you’ve learned how to get started with Midjourney, let’s continue with our tutorial.
Before moving on with our tutorial, we have to choose our reference image first. Keep in mind that the image you choose is the basis for Midjourney to provide you with similar options, so choose something that you like.
We’ll be using an image from Envato Elements:

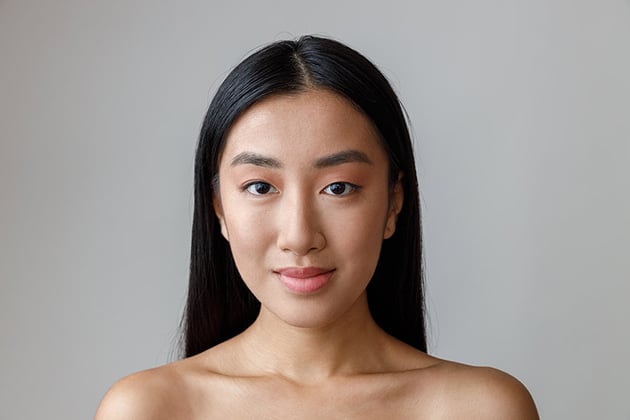

Once you have your image, save it in your files.
Step 3
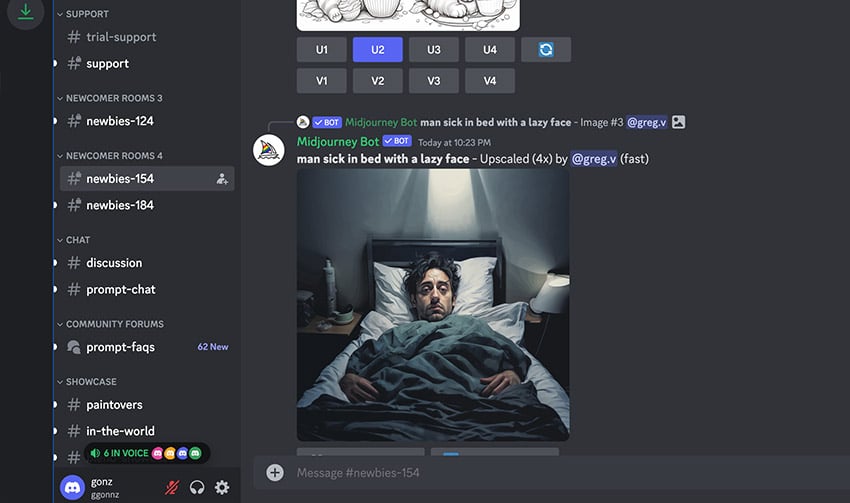
Now, let’s go to Midjourney and select the Newbie channel of your choice. I’ll be using #newbies-154.
info
Keep in mind that these channels aren’t private chat rooms, so everyone who’s in the room will be able to see your results.
Once you’re in the channel, drag and drop your image into the chat room.
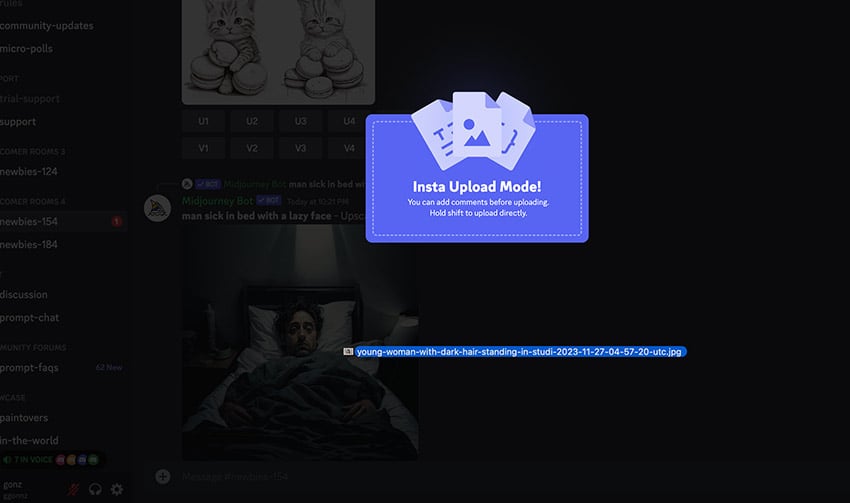


You’ll see the image will be uploaded into your text box. Hit Enter to upload the image.
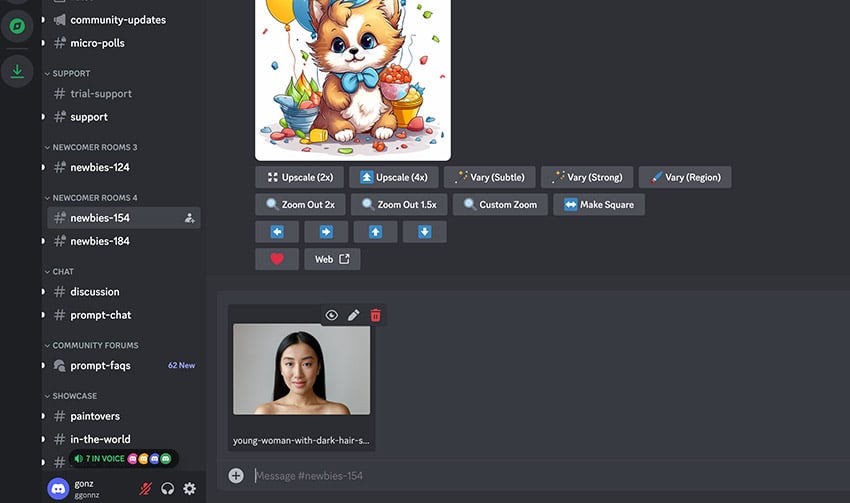

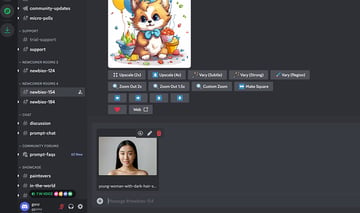
Now the image is loaded and is visible in the chatroom.


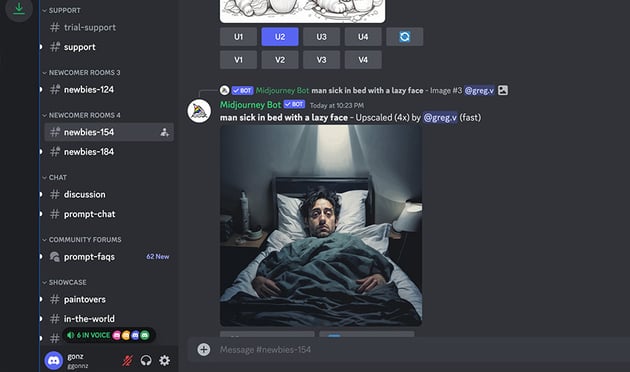
Click on your image, and then right-click on it and click Copy Image Address.


You now have the URL for your image. Go to your text box and type the following Midjourney prompts:
1 |
/imagine [paste the URL you copied from your image here] Test |


Midjourney Prompts Explained
- /imagine: This is the primary command we’ll be using to generate all our images from a short text description. Always use /imagine first, before adding any additional text.
- Test: We’re using the “Test” prompt simply because we’re not doing anything creative or cool at this point. The goal is to shorten the initial big URL chunk.
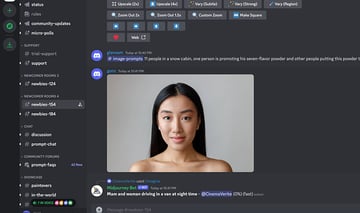
Now our URLs got shorter.
This is the URL we’ll be using from now on for all our creations. Don’t lose it!
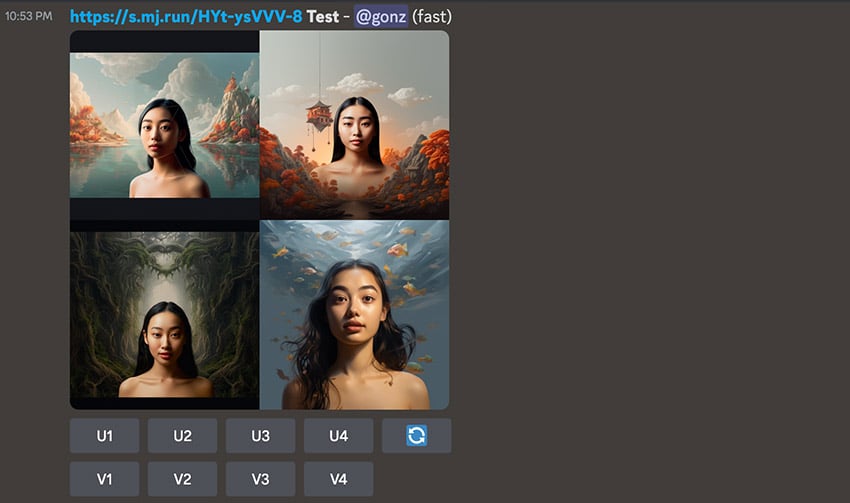


(We even got four images, but don’t pay attention to them—we’ll create something better!)
Step 4
For our tutorial on how to use reference photos in Midjourney, I thought that we could play a little with fantasy and photography concepts. It’s always helpful to have a concept in mind before starting to experiment.
I want our reference image to be inspired by Alice in Wonderland, editorial photography, fashion, and flowers.
Now, let’s input all our Midjourney prompts or concepts into the text box. Be as detailed as possible, including everything from colors, ideas, and camera angles to camera lenses. Add anything you think could improve your results.
These are the Midjourney prompts I used: /imagine Output: https://s.mj.run/HYt-ysVVV-8 Candid shot. Subject: Young woman, beauty, fashion and editorial photography. Background: beautiful and fantasy Influences, colorful gardens, pinkcore, babybluecore, Alice in Wonderland aesthetic, detailed face, sharp focus on face camera. Shot on a Hasselblad medium format camera. Carl Zeiss Distagon t* 15 mm f/ 2. 8 ze
Midjourney Prompts Explained
- Alice in Wonderland aesthetic: This is just the mood that I want to convey. Remember, Midjourney is an AI generator, so we might not get a literal example out of this.
- Hasselblad medium format camera: A type of camera known for its image quality and widely used in professional photography.
- Carl Zeiss Distagon t* 15 mm f/ 2. 8 ze: The exact wide-angle lens that we want for our photo.
- – v 6.0: The latest Midjourney version.
Here are some of the results that I got from giving it a few tries:

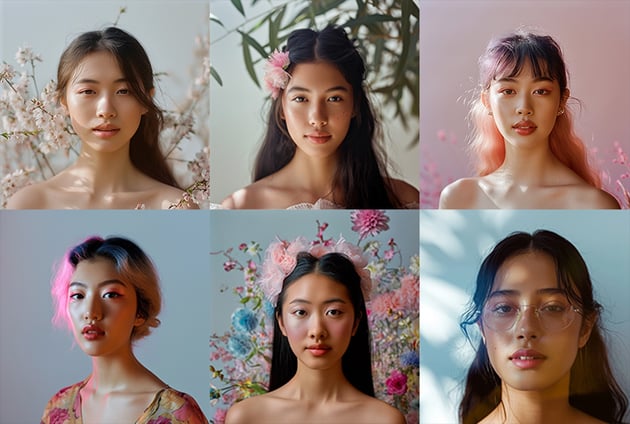
While the results are not exact replicas of Alice in Wonderland characters from the live-action and animated films, I’m quite pleased with the outcome.
Remember that the best Midjourney prompts are the ones that make sense for you and the work you create with this tool. But in case you were wondering, here’s a list of the best Midjourney prompts for your creations:
Best Midjourney Prompts
- –ar: Aspect ratio. Width-to-height ratio of the image.
- –v: Version. Use it to define which version you want to use. Value ranges are 1-6 (until January 2024).
-
–no: No. Using this prompt removes unnecessary elements that you don’t want in your results, e.g.
–no blue. - –s: Stylize. Changes how “artistic” or stylized an image is. Value ranges are 0–1000.
- –chaos: Chaos. This will give or not give variety to the images. Higher values will create more unexpected and different results. Value ranges are 0–100.
That’s It! Now You Know How to Use Reference Photos in Midjourney
Midjourney is an AI art generator tool capable of producing impressive results. To achieve the desired outcome, it’s essential to know which prompts to add to generate results that match your vision. I hope this tutorial on how to use reference photos in Midjourney was useful. I can’t wait to see what you create with these new tips.
Discover More Tutorials on Envato Tuts+
Check our tutorials from Envato Tuts+ if you want to learn more about Midjourney, AI, and design. You’ll love the options I’ve gathered for you in this section.