Consumers buy online because of the large number of available choices and the convenience of getting products delivered to their doorstep. While product prices usually stay the same for everyone, the shipping costs can vary depending on a lot of factors. This includes the total weight, quantity, shipping speed, shipping distance, etc.
You can solve all your shipping charge calculation woes with the help of a WooCommerce table rate shipping plugin. In this tutorial, I will show you exactly how to do that.
Installing a Table Rate Shipping Plugin
A table rate shipping plugin allows you to define your own custom shipping rates for a variety of conditions. This means that once you have specified shipping rates for a variety of conditions such as the product weight or shipping distance, the plugin will automatically calculate the final shipping cost to present to consumers.
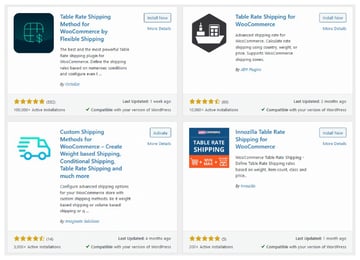
There are many free and paid WooCommerce table rate shipping plugins available for you to install. For example, WooCommerce has an official Table Rate Shipping plugin, but it costs about $99 annually. You can also find a paid Table Rate Shipping plugin on CodeCanyon that you can purchase by paying a one-time fee of $25. It gives you free lifetime updates.
You will usually get more features and better support with paid plugins, but it is also possible to get the basic functionality for free by installing a plugin from the WordPress plugin directory. For our tutorial, I will be using the Custom Shipping Methods for WooCommerce plugin. You can navigate to Plugins > Add New and then write Table Rate Shipping in the search field to find the plugin.


I chose this plugin due to its decent feature set. Click the Install Now button to install the plugin and then the Activate button to activate it.
Setting Custom Shipping Method Options
Navigate to WooCommerce > Settings once you have installed and activated the plugin. You should now see a bunch of tabs at the top of the page. Click on the Custom Shipping Methods tab, and you’ll see some options to control the behavior of the plugin globally.
Here are some of the settings that I’ve applied for the Custom Shipping Methods:
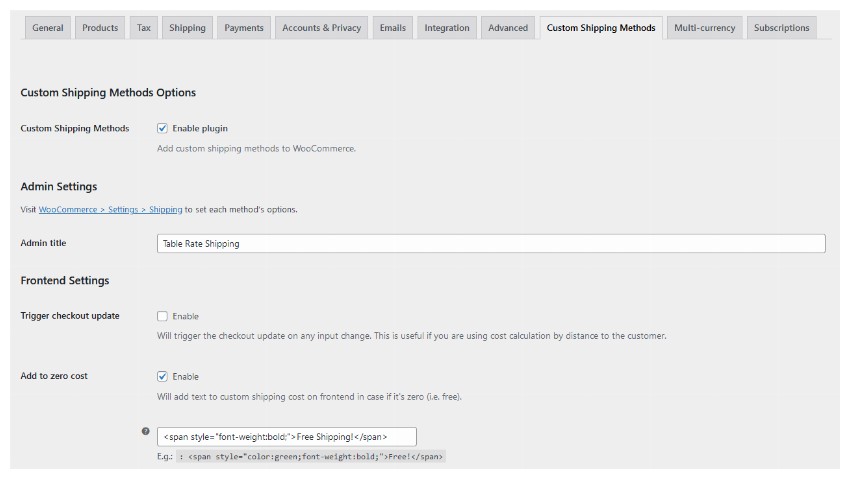
First, you have to make sure that the plugin is enabled by checking the Enable Plugin checkbox. This is important to make sure the custom shipping methods we define are available in WooCommerce.
Next, provide an Admin Title which will show up in the dropdown menu when adding shipping methods. This will help you identify the shipping method set up by this plugin.
Finally, you have to Enable the checkbox for the Add to Zero Cost option in order to add some custom text besides the Shipping label on the checkout page when the total shipping cost is zero. I have used the following markup for this purpose:
1 |
<span style="font-weight:bold;">Free Shipping!</span> |
Setting Up a Home State Shipping Zone
Now that we’ve completed the basic setup of the Custom Shipping Method plugin, we can start defining some shipping zones. Navigate to WooCommerce > Settings and then click on the Shipping tab. You will see the option of adding shipping zones. There is no limit on the number of zones that you can add. Customers will only see the shipping methods that apply to them.
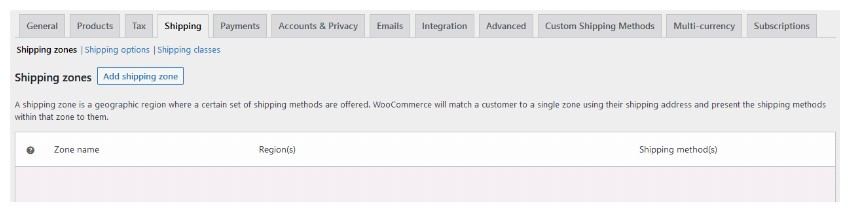
Shipping zones allow us to define where a particular shipping method is available. When a customer provides an address for shipping the products, WooCommerce will detect their shipping zone and automatically provide a list of available shipping methods. Click the Add Shipping Zone button. Set the Zone Name to Home State and Zone Regions to Nevada, United States.
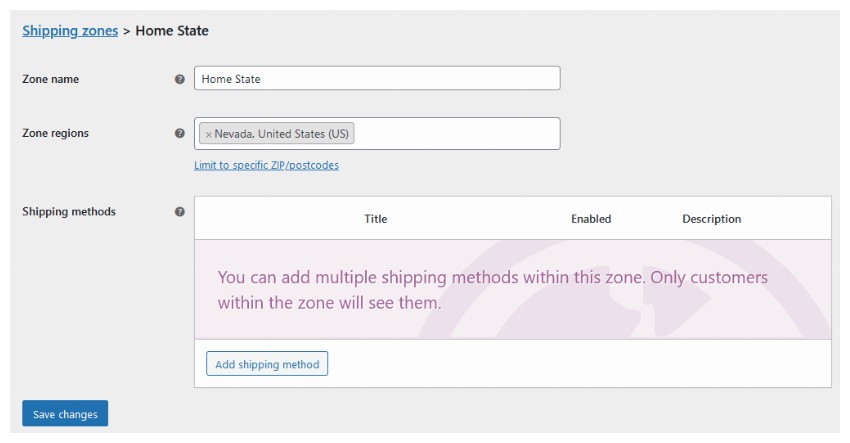


Now, click the Add Shipping Method button and select Free Shipping from the popup that appears. Click on the Add Shipping button in the popup, and you should see the shipping method listed under Shipping Methods.
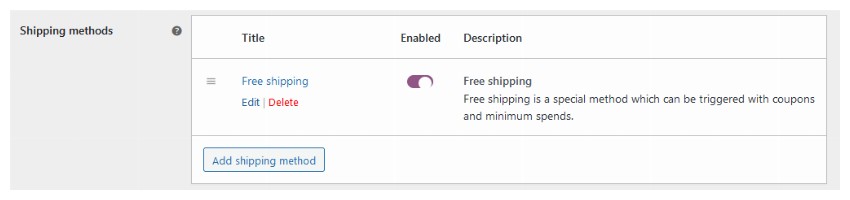


Click on the Edit button that comes up when you hover over the title Free Shipping. You will now see a new popup where you can enter the following details.
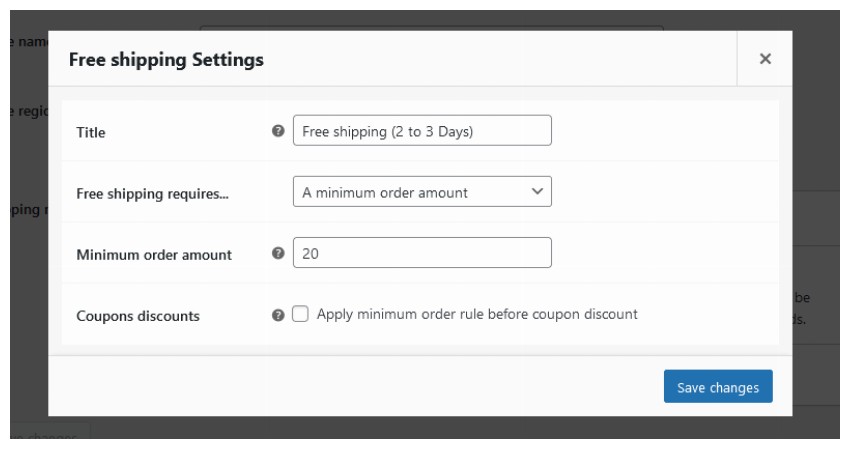


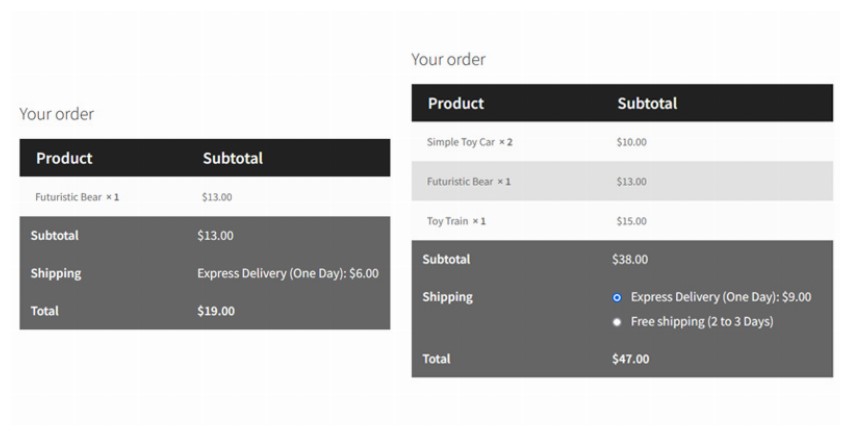
We change the title to Free Shipping (2 to 3 Days) because this title will be shown to users on the checkout page when they see available shipping methods, and modifying it to show the number of days makes it more informative. I have also set a minimum order amount of 20 before this method shows up. Finally, click on the Save Changes button.
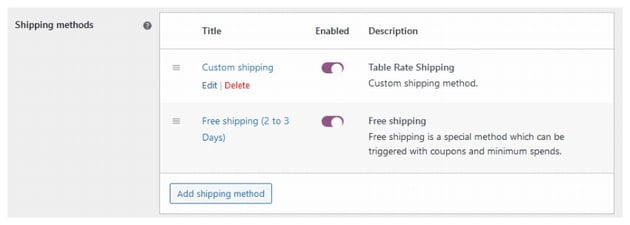
Now, click on the Add Shipping Button again to add another shipping method that will deliver products faster but at a cost. Select Table Rate Shipping this time. You should see Custom Shipping added to the shipping methods, as shown below.

Click on the Edit button under Custom Shipping, and you will see the following popup. I have updated the Method Title to Express Delivery (One Day). This will show up on the checkout page if the shipping method is available for users.
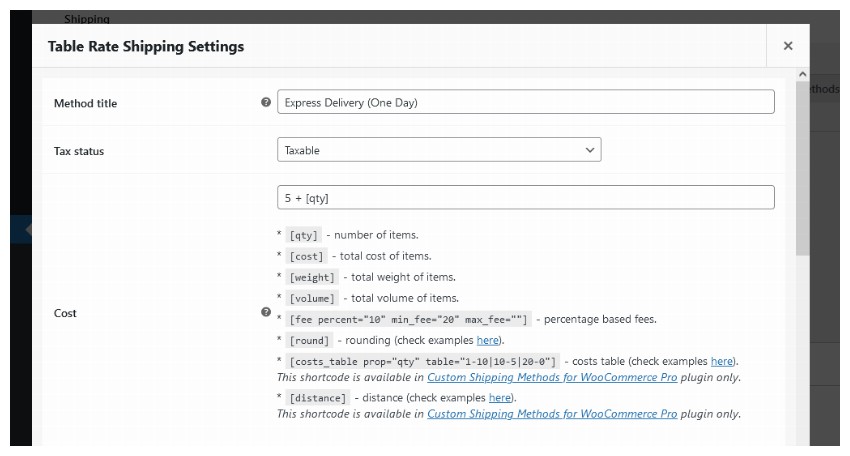

You can use the Cost input field to determine how the shipping cost is calculated. The plugin gives you to option to use a bunch of variables to calculate the final shipping cost. Here are the available variables in the free version.
| Variable | Meaning |
|---|---|
[qty] |
number of items in the cart |
[cost] |
total cost of all items in the cart |
[weight] |
total weight of all items in the cart |
[volume] |
total volume of all items in the cart |
[round] |
rounded down calculated value |
[fee percent="5" min_fee="10" max_fee=""] |
percentage-based fees |
We will keep things simple here and set the value of cost to 5 + [qty], which means that the total shipping cost would be 5 plus the number of items in cart.
Scroll down a bit and you will see a section for setting Availability conditions for the shipping method. Set a Min Cart Cost value of 10 so that this shipping method only appears if the total cost of items in the cart is at least 10.
As you can see, there are a lot of other criteria available for you to specify when our shipping method should be available. The value of all of them is set to 0 by default. This tells the shipping plugin to ignore that specific criteria. Click on the Save Changes button to update the shipping method.
I tested these settings on my local website with the shipping address to set a city in Nevada, United States, and the image below shows the result. The free shipping method only shows up when the cart value is above or equal to $20.

Setting Up a Home Country Shipping Zone
As I mentioned earlier, we can set up an unlimited number of shipping zones to address all our shipping needs. Let’s add another shipping zone that is used to set the shipping methods for shipping anywhere within the country.
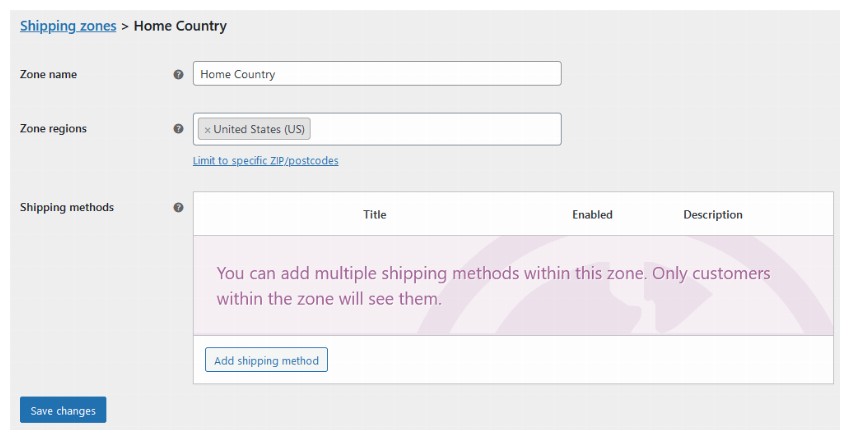


Navigate to WooCommerce > Settings and then click on the Shipping tab. Click on the Add Shipping Method button to add a new shipping method.
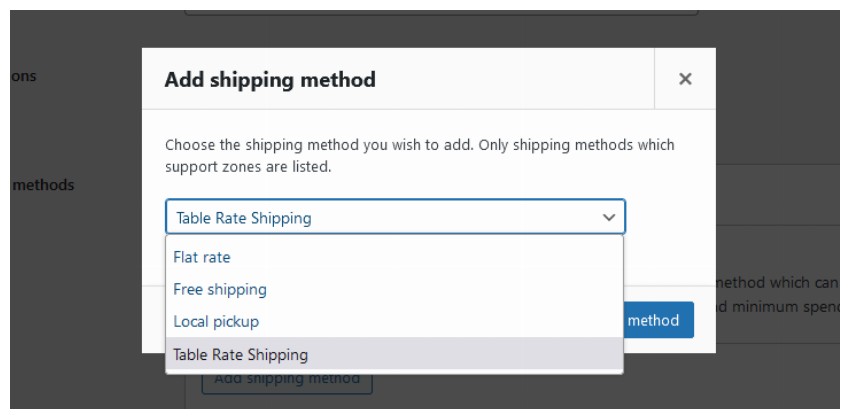

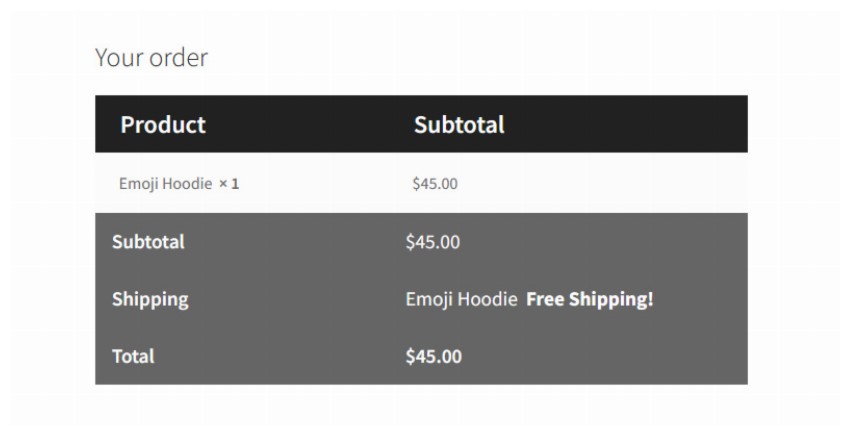
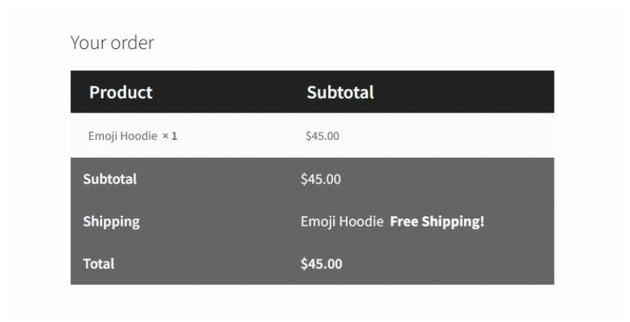
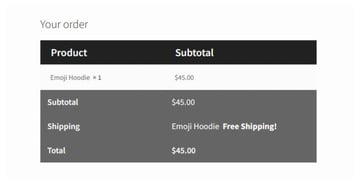
Select Table Rate Shipping in the next popup, and then again click on the Add Shipping Method button. We will update the Method Title to Emoji Hoodie. This time, we will set the cost to 0. However, there is a twist.
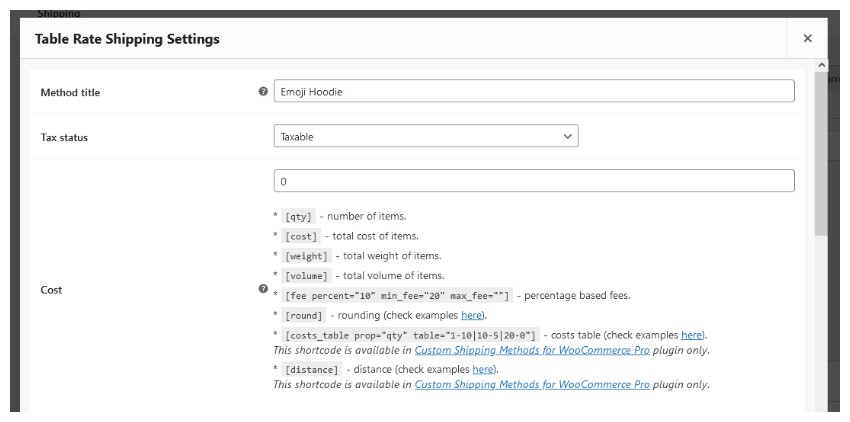
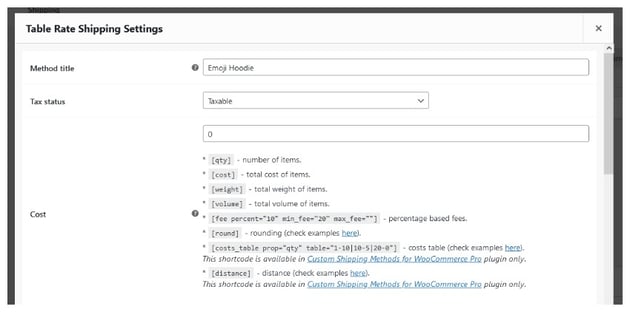

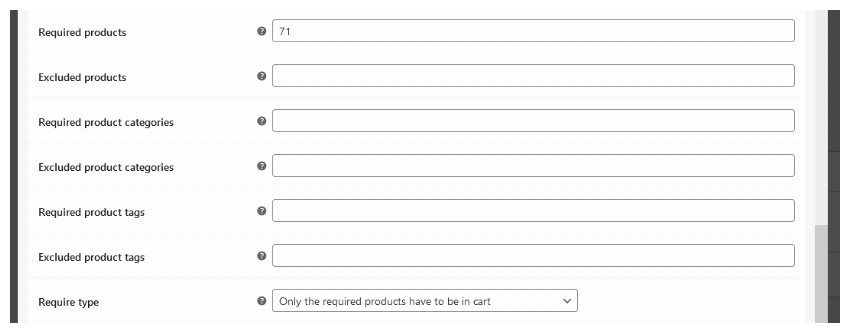
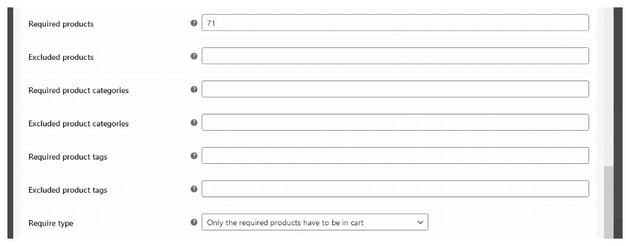
I want a particular hoodie to always have free shipping. To do this, I will enter the hoodie ID in the Required Products field. Under the Require Type field, we will set the value from the dropdown to Only the required products have to be in cart. Finally, click the Save Changes button.
Now, our Emoji Hoodie shipping method will be available across the United States with no shipping charges as shown below. This is applicable only if the cart contains no other products.
We can similarly add other shipping methods to our Home Country shipping zone.
Final Thoughts
Calculating the shipping cost can be a complicated process due to the involvement of a variety of factors such as the distance, weight, or the number of items to be shipped. However, using the right plugin can make the whole thing a lot easier. While there are some paid plugins available to do this in WordPress, we accomplished this with a free plugin. You can also consider using a paid plugin such as the one available on CodeCanyon if you want more features.